Creating 2D particle effects in Unity3D
Hi, my name is David Finset. I am a technical artist at Synapse Games and I work on games that require visual effects that require both technical and artistic components. Most of my work is creating particle effects for mobile games. I really like this work, so I want to share my workflow and give some tips on how to create such effects on my own.
Particle effects is a unique tool that allows you to add interactivity and responsiveness to the game. They are excellent for creating movement and transferring sensations. Particle effects can be used to create magical fireballs, vortex spatial portals, or to draw a player’s attention to a glowing treasure chest.
First, I’ll talk about parts of my particle effects workflow in Unity, and then I’ll share some technical tips and tricks. Most of these examples are from my work on Spellstone and Animation Throwdown games.
The working process
We break into parts the requirements:
')
The first thing I do before creating the particle effect is asking questions to determine the requirements for the effect. Answers to these questions become limitations and let me know what kind of appearance and emotional impact one should expect from the effect.
Questions may be:
- What size should the effect be?
- How long should it last?
- How to trigger the effect?
- Is it necessary to break it into separate parts so that the execution time can be controlled through the code?
- What can happen during the effect? How can this affect the speed of the game?
- Does this effect interact with other objects on the screen?
Create a concept sketch:
Then I create the concept of how the effect as a whole may look. I focus on the look and feel of the whole effect and have not thought about how I will implement it. If the effect uses a lot of movement, then the sketch may look more like a storyboard. If the effect is static, for example, the flickering aura around the magic wand, then usually one sketch is enough.
We assemble a concept from several components:
Most effects are created by overlapping several components. At this point, I'm starting to experiment with Unity. It was useful for me to start with the largest element of the object, and then work on the smallest, or, if this is a consistent effect, then I work it out from beginning to end.
Testing
Effects are usually tied to the technical elements of the game, so it is very important to test the effects and iterate according to how they look in the game. Often it is necessary to change the duration of the effect, its scale and pace so that when it is triggered it looks correct. I strive to make our effects seem responsive! After I make sure that everything looks right in the game, I consider the process complete.
And now let's go through my workflow with examples from Spellstone and Animation Throwdown.
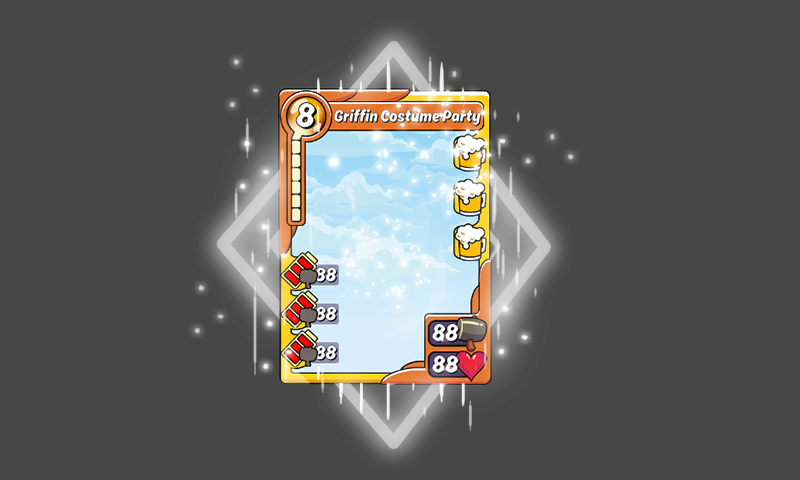
Glow rare card in Animation Throwdown
We break into parts the requirements:
- The effect should interact with the frame of the map on all screens and pop-ups.
- It must NOT obscure the graphics card and the values on it.
- Match the colors and symbols of rare cards
- To be built on: the rarer the map, the harder the effect
Create a concept sketch:
We assemble a concept from several components:

The particle system is composed of several different components located on different layers.
Testing:
In the process of testing this glow, we found that the effect was too large and may overlap with other cards from the hand. To fix this, I simplified the effect so that it fits on all screens and pop-ups. This is an example of why testing is so important when working on effects.
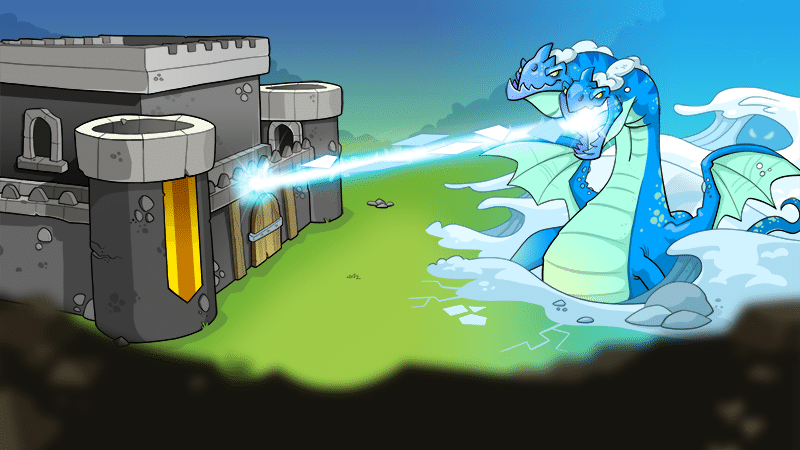
Frostbite Raid from Spellstone

Frostbite Raid Frostbite Spellstone effect.
We break into parts the requirements:
- Must be used for both dragon heads.
- Interacts with other sprites.
- This is a “wow moment” and the culmination of the raid, so when triggered, it should have a strong effect on the player.
- It can last any amount of time. He just has to look cool.
Create a concept sketch:
This particle effect should convince the player that the two-headed dragon is a fierce opponent. I wanted ice breath to be a physical ray of ice and snow. I wanted to make these particles more opaque, so that they would have more impact on the player when the dragon hits the guild castle with a beam.
We assemble a concept from several components:
To create an ice beam effect, several components are superimposed on each other.
To create a basic ray effect, I use a two-dimensional ray texture that is scalable on the screen. Then the effects of the particles are added to break the straightness of the beam and give it a directional flow.
Overhead added triangular "shells". They give the feeling of icicles shot from the mouth of a dragon.
At the end of the beam, an explosion of particles is added to hide the edges of the plane of the beam, as well as to show where the beam enters the castle.
Testing
This effect worked wonderfully in the game and we didn’t have serious problems with its work and influence on other animations of this scene.
Tips and Tricks:
Ready to create your own 2D particle effects in Unity3D? Here are some tips that will simplify your work a bit.
The form

The most useful shapes for 2D are Box, Circle and Edge. When using Box, I reduce the Z size to zero to destroy the depth. A circle is useful when you need to shoot particles radially from a central point.
The main components that I use to impart movement to 2D effects are Rotation, Scale, Gravity and Force over Lifetime. Gravity is fantastically convenient for moving effects along the Y axis, and I usually use Force over Lifetime to move particles along the X axis.
Rendering mode: Stretched Billboard
Using the Stretched Billboard rendering mode allows you to give particles the ability to grow and shrink along the axis when the Speed Scale value is set. This mode can be used to create very interesting effects and squeeze the maximum out of static textures.
A simple round texture turns into a blast line using Stretched Billboard.

A triangular particle can shrink and stretch to show speed when using stretched particles.
Emission by distance
The choice for the particle component Emission depending on the distance allows the emitter to emit particles as it moves in space. I often use this technique for projectiles, but it is also useful if you need to animate particles along their path.
The spellstone imbue skill uses distance to particle to create a map outline.
Texture Sheet Animation
The Texture Sheet Animation component can be used when you want to mix sprite sheet animations with particle effects. I use this component to create stylized 2D effects.

Texture Sheet Animation on a particle system, scalable over time to create an explosion.

The texture used for the particle system.
Additional sources
If you want to learn more about the effects and particle system of Unity, then learn the following helpful resources:
- Unity3D Particle Systems Guide
- Unity blog post about effects used in the short film “Adam”
- The Elemental Magic, Volume I: The Art of Special Effects Animation by Joseph Gilland
About the author: David Finset is a technical artist at the Chicago studio Synapse Games. Engaged in effects, animation, shaders and tools.
Source: https://habr.com/ru/post/349778/
All Articles