Authorization using ssl certificate on nginx + Let's Encrypt
Good afternoon, evening or night, it all depends on the time of day in which you happened to read my article.
Due to the growing number of corporate clients, it was decided to give access to the accounting system to external users. For self ordering and tracking their status. The implementation created a web interface with the necessary functionality and access. Immediately there was a security issue, in addition to the standard user-password, it was decided to further enhance security, for this they used OpenVPN, but there were customers for whom you cannot use OpenVPN (security policies, reluctance, etc.), then the articles about access by ssl certificate

Initial data:
')
The server with the accounting program + web interface are in the DMZ;
WEB-server on nginx, http (80) and https (443) ports are forwarded to it;
The proxy_pass to the server with the account program is configured on the web server, access is only on port 8080 and only from the IP web server, there is no greater access from the server (normal security);
A certificate from Let's Encrypt is installed on the site for access.
Go to the process of creating a user certificate:
For certificates we will use the directory "/etc/ssl/crm.example.ru"
Create a directory structure:
Create a configuration file for signing certificates.
/etc/ssl/crm.example.ru/ca.conf "
Create a self-signed certificate and a new server key without a password:
Or, if you want to enter everything manually.
You can view the private key and certificate data using the commands:
Creating a client private key and certificate request (CSR):
Or, if you want to enter everything manually.
Instead of User example1, you can specify the mail of the client, and for the place of EXAMPLE the company of the client, it will help keep track of certificates.
As a result of the command, two files client01.key and client01.csr will appear. You can view the data of the private key and certificate request (CSR) using the commands:
Signed a certificate request (CSR) using a trusted certificate (CA). When signing a request, the parameters specified in the ca.config file are used.
Preparation of data for transfer to the client. To transfer the files received as a result of previous operations to the client, a file in the format PKCS # 12 is usually used. This file is packed and protected with a password with all the information necessary for the client to install the certificate in the browser.
We expose the access rights to the keys.
Move all created files to the db / certs directory for storage.
In nginx you need to install:
In order for the client to connect using the certificate, it needs to send the file client01.p12 and ca.crt, as well as provide the password to install the certificate. ca.crt is required, since we do not use it for server certification, let's use Encrypt for this.
The process of issuing certificates can be automated, just write a script is not difficult. We do not have many such clients, about 15, so it was not a problem to drive in everything by hand.
My working example:
Certificate selection window:
Self certificate:

Efficiency of Let's Encrypt:

The following articles helped in preparing the material:
→ "Authorization of clients in nginx via SSL certificates"
→ "Authorization for SSL certificates"
→ “Authorization using SSL client certificates. (ssl crypt mod_ssl apache) »
→ “Great and mighty google”
PS Check was carried out on Google Chrome.
Due to the growing number of corporate clients, it was decided to give access to the accounting system to external users. For self ordering and tracking their status. The implementation created a web interface with the necessary functionality and access. Immediately there was a security issue, in addition to the standard user-password, it was decided to further enhance security, for this they used OpenVPN, but there were customers for whom you cannot use OpenVPN (security policies, reluctance, etc.), then the articles about access by ssl certificate
Initial data:
')
The server with the accounting program + web interface are in the DMZ;
WEB-server on nginx, http (80) and https (443) ports are forwarded to it;
The proxy_pass to the server with the account program is configured on the web server, access is only on port 8080 and only from the IP web server, there is no greater access from the server (normal security);
A certificate from Let's Encrypt is installed on the site for access.
Go to the process of creating a user certificate:
For certificates we will use the directory "/etc/ssl/crm.example.ru"
Create a directory structure:
# mkdir /etc/ssl/crm.example.ru # cd /etc/ssl/crm.example.ru # mkdir db # mkdir db/certs # mkdir db/newcerts # touch db/index.txt # echo "01" > db/serial # chmod 700 ./ Create a configuration file for signing certificates.
/etc/ssl/crm.example.ru/ca.conf "
[ ca ] default_ca = CA_CITENAME # [ CA_CITENAME ] droot = /etc/ssl/crm.example.ru # dir = $droot/db # certs = $dir/certs # new_certs_dir = $dir/newcerts # (pem) database = $dir/index.txt # serial = $dir/serial # # certificate = $droot/ca.crt # private_key = $droot/ca.key default_days = 365 # () default_crl_days = 7 # default_md = md5 # MD5 policy = policy_citename # [ policy_citename ] countryName = optional # stateOrProvinceName = optional # ....................... localityName = optional # ....................... organizationName = optional # ....................... organizationalUnitName = optional # ....................... commonName = supplied # emailAddress = supplied # ..................... [ req_distinguished_name ] countryName = (2- ) countryName_default = RU countryName_min = 2 countryName_max = 2 stateOrProvinceName = ( ) stateOrProvinceName_default = Tyumen region localityName = (, ) localityName_default = Tyumen 0.organizationName = 0.organizationName_default = EXAMPLE organizationalUnitName = (, ) commonName = commonName_max = 64 emailAddress = Email emailAddress_max = 64 Create a self-signed certificate and a new server key without a password:
# openssl req -new -newkey rsa:2048 -nodes -keyout ca.key -x509 -days 365 \ -subj "/C=RU/ST=Tyumen region/L=Tyumen/O=EXAMPLE/OU=CRM/CN=crm.example.ru/emailAddress=crm@example.ru" \ -out ca.crt Or, if you want to enter everything manually.
# openssl req -new -newkey rsa:2048 -nodes -keyout ca.key -x509 -days 365 -out ca.crt You can view the private key and certificate data using the commands:
# openssl rsa -noout -text -in ca.key ( ) # openssl x509 -noout -text -in ca.crt ( ) Creating a client private key and certificate request (CSR):
# openssl req -new -newkey rsa:2048 -nodes -keyout client01.key \ -subj "/C=RU/ST=Tyumen region/L=Tyumen/O=EXAMPLE/OU=CRM/CN=User example1/emailAddress=user@example1.ru" \ -out client01.csr Or, if you want to enter everything manually.
#openssl req -new -newkey rsa:2048 -nodes -keyout client01.key -out client01.csr Instead of User example1, you can specify the mail of the client, and for the place of EXAMPLE the company of the client, it will help keep track of certificates.
As a result of the command, two files client01.key and client01.csr will appear. You can view the data of the private key and certificate request (CSR) using the commands:
# openssl rsa -noout -text -in client01.key ( ) # openssl req -noout -text -in client01.csr ( ) Signed a certificate request (CSR) using a trusted certificate (CA). When signing a request, the parameters specified in the ca.config file are used.
# openssl ca -config ca.config -in client01.csr -out client01.crt -batch Preparation of data for transfer to the client. To transfer the files received as a result of previous operations to the client, a file in the format PKCS # 12 is usually used. This file is packed and protected with a password with all the information necessary for the client to install the certificate in the browser.
# openssl pkcs12 -export -in client01.crt -inkey client01.key \ -certfile ca.crt -out client01.p12 -passout pass:123ewqasdcxz We expose the access rights to the keys.
# chmod 600 /etc/ssl/crm.example.ru/client*.crt # chmod 600 /etc/ssl/crm.example.ru/client*.key Move all created files to the db / certs directory for storage.
# mv ./client01.* db/certs/ In nginx you need to install:
ssl_client_certificate /etc/ssl/crm.example.ru/ca.crt; ssl_verify_client on; ssl_verify_depth 1; In order for the client to connect using the certificate, it needs to send the file client01.p12 and ca.crt, as well as provide the password to install the certificate. ca.crt is required, since we do not use it for server certification, let's use Encrypt for this.
The process of issuing certificates can be automated, just write a script is not difficult. We do not have many such clients, about 15, so it was not a problem to drive in everything by hand.
My working example:
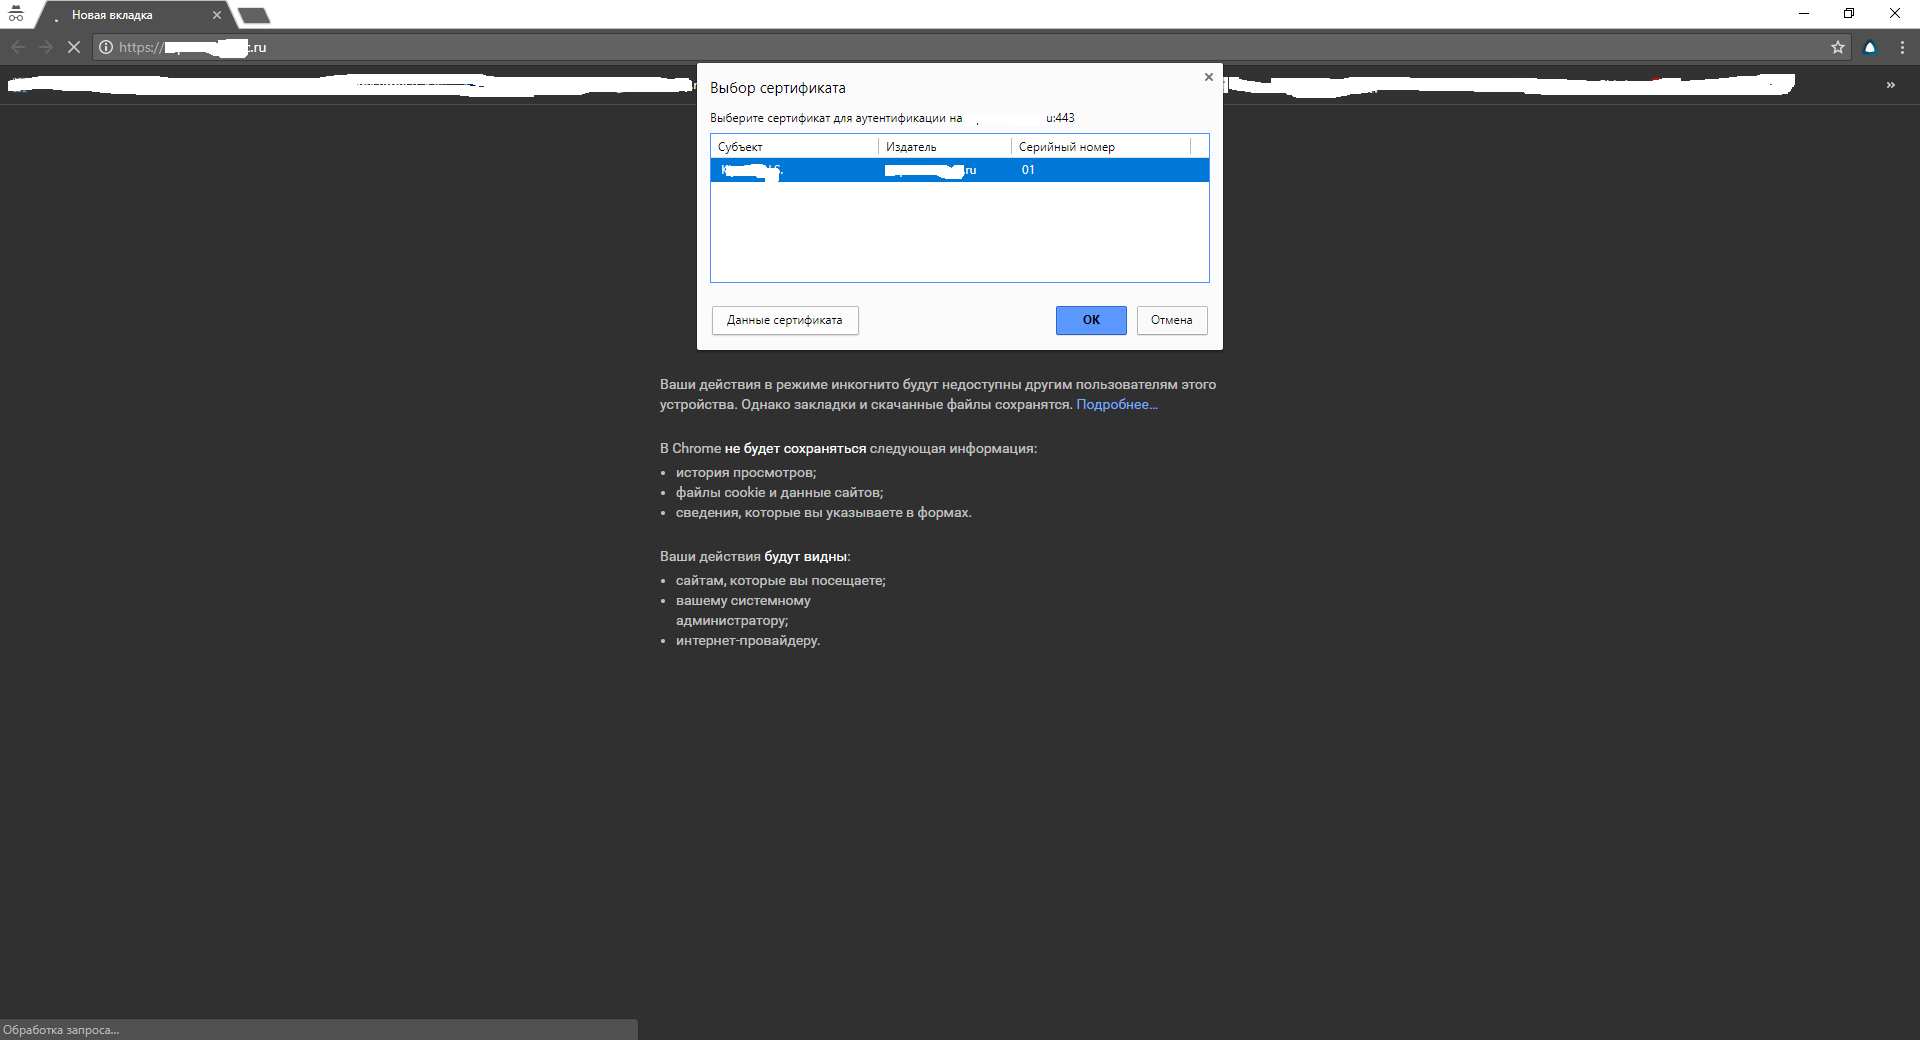
Certificate selection window:
Self certificate:
Efficiency of Let's Encrypt:
The following articles helped in preparing the material:
→ "Authorization of clients in nginx via SSL certificates"
→ "Authorization for SSL certificates"
→ “Authorization using SSL client certificates. (ssl crypt mod_ssl apache) »
→ “Great and mighty google”
PS Check was carried out on Google Chrome.
Source: https://habr.com/ru/post/349720/
All Articles