Creating a game on Lua and LÖVE - 3
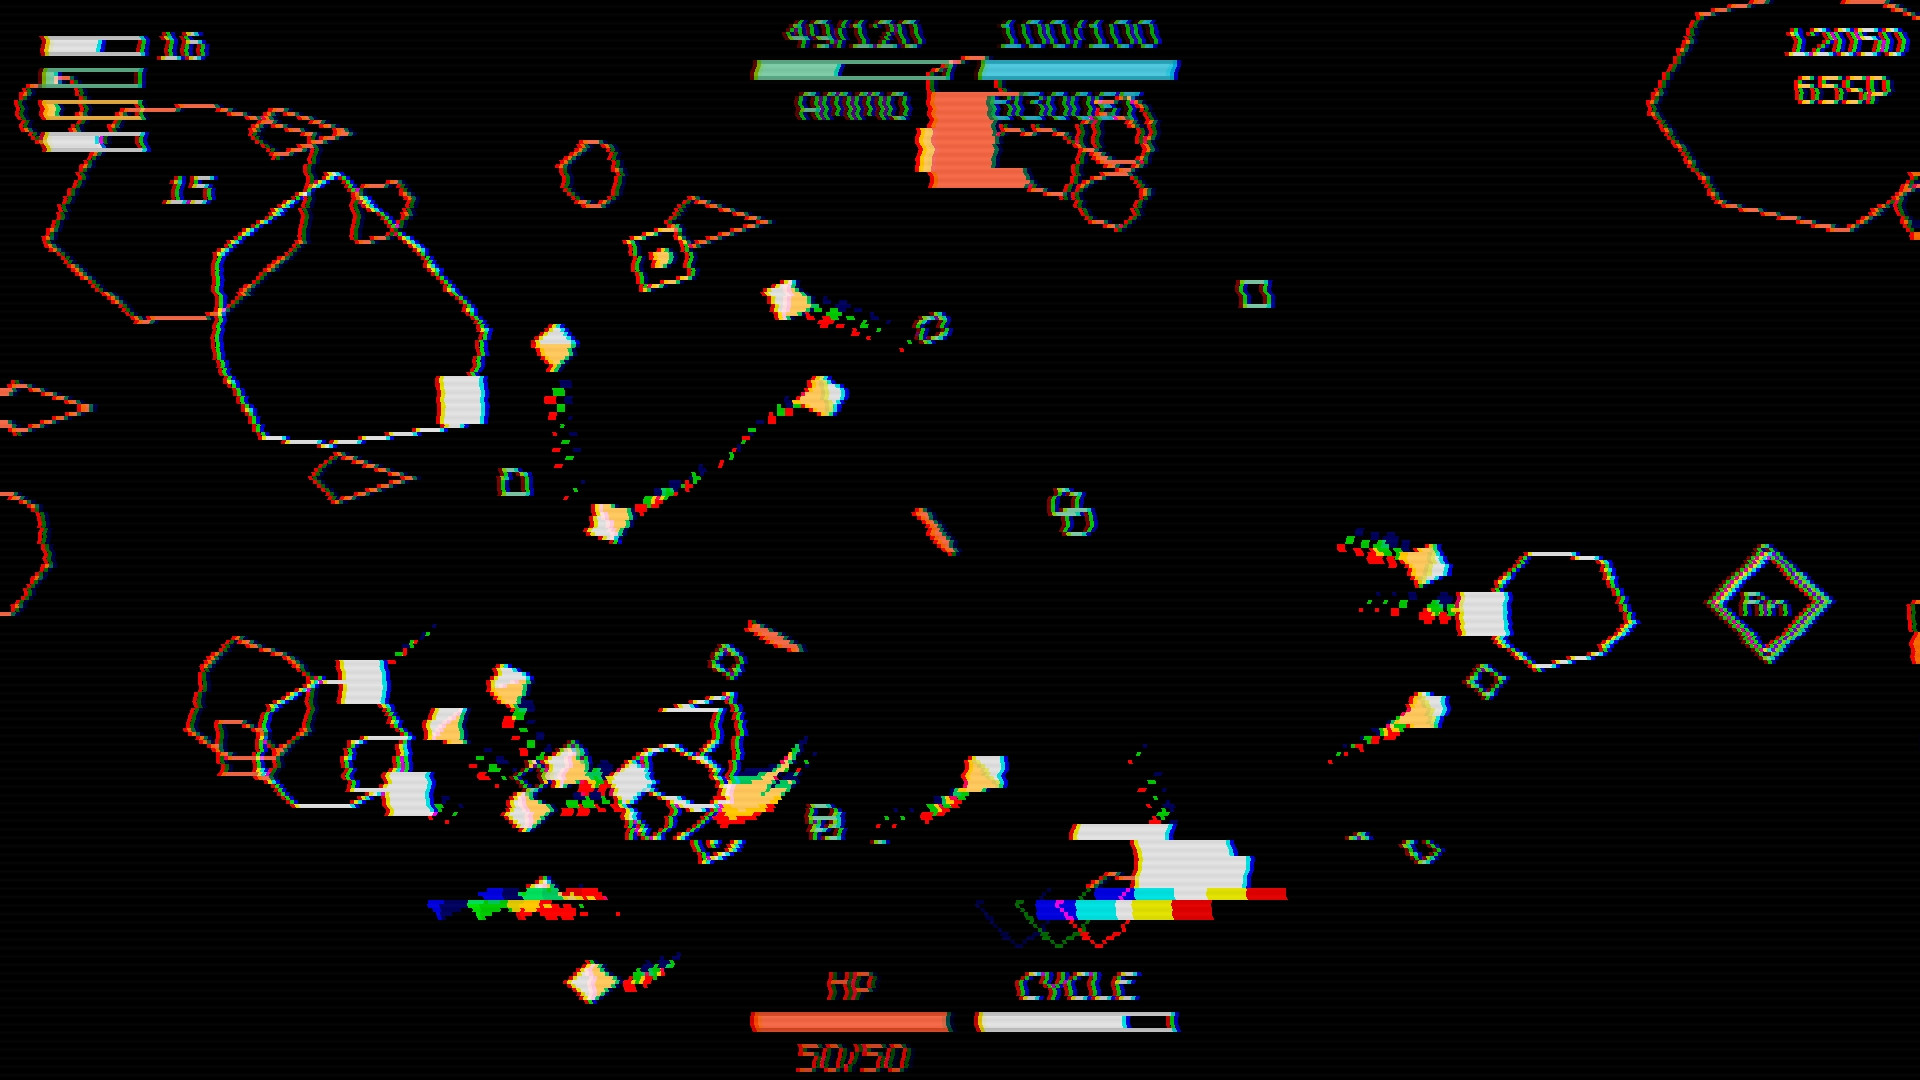
Table of contents
- Article 1
- Part 1. Game cycle
- Part 2. Libraries
- Part 3. Rooms and areas
- Part 4. Exercises
- Article 2
- Part 5. Basics of the game
- Part 6. Basics of the Player Class
- Article 3
- Part 7. Player Parameters and Attacks
- Part 8. Enemies
- Article 4
- Part 9. Director and game cycle
- Part 10. Code Writing Practices
- Part 11. Passive skills
- Article 5
- Part 12. Other Passive Skills
13. Skill Tree
14. Console
15. Final
')
Part 7: Player Parameters and Attacks
Introduction
In this part we will focus more on the part of the gameplay related to the player. First we will add the most fundamental parameters: ammunition, acceleration, health (HP) and skill points. These parameters will be used throughout the game and they are the main parameters that the player will use to perform all the actions available to him. After that, we will proceed to creating Resource objects, that is, objects that a player can collect. They contain the above parameters. Finally, after this, we will add a system of attacks, as well as several different player attacks.
Draw order
Before moving on to the main parts of the game, we need to consider another important aspect that I missed: the order of rendering.
The order of drawing determines which objects will be drawn on top, and which on the bottom. For example, now we have several effects that are drawn when performing certain events. If the effects are drawn under other objects, for example, under Player, then they either will not be visible, or they will look wrong. Therefore, we need to make sure that they always draw on top of everything else. To do this, we need to specify a certain order of drawing objects.
The way to solve this problem will be fairly straightforward. In the
GameObject class, we define the depth attribute, which is initially 50 for all entities. Then, if we want to define the constructor of each class, we can set the depth attribute for each object class ourselves. The idea is that objects with greater depth should be drawn from above, and smaller depth - at the bottom. That is, for example, if we want all effects to be drawn on top of everything else, then we can simply assign them to the depth attribute, for example, the value 75. function TickEffect:new(area, x, y, opts) TickEffect.super.new(self, area, x, y, opts) self.depth = 75 ... end Inside it will work like this: in each frame we will sort the
game_objects list by the depth attribute of each object: function Area:draw() table.sort(self.game_objects, function(a, b) return a.depth < b.depth end) for _, game_object in ipairs(self.game_objects) do game_object:draw() end end Here, before rendering, we simply use
table.sort to sort entities by their depth attribute. Entities with a smaller depth will move to the front of the table, that is, they will be drawn first (under the rest), and entities with greater depth will move to the end of the table and will be the last ones (on top of everything). If you try to set different depth values for different types of objects, you will see that it works.With this approach, one small problem arises - some objects will have the same depth, and when this happens, then when constantly sorting the
game_objects table, game_objects may occur. Flickering occurs because if objects have the same depth, then in one frame one object may be on top of another, but in the next frame, go down below it. The likelihood of this is small, but it can happen and we should prevent it.One solution is to define another sorting parameter in the case when objects have the same depth. In our case, I chose the object creation time as another parameter:
function Area:draw() table.sort(self.game_objects, function(a, b) if a.depth == b.depth then return a.creation_time < b.creation_time else return a.depth < b.depth end end) for _, game_object in ipairs(self.game_objects) do game_object:draw() end end That is, if the depths are the same, then the previously created object will be drawn earlier, and later created - later. This is a logical decision, and if you test it, you will see that it works!
Exercises with drawing order
93. Change the order of objects so that objects with greater depth are drawn from behind, and from smaller depths - from front. If objects have the same depth, they should be sorted by creation time. Objects created earlier should be rendered last, and objects created later should be the first.
94. In a 2.5D game with a top view, like the one shown below, you need to make sure that the entities are drawn in the appropriate order, that is, sorted by position
y . Entities with a larger value of y (that is, closer to the bottom of the screen) should be rendered last, and entities with a smaller value of y should be drawn first. What will the sort function look like in this case?Gif
Main settings
Now we will start building parameters. The first parameter we consider is acceleration (boost). It works as follows - when a player presses "up" or "down", the ship changes its speed depending on the key pressed. Above this basic functionality, there should also be a resource that is exhausted by using acceleration and is gradually restored when acceleration is not used. I will apply these values and rules:
- Initially, the player will have 100 units of acceleration.
- When using acceleration will decrease by 50 units of acceleration
- 10 acceleration units are always generated per second.
- When the number of acceleration units reaches 0, this property takes 2 seconds to cool down before it can be used again.
- Acceleration can be performed only when “cooling” is disabled and the resource of acceleration units is greater than 0
The rules seem a bit complicated, but in fact everything is simple. The first three are just the task of numerical values, the last two are needed to prevent infinite acceleration. When a resource reaches 0, it will continuously recover to 1, and this can lead to a situation where the player will use acceleration all the time. “Cooling down” is needed to prevent such a situation.
Now add this to the code:
function Player:new(...) ... self.max_boost = 100 self.boost = self.max_boost end function Player:update(dt) ... self.boost = math.min(self.boost + 10*dt, self.max_boost) ... end This is how we implement rules 1 and 3. Initially,
boost is set to max_boost , that is, 100, and then we add to boost by 10 per second until the value max_boost . We can also implement rule 2 by simply subtracting 50 units per second when the player accelerates: function Player:update(dt) ... if input:down('up') then self.boosting = true self.max_v = 1.5*self.base_max_v self.boost = self.boost - 50*dt end if input:down('down') then self.boosting = true self.max_v = 0.5*self.base_max_v self.boost = self.boost - 50*dt end ... end A part of this code was already here, that is, the only added lines are
self.boost -= 50*dt . Now, to check rule 4, we need to make sure that when boost reaches 0, the cooling will start for 2 seconds. This is a bit more complicated, because more moving parts are used here. The code looks like this: function Player:new(...) ... self.can_boost = true self.boost_timer = 0 self.boost_cooldown = 2 end First we introduce three variables.
can_boost will be used to report when acceleration can be performed. By default, it is true, because the player must be able to accelerate when starting the game. It is set to false when boost reaches 0, and then true in boost_cooldown seconds. The variable boost_timer will track how much time has passed after the boost reached 0, and when this variable exceeds boost_cooldown , can_boost will be set to true. function Player:update(dt) ... self.boost = math.min(self.boost + 10*dt, self.max_boost) self.boost_timer = self.boost_timer + dt if self.boost_timer > self.boost_cooldown then self.can_boost = true end self.max_v = self.base_max_v self.boosting = false if input:down('up') and self.boost > 1 and self.can_boost then self.boosting = true self.max_v = 1.5*self.base_max_v self.boost = self.boost - 50*dt if self.boost <= 1 then self.boosting = false self.can_boost = false self.boost_timer = 0 end end if input:down('down') and self.boost > 1 and self.can_boost then self.boosting = true self.max_v = 0.5*self.base_max_v self.boost = self.boost - 50*dt if self.boost <= 1 then self.boosting = false self.can_boost = false self.boost_timer = 0 end end self.trail_color = skill_point_color if self.boosting then self.trail_color = boost_color end end This seems complicated, but the code simply implements what we wanted to accomplish. Instead of just checking if the key is pressed using
input:down , we also check that boost above 1 (rule 5) and that can_boost is true (rule 5). When boost reaches 0, we set the variables boosting and can_boost false, and then reset boost_timer to 0. Since boost_timer added to boost_timer , every two seconds it will set can_boost to true and we can accelerate again (rule 4).The above code is an acceleration mechanism in its completed state. Here it is worth noting that this code can be called ugly, disordered and combining bad decisions. But this is exactly what most of the code looks like that handles certain aspects of the gameplay. Here you need to follow several rules and follow them at the same time. It seems to me that you should start getting used to this code.
Be that as it may, of all the main parameters, the acceleration is the only one that has such a complex logic. There are two more important parameters: ammunition and HP, but both are much simpler. Ammunition is simply spent on player attacks and recovered when resources are collected during the game, and HP drops when the player takes damage, and is also restored when resources are collected. Now we can simply add them as basic parameters, as we did with acceleration:
function Player:new(...) ... self.max_hp = 100 self.hp = self.max_hp self.max_ammo = 100 self.ammo = self.max_ammo end Resources
I call resources small objects that affect one of the main parameters. There will be five types of such objects in the game, and they will work as follows:
- The ammunition resource recovers 5 units of ammunition for the player and is created when the enemy dies
- The acceleration resource recovers 25 acceleration units for the player and is randomly created by the Director
- The HP resource recovers 25 HP from the player and is randomly created by the Director.
- The SkillPoint resource adds 1 skill point to the player and is randomly created by the Director.
- The attack resource changes the current attack of the player and is randomly created by the Director.
Director (Director) is a piece of code that controls the creation of enemies and resources. I called him that because he has that name in other games (for example, in L4D) and it seemed appropriate to me. We are not going to work on this part of the code yet, so we will tie the creation of each resource to the key in order to simply test their work.
Ammo Resource (Ammo Resource)
Let's start with the ammunition. The end result should be this:
Gif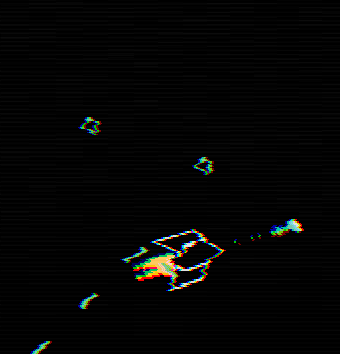
Small green rectangles are a resource of ammunition. When a player touches him, the resource is destroyed, and the player receives 5 units of ammunition. We can create a new
Ammo class and begin with the definitions: function Ammo:new(...) ... self.w, self.h = 8, 8 self.collider = self.area.world:newRectangleCollider(self.x, self.y, self.w, self.h) self.collider:setObject(self) self.collider:setFixedRotation(false) self.r = random(0, 2*math.pi) self.v = random(10, 20) self.collider:setLinearVelocity(self.v*math.cos(self.r), self.v*math.sin(self.r)) self.collider:applyAngularImpulse(random(-24, 24)) end function Ammo:draw() love.graphics.setColor(ammo_color) pushRotate(self.x, self.y, self.collider:getAngle()) draft:rhombus(self.x, self.y, self.w, self.h, 'line') love.graphics.pop() love.graphics.setColor(default_color) end Ammunition resources will be physical rectangles created at random slow speeds and turns, originally defined by
setLinearVelocity and applyAngularImpulse . In addition, this object is drawn using the draft library. This is a small library that allows you to draw all sorts of shapes more conveniently than you would have done it yourself. In our case, we can simply draw the resource like any rectangle, but I decided to do it this way. I will assume that you have already installed the library yourself and have read the documentation, having learned about its capabilities. In addition, we will take into account the rotation of the physical object, using the getAngle result in pushRotate .To test all this, we can bind the creation of one of these objects to the key:
function Stage:new() ... input:bind('p', function() self.area:addGameObject('Ammo', random(0, gw), random(0, gh)) end) end If you start the game now and click on P several times, then you will see how objects are created and move / rotate.
The next thing we need to create is the interaction of collisions between the player and the resource. This interaction will be used for all resources and will almost always be the same. The first thing we want to do is intercept the event of the collision of a player’s physical object with the physical object of the ammunition. The easiest way to do this is to use
(collision classes) . For a start, we can define three classes of collisions for already existing objects: the player, shells, and resources. function Stage:new() ... self.area = Area(self) self.area:addPhysicsWorld() self.area.world:addCollisionClass('Player') self.area.world:addCollisionClass('Projectile') self.area.world:addCollisionClass('Collectable') ... end And in each of these files (Player, Projectile and Ammo) we can set the collider collision class using
setCollisionClass (repeat this code in other files): function Player:new(...) ... self.collider:setCollisionClass('Player') ... end By itself, it does not change anything, it creates a basis with which you can intercept collision events between physical objects. For example, if we change the
Collectable collision class so that it ignores the Player : self.area.world:addCollisionClass('Collectable', {ignores = {'Player'}}) then when you start the game, you will notice that the player physically ignores objects of ammunition resources. We are not striving for this, but it serves as a good example of what can be done with collision classes. We want these three classes of collisions to follow the following rules:
- Projectile ignores Projectile
- Collectable ignores Collectable
- Collectable ignores Projectile
- Player generates collision events with Collectable
Rules 1, 2 and 3 can be implemented by making small changes to the calls to
addCollisionClass : function Stage:new() ... self.area.world:addCollisionClass('Player') self.area.world:addCollisionClass('Projectile', {ignores = {'Projectile'}}) self.area.world:addCollisionClass('Collectable', {ignores = {'Collectable', 'Projectile'}}) ... end It is worth noting that the order of declaring clash classes is important. For example, if we swap the declarations of the Projectile and Collectable classes, a bug will occur because the Collectable collision class creates a reference to the Projectile collision class, since the Projectile collision class has not yet been defined, an error occurs.
The fourth rule can be implemented by calling
enter : function Player:update(dt) ... if self.collider:enter('Collectable') then print(1) end end If you run the code, then at each player's collision with the ammunition resource, 1 is displayed in the console.
Another element that needs to be added to the
Ammo class is the slow motion of an object towards a player. The easiest way to do this is to add the behavior of Seek Behavior . My version of seek behavior is based on the book Programming Game AI by Example , in which there is a very good selection of general control behaviors. I will not explain the behavior in detail, because, frankly, I don’t remember how it works, so if you are interested, sort it out yourself: D function Ammo:update(dt) ... local target = current_room.player if target then local projectile_heading = Vector(self.collider:getLinearVelocity()):normalized() local angle = math.atan2(target.y - self.y, target.x - self.x) local to_target_heading = Vector(math.cos(angle), math.sin(angle)):normalized() local final_heading = (projectile_heading + 0.1*to_target_heading):normalized() self.collider:setLinearVelocity(self.v*final_heading.x, self.v*final_heading.y) else self.collider:setLinearVelocity(self.v*math.cos(self.r), self.v*math.sin(self.r)) end end Here the ammunition resource is directed towards the
target , if it exists, otherwise the resource will move in the initially specified direction. target contains a link to the player, which is set in the Stage as follows: function Stage:new() ... self.player = self.area:addGameObject('Player', gw/2, gh/2) end The only thing that remains is to process the actions that occur during the collection of ammunition resources. In the above gif-animation, you can see that a small effect is played (similar to the effect of “death” of a projectile) with particles, and then the player gets +5 ammunition.
Let's start with the effect. This effect uses the same logic as in the
ProjectileDeathEffect object: a small white flash occurs, and then the actual color of the effect appears. The only difference here is that instead of drawing a square, we will draw a rhombus, that is, the same shape that we used to draw the actual ammunition resource. I will name this new object AmmoEffect . We will not consider it in detail, because it is similar to ProjectileDeathEffect . However, we call it as follows: function Ammo:die() self.dead = true self.area:addGameObject('AmmoEffect', self.x, self.y, {color = ammo_color, w = self.w, h = self.h}) for i = 1, love.math.random(4, 8) do self.area:addGameObject('ExplodeParticle', self.x, self.y, {s = 3, color = ammo_color}) end end Here we create one
AmmoEffect object and then from 4 to 8 ExplodeParticle objects, which we have already used in the effect of death Player. The die function of the Ammo object will be called when it collides with the Player: function Player:update(dt) ... if self.collider:enter('Collectable') then local collision_data = self.collider:getEnterCollisionData('Collectable') local object = collision_data.collider:getObject() if object:is(Ammo) then object:die() end end end Here we first use
getEnterCollisionData to retrieve collision data generated by the last enter collision event for the specified label. Then we use getObject to access the object attached to the collider participating in the collision event, which can be any object in the Collectable collision class. In our case, we only have an Ammo object, but if we had others, then it would be here that the code would distinguish them. And this is exactly what we do - to check if the object obtained from getObject is an Ammo class, we use the is function from the classic library. If this is actually an object of the Ammo class, then we call its function die . All this should look like this:Gif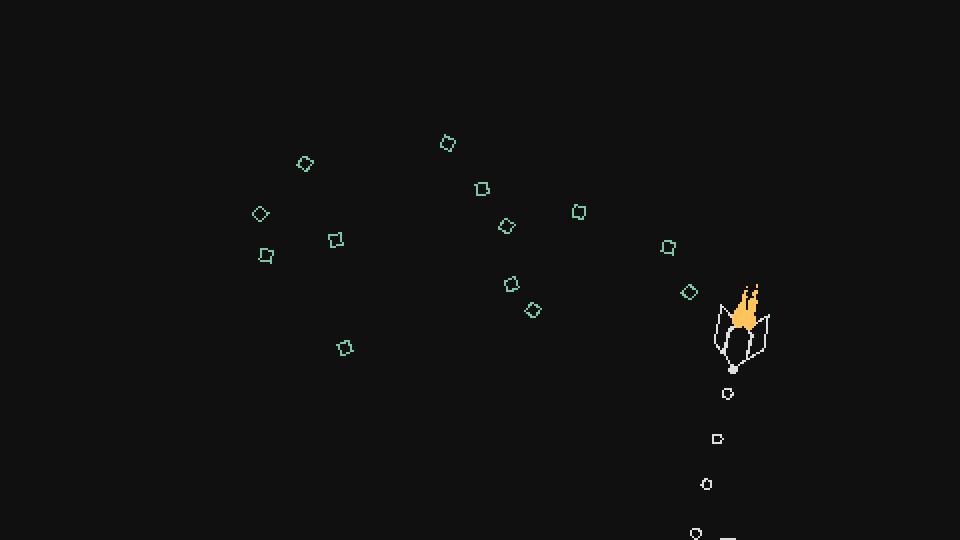
The last thing we forgot is the addition of +5 ammunition to the player when collecting ammunition resources. To do this, we define the
addAmmo function, which simply adds a specific value to the ammo variable and checks that it does not exceed max_ammo : function Player:addAmmo(amount) self.ammo = math.min(self.ammo + amount, self.max_ammo) end And then we just call this function after
object:die() in the newly added code.Boost Resource (Boost)
Now let's do the acceleration. The end result should look like this:
Gif
As you can see, the idea is about the same as with the ammunition resource, only the boost movement of the resource is slightly different, it looks a little different and the visual effect is different when it is picked up.
Let's start with the main thing. All resources, except for ammunition, will be created in the left or right side of the screen, and then slowly move in a straight line in the opposite direction. The same applies to enemies. This gives the player enough time to move to the resource and collect it if he wants.
The basic starting code of the
Boost class will be approximately the same as that of the Ammo class. It looks like this: function Boost:new(...) ... local direction = table.random({-1, 1}) self.x = gw/2 + direction*(gw/2 + 48) self.y = random(48, gh - 48) self.w, self.h = 12, 12 self.collider = self.area.world:newRectangleCollider(self.x, self.y, self.w, self.h) self.collider:setObject(self) self.collider:setCollisionClass('Collectable') self.collider:setFixedRotation(false) self.v = -direction*random(20, 40) self.collider:setLinearVelocity(self.v, 0) self.collider:applyAngularImpulse(random(-24, 24)) end function Boost:update(dt) ... self.collider:setLinearVelocity(self.v, 0) end However, there are some differences. The first three lines in the constructor get the starting position of the object. The function is
table.randomdefined utils.luaas follows: function table.random(t) return t[love.math.random(1, #t)] end As you can see, it simply selects a random element from the table. In our case, we simply choose -1 or 1, indicating the side with which the object should be created. If the value is -1, then the object will be created on the left side of the screen, and if 1, then the object will be created on the right. Specific positions for this selected position will be equal
-48or gw+48, that is, an object is created outside the screen, but close enough to its edge.Next, we define the object in almost the same way as Ammo, except for some differences in speed. If the object was created on the right, then we want it to move to the left, and if it is to the left, then we want it to move to the right. Therefore, the speed is assigned a random value from 20 to 40, and then multiplied by
-direction, because if the object is on the right, thendirectionequals 1; we want to move it to the left, so the speed must be negative (and vice versa for the opposite side). The component's velocity along the x axis is always assigned an attribute value v, and the y component is assigned a value of 0. We want the object to move along a horizontal line, so we set the velocity along y to 0.The last major difference is in the way it is drawn:
function Boost:draw() love.graphics.setColor(boost_color) pushRotate(self.x, self.y, self.collider:getAngle()) draft:rhombus(self.x, self.y, 1.5*self.w, 1.5*self.h, 'line') draft:rhombus(self.x, self.y, 0.5*self.w, 0.5*self.h, 'fill') love.graphics.pop() love.graphics.setColor(default_color) end Instead of drawing a single diamond, we draw one internal and one external, which will be a kind of outline. Of course, you can draw objects as you like, but I personally chose this method.
We now turn to the effects. It uses two objects: one is similar to
AmmoEffect(however, it is a bit more complicated), and the second is used for text +BOOST. We'll start with one that looks like AmmoEffect and name it BoostEffect.This effect consists of two parts: a center with a white flash and a flicker effect after it disappears. The center works in the same way as the
AmmoEffectonly difference lies in the execution time of each phase: from 0.1 to 0.2 in the first phase and from 0.15 to 0.35 in the second: function BoostEffect:new(...) ... self.current_color = default_color self.timer:after(0.2, function() self.current_color = self.color self.timer:after(0.35, function() self.dead = true end) end) end The second part of the effect is flickering before his death. Flicker can be achieved by creating a variable
visible, if true, the effect will be drawn, and if false, it will not. By changing the value of this variable, we will achieve the desired effect: function BoostEffect:new(...) ... self.visible = true self.timer:after(0.2, function() self.timer:every(0.05, function() self.visible = not self.visible end, 6) self.timer:after(0.35, function() self.visible = true end) end) end Here, to switch between visibility / invisibility, we use a call six times
everyat intervals of 0.05 seconds, and after completion we finally make the effect visible. The effect “dies” after 0.55 seconds (because we set the deadvalue to true after 0.55 when setting the current color), so making it visible at the end is not very important. Now we can draw it as follows: function BoostEffect:draw() if not self.visible then return end love.graphics.setColor(self.current_color) draft:rhombus(self.x, self.y, 1.34*self.w, 1.34*self.h, 'fill') draft:rhombus(self.x, self.y, 2*self.w, 2*self.h, 'line') love.graphics.setColor(default_color) end We just draw the inner and outer diamonds of different sizes. Specific values (1.34, 2) are derived mainly by trial and error.
The last thing we need to do for this effect is to increase the external contour-rhombus during the life of the object. We can do it like this:
function BoostEffect:new(...) ... self.sx, self.sy = 1, 1 self.timer:tween(0.35, self, {sx = 2, sy = 2}, 'in-out-cubic') end And then change the draw function to read:
function BoostEffect:draw() ... draft:rhombus(self.x, self.y, self.sx*2*self.w, self.sy*2*self.h, 'line') ... end Thanks to this variable
sxand sywill be increased to 2 for 0.35 seconds, that is, circuit, too, for the 0.35 second double. In the end, the result will look like this (I assume that you have already linked the function of diethis object to the collision event with the Player, as we did with the ammunition resource):Gif
Now let's do another part of the effect - crazy text. This text effect will be used almost everywhere in the game, so we need to implement it correctly. Let me show you what it looks like:
Gif
First let's split the effect into several parts. The first thing to notice is just a line that was originally drawn on the screen, but towards the end it starts flickering like an object
BoostEffect. Flicker uses the same logic as BoostEffect, that is, we have already considered it.Also, the letters of the line begin to randomly change to other letters, and the background of each character also randomly changes colors. This tells us that this effect processes each character separately, and does not operate on the entire line, that is, we will need to store all the characters in the table
characters, process this table, and then draw each character from the table on the screen with all modifications and effects.Given all this, we can define the basics of a class
InfoText. We will call it like this: function Boost:die() ... self.area:addGameObject('InfoText', self.x, self.y, {text = '+BOOST', color = boost_color}) end That is, our string will be stored in the attribute
text. Then the definition of the base class will look like this: function InfoText:new(...) ... self.depth = 80 self.characters = {} for i = 1, #self.text do table.insert(self.characters, self.text:utf8sub(i, i)) end end So we determine that the object will have a depth of 80 (higher than all other objects, that is, it will be drawn on top of everything), and then we divide the source row into table symbols. For this we use the library
utf8. In general, it is a good idea to manipulate strings using a library that supports all types of characters, and as we will see soon, this is especially important for our object.The drawing of these characters must also be done individually, because, as we found out earlier, each character has its own background, changing at random.
The logic of drawing each character separately is to go through the symbol table and draw each character at position x, which is the sum of all the characters in front of it. That is, for example, drawing the first
Oin line +BOOSTmeans drawing at position initial_x_position + widthOf('+B'). In our case, the problem with getting the width +Bis that it depends on the font used, since we will use the function Font:getWidth, but have not yet set the font. However, we can easily solve this problem!To this effect we use the font m5x7 Daniel Linssen. We can put this font in a folder
resources/fontsand then upload it. I will leave the code needed to load it as an exercise for you, because it is somewhat similar to the code used to load class definitions from a folder objects(Exercise 14). By the end of this download process, we will have a global table fontsthat will contain all the downloaded fonts in the formatfontname_fontsize. In this example we will use m5x7_16: function InfoText:new(...) ... self.font = fonts.m5x7_16 ... end And this is how the rendering code will look like:
function InfoText:draw() love.graphics.setFont(self.font) for i = 1, #self.characters do local width = 0 if i > 1 then for j = 1, i-1 do width = width + self.font:getWidth(self.characters[j]) end end love.graphics.setColor(self.color) love.graphics.print(self.characters[i], self.x + width, self.y, 0, 1, 1, 0, self.font:getHeight()/2) end love.graphics.setColor(default_color) end First, we will use
love.graphics.setFontto specify the font that we want to use in the following drawing operations. Then we have to go through each of the characters, and then draw them. But first we need to calculate its position in x, which is the sum of the width of all characters before it. The internal loop that accumulates a variable widthdoes just that. It starts from 1 (the beginning of the line) to i-1 (the character before the current one) and adds the width of each character to the total width, that is, to the sum of all of them. Then we use love.graphics.printto draw each individual character in its corresponding position. We also shift each character half the height of the font (so that the characters are centered relative to the position given by us y).If we test all this, we get the following:
Gif
Just what we need!
Now we can proceed to the flickering of the text before disappearing. This effect uses the same logic as in the BoostEffect object, that is, we can simply copy it:
function InfoText:new(...) ... self.visible = true self.timer:after(0.70, function() self.timer:every(0.05, function() self.visible = not self.visible end, 6) self.timer:after(0.35, function() self.visible = true end) end) self.timer:after(1.10, function() self.dead = true end) end If we run this, we see that the text remains normal for a while, then it starts to flicker and disappears.
And now the most difficult thing is to make each character change randomly, and do the same with the main and background colors. These changes begin approximately at the same time when the symbol starts to flicker, so we will put this part of the code inside the call
afterfor 0.7 seconds, which we defined above. We will do this - every 0.035 seconds we will run a procedure that has a chance to change a character to another random character. It looks like this: self.timer:after(0.70, function() ... self.timer:every(0.035, function() for i, character in ipairs(self.characters) do if love.math.random(1, 20) <= 1 then -- change character else -- leave character as it is end end end) end) That is, every 0.035 seconds, each character has a 5% chance to change to something else. We can complete this by adding a variable
random_characters, which is a string containing all the characters that a character can change into. When a character needs to change, we randomly select a character from this string: self.timer:after(0.70, function() ... self.timer:every(0.035, function() local random_characters = '0123456789!@#$%¨&*()-=+[]^~/;?><.,|abcdefghijklmnopqrstuvwxyzABCDEFGHIJKLMNOPQRSTUVWYXZ' for i, character in ipairs(self.characters) do if love.math.random(1, 20) <= 1 then local r = love.math.random(1, #random_characters) self.characters[i] = random_characters:utf8sub(r, r) else self.characters[i] = character end end end) end) When we run the code, it should look like this:
Gif
We can use the same logic to change the main and background colors of a symbol. To do this, we define two tables,
background_colorsand foreground_colors. Each table is the same size as the table characters, and will simply contain the background and primary colors for each character. If no symbol is specified for a symbol in this table, it will by default use the primary color ( boost_color) and a transparent background. function InfoText:new(...) ... self.background_colors = {} self.foreground_colors = {} end function InfoText:draw() ... for i = 1, #self.characters do ... if self.background_colors[i] then love.graphics.setColor(self.background_colors[i]) love.graphics.rectangle('fill', self.x + width, self.y - self.font:getHeight()/2, self.font:getWidth(self.characters[i]), self.font:getHeight()) end love.graphics.setColor(self.foreground_colors[i] or self.color or default_color) love.graphics.print(self.characters[i], self.x + width, self.y, 0, 1, 1, 0, self.font:getHeight()/2) end end If defined
background_colors[i](background color for the current character), then for the background color we simply draw a rectangle in the appropriate position and the size of the current character. We change the main color by simply setting the setColorcolor of the current character using the color. If foreground_colors[i]not defined, then by default it is equal self.color, which for this object is always equal boost_color, since we are the ones that we transmit when we call it from the Boost object. But if self.colornot defined, then it defaults to white ( default_color). By itself, this code fragment does nothing, because we have not defined the values inside the tables background_colorsand foreground_colors.To do this, we can use the same logic that was used to randomly change characters:
self.timer:after(0.70, function() ... self.timer:every(0.035, function() for i, character in ipairs(self.characters) do ... if love.math.random(1, 10) <= 1 then -- change background color else -- set background color to transparent end if love.math.random(1, 10) <= 2 then -- change foreground color else -- set foreground color to boost_color end end end) end) The code replacing the colors should choose from a list of colors. We have defined a global group of six colors, so we can simply put all of them in the list and then use one to randomly select one of them
table.random. In addition, beyond this, we will define six more colors, which will be negatives of the six original ones. That is, if we have the original color 232, 48, 192, then its negative can be defined as 255-232, 255-48, 255-192. function InfoText:new(...) ... local default_colors = {default_color, hp_color, ammo_color, boost_color, skill_point_color} local negative_colors = { {255-default_color[1], 255-default_color[2], 255-default_color[3]}, {255-hp_color[1], 255-hp_color[2], 255-hp_color[3]}, {255-ammo_color[1], 255-ammo_color[2], 255-ammo_color[3]}, {255-boost_color[1], 255-boost_color[2], 255-boost_color[3]}, {255-skill_point_color[1], 255-skill_point_color[2], 255-skill_point_color[3]} } self.all_colors = fn.append(default_colors, negative_colors) ... end Here we define two tables containing the corresponding values of each of the colors, and then use the function
appendto combine them. Then now we can do something of a type table.random(self.all_colors)and get one random color out of ten defined in this table. That is, we can do the following: self.timer:after(0.70, function() ... self.timer:every(0.035, function() for i, character in ipairs(self.characters) do ... if love.math.random(1, 10) <= 1 then self.background_colors[i] = table.random(self.all_colors) else self.background_colors[i] = nil end if love.math.random(1, 10) <= 2 then self.foreground_colors[i] = table.random(self.all_colors) else self.background_colors[i] = nil end end end) end) If we start the game, we will see the following:
Gif
That's all.Later we will improve this effect (including in exercises), but for now this is enough. The last thing we need to do is to add +25 boost to the player when collecting acceleration resources. It works exactly the same as with the ammunition resource, so we will skip the code.
Resource Exercises
95. Have the Projectile collision class ignore the collision class Player.
96. Change the function
addAmmoso that it supports the addition of negative values and does not allow the attribute ammoto fall below 0. Do the same for the functions addBoostand addHP(adding HP resource will be the task of another exercise).97. Judging by the previous exercise, it is better to process the positive and negative values in one function or to divide them into functions
addResourceand removeResource?98. In the object,
InfoTextchange the probability of changing the symbol by 20%, the probability of changing the primary color by 5%, and the probability of changing the background color by 30%.99. Define the tables
default_colors, negative_colorsAnd all_colorsin InfoTextnon-locally and globally.100. Randomize the position of an object
InfoTextso that it is created between -self.wand self.wover the x component, between -self.hand self.hover the y component. Attributes wand hrelate to the Boost object that creates the InfoText.101. Suppose we have the following function:
function Area:getAllGameObjectsThat(filter) local out = {} for _, game_object in pairs(self.game_objects) do if filter(game_object) then table.insert(out, game_object) end end return out end It returns all game objects inside the Area that the filter function passes. Also assume that it is invoked in the InfoText constructor as follows:
function InfoText:new(...) ... local all_info_texts = self.area:getAllGameObjectsThat(function(o) if o:is(InfoText) and o.id ~= self.id then return true end end) end That returns all existing and live InfoText objects that are not current. Make sure that the InfoText object does not visually overlap with any other InfoText object, that is, does not occupy the same space on the screen and the text does not become unreadable. You can do it any way you want, as long as he performs the task.
102. (CONTENT) Add an HP resource with all the functionality and visual effects. It uses the exact same logic as the Boost resource, but adds +25 HP. Resource and effects should look like this:
Gif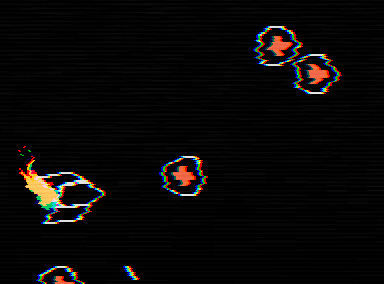
103. (CONTENT) Add an SP resource with all the functionality and visual effects. It uses the same logic as the resource, but adds +1 SP. In addition, the SP resource must be defined as a global variable, and not as an internal variable of the Player object. Resource and effect should look like this:
Gif
Attacks
Great, now let's move on to the attacks. First of all, we will change the way shells are drawn. Now they are drawn as circles, but we want them to be lines. This can be implemented like this:
function Projectile:draw() love.graphics.setColor(default_color) pushRotate(self.x, self.y, Vector(self.collider:getLinearVelocity()):angle()) love.graphics.setLineWidth(self.s - self.s/4) love.graphics.line(self.x - 2*self.s, self.y, self.x, self.y) love.graphics.line(self.x, self.y, self.x + 2*self.s, self.y) love.graphics.setLineWidth(1) love.graphics.pop() end In the function
pushRotatewe use the speed of the projectile, so we can rotate it in accordance with the angle at which it moves. Then inside we use love.graphics.setLineWidthand set a value roughly proportional to the attribute s, but slightly smaller. This means that shells with sa large overall will be thicker. Then we draw the projectile with love.graphics.line. It is also important that we draw one line from -2*self.sto the center, and then one more from the center to 2*self.s. We do this because each attack will have its own color, and we will change the color of one of these lines, but not the second. That is, for example, if we do this: function Projectile:draw() love.graphics.setColor(default_color) pushRotate(self.x, self.y, Vector(self.collider:getLinearVelocity()):angle()) love.graphics.setLineWidth(self.s - self.s/4) love.graphics.line(self.x - 2*self.s, self.y, self.x, self.y) love.graphics.setColor(hp_color) -- change half the projectile line to another color love.graphics.line(self.x, self.y, self.x + 2*self.s, self.y) love.graphics.setLineWidth(1) love.graphics.pop() end Then it will look like this:
Gif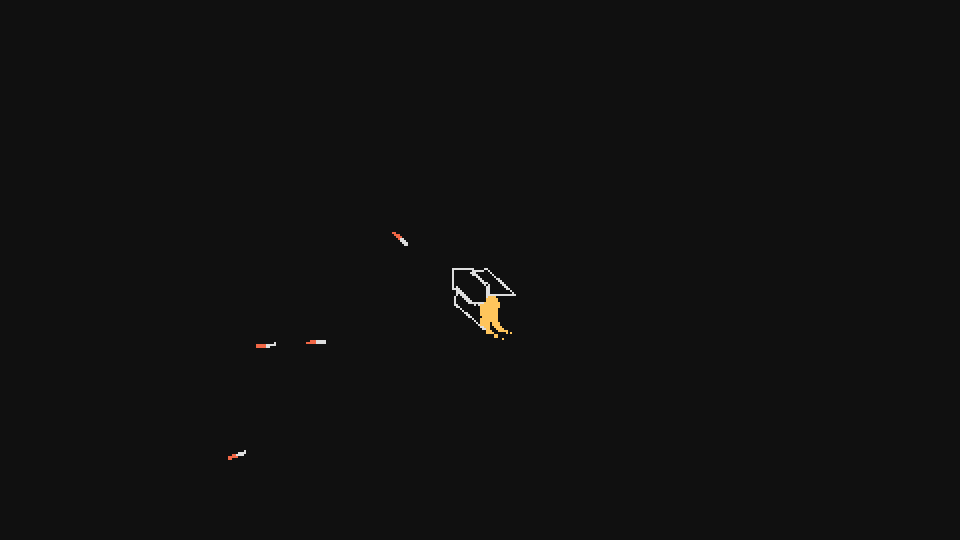
Thus, we can assign each attack its own color, and allow the player to better understand what is happening on the screen.
In the finished game will be 16 attacks, but now we consider only some of them. The attack system is very simple and is based on the following rules:
- Attacks (with the exception of Neutral) use ammunition with each shot;
- When ammunition drops to 0, the current attack changes to Neutral;
- New attacks can be obtained using randomly created resources;
- When a new attack is received, the current attack is replaced, and the ammunition is fully restored;
- Each attack spends its amount of ammunition and has its own properties.
The first thing we will do is define a table that will contain information about each of the attacks: the time they “cool down”, the consumption of ammunition and the color. We will define the table in
globals.luaand for now it will look like this: attacks = { ['Neutral'] = {cooldown = 0.24, ammo = 0, abbreviation = 'N', color = default_color}, } The standard attack that we have already defined is called
Neutral. It will use the attack parameters that we already have in the game. Now we can define a function setAttackthat will replace one attack with another and use this global attack table: function Player:setAttack(attack) self.attack = attack self.shoot_cooldown = attacks[attack].cooldown self.ammo = self.max_ammo end We can call her like this:
function Player:new(...) ... self:setAttack('Neutral') ... end Here we simply change the attribute
attackthat will contain the name of the current attack. This attribute will be used in the function shootto check the current active attack and determine how to create projectiles.We can also change the attribute
shoot_cooldown. We have not created this attribute yet, but it will be similar to the attributes boost_timerand boost_cooldown. It will be used to control how often an action takes place, in our case an attack. We will delete this line: function Player:new(...) ... self.timer:every(0.24, function() self:shoot() end) ... end And we will set the attack timings manually:
function Player:new(...) ... self.shoot_timer = 0 self.shoot_cooldown = 0.24 ... end function Player:update(dt) ... self.shoot_timer = self.shoot_timer + dt if self.shoot_timer > self.shoot_cooldown then self.shoot_timer = 0 self:shoot() end ... end At the end of the function, we will also restore the amount of ammunition. So we implement rule 4. The next thing to do is to slightly change the function
shootso that it starts to take into account the existence of various attacks: function Player:shoot() local d = 1.2*self.w self.area:addGameObject('ShootEffect', self.x + d*math.cos(self.r), self.y + d*math.sin(self.r), {player = self, d = d}) if self.attack == 'Neutral' then self.area:addGameObject('Projectile', self.x + 1.5*d*math.cos(self.r), self.y + 1.5*d*math.sin(self.r), {r = self.r}) end end Before launching the projectile, we check the
if self.attack == 'Neutral'current attack with a conventional design . This function will gradually grow into a large chain of conditions, because we have to check all 16 attacks.Let's start by adding one attack to see what it looks like. The attack we add will be called
Double. She looks like this:
As you can see, she shoots at an angle with two shells instead of one. First we need to add a description of the attack to the global attack table. This attack will have a “cooling down” time of 0.32 seconds, spend 2 ammunition, and its color will be
ammo_color(I obtained these values by trial and error): attacks = { ... ['Double'] = {cooldown = 0.32, ammo = 2, abbreviation = '2', color = ammo_color}, } Now we can add it to the function
shoot: function Player:shoot() ... elseif self.attack == 'Double' then self.ammo = self.ammo - attacks[self.attack].ammo self.area:addGameObject('Projectile', self.x + 1.5*d*math.cos(self.r + math.pi/12), self.y + 1.5*d*math.sin(self.r + math.pi/12), {r = self.r + math.pi/12, attack = self.attack}) self.area:addGameObject('Projectile', self.x + 1.5*d*math.cos(self.r - math.pi/12), self.y + 1.5*d*math.sin(self.r - math.pi/12), {r = self.r - math.pi/12, attack = self.attack}) end end Here we create not one, but two projectiles, each of which is directed at an angle of math.pi / 12 radians, or 15 degrees. We also made the projectile receive the attribute as the name of the attack
attack. We will do this for each type of projectile, because it will help us determine what type of attack the projectile belongs to. This is useful for setting the appropriate color, as well as for changing behavior if necessary. The Projectile object now looks like this: function Projectile:new(...) ... self.color = attacks[self.attack].color ... end function Projectile:draw() pushRotate(self.x, self.y, Vector(self.collider:getLinearVelocity()):angle()) love.graphics.setLineWidth(self.s - self.s/4) love.graphics.setColor(self.color) love.graphics.line(self.x - 2*self.s, self.y, self.x, self.y) love.graphics.setColor(default_color) love.graphics.line(self.x, self.y, self.x + 2*self.s, self.y) love.graphics.setLineWidth(1) love.graphics.pop() end In the constructor, we set the
colorcolor defined for this attack in the global table attacks. And in the draw function, we draw one part of the line with this color, which is an attribute color, and the other, which is default_color. For most types of shells, the scheme will be the same.The last thing we forgot is to make this attack comply with rule 1, that is, we forgot to add a code that forces it to waste the necessary amount of ammunition. It's pretty easy to fix:
function Player:shoot() ... elseif self.attack == 'Double' then self.ammo = self.ammo - attacks[self.attack].ammo ... end end Thanks to this rule 1 will be executed (for the Double attack). We can also add code that implements rule 2: when it
ammodrops to 0, we change the current attack to Neutral: function Player:shoot() ... if self.ammo <= 0 then self:setAttack('Neutral') self.ammo = self.max_ammo end end We have to go to the end of the function
shoot, because we do not want the player to shoot after the amount of ammunition drops to 0.If you do this and try to start the program, you will receive the following:
Gif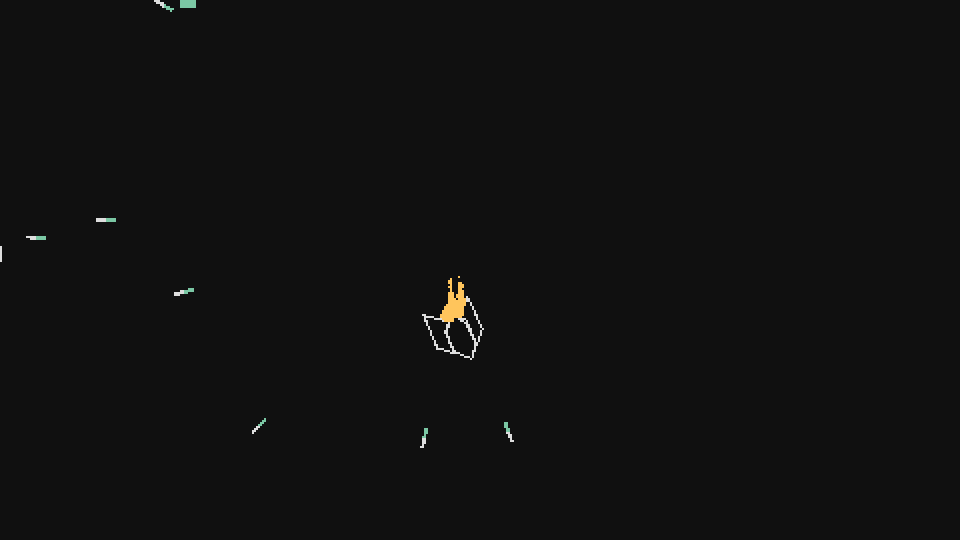
Exercises with attacks
104. (CONTENT) Implement the attack
Triple. Its definition in the attack table looks like this: attacks['Triple'] = {cooldown = 0.32, ammo = 3, abbreviation = '3', color = boost_color} And the attack itself will look like this:
Gif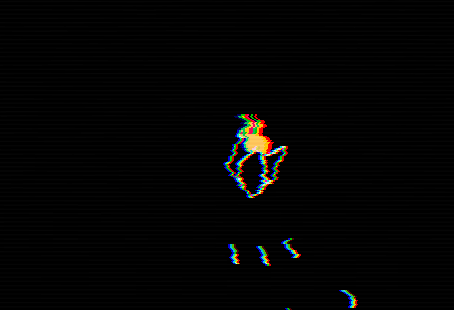
The angles of the shells are exactly the same as in
Double, but there is still an additional projectile, created in the middle (at the same angle as the attack projectile Neutral). Create this attack in the same way as Double.105. (CONTENT) Implement the attack
Rapid. Its definition in the attack table looks like this: attacks['Rapid'] = {cooldown = 0.12, ammo = 1, abbreviation = 'R', color = default_color} And the attack itself looks like this:
Gif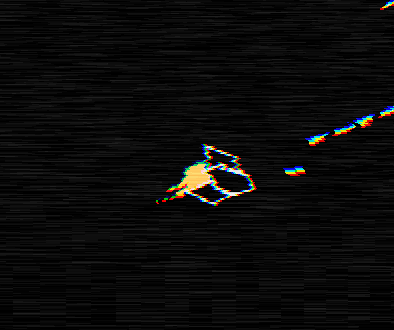
106. (CONTENT) Implement the attack
Spread. Its definition in the attack table: attacks['Spread'] = {cooldown = 0.16, ammo = 1, abbreviation = 'RS', color = default_color} And the attack itself looks like this:
Gif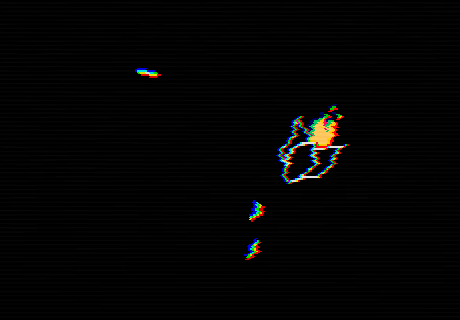
The angles used for the shots are a random value from -math.pi / 8 to + math.pi / 8. The color of the shells of this attack also works a little differently. Instead of having only one color, in each frame the color changes randomly to one of the list
all_colors(or through the frame, depending on how you feel better).107. (CONTENT) Implement the attack
Back. Its definition in the attack table looks like this: attacks['Back'] = {cooldown = 0.32, ammo = 2, abbreviation = 'Ba', color = skill_point_color} And the attack itself looks like this:
Gif
108. (CONTENT) Implement the attack
Side. Its definition in the attack table: attacks['Side'] = {cooldown = 0.32, ammo = 2, abbreviation = 'Si', color = boost_color} The attack itself:
Gif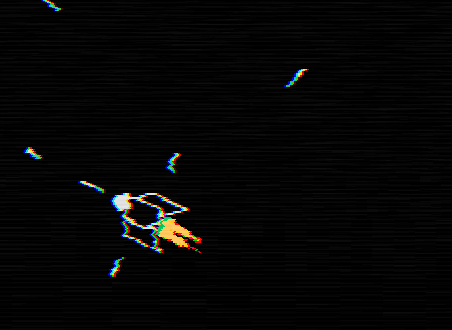
109. (CONTENT) Implement a resource
Attack. As Boostwith SkillPoint, the Attack resource is created in the left or right edge of the screen, and then very slowly moves inward. When a player interacts with an Attack resource, his attack with the function setAttackchanges to an attack that is contained in the resource.The Attack resource is slightly different in appearance from the Boost and SkillPoint resources, but the principle of it and its effects is almost the same. The colors used for each resource are the same as that of their shells, and the name-identifier is the one we named
abbreviationin the table attacks. Here is what they look like:Gif
Do not forget to create InfoText objects when selecting a new attack by the player!
Part 8: Enemies
Introduction
In this part, we will consider the creation of several enemies, as well as the EnemyProjectile class, that is, projectiles with which some enemies will be able to shoot the player. This part will be a bit shorter than the others, because now I will not talk in detail about the creation of all enemies, but only about the general behavior, which will be almost the same for all of them.
The enemies
The enemies in this game behave almost the same as the resources created in the previous part: they are created near the left or right border of the screen in a random position y, and then slowly move inward. The code of their behavior will be almost the same that we have implemented for resources.
We will start with the first enemy, which we call
Rock. It looks like this:Gif
The constructor code of this object will be very similar to the code
Boost, but with a few differences: function Rock:new(area, x, y, opts) Rock.super.new(self, area, x, y, opts) local direction = table.random({-1, 1}) self.x = gw/2 + direction*(gw/2 + 48) self.y = random(16, gh - 16) self.w, self.h = 8, 8 self.collider = self.area.world:newPolygonCollider(createIrregularPolygon(8)) self.collider:setPosition(self.x, self.y) self.collider:setObject(self) self.collider:setCollisionClass('Enemy') self.collider:setFixedRotation(false) self.v = -direction*random(20, 40) self.collider:setLinearVelocity(self.v, 0) self.collider:applyAngularImpulse(random(-100, 100)) end Here, instead of a RectangleCollider, the object will use a PolygonCollider. We create the vertices of this polygon by the function
createIrregularPolygonto be defined in utils.lua. This function should return a list of vertices that make up an irregular rectangle. By an irregular rectangle, I mean one that looks like a circle, but each vertex of which may be slightly closer or farther from the center, and in which the angles between each of the vertices may also be slightly random.To begin the definition of a function, we can say that it will receive two arguments:
sizeand point_amount. The first will relate to the radius of the circle, and the second to the number of points that make up the polygon (polygon): function createIrregularPolygon(size, point_amount) local point_amount = point_amount or 8 end Here we can also say that if
point_amountnot defined, then the default is 8.The next thing we can do is define all points. This can be done in a cycle from 1 to
point_amount, in each iteration of which we will determine the next vertex based on the interval of angles. For example, to determine the position of the second point, we can say that its angle will be in the interval 2*angle_interval, where angle_intervalis the value 2*math.pi/point_amount. That is, in this case it will be approximately equal to 90 degrees. It is more logical to write this code, so: function createIrregularPolygon(size, point_amount) local point_amount = point_amount or 8 local points = {} for i = 1, point_amount do local angle_interval = 2*math.pi/point_amount local distance = size + random(-size/4, size/4) local angle = (i-1)*angle_interval + random(-angle_interval/4, angle_interval/4) table.insert(points, distance*math.cos(angle)) table.insert(points, distance*math.sin(angle)) end return points end Here we define
angle_interval, as explained above, but also define distanceas being somewhere within the radius of a circle, but with a random offset from -size/4to +size/4. This means that each vertex will not be exactly on the circle of the circle, but somewhere nearby. We also randomly randomize a range of angles to create the same effect. Finally, we add the x and y components to the list of returned points. Notice that the polygon is created in local space (assuming that the center is at 0, 0), that is, to place the object in the right place, we will then have to use it setPosition.Another difference between the constructor of this object is that it uses the collision class
Enemy. Like all other classes of collisions, this one must also be defined before use: function Stage:new() ... self.area.world:addCollisionClass('Enemy') ... end In general, new classes of collisions should be added for types of objects that will have different collision behaviors between each other. For example, enemies will physically ignore the player, but not the shells. Since no other type of object uses this behavior, we need to create a new class of collisions for it. If the Projectile collision class ignored only the player and not other projectiles, then the Projectile collision class could also be used for enemies.
The last thing to do with the Rock object is to render it. Since this is just a polygon, we can simply draw its points with
love.graphics.polygon: function Rock:draw() love.graphics.setColor(hp_color) local points = {self.collider:getWorldPoints(self.collider.shapes.main:getPoints())} love.graphics.polygon('line', points) love.graphics.setColor(default_color) end First we get these points with
PolygonShape:getPoints. The points are returned in local coordinates, and we need global ones, so we have to use Body:getWorldPointsto convert local coordinates to global ones. After that we can draw a polygon and it will behave as we expect. Note that since we get points directly from the collider, and the collider is a rotating polygon, we do not need to use pushRotateto rotate the object, as it did with the Boost object, because the resulting points already take into account the rotation of objects.If we do all this, the game will look like this:
Gif
Exercises with enemies
110. Complete the following tasks:
- Add an attribute
hpto the Rock class with an initial value of 100 - Rock
hit. :damage, , 100damagehp,hp0 , Rock «»hp0 ,hit_flashtrue, 0,2 — false.hit_flashtrue,default_color,hp_color.
111. Create a new class
EnemyDeathEffect. This effect is created when the enemy dies and behaves exactly like an object ProjectileDeathEffect, only it is larger and corresponds to the size of the Rock object. This object must be created when the attribute hpof the Rock object becomes 0 or lower.112. Implement a collision event between a Projectile collision class object and an Enemy collision class object. In our case, we need to implement it in the update function of the Projectile class. When a projectile hits an object of the Enemy class, it must call the enemy’s function
hitwith the amount of damage the projectile hits (by default, the projectiles will have an attribute damageinitially equal to 100). When hit, the projectile must also call its own function die.113.Add a function to the Player class
hit. This function should do the following:- It should receive an argument
damage, and in the case when it is not defined, the default value is 10 - This function should do nothing but set the attribute
invincibleto true. - From 4 to 8 objects should be created.
ExplodeParticle - The function
addHP(orremoveHP, if you decide to add it) should receive the attributedamageand use it to reduce the HP of the Player object. Inside the functionaddHP(orremoveHP), a method must be implemented to handle the situation whenhpit becomes equal to or less than 0 and the player dies.
In addition, the following conditional operations should be fair:
- 30,
invincibletrue, — false. , 0,2 6, , 0,5 0,25. ,invisibletrue false 0,04 ,invincibletrue.invisibletrue, Player . - 30, 0,1 6, , 0,25 0,75.
This function
hitshould be called when a player collides with Enemy. In the event of a conflict with the enemy, the player must be dealt damage 30.After completing these four exercises, you should have everything you need for such interactions between Player, Projectile and the enemy of Rock, as they should be in the game. These interactions will apply to other enemies. All this should look like this:
Gif
EnemyProjectile
Now we can focus on one more part of the work with the enemies - making enemies firing projectiles. Some of the enemies will have such an opportunity available, so we will need to create an object similar to Projectile, but which the enemies will use. To do this, we will create an object
EnemyProjectile.This object can first be created by simply copying and slightly changing the code
Projectile. Both of these objects will have a lot of common code. We can abstract into a general object of shells that have a common behavior, but in fact this is not necessary, because there will be only two types of shells in the game. After copying we must make the following changes: function EnemyProjectile:new(...) ... self.collider:setCollisionClass('EnemyProjectile') end The EnemyProjectile collision class should also be EnemyProjectile. We want EnemyProjectile objects to ignore other EnemyProjectile, Projectile and Player. Therefore, we add a collision class appropriate for this goal:
function Stage:new() ... self.area.world:addCollisionClass('EnemyProjectile', {ignores = {'EnemyProjectile', 'Projectile', 'Enemy'}}) end Another important aspect that needs to be changed is damage. A normal projectile, fired by a player, deals 100 damage, and an enemy projectile must do 10 damage:
function EnemyProjectile:new(...) ... self.damage = 10 end We also need the shells fired by the enemies to collide with the Player, but not with other enemies. Therefore, we take the collision code used by the Projectile object and wrap it against the Player itself:
function EnemyProjectile:update(dt) ... if self.collider:enter('Player') then local collision_data = self.collider:getEnterCollisionData('Player') ... end Finally, we want this object to be completely red, not red and white, so that the player can distinguish their shells from enemy ones:
function EnemyProjectile:draw() love.graphics.setColor(hp_color) ... love.graphics.setColor(default_color) end Having made all these small changes, we have successfully created an EnemyProjectile object. Now we need to create an enemy that will use it!
Shooting enemy
Here is what the enemy Shooter looks like:
Gif
As you can see, a small effect is played first, and then a shell is fired. The projectile looks the same as that of the player, only completely red.
We can start creating this enemy by copying the code from the Rock object. This enemy (and indeed all enemies) will have a common property - appearing to the left or right of the screen, and then slowly moving inwards. Since the Rock object already has this code, we can start with it. After copying the code, we need to make small changes:
function Shooter:new(...) ... self.w, self.h = 12, 6 self.collider = self.area.world:newPolygonCollider( {self.w, 0, -self.w/2, self.h, -self.w, 0, -self.w/2, -self.h}) end The width, height and top of the enemy Shooter differ in values from Rock. We simply created an irregular polygon near the stone, but this enemy needs to be given a clearly distinguishable and pointed shape so that the player can instinctively understand where he will move. The task of the peaks here is similar to the design process of the ships, so if you wish, you can change the appearance of the enemy and make it more steep.
function Shooter:new(...) ... self.collider:setFixedRotation(false) self.collider:setAngle(direction == 1 and 0 or math.pi) self.collider:setFixedRotation(true) end We also need to change the following: unlike a stone, it is not enough just to set the speed of an object. We also need to set its angle so that the physical collider points in the right direction. To do this, we first need to turn off its constant rotation (otherwise the angle setting will not work), change the angle, and then make a constant rotation true again. We make the turn constant again, because we don’t want the collider to rotate when something hits it. We need it to stay in the direction of movement.
The string
direction == 1 and math.pi or 0is the implementation of the ternary operator in Lua. In other languages, it may look like (direction == 1) ? math.pi : 0. I think the exercises in parts 2 and 4 allowed you to examine them in detail. In essence, the following happens here: ifdirectionequal to 1 (the enemy appears to the right and is directed to the left), then the first conventional design is true, that is, we get true and math.pi or 0. Because of the order of execution andand or, the first will be true and math.pi, that is, as a result we will have math.pi or 0, which returns math.pi, because when both elements are true, then the orfirst one returns. On the other hand, if it directionis -1, then the first conditional is spars to false and we succeed false and math.pi or 0, that is false or 0, which leads us to 0, because when the first element is false, it orreturns the second.Given all this, we can start creating objects in the game Shooter, and they will look like this:
Gif
Now we need to create a pre-attack effect. Usually in most games, when the enemy is about to attack, something happens that tells the player about it. Most often it is an animation, but it can also be an effect. In our case, we will use the simple effect of "charging", in which many particles are sucked into the point from which the projectile will fly.
Here is how it will be implemented at a high level:
function Player:new(...) ... self.timer:every(random(3, 5), function() -- spawn PreAttackEffect object with duration of 1 second self.timer:after(1, function() -- spawn EnemyProjectile end) end) end This means that at intervals of 3 to 5 seconds, each enemy Shooter will fire a new projectile. This will occur after the effect has been completed
PreAttackEffectfor one second.Similar effects work with particles as follows: as is the case with traces of exhaust, in each frame or through a frame, particles of a certain type are created that make up this effect. In our case, particles will be created called
TargetParticle. These particles will move to the point that we define as the target, and then die after some time, or when they reach the goal. function TargetParticle:new(area, x, y, opts) TargetParticle.super.new(self, area, x, y, opts) self.r = opts.r or random(2, 3) self.timer:tween(opts.d or random(0.1, 0.3), self, {r = 0, x = self.target_x, y = self.target_y}, 'out-cubic', function() self.dead = true end) end function TargetParticle:draw() love.graphics.setColor(self.color) draft:rhombus(self.x, self.y, 2*self.r, 2*self.r, 'fill') love.graphics.setColor(default_color) end Here, for each particle, over time
d(or a random value from 0.1 to 0.3 seconds), the transition is performed by the function tween k target_x, target_y, and when the particle reaches this position, it dies. The particle is also drawn as a rhombus (as in one of the effects created earlier), but it can also be drawn as a circle or square, because it is rather small and becomes even smaller with time.We create these objects
PreAttackEffectas follows: function PreAttackEffect:new(...) ... self.timer:every(0.02, function() self.area:addGameObject('TargetParticle', self.x + random(-20, 20), self.y + random(-20, 20), {target_x = self.x, target_y = self.y, color = self.color}) end) end So, here we create one particle every 0.02 seconds (almost every frame) in a random place around its position, and then set the attributes of the
target_x, target_yvalue of the position of the effect itself (that is, on the nose of the ship).In
Shooterwe create PreAttackEffect like this: function Shooter:new(...) ... self.timer:every(random(3, 5), function() self.area:addGameObject('PreAttackEffect', self.x + 1.4*self.w*math.cos(self.collider:getAngle()), self.y + 1.4*self.w*math.sin(self.collider:getAngle()), {shooter = self, color = hp_color, duration = 1}) self.timer:after(1, function() end) end) end The initial position we specify should be on the nose of the Shooter object, so we can use the usual pattern with math.cos and math.sin, which we have already used, and take into account both possible angles (0 and math.pi). We can also pass an attribute
durationthat controls the lifetime of the PreAttackEffect object. Here we can do the following: function PreAttackEffect:new(...) ... self.timer:after(self.duration - self.duration/4, function() self.dead = true end) end We do not use it ourselves
durationbecause this is the object that I myself call the “controller object”. For example, it has nothing in the draw function, that is, we will never see it in the game. We see only the objects TargetParticlethat he orders to create. These objects have a random lifetime, from 0.1 to 0.3 seconds, that is, if we want the last particles to end immediately when the shell is fired, then this object will die in 0.1-0.3 seconds later than its duration in 1 second. I decided to make it equal to 0.75 (duration - duration / 4), but you can instead use another number, closer to 0.9 seconds.If we start the game now, it will look like this:
And everything works quite well. But if you look closely, you will notice that the target position of the particles (the position of the PreAttackEffect object) remains fixed, and does not follow the Shooter. We can fix it just as we fixed the player's ShootEffect object. We already have an attribute
shooterpointing to the Shooter object that created the PreAttackEffect object, so we can simply update the position of the PreAttackEffect based on the position of this parent object shooter: function PreAttackEffect:update(dt) ... if self.shooter and not self.shooter.dead then self.x = self.shooter.x + 1.4*self.shooter.w*math.cos(self.shooter.collider:getAngle()) self.y = self.shooter.y + 1.4*self.shooter.w*math.sin(self.shooter.collider:getAngle()) end end Here we each frame update the position of this object so that it is located on the nose of the object that created it Shooter. If you start the game, it will look like this:

An important aspect of the update code is a part
not self.shooter.dead. It may happen that when we refer to objects inside each other in a similar way, then when one object dies, another one will still keep a reference to it. For example, a PreAttackEffect object lives 0.75 seconds, but between its creation and disappearance, the Shooter object that created it can be killed by a player. If this happens, there may be a problem.In our case, the problem is that we have access to the
colliderShooter object attribute , which is destroyed when the Shooter object dies. And if this object is destroyed, we can do nothing with it, because it no longer exists. So when we try to executegetAnglethen the game will fall out. We can work out a general system that solves such a problem, but in fact I don’t think it is necessary. For now, it is enough for us to simply be attentive to when we refer to objects in this way, so as not to try to gain access to objects that may already be dead.And finally, the last part in which we will create an EnemyProjectile object. For now we will work with it quite simply, creating it, as we usually create any other object, but with our own attributes:
function Shooter:new(...) ... self.timer:every(random(3, 5), function() ... self.timer:after(1, function() self.area:addGameObject('EnemyProjectile', self.x + 1.4*self.w*math.cos(self.collider:getAngle()), self.y + 1.4*self.w*math.sin(self.collider:getAngle()), {r = math.atan2(current_room.player.y - self.y, current_room.player.x - self.x), v = random(80, 100), s = 3.5}) end) end) end Here we create a projectile in the same position in which we created PreAttackEffect, and then assign its speeds to a random value between 80 and 100. We also slightly increase its size relative to the default value. The most important part is to have its angle (
rattribute) pointing in the direction of the player. In general, when we want to get the angle from sourceto target, we need to do the following: angle = math.atan2(target.y - source.y, target.x - source.x) So we do. After creating the object, it will be directed to the player and begin to move towards it. It should look like this:

If you compare this animation with the animation from the beginning of this part of the tutorial, you will notice a slight difference. Projectiles have a period of time when they slowly turn towards the player, rather than fly directly to him. The same code fragment is used here as in the passive homing skill, which we will add over time, so I will leave it for later.
Gradually, we will fill the EnemyProjectile object with various functionalities so that it can be applied to many different enemies. However, all this functionality will be first implemented in the Projectile object, since it will serve as player passive skills. For example, there is a passive skill that causes projectiles to circle around the player. After we implement it, we can copy the code into the EnemyProjectile object and implement the enemy using the function. He will not fire shells - they will circle around him. In this way we will create many enemies, so when we create passive skills for the player, I will leave this part as an exercise.
For now, we’ll focus on two enemies (Rock and Shooter), leave the EnemyProjectile as it is, and move on to other aspects. But later, when we add more functionality to the game, we will return to create new enemies.
EnemyProjectile / Shooter Exercises
114. Implement a collision event between Projectile and EnemyProjectile. In the EnemyProjectile class, make it so that when it gets into an object of the Projectile class, the function of
dieboth objects is called and both are destroyed.115. Does the name of an attribute
directionin the class Shooter confuse us? If so, how should it be renamed? If not, why not?Source: https://habr.com/ru/post/349718/
All Articles