Creating a game on Lua and LÖVE - 2
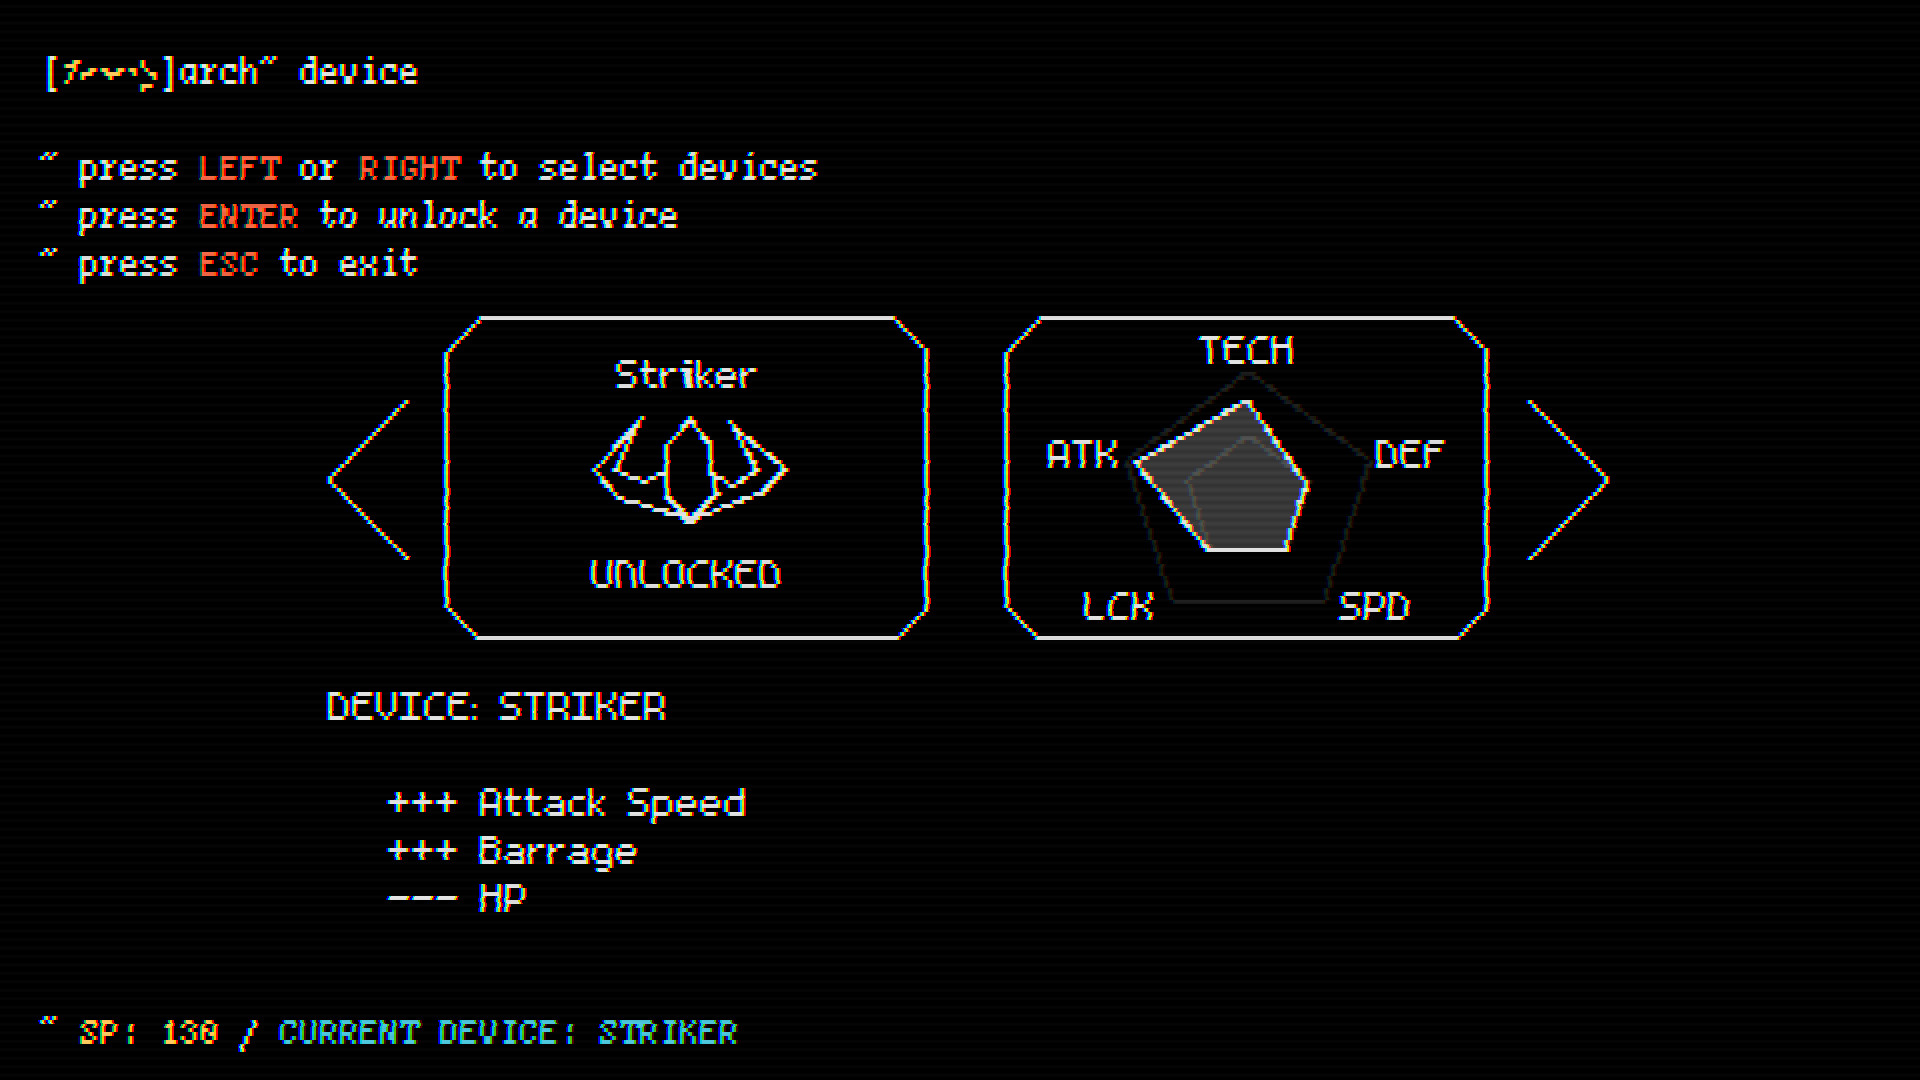
Table of contents
- Article 1
- Part 1. Game cycle
- Part 2. Libraries
- Part 3. Rooms and areas
- Part 4. Exercises
- Article 2
- Part 5. Basics of the game
- Part 6. Basics of the Player Class
- Article 3
- Part 7. Player Parameters and Attacks
- Part 8. Enemies
- Article 4
- Part 9. Director and game cycle
- Part 10. Code Writing Practices
- Part 11. Passive skills
- Article 5
- Part 12. Other Passive Skills
13. Skill Tree
14. Console
15. Final
')
Part 5: The Basics of the Game
Introduction
In this part we will finally start the game itself. First, we will review the structure of the game in terms of gameplay, and then focus on the basics that are common to all parts of the game: its pixelated style, camera, and also physics simulation. Then we will look at the basics of moving the player and, finally, we will deal with garbage collection and possible leaks of objects.
Structure of the gameplay
The game itself is divided into just three separate rooms:
Stage , Console and SkillTree .In the Stage room the whole game process takes place. It contains objects such as a player, enemies, shells, resources, bonuses, and so on. Gameplay is very similar to Bit Blaster XL and is actually quite simple. I chose such a simple gameplay, because it will allow me to focus on another aspect of the game (a huge skill tree).
Gif
In the Console room, everything happens related to the “menu”: changing sound and video settings, viewing achievements, choosing a ship, accessing the skill tree, and so on. Instead of creating different menus for a game with a similar style, it is more logical to give it a “computerized” look (also known as “art of lazy programmers”), because the console emulates a terminal and makes it clear that you (the player) are playing the game simply through a terminal .
Gif
In the room SkillTree you can get all the passive skills. In the Stage room a player can earn SP (skill points, skill points), which are created randomly or are given when killing enemies. After death, the player can use these skill points to purchase passive skills. I wanted to realize something huge, in the style of the tree of passive skills Path of Exile , and it seems to me that I have succeeded enough in this. In the skill tree created by me about 600-800 nodes. In my opinion, quite good.
Gif
I will look at the creation of each of these rooms in detail, including all skills in the skill tree. However, I highly recommend deviating as much as possible from what I am doing. The many decisions I have made regarding gameplay are a matter of taste, and you can choose something else.
For example, instead of a huge skill tree, you can choose a huge class system that allows you to create many combinations like those implemented in the Tree of Savior . So instead of building a tree of passive skills, you can implement all the passive skills, and then build your own class system using these passive skills.
This is just one of the ideas; There are many areas in which you can choose your own variations. I supplement these tutorials with exercises also in order to encourage people to work with the material on their own, and not just to copy the existing one; It seems to me that this is how people learn better. Therefore, when you see the opportunity to do something in your own way, I recommend that you do so.
Game size
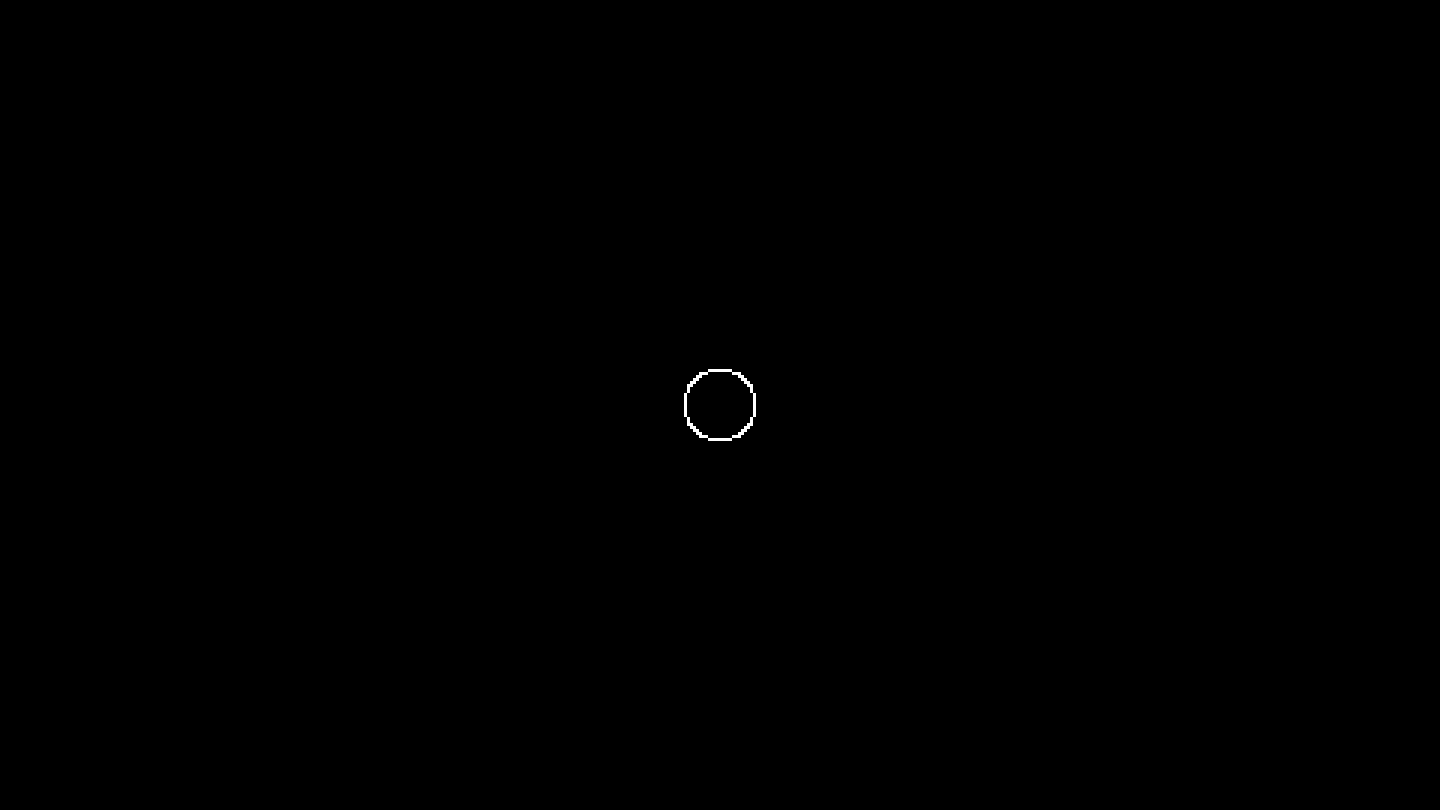
Now let's get down to the Stage. The first thing we need (and this will be true for all rooms, not just for the Stage) is to create a pixelated appearance of the room in low resolution. For example, look at this circle:
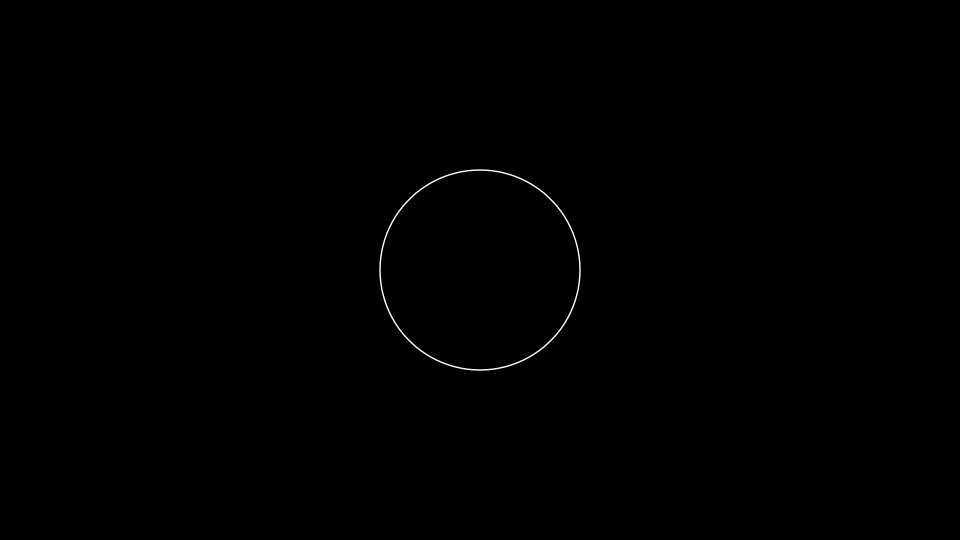
And now look at this:

I prefer the second option. My motives are purely aesthetic and are my own preference. There are many games that do not use a pixelated look, but at the same time they are still limited to simple shapes and colors, for example , this one . That is, it depends on your stylistic preferences and on how much work you put into the game. But in my game I will use a pixelated view.
One of the ways to implement it is to define a very small default resolution, it is desirable that it be well scaled then the target resolution of the game window is
1920x1080 . For this game, I will choose 480x270 , because this is 1920x1080 divided by 4. To change the size of the game to this value, we need to use the conf.lua file, which, as I explained in the previous part, is a configuration file that defines the parameters of the LÖVE project by default, including the resolution of the window in which the game is launched.In addition, in this file I will also define two global variables
gw and gh , corresponding to the width and height of the base resolution, and variables sx and sy , corresponding to the scale applied to this base resolution. The conf.lua file should be in the same folder as the main.lua file, and still look like this: gw = 480 gh = 270 sx = 1 sy = 1 function love.conf(t) t.identity = nil -- () t.version = "0.10.2" -- LÖVE, () t.console = false -- (boolean, Windows) t.window.title = "BYTEPATH" -- () t.window.icon = nil -- , () t.window.width = gw -- () t.window.height = gh -- () t.window.borderless = false -- (boolean) t.window.resizable = true -- (boolean) t.window.minwidth = 1 -- () t.window.minheight = 1 -- () t.window.fullscreen = false -- (boolean) t.window.fullscreentype = "exclusive" -- () t.window.vsync = true -- (boolean) t.window.fsaa = 0 -- () t.window.display = 1 -- , () t.window.highdpi = false -- dpi Retina (boolean) t.window.srgb = false -- - sRGB (boolean) t.window.x = nil -- x () t.window.y = nil -- y () t.modules.audio = true -- (boolean) t.modules.event = true -- (boolean) t.modules.graphics = true -- (boolean) t.modules.image = true -- (boolean) t.modules.joystick = true -- (boolean) t.modules.keyboard = true -- (boolean) t.modules.math = true -- (boolean) t.modules.mouse = true -- (boolean) t.modules.physics = true -- (boolean) t.modules.sound = true -- (boolean) t.modules.system = true -- (boolean) t.modules.timer = true -- (boolean), 0 delta time love.update 0 t.modules.window = true -- (boolean) t.modules.thread = true -- (boolean) end If you start the game now, you will see that the window has become smaller.
To get a pixelated view, as we zoom in on the window, we need to do additional work. If you draw a circle in the center of the screen (
gw/2, gh/2 ) now, like this:
and scale the screen directly by calling
love.window.setMode , for example, with a width of 3*gw and a height of 3*gh , you get something like this:
As you can see, the circle was not scaled along with the screen and remained just a small circle. It is also not centered on the screen, because
gw/2 and gh/2 no longer the center of the screen when it is tripled. We want to be able to draw a small circle at a base resolution of 480x270 , so that when the screen is enlarged to the size of a regular monitor, the circle also scales proportionally (and pixelated), and its position also proportionally remains the same. The simplest way to solve this problem is to use Canvas , which is also called in other engines the frame buffer (framebuffer) or target render (render target). First, we will create a canvas with the base resolution in the constructor of the Stage class: function Stage:new() self.area = Area(self) self.main_canvas = love.graphics.newCanvas(gw, gh) end This will create a canvas with a size of
480x270 , on which you can draw: function Stage:draw() love.graphics.setCanvas(self.main_canvas) love.graphics.clear() love.graphics.circle('line', gw/2, gh/2, 50) self.area:draw() love.graphics.setCanvas() end The way to draw the canvas can be seen on the example from the page Canvas . According to this page, when I want to draw something on the canvas, I have to call
love.graphics.setCanvas , which redirects all the drawing operations to the current given canvas. Then we call love.graphics.clear , which clears the contents of this canvas in the current frame, because it was also drawn in the previous frame, and in each frame we want to draw everything from scratch. Then, drawing everything we need, we reuse setCanvas , but this time without passing anything, so that our target canvas is no longer current and the redirection of drawing operations is no longer performed.If we stop here, nothing will happen on the screen. This is because everything that has been drawn has gone to the canvas, but we do not actually draw the canvas itself. Therefore, we need to draw the canvas itself on the screen, and it will look like this:
function Stage:draw() love.graphics.setCanvas(self.main_canvas) love.graphics.clear() love.graphics.circle('line', gw/2, gh/2, 50) self.area:draw() love.graphics.setCanvas() love.graphics.setColor(255, 255, 255, 255) love.graphics.setBlendMode('alpha', 'premultiplied') love.graphics.draw(self.main_canvas, 0, 0, 0, sx, sy) love.graphics.setBlendMode('alpha') end We simply use
love.graphics.draw to draw the canvas on the screen, and then also wrap it with calls to love.graphics.setBlendMode , which according to the Canvas page of the LÖVE wiki is used to prevent blending. If you run the program now, you will see a drawn circle.Notice that we used to increase the Canvas
sx and sy . While these variables have the value 1, but if you change their values, for example, by 3, the following will occur:
We see nothing! But this happened because the circle in the middle of the
480x270 canvas is now in the middle of the 1440x810 canvas. Since the screen itself has a size of 480x270 , we cannot see the entire Canvas, because it is larger than the screen. To fix this, we can create the resize function in main.lua , which, when it main.lua sx , sy , changes the size of the screen itself: function resize(s) love.window.setMode(s*gw, s*gh) sx, sy = s, s end So when we call
resize(3) in love.load , the following should happen:
About this we and sought. However, there is another problem: the circle looks blurry, not pixelated.
The reason for this is that when LÖVE increases or decreases the drawn objects, they use FilterMode , and this filtering mode defaults to
'linear' . Since we want the game to have a pixelated appearance, we must change the value to 'nearest' . Calling love.graphics.setDefaultFilter with the argument 'nearest' at the beginning of love.load should fix the problem. Another aspect is that we need to assign the value 'rough' to LineStyle . Since it defaults to 'smooth' , LÖVE primitives will be rendered with aliasing, and this is not suitable for creating a pixel style. If you do all this and run the code again, the screen should look like this:
Just that broken and pixelated appearance that we need! Most importantly, we can now use one resolution to create the entire game. If we want to create an object in the center of the screen, we can say that its
x, y position should be equal to gw/2, gh/2 , and regardless of the final resolution, the object will always be in the center of the screen. This greatly simplifies the process: it means that we only need to worry once about how the game looks and how the objects are distributed on the screen.Exercises on the size of the game
65. Look at the “Primary Display Resolution” section in the Steam Computer Configuration Survey . The most popular resolution used by almost half of Steam users is
1920x1080 . The basic resolution of our game is perfectly scaled to him. But the second most popular resolution is 1366x768 . 480x270 does not scale to it. What options can you offer to work with non-standard permissions when switching the game to full screen?66. Select a game from your collection, which uses the same or similar technique (increase the small base resolution). It is usually used in games with pixel graphics. What is the basic resolution of the game? How does the game deal with non-standard permissions in which the basic resolution cannot be correctly entered? Change the resolution of the desktop several times, launching the game with different resolutions each time to see the changes and understand how the game processes the variability.
Camera
In all three rooms the camera is used, so it would be logical to consider it now. In the second part of the tutorial, we used the hump library for timers. This library also has a useful camera module, which we also use. However, I use a slightly modified version that has a screen shake function. Files can be downloaded from here . Place the
camera.lua file in the hump library folder (and overwrite the existing version of camera.lua ), and then add the require of the camera module to main.lua . Place the Shake.lua file in the objects folder.(Additionally, you can also use the library written by me, which already has all this functionality. I wrote this library after completing the tutorial, so it will not be used in it. If you decide to use this library, you can continue working with the tutorial, but transfer some aspects to use the functions of this library.)
After adding the camera, we need the following function:
function random(min, max) local min, max = min or 0, max or 1 return (min > max and (love.math.random()*(min - max) + max)) or (love.math.random()*(max - min) + min) end It will allow you to get a random number between any two numbers. It is necessary because it uses the
Shake.lua file. After defining this function in utils.lua try doing something like this: function love.load() ... camera = Camera() input:bind('f3', function() camera:shake(4, 60, 1) end) ... end function love.update(dt) ... camera:update(dt) ... end And then in the
Stage class: function love.load() ... camera = Camera() input:bind('f3', function() camera:shake(4, 60, 1) end) ... end function love.update(dt) ... camera:update(dt) ... end You will see that after pressing
f3 screen will start shaking:
The shaking function is based on the function described in this article ; it gets amplitude (in pixels), frequency, and duration. The screen will be shaken with a gradual attenuation, starting with amplitude, for the specified number of seconds and the specified frequency. The higher the frequency, the more actively the screen will oscillate between two limits (amplitude, -amplitude); low frequencies lead to the opposite.
It is also important to note that the camera is not yet tied to a certain point, so when shaken it will throw in all directions, that is, after the shaking is completed, it will be centered in another place, as can be seen in the previous gif-animation.
One way to solve this problem is to center the camera, which can be implemented as the camera: lockPosition function . In the modified version of the camera module, I changed all the functions of camera movement so that they first receive the
dt argument. And it will look like this: function Stage:update(dt) camera.smoother = Camera.smooth.damped(5) camera:lockPosition(dt, gw/2, gh/2) self.area:update(dt) end To smooth the camera is set to
damped with a value of 5 . I derived these parameters through trial and error, but in general this allows the camera to focus on the target point in a smooth and pleasant way. I put this code inside the Stage room because we are now working with the Stage room, and in this room the camera should always be centered in the middle of the screen and never move (except for screen shaking moments). As a result, we get the following:
For the whole game, we will use one global camera, because there is no need to create separate camera instances for each room. In the Stage room the camera will not be used in any other way except for shaking, so I’ll stop on this for now. In the Console and SkillTree rooms, the camera will be used in a more complex way, but we'll get to that later.
Player physics
Now we have everything we need to start the game itself. We'll start with the Player object. Create a new file in the
objects folder called Player.lua , which will look like this: Player = GameObject:extend() function Player:new(area, x, y, opts) Player.super.new(self, area, x, y, opts) end function Player:update(dt) Player.super.update(self, dt) end function Player:draw() end In this way, a new class of game objects should be created by default. All of them will inherit from
GameObject and have the same structure of the constructor, the update and draw functions. Now we can create an instance of this Player object in the Stage room as follows: function Stage:new() ... self.area:addGameObject('Player', gw/2, gh/2) end To check how instantiation works, and make sure that the Player object is updated and the
Area drawn, we can simply draw a circle in its position: function Player:draw() love.graphics.circle('line', self.x, self.y, 25) end This should give us a circle in the center of the screen. It is interesting to note that the call
addGameObject returns the created object, so we can store a link to the player inside the self.player Stage, and if necessary, include the death event of the Player object with an self.player key: function Stage:new() ... self.player = self.area:addGameObject('Player', gw/2, gh/2) input:bind('f3', function() self.player.dead = true end) end When you press the
f3 key, the Player object should die, that is, the circle should stop drawing. This happens as a result of how we set up the Area object code in the previous section. It is also important to note that if we decide to store the links returned by addGameObject in this way, then if we do not specify a variable in which the reference to nil is stored, this object will never be deleted. In addition, it is important not to forget to assign nil values to the links (in our case, the string self.player = nil ), if you want the object to actually be deleted from memory (besides the fact that its attribute is assigned a dead true value).We now turn to physics. The player (as well as enemies, shells and resources) will be a physical object. For this, I use box2d integration in LÖVE, but in general this is not necessary for our game, because it will not get anything useful from using such a complete physics engine as box2d. I use it because I'm used to it. But I recommend that you either try to write your own collision handling procedures (which will be very easy for such a game), or use the library that will do this for you.
In the tutorial, I’ll use the windfield library that I created, which makes using box2d with LÖVE much easier.There are other libraries for LÖVE that also handle collisions: HardonCollider or bump.lua .
I highly recommend that you either implement the collisions yourself, or use one of these two libraries, and not repeat after the tutorial. So you force yourself to develop abilities that need to be developed all the time, for example, choosing between different solutions, finding solutions that suit your needs and working in the best way for you, as well as developing your own solutions to problems, and not just following tutorials.
Again, I repeat - one of the main reasons for the presence of exercises in this tutorial is that people learn only when they are actively involved in the development of the material. Exercises - this is another opportunity to get acquainted with the material. If you simply repeat after the tutorial and do not learn to cope with what you do not know, you will never really learn. Therefore, I highly recommend deviating here from the tutorial and implementing a part with physics / collisions on your own.
Anyway, you can download the library
windfieldand add its require to the file main.lua. According to her documentation, there are two basic concepts in her - WorldandCollider. World is the physical world in which the simulation takes place, and the Collider is a physical object simulated inside this world. That is, our game will need a semblance of the physical world, and the player will be a collider inside this world.We will create a world inside a class
Areaby adding a call addPhysicsWorld: function Area:addPhysicsWorld() self.world = Physics.newWorld(0, 0, true) end So we will set the attribute of the
.worldarea containing the physical world. We also need to update this world (and, if necessary, draw it for debugging purposes), if it exists: function Area:update(dt) if self.world then self.world:update(dt) end for i = #self.game_objects, 1, -1 do ... end end function Area:draw() if self.world then self.world:draw() end for _, game_object in ipairs(self.game_objects) do game_object:draw() end end We update the physical world before updating all game objects, because we want to use updated information for game objects, and this is possible only if physics simulation will be performed before this frame. If we first updated the game objects, we would use the physical information from the previous frame and it would break the frame of the frame. In fact, this does not really affect the work of the program, but from a conceptual point of view it is more confusing.
We added peace through challenge
addPhysicsWorldrather than just adding it to the Area constructor because we don't want all regions to have physical worlds. For example, the Console room will also use an object to manage its entities, but there is no need to attach the physical world to this Area. Therefore, by calling one function, we make it optional. We can create an instance of the physical world in the Area of the Stage room as follows: function Stage:new() self.area = Area(self) self.area:addPhysicsWorld() ... end And now that we have a world, we can add a Player collider to it:
function Player:new(area, x, y, opts) Player.super.new(self, area, x, y, opts) self.x, self.y = x, y self.w, self.h = 12, 12 self.collider = self.area.world:newCircleCollider(self.x, self.y, self.w) self.collider:setObject(self) end Notice how it comes in here that the player has a link to the Area, because in this way we can access the World of the Area object to add new colliders to it. Such a pattern (access to entities within the Area) is often repeated, for example, I made it so that all objects
GameObjecthave the same constructor, in which they receive a reference to the object Areato which they belong.In the Player constructor, we use attributes
wand hdefine its width and height as 12. Next, we add a newCircleColliderwith a radius equal to the width. It is not very logical to create a collider as a circle, if we define width and height, but this will be useful in the future, because when we add different types of ships, all ships will have a visual width and height, but physically the collider will always be around, so that all ships have the same chances and have predictable behavior for the player.After adding the collider, we call the function
setObjectthat binds the Player object to the newly created Collider. This is useful because when two colliders collide, we can get information from the point of view of colliders, not objects. For example, if a Player encounters Projectile, we will have two colliders representing Player and Projectile, but we may not have the objects themselves. setObject(andgetObject) allows us to set and retrieve the object to which Collider belongs.Now we can finally draw the Player according to its size:
function Player:draw() love.graphics.circle('line', self.x, self.y, self.w) end If you start the game now, we will see a small circle representing the player:
Physics exercises Player
If you decide to create collisions yourself or choose one of the alternative collision / physics libraries, then you do not need to do these exercises.
67. Change the gravity of the y axis of the physical world to 512. What happens to the Player object?
68. What does the third call argument do
.newWorldand what happens if you set it to false? Are there any advantages to setting the value true / false? What kind?Player movement
The player's movement in this game acts as follows: there is a constant speed with which the player moves, and an angle that can be changed by holding “left” or “right”. To implement this, we need several variables:
function Player:new(area, x, y, opts) Player.super.new(self, area, x, y, opts) ... self.r = -math.pi/2 self.rv = 1.66*math.pi self.v = 0 self.max_v = 100 self.a = 100 end Here I define
ras the angle at which the player moves. At first it matters -math.pi/2, that is, it points up. The angles in LÖVE are shown clockwise, that is math.pi/2, it is down and -math.pi/2up is (and 0 is to the right). A variable rvis the rate at which the angle changes when the player presses "left" or "right." Then we have v, denoting the speed of the player, and max_vdenoting the maximum speed of the player. The last attribute is the aplayer acceleration. All values are obtained by trial and error.To update the player’s position taking into account all these variables, we can do something similar:
function Player:update(dt) Player.super.update(self, dt) if input:down('left') then self.r = self.r - self.rv*dt end if input:down('right') then self.r = self.r + self.rv*dt end self.v = math.min(self.v + self.a*dt, self.max_v) self.collider:setLinearVelocity(self.v*math.cos(self.r), self.v*math.sin(self.r)) end The first two lines define what happens when you press the left and right keys. It is important to note that according to the Input library we use, these bindings must be defined in advance, and I did this in the file
main.lua(since we use the global Input object for everything): function love.load() ... input:bind('left', 'left') input:bind('right', 'right') ... end And when a player presses “left” or “right”, the attribute
rcorresponding to the player’s angle changes by 1.66*math.piradian in the corresponding direction. It is also important to note here that this value is multiplied by dt, that is, this value is controlled on a per-second basis. That is, the rate of change of the angle is measured in 1.66*math.piradians per second. This is the result of how the game loop works, which we analyzed in the first part of the tutorial.After that we set the attribute
v. It is a little more complicated, but if you did it in other languages, it should be familiar to you. The original calculation has the form self.v = self.v + self.a*dt, that is, we simply increase the speed by the magnitude of the acceleration. In this case, we increase it by 100 per second. But we also defined the attributemax_vwhich should limit the maximum allowed speed. If we do not limit it, it self.v = self.v + self.a*dtwill increase vinfinitely, and our player will turn into Sonic. And we do not need this! One way to prevent this is to: function Player:update(dt) ... self.v = self.v + self.a*dt if self.v >= self.max_v then self.v = self.max_v end ... end At the same time, when
vit becomes larger max_v, we limit it to this value, and not exceed it. Another brief way to write this is to use a function math.minthat returns the minimum value among all the arguments passed to it. In our case, we pass the result self.v + self.a*dtand self.max_v, that is, if the result of the addition is greater max_v, it math.minwill return max_v, since it is less than the sum. This is a very common and useful pattern in Lua (and in other programming languages too).Finally, we
setLinearVelocityset the speed of the Collider using x and y equal to the attributevmultiplied by the appropriate value depending on the angle of the object. In general, when we want to move something in some direction, and we have an angle for this, we should use it costo move along the x axis and sinto move along the y axis. This is also a very common pattern in the development of 2D games. I will not explain this by suggesting that you’ve got it sorted out at school (if it’sn’t, search Google for the basics of trigonometry).The last change we can make to the class
GameObject, and it is quite simple. Since we use the physics engine, we have two representations in some variables, for example, speed and position. We get the position and speed of the player using the attributes x, yand v, and the position and speed of the Collider - usinggetPositionand getLinearVelocity. It will be logical to synchronize these two views, and one of the ways to achieve this automatically is to change the parent class of all game objects: function GameObject:update(dt) if self.timer then self.timer:update(dt) end if self.collider then self.x, self.y = self.collider:getPosition() end end Here the following happens: if an object has an attribute defined
collider,then
xit ywill be set to the position of this collider. And when the position of the collider changes, the representation of this position in the object itself will also change accordingly.If you run the program now, you will see the following:
Gif
So, we see that the Player object moves in the usual way around the screen and changes direction when you press the "left" or "right" keys. Here one detail is also important: in the Area object, a call is
world:draw()drawn by the Collider. In fact, we want to draw not only colliders, so it would be logical to comment out this line and draw the Player object directly: function Player:draw() love.graphics.circle('line', self.x, self.y, self.w) end The last useful thing we can do is visualize the direction in which the player “looks”. This can be done by simply drawing a line from the player’s position to the side where he is directed:
function Player:draw() love.graphics.circle('line', self.x, self.y, self.w) love.graphics.line(self.x, self.y, self.x + 2*self.w*math.cos(self.r), self.y + 2*self.w*math.sin(self.r)) end And it will look like this:
Gif
This is also the basis of trigonometry, here we use the same idea that we used before. When we want to get a position
Bthat is in distanceunits of a position A, such that the position Bis at a certain angle anglerelative to the position A, the pattern will be something like this: bx = ax + distance*math.cos(angle)and by = ay + distance*math.sin(angle). This is very often used in the development of 2D games (at least, I think so) and an intuitive understanding of this pattern will be useful for you.Exercises with player movement
69. Transform the following angles into degrees (mentally) and tell which quadrant they belong to (top left, top right, bottom left or bottom right). Do not forget that in LÖVE the angles are counted clockwise, and not against how we were taught in school.
math.pi/2 math.pi/4 3*math.pi/4 -5*math.pi/6 0 11*math.pi/12 -math.pi/6 -math.pi/2 + math.pi/4 3*math.pi/4 + math.pi/3 math.pi 70. Is the acceleration attribute required to exist
a? What will the player’s update function look like if it didn’t exist? Are there any advantages to its existence?71. Get the position of the
(x, y)point Bfrom the position A, if the angle used is equal -math.pi/4, and the distance is 100.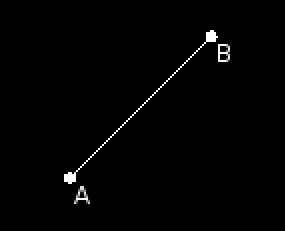
72. Get the position of the
(x, y)point Cfrom the position B, if the angle used is equal math.pi/4, and the distance is equal 50. Positions Aand B, as well as the distance and angle between them remain the same as in the previous exercise.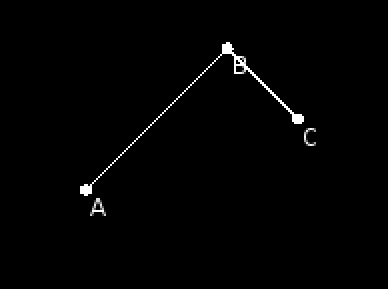
73. Based on the previous two exercises, tell me, what is the general pattern used when you need to get from a point
Ato a certain point Cand is it permissible to use only a set of intermediate points that can be reached through angles and distances?74. In synchronization of Player attribute and Collider attribute views, positions and speeds are mentioned, but what about the rotation? The collider has a turn that can be accessed through
getAngle. Why not synchronize it through the attribute r?Garbage collection
Now that we have added the code for the physics engine and motion, we can focus on what we have missed, namely, working with memory leaks. One of the problems that can arise in any programming environment is a memory leak that can lead to all sorts of negative consequences. In languages with managed code such as Lua, this can be even more annoying because data is more hidden in black boxes than with full memory management.
The garbage collector works as follows - when no reference points to an object, it is deleted. That is, if you have a table that is referenced only by a variable
a, then when performing the assignmenta = nilthe garbage collector will understand that the table to which they referred to is no longer referenced, so it can be removed from memory in the future garbage collection cycle. The problem occurs when one object is referred to several times and you forget to remove links from all these points.For example, when we create a new object with
addGameObject, the object is added to the list .game_objects. This is considered a single link pointing to this object. However, the object itself is also returned in this function. Therefore, earlier we did something like self.player = self.area:addGameObject('Player', ...), that is, in addition to storing the object reference in the list inside the Area object, we also store the reference to it in a variable self.player. That is, when we sayself.player.deadand the Player object is removed from the list of game objects in the Area object, it still cannot be deleted from memory, because it still points to it self.player. That is, in this case, in order to really remove the Player object from memory, we need to set both deadtrue and then execute self.player = nil.This is just one example of what can happen, but such a problem is ubiquitous. You need to be especially careful when using third-party libraries. For example, in the physical library written by me there is a function
setObjectto which we pass an object so that Collider stores a link to it. If the object dies, will it be removed from memory? No, because Collider still holds a link to it. The same problem, only in other conditions. One way to solve the problem is to explicitly delete objects using the function created for them destroy, which will deal with the removal of links.That is, we can add the following to all objects:
function GameObject:destroy() self.timer:destroy() if self.collider then self.collider:destroy() end self.collider = nil end Now all objects have this function by default
destroy. This function calls the functions destroyof the EnhancedTimer object, as well as the function of the collider (Collider) . These functions perform the dereferencing of items that the user probably wants to remove from memory. For example, in Collider:destroyone of the actions is a call self:setObject(nil): since we want to destroy this object, we do not need Collider to keep a link to it anymore.We can also change the update function of the Area as follows:
function Area:update(dt) if self.world then self.world:update(dt) end for i = #self.game_objects, 1, -1 do local game_object = self.game_objects[i] game_object:update(dt) if game_object.dead then game_object:destroy() table.remove(self.game_objects, i) end end end If the
deadobject attribute is true, then in addition to deleting game objects from the list, we also call its destroy function, which gets rid of references to it. We can expand this concept and realize that the physical world itself has World: destroy , and we can use it when we destroy the Area: object function Area:destroy() for i = #self.game_objects, 1, -1 do local game_object = self.game_objects[i] game_object:destroy() table.remove(self.game_objects, i) end self.game_objects = {} if self.world then self.world:destroy() self.world = nil end end When you destroy an Area, we first destroy all the objects in it, and then destroy the physical world, if it exists. Now we can change the room Stage to adapt to these actions:
function Stage:destroy() self.area:destroy() self.area = nil end We can also change the function
gotoRoom: function gotoRoom(room_type, ...) if current_room and current_room.destroy then current_room:destroy() end current_room = _G[room_type](...) end We check whether an
current_roomexisting variable is present and if it contains an attribute destroy(in fact, we ask if it contains a real room); if so, we call the destroy function. And then we make the transition to the target room.It is also important to remember that after adding the destroy function, all objects should follow this pattern:
NewGameObject = GameObject:extend() function NewGameObject:new(area, x, y, opts) NewGameObject.super.new(self, area, x, y, opts) end function NewGameObject:update(dt) NewGameObject.super.update(self, dt) end function NewGameObject:draw() end function NewGameObject:destroy() NewGameObject.super.destroy(self) end All this is of course good, but how can we check whether we actually remove the elements from the memory? I found the answer in one post I liked , which also has a relatively simple solution for tracking leaks:
function count_all(f) local seen = {} local count_table count_table = function(t) if seen[t] then return end f(t) seen[t] = true for k,v in pairs(t) do if type(v) == "table" then count_table(v) elseif type(v) == "userdata" then f(v) end end end count_table(_G) end function type_count() local counts = {} local enumerate = function (o) local t = type_name(o) counts[t] = (counts[t] or 0) + 1 end count_all(enumerate) return counts end global_type_table = nil function type_name(o) if global_type_table == nil then global_type_table = {} for k,v in pairs(_G) do global_type_table[v] = k end global_type_table[0] = "table" end return global_type_table[getmetatable(o) or 0] or "Unknown" end I will not parse this code, because it is explained in a post, but we will add it to
main.lua, and then add the love.loadfollowing inside : function love.load() ... input:bind('f1', function() print("Before collection: " .. collectgarbage("count")/1024) collectgarbage() print("After collection: " .. collectgarbage("count")/1024) print("Object count: ") local counts = type_count() for k, v in pairs(counts) do print(k, v) end print("-------------------------------------") end) ... end What this code does: when the user clicks
f1, it shows the amount of memory before and after the garbage collection cycle, and also displays the types of objects in memory. This is useful because now we can, for example, create a new Stage room with objects inside, delete it, and then make sure that the memory remains the same (or almost the same, hehe) as before creating the Stage. If it remains the same, there are no memory leaks, and if not, then we have problems and we need to look for their sources.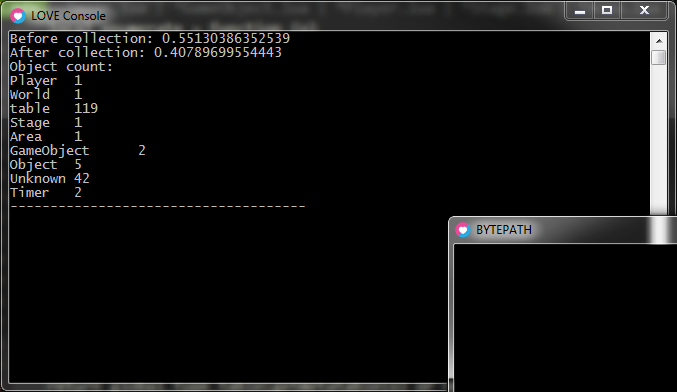
Garbage collection exercises
75. Assign a key
f2to creating and activating a new Stage room with a call gotoRoom.76. Bind the key
f3to the destruction of the current room.77. Check several times the amount of used memory by pressing
f1. Thereafter ponazhimayte key several times f2, and f3to create and destroy new rooms. Now again check the amount of used memory by repeatedly pressing f1. Is the amount of memory left as it was before, or has it become more?78. Set the Stage room to create 100 Player objects instead of one by doing something like this:
function Stage:new() ... for i = 1, 100 do self.area:addGameObject('Player', gw/2 + random(-4, 4), gh/2 + random(-4, 4)) end end Also change the Update function of the Player so that the Player objects no longer move (comment out the movement code). Now repeat the process from the previous exercise. Has the amount of occupied memory changed? Have the overall results changed?
Part 6: Player Class Basics
Introduction
In this section, we will focus on adding functionality to the Player class. First we look at the attack of the player and the object Projectile. Then we focus on two main player characteristics: Boost and Cycle / Tick. And finally, we will begin to create the first part of the content that will be added to the game, namely the various player ships. Starting from this part, we will focus only on gameplay related moments (the previous five parts were preliminary preparations).
Player attack
The player in this game attacks as follows: every
nsecond the attack is triggered and starts automatically. In the end, we will have 16 types of attacks, but most of them will be associated with firing projectiles in the direction of the player’s gaze. For example, this is an attack of suggestive missiles:Gif
This attack shoots faster, but at random angles:
Gif
Attacks and shells will have all sorts of properties and will be affected by various aspects, but their very basis is always the same.
First we need to make the player attack every
nsecond. nIs a number that varies depending on the attack, but by default it matters 0.24. This can be easily implemented using the timer library, which we described in the previous sections: function Player:new() ... self.timer:every(0.24, function() self:shoot() end) end Thus, we will call the function
shootevery 0.24 seconds, and inside this function we will locate the code that will create the object of the projectile.Now we can set what will happen inside the shoot function. For a start, we will have a small effect, denoting the shot. In practice, I developed the following rule: when creating or deleting an entity from a game, the accompanying effect should appear, which will hide the fact that the entity simply appears / disappears from the screen to nowhere. In addition, it should improve the overall appearance.
To create this new effect, we first need to create a new game object called
ShootEffect(now you should already know how to do it). This effect should be a simple square, remaining on the screen for a short period of time next to the position in which the projectile was created. The easiest way to achieve this is to use something like this: function Player:shoot() self.area:addGameObject('ShootEffect', self.x + 1.2*self.w*math.cos(self.r), self.y + 1.2*self.w*math.sin(self.r)) end function ShootEffect:new(...) ... self.w = 8 self.timer:tween(0.1, self, {w = 0}, 'in-out-cubic', function() self.dead = true end) end function ShootEffect:draw() love.graphics.setColor(default_color) love.graphics.rectangle('fill', self.x - self.w/2, self.y - self.w/2, self.w, self.w) end And it will look like this:
Gif
The effect code is quite simple. It's just a square with a width of 8, living for 0.1 seconds, the width of which during this time goes to 0 using the function
tween. So far we have one problem: the position of the effect is static and does not follow the player. This seems like a minor detail, because the duration of the effect is small, but try changing it to 0.5 seconds or more, and you will see what I mean.One way to solve the problem is to pass a Player object as a reference to the ShootEffect object. Thus, the ShootEffect object will be able to synchronize its position with the Player object:
function Player:shoot() local d = 1.2*self.w self.area:addGameObject('ShootEffect', self.x + d*math.cos(self.r), self.y + d*math.sin(self.r), {player = self, d = d}) end function ShootEffect:update(dt) ShootEffect.super.update(self, dt) if self.player then self.x = self.player.x + self.d*math.cos(self.player.r) self.y = self.player.y + self.d*math.sin(self.player.r) end end function ShootEffect:draw() pushRotate(self.x, self.y, self.player.r + math.pi/4) love.graphics.setColor(default_color) love.graphics.rectangle('fill', self.x - self.w/2, self.y - self.w/2, self.w, self.w) love.graphics.pop() end The attribute
playerShootEffect object through the table optsin the function of the shoot player is assigned a value self. This means that access to the link to the Player object can be obtained through self.playerthe ShootEffect object. In general, we transfer object references to each other in this way, because usually objects are created from functions of other objects, that is, by transferring self, we get what we need. In addition, we assign the attribute the dvalue of the distance at which the effect should appear from the center of the Player object. This is also implemented using the table opts.Then, in the ShootEffect update function, we assign its position to the player’s position value. It is always important to check whether the variable is set to which we will access (
if self.player then), because if it is not, then an error will occur. Also very often in the process of creating the game, there will be cases when entities will be referenced from somewhere else, and we will try to get access to their values, but since they have already died, these values will not be set, and we will get an error. It is important not to forget about this, referring to the entities within each other in this way.Finally, the last thing to do here is to synchronize the square with the player’s angle, and then also rotate it 45 degrees so that it looks prettier. For this we use a function
pushRotatethat looks like this: function pushRotate(x, y, r) love.graphics.push() love.graphics.translate(x, y) love.graphics.rotate(r or 0) love.graphics.translate(-x, -y) end This is a simple function that passes transitions to the transition stack. In essence, it turns everything on
raround a point x, yuntil we call love.graphics.pop. That is, in this example we have a square and we rotate it around its center at the player's angle plus 45 degrees (pi / 4 radians). For the sake of completeness, you can show another version of this function, also containing scaling: function pushRotateScale(x, y, r, sx, sy) love.graphics.push() love.graphics.translate(x, y) love.graphics.rotate(r or 0) love.graphics.scale(sx or 1, sy or sx or 1) love.graphics.translate(-x, -y) end These functions are quite useful and we will use them throughout the game, so experiment with them and understand them well!
Exercises with player attacks
80. For now we only use the initial timer call in the player's constructor, which causes the shoot function to be called every 0.24 seconds. Suppose there is an attribute in Player
self.attack_speedthat changes every 5 seconds to a random value in the interval from 1 to 2: function Player:new(...) ... self.attack_speed = 1 self.timer:every(5, function() self.attack_speed = random(1, 2) end) self.timer:every(0.24, function() self:shoot() end) How do you change the player's object so that instead of shooting every 0.24 seconds, he shoots every
0.24/self.attack_speedsecond? Note that a simple change in a call everythat calls the shoot function will not work.81In the previous section, we looked at garbage collection and said that forgotten links can be dangerous and lead to leaks. In this part, using the example of the Player and ShootEffect objects, I explained that we can refer to objects from each other. In this case, when ShootEffect is a non-durable object that contains a link to the Player, should we worry about dereference of the link to the Player so that this object can be deleted by the garbage collector, or is it not necessary? More generally, when do we need to take care of dereferencing objects that reference each other in this way?
82. With the help
pushRotateturn the player around its center by 180 degrees. It should look like this:Gif
83. Using,
pushRotaterotate the line indicating the direction of the player’s movement around its center by 90 degrees. It should look like this:Gif
84. Using Using,
pushRotaterotate the line indicating the player’s direction around the player’s center by 90 degrees. It should look like this:Gif
85. Using,
pushRotaterotate the ShootEffect object around the center of the player by 90 degrees (beyond that it already rotates relative to the player’s direction). It should look like this:Gif
Player's shell
Now that we have a shooting effect, we can go to the projectile itself. The projectile will have a movement mechanism, very similar to the player's mechanism in that it will be a physical object with an angle for which you can set the speed according to this angle. First, let's write a call inside the shoot function:
function Player:shoot() ... self.area:addGameObject('Projectile', self.x + 1.5*d*math.cos(self.r), self.y + 1.5*d*math.sin(self.r), {r = self.r}) end And there is nothing unexpected. To set the initial position of the Projectile, we use the same variable
dthat was previously defined, and then pass the angle of the player as an attribute r. Note that unlike the ShootEffect object, the Projectile object doesn’t require anything other than the player’s corner when creating it, so we don’t need to pass the player as a link.Now let's do the Projectile constructor. The Projectile object will also have a collider circle (like the Player), speed and direction of motion:
function Projectile:new(area, x, y, opts) Projectile.super.new(self, area, x, y, opts) self.s = opts.s or 2.5 self.v = opts.v or 200 self.collider = self.area.world:newCircleCollider(self.x, self.y, self.s) self.collider:setObject(self) self.collider:setLinearVelocity(self.v*math.cos(self.r), self.v*math.sin(self.r)) end The attribute
sis the radius of the collider, it is not designated as r, because we already use this variable for the angle of motion. In general, I would object to specify the size of the variables to use w, h, ror s. The first two are when the object is a rectangle, and the last two are when it is a circle. In cases where the variable is ralready used for the direction (as in this case), the radius will be used s. These attributes are mainly used for visualization, because most often these objects already have a collider that does all the work associated with collisions.Another aspect that we use here is the construction described earlier
opts.attribute or default_value. Thanks to howor working in Lua, we can use this design as a quick way to transfer the following: if opts.attribute then self.attribute = opts.attribute else self.attribute = default_value end We check if the attribute exists, and then set some variable to this attribute, and if it does not exist, then we give it a default value. In case,
self.sit will be assigned a value opts.sif it is defined, otherwise it is assigned a value 2.5. The same applies to self.v. Finally, we specify the velocity of the projectile using setLinearVelocity, indicating the initial velocity of the projectile and the angle transmitted from the Player. It uses the same approach as when moving the Player, so you should already understand this.If we now update and render the projectile as follows:
function Projectile:update(dt) Projectile.super.update(self, dt) self.collider:setLinearVelocity(self.v*math.cos(self.r), self.v*math.sin(self.r)) end function Projectile:draw() love.graphics.setColor(default_color) love.graphics.circle('line', self.x, self.y, self.s) end then it will look like this:
Gif
Exercises with player projectiles
86. In the function of the shoot player, change the size / radius of the shells being created by 5, and their speed by 150.
87. Change the shoot function so that it creates not one, but three projectiles, and two of them should be created with player direction angles + - 30 degrees. It should look like this:
Gif
88. Change the shoot function so that it creates not one, but three projectiles so that the position of each side projectile is offset from the center by 8 pixels. It should look like this:
Gif
89. Change the initial velocity of the projectile to 100 and set it to accelerate to 400 within 0.5 seconds after creation.
Death of a player and projectile
Now, when the Player can move and make the simplest attacks, you need to attend to additional rules of the game. One of these rules is that if a player touches the edge of the playing area, then he must die. The same applies to the shells, because while they are created, but never destroyed, and at some point they will become so many that the game will begin to slow down.
Let's start with the object Projectile:
function Projectile:update(dt) ... if self.x < 0 then self:die() end if self.y < 0 then self:die() end if self.x > gw then self:die() end if self.y > gh then self:die() end end We know that the center of the game area is in
gw/2, gh/2, that is, the upper left corner is in 0, 0, and the lower right is in gw, gh. And we need only add a few conditional constructions to the update function of the projectile, checking its position, and if it is outside the bounds, then we must call the function die.The same logic applies to the Player object:
function Player:update(dt) ... if self.x < 0 then self:die() end if self.y < 0 then self:die() end if self.x > gw then self:die() end if self.y > gh then self:die() end end We now turn to the function
die. It is very simple and, in essence, the only thing it does is to set the deadentity attribute to true, and then create visual effects. For a projectile, the effect created will be called ProjectileDeathEffect; as in the case of ShootEffect, it will be a square, remaining on the screen for a short period of time, and then disappearing, but with some differences. The main difference is that ProjectileDeathEffect will flicker for a while, then switch to its normal color and fade. This creates a light, but interesting cotton effect. So the constructor will look like this: function ProjectileDeathEffect:new(area, x, y, opts) ProjectileDeathEffect.super.new(self, area, x, y, opts) self.first = true self.timer:after(0.1, function() self.first = false self.second = true self.timer:after(0.15, function() self.second = false self.dead = true end) end) end We have identified two attributes -
firstand secondthat will indicate what stage the effect is at. If it is in the first stage, then it will have a white color, and in the second it will take its real color. After the second stage is completed, the effect “dies”, which is done by assigning the deadvalue true. All this happens within 0.25 seconds (0.1 + 0.15), that is, it is a very short-lived and fast effect. The effect will be rendered in a manner very similar to the ShootEffect drawing method: function ProjectileDeathEffect:draw() if self.first then love.graphics.setColor(default_color) elseif self.second then love.graphics.setColor(self.color) end love.graphics.rectangle('fill', self.x - self.w/2, self.y - self.w/2, self.w, self.w) end Here we simply set the color according to the effect stage, and then draw a rectangle of that color. We implement this effect in a function
diein the Projectile object: function Projectile:die() self.dead = true self.area:addGameObject('ProjectileDeathEffect', self.x, self.y, {color = hp_color, w = 3*self.s}) end I forgot to mention earlier that the game will have a finite number of colors. I am not an artist and I don’t want to spend much time thinking about colors, so I just chose several well-matched colors and used them throughout the game. These colors are defined in
globals.luaand look like this: default_color = {222, 222, 222} background_color = {16, 16, 16} ammo_color = {123, 200, 164} boost_color = {76, 195, 217} hp_color = {241, 103, 69} skill_point_color = {255, 198, 93} For the projectile death effect, I use color
hp_color(red) to show how the effect looks, but in the future it will be right to use the color of the projectile object. Different types of attacks will have different colors, so the effect of death will also have different colors depending on the attack. Now the effect is as follows:Gif
We now turn to the effect of death Player. The first thing to do is copy the function
dieof the Projectile object and set the attribute deadto true when the player reaches the edges of the screen. By doing this, you can add visual effects to death. The main special effect at the death of the player will be a particle beam, called ExplodeParticle, a bit like an explosion. In general, the particles will be lines moving at random angles from the initial position and slowly decreasing in length. You can implement it in this way: function ExplodeParticle:new(area, x, y, opts) ExplodeParticle.super.new(self, area, x, y, opts) self.color = opts.color or default_color self.r = random(0, 2*math.pi) self.s = opts.s or random(2, 3) self.v = opts.v or random(75, 150) self.line_width = 2 self.timer:tween(opts.d or random(0.3, 0.5), self, {s = 0, v = 0, line_width = 0}, 'linear', function() self.dead = true end) end Here we have defined several attributes, most of them speak for themselves. Additionally, in the interval between 0.3 and 0.5 seconds, we use tween to change the size, speed and width of the line to 0, and after the transition is completed, the particle "dies". The particle motion code is similar to Projectile and Player, so I’ll skip it. It simply follows the angle with its speed.
Finally, the particle is drawn as a line:
function ExplodeParticle:draw() pushRotate(self.x, self.y, self.r) love.graphics.setLineWidth(self.line_width) love.graphics.setColor(self.color) love.graphics.line(self.x - self.s, self.y, self.x + self.s, self.y) love.graphics.setColor(255, 255, 255) love.graphics.setLineWidth(1) love.graphics.pop() end Usually, when you need to draw something that turns (in our case, the angle of the particle), we draw it as if it is at an angle of 0 (pointing to the right). That is, in our case, we need to draw a line from left to right, the center of which will be the turning position. That is
s- it is actually half the size of the line, not the full size. We also use the love.graphics.setLineWidthline first to be oily and thinner over time.Particles are created in a fairly simple way. Just create a random number of them in the function
die: function Player:die() self.dead = true for i = 1, love.math.random(8, 12) do self.area:addGameObject('ExplodeParticle', self.x, self.y) end end The last thing we can do is bind the key to trigger the
diePlayer function , because we cannot see the effect on the border of the screen: function Player:new(...) ... input:bind('f4', function() self:die() end) end And it will look like this:
Gif
But the picture was not very impressive. To make the moment more dramatic, you can slow down a bit. Most people will not notice this, but if you look closely, many games slow down a bit when the player takes damage or dies. Downwell is a good example, this video shows its gameplay. I noted the time when the damage is done, so that you can observe and notice it yourself.
Implementing it yourself is pretty easy. First, we can define a global variable
slow_amountin love.loadand assign it an initial value of 1. We will use this variable to multiply the delta passed in all update functions. So when we need to slow down time by 50%, we will assignslow_amounta value of 0.5. Performing this multiplication looks like this: function love.update(dt) timer:update(dt*slow_amount) camera:update(dt*slow_amount) if current_room then current_room:update(dt*slow_amount) end end And now we need to determine the function that causes it to fire. In general, we want the time dilation to return to the original after a short period of time. Therefore, it will be logical to add to this function along with the level of slowing down its duration:
function slow(amount, duration) slow_amount = amount timer:tween('slow', duration, _G, {slow_amount = 1}, 'in-out-cubic') end That is, the call
slow(0.5, 1)will mean that the game will first slow down to 50% speed, and then return to full speed after 1 second. It is important to note here that the string is used in the tween function 'slow'. As explained in the previous sections, this means that when the slow function is called, when the tween of the other slow function is still active, this previous tween will be canceled and the new tween will continue, which will prevent the two tween functions from performing one variable at the same time.If we call
slow(0.15, 1)the player at the time of death, we get the following:Gif
Here we can also add screen shake. The camera module already has a function
:shake, so we can add the following: function Player:die() ... camera:shake(6, 60, 0.4) ... end Finally, we can make the screen flicker for several frames. This is another effect that is used in many games that you may not notice, but it creates a good impression of the visual effect as a whole. This effect is quite simple: when called
flash(n), the screen will flicker with the background color for n frames. One way to implement this possibility is to define a global variable flash_framesin love.load, which is initially nil. When flash_framesequal to nil, this means that the effect is inactive, and when it is not equal to nil, then it is active. The blink function looks like this: function flash(frames) flash_frames = frames end Now we can configure it in the function
love.draw: function love.draw() if current_room then current_room:draw() end if flash_frames then flash_frames = flash_frames - 1 if flash_frames == -1 then flash_frames = nil end end if flash_frames then love.graphics.setColor(background_color) love.graphics.rectangle('fill', 0, 0, sx*gw, sy*gh) love.graphics.setColor(255, 255, 255) end end First, we decrease each frame
flash_framesby 1, and then, when it reaches, -1we assign it nil, because the effect is complete. And when the effect is not complete, we simply draw a large rectangle with a color background_colorthat covers the whole screen. Adding this to a function dielooks like this: function Player:die() self.dead = true flash(4) camera:shake(6, 60, 0.4) slow(0.15, 1) for i = 1, love.math.random(8, 12) do self.area:addGameObject('ExplodeParticle', self.x, self.y) end end In this case, we get the following:
Gif
This is a very weak and inconspicuous effect, but such small details make the whole picture more powerful and beautiful.
Death Exercises Player / Projectile
90. What other way can you achieve the effect of changing the colors of a ProjectileDeathEffect object without using attributes
firstand second, and using only a new attribute current_color?91. Change the function
flashso that it receives the duration in seconds, not frames. Which one is better, or is it just a matter of taste? Can a timer be used to measure the duration of frames instead of seconds?Player Tact
Now we come to another important aspect of the Player - its loop mechanism. The game works in such a way that in the passive skills tree there are skills that have a probability of triggering in each cycle. And the cycle is just a counter that fires every n seconds. We need to configure its main tasks. And for this we simply make sure that the function is
tickcalled every 5 seconds: function Player:new(...) ... self.timer:every(5, function() self:tick() end) end In the tick function, for the beginning, we only add a small visual effect
TickEffectthat is triggered by each measure. This effect is similar to the effect of refresh in Downwell (see video about Downwell above), it is a large rectangle that briefly overlaps with the player. It looks like this:Gif
The first thing to notice is that the large rectangle covers the player and becomes smaller over time. But besides that, he, as a ShootEffect, follows the player. That is, we understand that it will be necessary to pass a Player object to the TickEffect object as a reference:
function Player:tick() self.area:addGameObject('TickEffect', self.x, self.y, {parent = self}) end function TickEffect:update(dt) ... if self.parent then self.x, self.y = self.parent.x, self.parent.y end end We also see that the rectangle becomes smaller with time, but only in height. The easiest way to do this is:
function TickEffect:new(area, x, y, opts) TickEffect.super.new(self, area, x, y, opts) self.w, self.h = 48, 32 self.timer:tween(0.13, self, {h = 0}, 'in-out-cubic', function() self.dead = true end) end But if you try to do this, you will see that the rectangle does not rise up as it should, but simply becomes smaller near the player’s center. One way to solve this problem is to introduce an attribute
y_offsetthat increases with time and is subtracted from the position yof the TickEffect object: function TickEffect:new(...) ... self.y_offset = 0 self.timer:tween(0.13, self, {h = 0, y_offset = 32}, 'in-out-cubic', function() self.dead = true end) end function TickEffect:update(dt) ... if self.parent then self.x, self.y = self.parent.x, self.parent.y - self.y_offset end end And in this way we will manage to get the desired effect. For now, this is all that tick will do. Later we will add features and passive skills, and a new code will appear in it.
Player acceleration
Another important aspect of the gameplay is acceleration. When the user presses "up", the player should start moving faster. And when the user presses "down", the player should start to move more slowly. This acceleration mechanic is a basic part of the gameplay; as in the case of bars, we will first create the basics, and then we will add new features to them.
First we need to set up key management. The player has an attribute
max_vthat sets the maximum speed at which a player can move. We want to make it so that when you press "up" / "down" this value changes and becomes more / less. The problem here is that after the key is released, we need to return to the normal value. Therefore, we need another variable that stores the base value and another one that contains the current value.The presence in the game of characteristics (for example, speed), which must be changed by modifiers (i.e. basic and current values are necessary), is a very common pattern. Later we will add new features and passive skills to the game and consider this in more detail. But for now we will add an attribute
base_max_vcontaining the initial / base value of the maximum speed, and the usual attribute max_vwill contain the current maximum speed to which all possible modifiers are applied (for example, acceleration). function Player:new(...) ... self.base_max_v = 100 self.max_v = self.base_max_v end function Player:update(dt) ... self.max_v = self.base_max_v if input:down('up') then self.max_v = 1.5*self.base_max_v end if input:down('down') then self.max_v = 0.5*self.base_max_v end end With this code, we assign a
max_vvalue in each frame base_max_v, and then check whether the up / down keys are pressed and change them accordingly max_v. It is important to note that this means that the call setLinearVelocityusing max_vit should occur after that, otherwise everything will fall apart!Now that we have a basic acceleration capability, we can add visual effects. To do this, we will add traces of exhaust to the player’s object:
Gif
Creating traces follows a common pattern. I will create a new object in each frame or so, and then reduce the size of the object with the tween function for a certain time. Over time, we will create an object behind the object, and they will be drawn next to each other. Created earlier will become smaller, and just created will be more. All of them will be created in the lower part of the player, and with his movement we will get the desired effect of the trace.
To implement this, we can create a new object
TrailParticle, which will simply be around a certain radius, for a certain time, reduced by the function tween: function TrailParticle:new(area, x, y, opts) TrailParticle.super.new(self, area, x, y, opts) self.r = opts.r or random(4, 6) self.timer:tween(opts.d or random(0.3, 0.5), self, {r = 0}, 'linear', function() self.dead = true end) end Different transition modes, for example,
'in-out-cubic'instead 'linear', will give a different shape to the trail. I used linear because it seems to me the most beautiful, but you can choose another one. The draw function simply draws a circle of the corresponding color and radius using an attribute r.From the Player object, we can create a new TrailParticles like this:
function Player:new(...) ... self.trail_color = skill_point_color self.timer:every(0.01, function() self.area:addGameObject('TrailParticle', self.x - self.w*math.cos(self.r), self.y - self.h*math.sin(self.r), {parent = self, r = random(2, 4), d = random(0.15, 0.25), color = self.trail_color}) end) That is, every 0.01 seconds (that is, in each frame), we create a new TrailParticle object for the player with a random radius from 2 to 4, random duration from 0.15 to 0.25 seconds and color
skill_point_color(yellow).Also, when you press "up" or "down" we can change the color of the particles to blue. To do this, we need to add logic to the acceleration code, namely, we need to report when acceleration occurs, and for this we need an attribute
boosting. With this attribute, we can find out when acceleration occurs and change the color to which it refers accordingly trail_color: function Player:update(dt) ... self.max_v = self.base_max_v self.boosting = false if input:down('up') then self.boosting = true self.max_v = 1.5*self.base_max_v end if input:down('down') then self.boosting = true self.max_v = 0.5*self.base_max_v end self.trail_color = skill_point_color if self.boosting then self.trail_color = boost_color end end So we achieved that when the player accelerates the color will change from
trail_colorto boost_color(blue).Player ship graphics
The last thing we look at in this part is the ships! The game will have many different types of ships, each with its own characteristics, passive skills and appearance. For now we will focus only on the appearance and add one ship, and in the exercise you will have to create seven more.
It is also worth mentioning the content: when you need to add content to the game — ships, passive skills, various menu options, visual construction of a skill tree, etc., you will have to do most of the work yourself. In the tutorial, I’ll do this with just one example, and then you’ll have to manually add new content like this yourself, so I’ll take this work into exercises.
I decided to do this for two reasons: first, a detailed explanation of everything would take too much time and the tutorial would be very long; secondly, you need to learn how to do manual work to add content to the game yourself. Most of the game development is simply adding content without creating something “new.” You may not like it, because you have to do a lot of work that you may not be interested in. It is better to understand this sooner than later. If you do not want this, then you can, for example, focus on creating games that do not require much manual labor. But my game is a completely different case. There will be about 800 nodes in the skill tree, and all of them need to be set manually (and you will have to do the same if your tree is as big), so this is a great opportunity to understand, do you like this kind of work,or not.
Anyway, let's start with one ship. Here is what it will look like:
Gif
As you can see, it consists of three parts: the main body and two wings. We will draw it from a set of simple polygons, that is, we need to define three separate polygons. We will determine the position of the polygons as if the ship is turned to the right (as I explained above, this is angle 0). We get something like this:
function Player:new(...) ... self.ship = 'Fighter' self.polygons = {} if self.ship == 'Fighter' then self.polygons[1] = { ... } self.polygons[2] = { ... } self.polygons[3] = { ... } end end Inside each polygon table we define the vertices of the polygon. To draw these polygons we have to do some work. First, we need to rotate the polygons around the player’s center:
function Player:draw() pushRotate(self.x, self.y, self.r) love.graphics.setColor(default_color) -- love.graphics.pop() end After that we need to consider each of the polygons:
function Player:draw() pushRotate(self.x, self.y, self.r) love.graphics.setColor(default_color) for _, polygon in ipairs(self.polygons) do -- end love.graphics.pop() end And then draw each polygon:
function Player:draw() pushRotate(self.x, self.y, self.r) love.graphics.setColor(default_color) for _, polygon in ipairs(self.polygons) do local points = fn.map(polygon, function(k, v) if k % 2 == 1 then return self.x + v + random(-1, 1) else return self.y + v + random(-1, 1) end end) love.graphics.polygon('line', points) end love.graphics.pop() end The first thing we do is properly arrange all points. Each polygon must be defined locally, that is, the distance from its center is considered equal
0, 0. This means that each polygon does not yet know in which position of the world it is.The function
fn.mapbypasses each element in the table and applies a function to it. In this case, the function will check the index for parity. If it is odd, it denotes the component x, and if it is even, then the component y. That is, in each of these cases, we simply add the player’s x or y position to the top, as well as a random number in the range from -1 to 1, so that the ship looks a bit more fuzzy and interesting. Then, finally, it is called love.graphics.polygonto draw all these points.Here is the definition of each polygon:
self.polygons[1] = { self.w, 0, -- 1 self.w/2, -self.w/2, -- 2 -self.w/2, -self.w/2, -- 3 -self.w, 0, -- 4 -self.w/2, self.w/2, -- 5 self.w/2, self.w/2, -- 6 } self.polygons[2] = { self.w/2, -self.w/2, -- 7 0, -self.w, -- 8 -self.w - self.w/2, -self.w, -- 9 -3*self.w/4, -self.w/4, -- 10 -self.w/2, -self.w/2, -- 11 } self.polygons[3] = { self.w/2, self.w/2, -- 12 -self.w/2, self.w/2, -- 13 -3*self.w/4, self.w/4, -- 14 -self.w - self.w/2, self.w, -- 15 0, self.w, -- 16 } The first is the main body, the second is the upper wing, the third is the lower wing. All vertices are defined in counterclockwise order, the first point of the line is always the component x, the second is the component y. Here is how the binding of each vertex to pairs of numbers specified above:
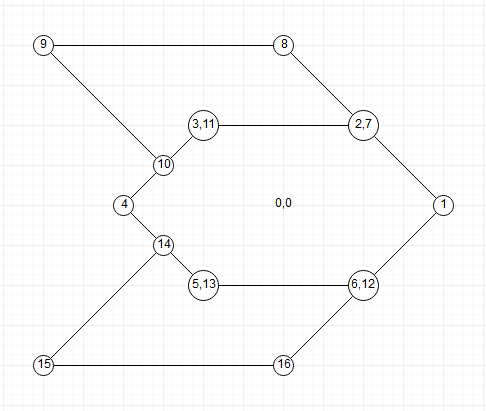
As you can see, the first point is far to the right and aligned with the center, that is, it has coordinates
self.w, 0. The next one is to the left and above the first one, that is, its coordinates self.w/2, -self.w/2, and so on.Finally, after adding points, we can make the tracks correspond to the ship. In our case, as seen from the above gif, there are two tracks, not one:
function Player:new(...) ... self.timer:every(0.01, function() if self.ship == 'Fighter' then self.area:addGameObject('TrailParticle', self.x - 0.9*self.w*math.cos(self.r) + 0.2*self.w*math.cos(self.r - math.pi/2), self.y - 0.9*self.w*math.sin(self.r) + 0.2*self.w*math.sin(self.r - math.pi/2), {parent = self, r = random(2, 4), d = random(0.15, 0.25), color = self.trail_color}) self.area:addGameObject('TrailParticle', self.x - 0.9*self.w*math.cos(self.r) + 0.2*self.w*math.cos(self.r + math.pi/2), self.y - 0.9*self.w*math.sin(self.r) + 0.2*self.w*math.sin(self.r + math.pi/2), {parent = self, r = random(2, 4), d = random(0.15, 0.25), color = self.trail_color}) end end) end Here we use the following technique: we pass from point to point on the basis of the angle necessary to reach the goal. The target points we need are behind the player (behind on
0.9*self.w), but each is shifted a short distance ( 0.2*self.w) along an axis opposite to the player’s movement.All this will look like this:
Gif
Exercises with graphics ships
A small note: tagged (CONTENT) labeled exercises, which are themselves the content of the game. The exercises marked in this way will have no answers and you will have to do them completely yourself! From this point on, these will be more and more exercises, because we are starting to move on to the game itself, and a huge part of it is in the simple manual addition of content.
92. (CONTENT) Add seven more types of ships. To add a new type of ship, you just need to add another conditional construction
elseif self.ship == 'ShipName' thenboth to the definition of polygons and to the definition of a trace. Here are the ships created by me (but you, of course, can create and invent your own design):Gif
If you like these tutorials and you want to stimulate me to write something like this in the future:
By purchasing a tutorial on itch.io, you will have access to the full source code of the game, answers to exercises 1-9, code that is broken down into parts (the code will look like it should look at the end of each part of the tutorial), and also the key of the game on Steam.
Source: https://habr.com/ru/post/349440/
All Articles