Authorization of the user on your site through Telegram for Django

Hello! On February 6, Telegram introduced the ability to add a widget to its site to authorize a user through his Telegram account. Widgets by the type of implementation on the server are divided into two types - process user data "here and now" in JavaScript or redirect data in the URL parameters to the specified address. Also, the button itself can be customized externally: resize, round corners, turn off and turn on the photo.
Material - a guide to setting up user authorization through a Telegram account on your site using the django-telegram-login package.
Disclaimer
django-telegram-login works for Python 2 and 3 for current versions of Django (tested on 1.11 and 2.0).
The article contains examples for each of the tutorial items. At the end of the article provided full examples.
')
Settings for Telegram
I recommend reading the news and documentation on widgets before reading the material below.
localtunnel
Telegram requires a domain name for your website, because it will make requests to your website, transfer user data. So you need a tunnel - a web site on the net that will forward all requests to your localhost .
Install the localtunnel package using npm (make sure you have it installed).
$ npm install -g localtunnel Run localtunnel on the port on which you will be raising your Django server.
$ lt --port 8000 In response, you will receive a link, for example, such kqmxkdqitb.localtunnel.me . You can share it with any other Internet user and he will have access to your site.
Start the server and make sure that you can reach the server through the tunnel.
$ ./manage.py runserver 0.0.0.0:8000 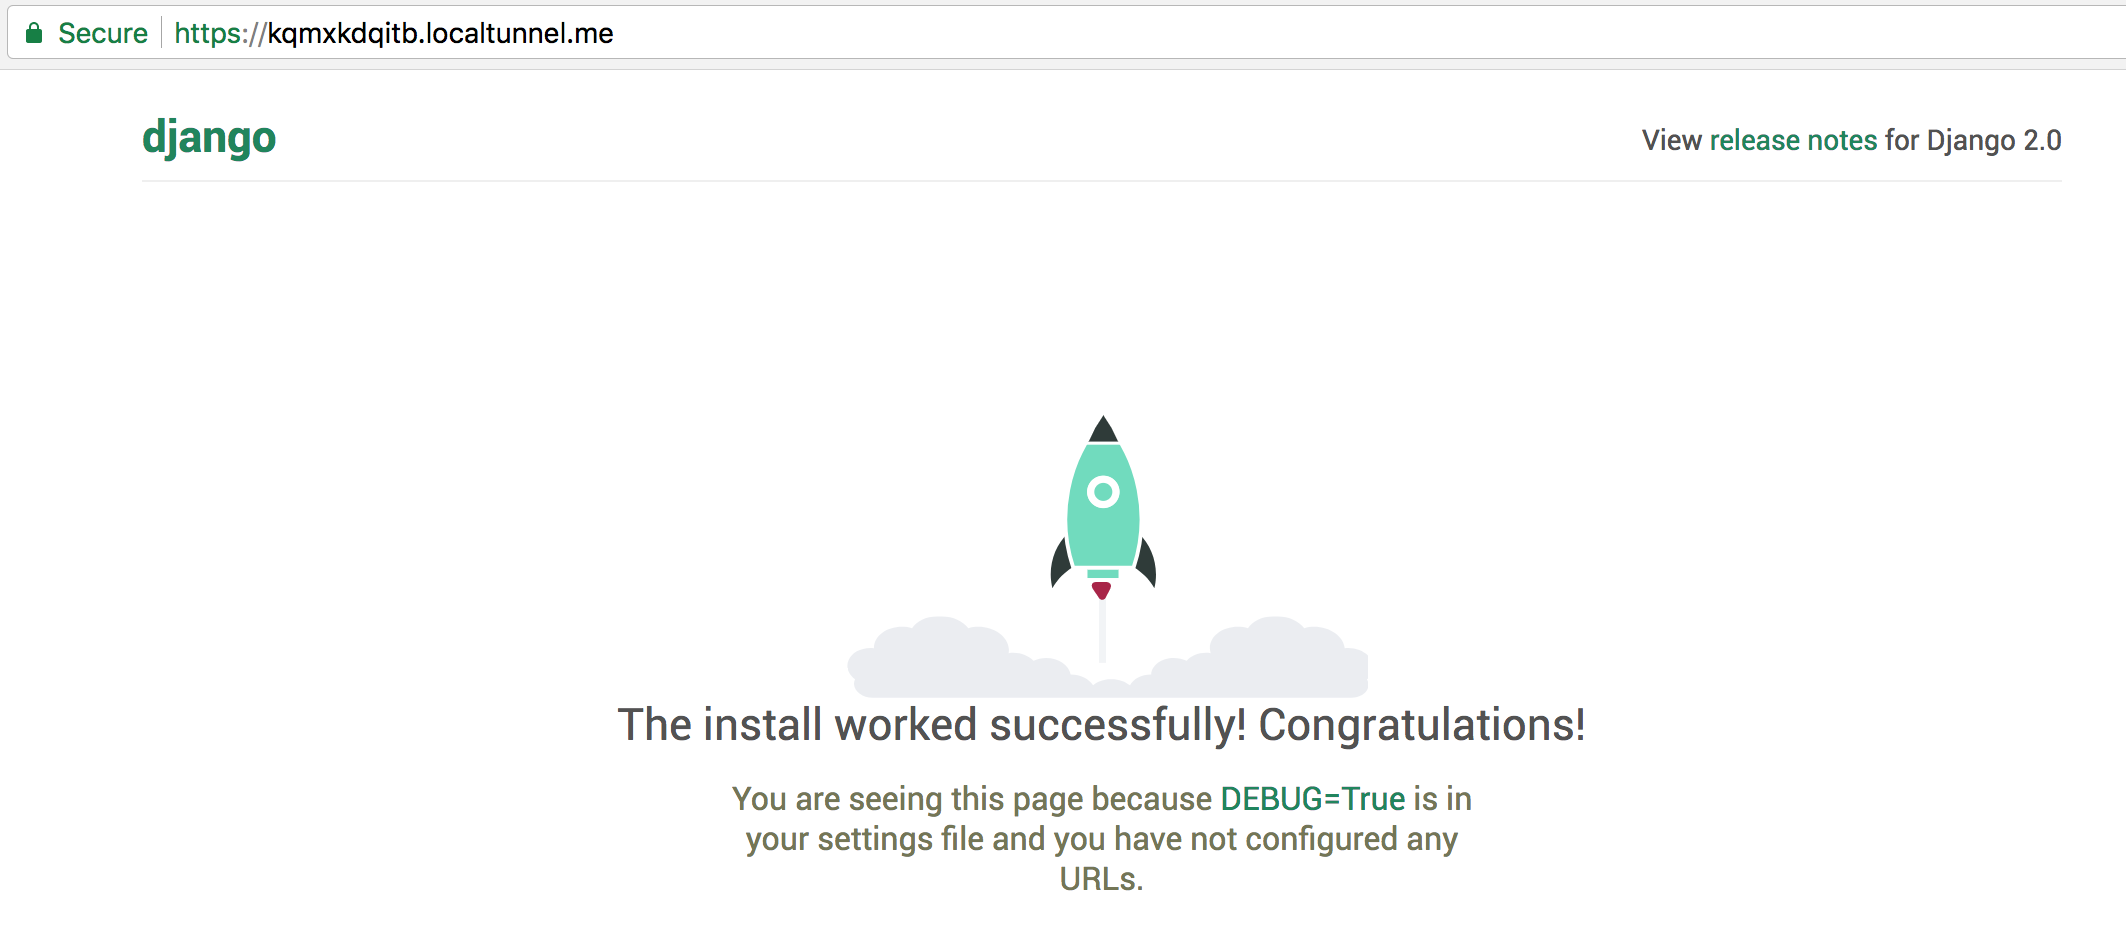
Domain Name Registration
As stated in the official Telegram documentation, your website needs a Telegram bot that will process user requests for authorization. It should be linked to your site via address.

In the future, we will need the user bot ( HabrahabrTelegramLoginBot ) and its token ( 540908629: AAEUGcF_M68nzHmfHtMSAWNncKBVJ75rOZI ). Based on the token, validation of the user data that comes from the Telegram is performed.
Install and configure Django
Download the package via pip with the following command.
$ pip install django-telegram-login Add the application to the installed apps .
INSTALLED_APPS = [ ... 'django_telegram_login', ] Structure information about the bot. For example, add constants to the settings file ( settings.py ).
TELEGRAM_BOT_NAME = 'HabrahabrTelegramLoginBot' TELEGRAM_BOT_TOKEN = '459236585:AAEee0Ba4fRijf1BRNbBO9W-Ar15F2xgV98' TELEGRAM_LOGIN_REDIRECT_URL = 'https://kqmxkdqitb.localtunnel.me/' And use them in this form.
from django.conf import settings bot_name = settings.TELEGRAM_BOT_NAME bot_token = settings.TELEGRAM_BOT_TOKEN redirect_url = settings.TELEGRAM_LOGIN_REDIRECT_URL django-telegram-login allows you to use an unlimited number of bots for authorization in Telegram. Widgets do not take the parameters of the bot from the settings, but accept them as arguments. Therefore, it is not a problem to design many different widgets.
How the widget works
The widget has the following view (picture below). You can change its size - small ( small ), medium ( medium ) and large ( large ), round the corners ( corner_radius ), remove the photo ( disable user photo ). You can specify the type of user authorization processing - process user data "here and now" in JavaScript or send URL parameters to the specified address. Telegram widget configuration documentation is available here . django-telegram-login already has everything inside it necessary to configure the widgets in the code.
(the size of the image is different from the original size of the widget)
Widget
A widget is an external JavaScript that accepts your arguments ( data-size - the size of the widget, for example), processes them and responds with user data when working correctly. It also generates a “button” Log in as .
<script async src="https://telegram.org/js/telegram-widget.js?2" data-telegram-login="samplebot" data-size="large" data-auth-url="" data-request-access="write"> </script> (Example widget with Telegram documentation)
How to configure the widget using django-telegram-login
You do not need to go into the Telegram documentation to configure the script and copy it to your HTML page each time. Use the widget generator from django-telegram-login .
from django.conf import settings from django_telegram_login.widgets.constants import ( SMALL, MEDIUM, LARGE, DISABLE_USER_PHOTO, ) from django_telegram_login.widgets.generator import ( create_callback_login_widget, create_redirect_login_widget, ) bot_name = settings.TELEGRAM_BOT_NAME bot_token = settings.TELEGRAM_BOT_TOKEN redirect_url = settings.TELEGRAM_LOGIN_REDIRECT_URL telegram_login_widget = create_callback_login_widget(bot_name, corner_radius=10, size=MEDIUM) telegram_login_widget = create_redirect_login_widget( redirect_url, bot_name, size=LARGE, user_photo=DISABLE_USER_PHOTO ) As you can see in the code clipping from the top - convenient constant solutions for specifying the size of the widget, a constant for turning off the user's photo.
corner_radius
The optional corner_radius parameter takes an integer from 1 to 20 (this is the default value). Rectangular - 1, rounded - 20.
user_photo
Using the DISABLE_USER_PHOTO constant passed to the user_photo parameter, you can turn off the user's photo near the widget.
create_callback_login_widget and create_redirect_login_widget , widget generators, accept these constants and, based on them, generate code for the widget according to your requirements. Let's see what they return in the telegram_login_widget variables.
As we discussed above, a widget is just external JavaScript. Therefore, telegram_login_widget in case of callback will return the following.
<script async src="https://telegram.org/js/telegram-widget.js?2" data-telegram-login="HabrahabrTelegramLoginBot" data-size="medium" data-radius="10" data-auth-url="https://kqmxkdqitb.localtunnel.me" data-onauth="onTelegramAuth(user)" data-request-access="write"></script> As you can see, the widget generator has put the bot username, widget size and link to your site into the script. The onTelegramAuth function in data-onauth will be discussed below.
Widget Design Logic
On the example of the create_redirect_login_widget function, which knows how to build a widget, you can see that the redirect_url , bot_name, and user_photo variables passed to it are inserted into the widget body.
def create_redirect_login_widget( redirect_url, bot_name, size=SMALL, user_photo=True, access_write=True ): """ Create redirect widget, that allows to handle user data as get request params. """ script_initital = \ '<script async src="https://telegram.org/js/telegram-widget.js?2" ' bot = 'data-telegram-login="{}" '.format(bot_name) size = 'data-size="{}" '.format(size) userpic = \ 'data-userpic="{}" '.format(str(user_photo).lower()) if not user_photo else '' redirect = 'data-auth-url="{}" '.format(redirect_url) access = 'data-request-access="write"' if access_write else '' script_end = '></script>' widget_script = \ script_initital + bot + size + userpic + redirect + access + script_end return widget_script The output is “raw text”, which can be displayed in an HTML template.
Display the generated script on the HTML page
Generate your widget in some view and pass it into context.
def callback(request): telegram_login_widget = create_callback_login_widget(bot_name, size=SMALL) context = {'telegram_login_widget': telegram_login_widget} return render(request, 'telegram_auth/callback.html', context) In the HTML template itself, use the telegram_login_widget variable from the context using Jinja ( such as that ).
It is template to render callback Telegram widget! <!-- {{ telegram_login_widget|safe }} --> {% autoescape off %} {{ telegram_login_widget }}{% endautoescape %} <script type="text/javascript"> function onTelegramAuth(user) { alert('Logged in as ' + user.first_name + ' ' + user.last_name + '!'); } </script> The autoescape tag is used to “say” HTML to display telegram_login_widget as markup, not as raw text. As a result, the following will appear on the page.

The user presses the button, receives a request for confirmation of authorization.

If the user does this for the first time, the Telegram authorization will first appear.

After that and in further clicks on the Log in as button - the Telegram will send the user data each time until the user disconnects in the chat with Telegram (if it is disconnected, you will have to confirm the input again).

The onTelegramAuth function receives a response from the Telegram with user data.
Use the user argument to get the data.
<script type="text/javascript"> function onTelegramAuth(user) { alert('Logged in as ' + user.first_name + ' ' + user.last_name + '!'); } </script> 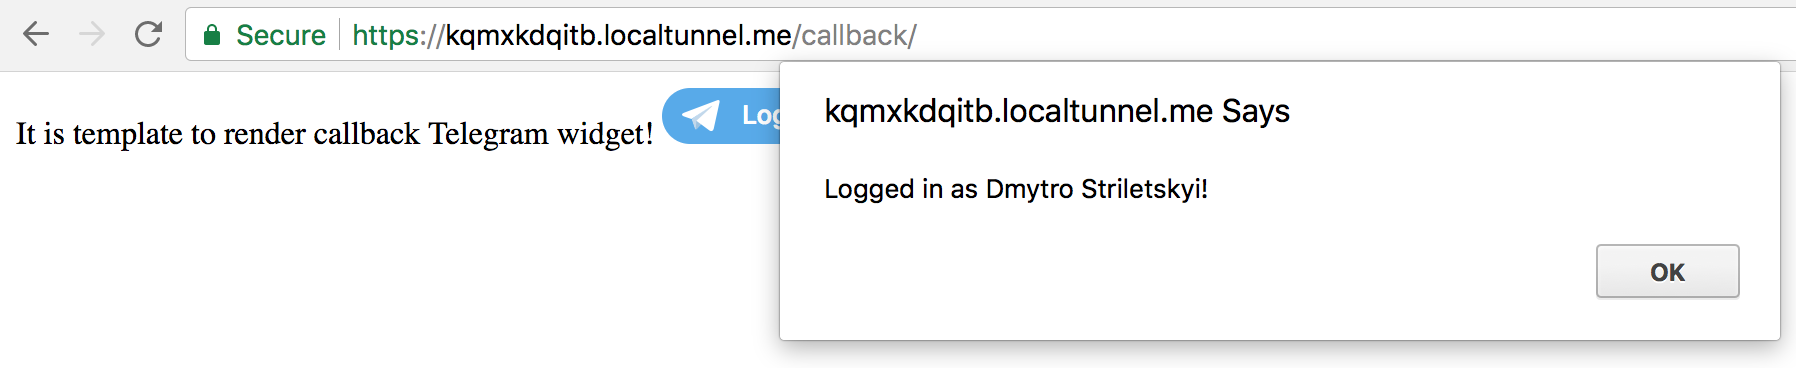
Telegram returns the following data: first_name, last_name, username, photo_url, auth_date (unix datetime) and hash (the last two values are technical, for verification). You can implement data transfer from onTelegramAuth to your view via an AJAX request.
The redirect widget clicked on the Log as in button redirects the user to the specified link (TELEGRAM_LOGIN_REDIRECT_URL) and inserts the user data into the request parameters (link parameters).

As for this type of widget, you need to authenticate the data.
from django_telegram_login.authentication import verify_telegram_authentication from django_telegram_login.errors import ( NotTelegramDataError, TelegramDataIsOutdatedError, ) def index(request): # , , # , # Telegram . if not request.GET.get('hash'): return HttpResponse('Handle the missing Telegram data in the response.') try: result = verify_telegram_authentication( bot_token=bot_token, request_data=request.GET ) except TelegramDataIsOutdatedError: return HttpResponse('Authentication was received more than a day ago.') except NotTelegramDataError: return HttpResponse('The data is not related to Telegram!') return HttpResponse('Hello, ' + result['first_name'] + '!') The function verify_telegram_authentication based on the received data from the request parameters and the bot token verifies the correctness of the data (verifies that you did not receive non-existent or fake data). The authentication algorithm is described here .
Examples
All necessary settings - settings.py
TELEGRAM_BOT_NAME = 'django_telegram_login_bot' TELEGRAM_BOT_TOKEN = '459236585:AAEee0Ba4fRijf1BRNbBO9W-Ar15F2xgV98' TELEGRAM_LOGIN_REDIRECT_URL = 'https://iyjjvnvszx.localtunnel.me/' This is how your views.py file may look like with the full implementation of user authorization via Telegram.
from django.conf import settings from django.http import HttpResponse from django.shortcuts import render from django_telegram_login.widgets.constants import ( SMALL, MEDIUM, LARGE, DISABLE_USER_PHOTO, ) from django_telegram_login.widgets.generator import ( create_callback_login_widget, create_redirect_login_widget, ) from django_telegram_login.authentication import verify_telegram_authentication from django_telegram_login.errors import ( NotTelegramDataError, TelegramDataIsOutdatedError, ) bot_name = settings.TELEGRAM_BOT_NAME bot_token = settings.TELEGRAM_BOT_TOKEN redirect_url = settings.TELEGRAM_LOGIN_REDIRECT_URL def index(request): # Initially, the index page may have no get params in URL # For example, if it is a home page, a user should be redirected from the widget if not request.GET.get('hash'): return HttpResponse('Handle the missing Telegram data in the response.') try: result = verify_telegram_authentication( bot_token=bot_token, request_data=request.GET ) except TelegramDataIsOutdatedError: return HttpResponse('Authentication was received more than a day ago.') except NotTelegramDataError: return HttpResponse('The data is not related to Telegram!') # Or handle it like you want. For example, save to DB. :) return HttpResponse('Hello, ' + result['first_name'] + '!') def callback(request): telegram_login_widget = create_callback_login_widget(bot_name, size=SMALL) context = {'telegram_login_widget': telegram_login_widget} return render(request, 'telegram_auth/callback.html', context) def redirect(request): telegram_login_widget = create_redirect_login_widget( redirect_url, bot_name, size=LARGE, user_photo=DISABLE_USER_PHOTO ) context = {'telegram_login_widget': telegram_login_widget} return render(request, 'telegram_auth/redirect.html', context) Template for callback login - callback.html
It is template to render callback Telegram widget! <!-- {{ telegram_login_widget|safe }} --> {% autoescape off %}{{ telegram_login_widget }}{% endautoescape %} <script type="text/javascript"> function onTelegramAuth(user) { alert('Logged in as ' + user.first_name + ' ' + user.last_name + '!'); } </script> Template for redirect login - redirect.html
It is template to render redirect Telegram widget! <!-- {{ telegram_login_widget|safe }} --> {% autoescape off %}{{ telegram_login_widget }}{% endautoescape %} Thanks for attention. Send feedback and suggestions to your personal mail. If you are interested in django-telegram-login , go to the project page on Github .
Source: https://habr.com/ru/post/348952/
All Articles