Part 2: Networking - Writing a blockchain in less than 200 lines of Go code
Have you read the first part of this series? If not, it's worth a look. Don't worry, we will wait ...
Welcome!
We were stunned by the feedback from our first post: "Writing a blockchain in less than 200 lines of Go code." What was intended for a small lesson for novice developers on blockchain has acquired a new life. We were overwhelmed with requests to make a post where we add network interaction.
Before we begin, you can join our chat in Telegram ! This is the best place to ask us questions, give feedback and ask for new lessons. If you need help with your code, then this is the perfect place to ask!
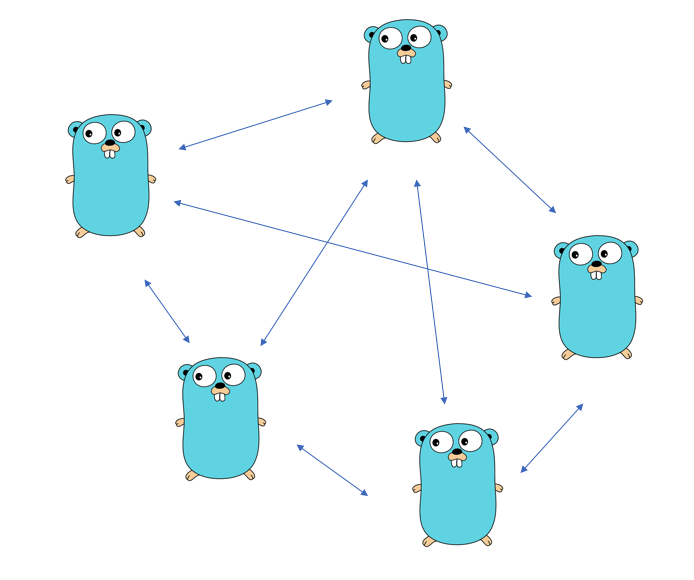
The last post showed you how to create your own blockchain with hashing and validating each new block. But all this was done on the same node. How can we connect another node to our main application and create new blocks, and update the entire block chain on all the other nodes?
The working process
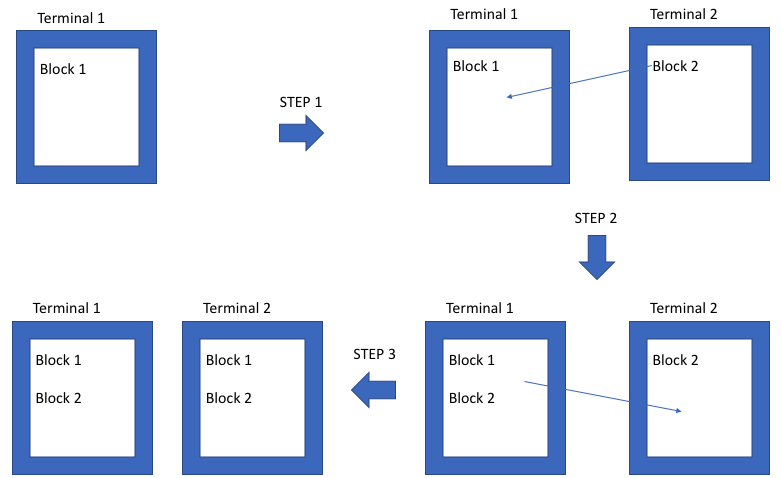
- The first terminal creates the first base unit and a TCP server to which new nodes can connect.
Step 1
- Additional terminals open and TCP connections to the first terminal
- The new terminal writes the block to the first terminal.
Step 2
- The first terminal checks the block
- The first terminal sends a new block chain to each new node.
Step 3
- All terminals are synchronized!
After the lesson, try to do it yourself: each new terminal also acts as the “first” terminal, but with different TCP ports and each has connections for the correct operation of the network.
What can you do
- Run a terminal that provides the first base unit.
- Run a lot of new additional terminals as you want and let them write the blocks to the first terminal
- The first terminal should send updated blocks for new terminals.
What you can not do
As in the previous post, the goal of this lesson is to get the core network out of the nodes, so that you can further study the blockchain yourself. You will not be able to add computers from another network that will write to your first terminal, but this can be achieved by running the binary in the cloud. In addition, the block chain will be modeled for each of the nodes. Don't worry, we'll explain everything soon.
Let's start the code!
Places will review the previous post. Let's leave a lot of functions, such as block generation, hashing, validation. We will not use HTTP functionality, but we will view the result in the console, and we will use TCP to work on the network.
What are the differences between TCP and HTTP?
We will not go into details, but all you need to know is that TCP is the basic protocol that transmits data. HTTP is built on top of the TCP stack to use this data transfer between the Internet and the browser. When you view a website, you use the HTTP protocol. In this lesson we will work with TCP, since we do not need to view anything in the browser. Go has a good network packet that provides all the TCP connection functions we need.
Installation, Import and Review
Some implementation has already been considered in the first part. To generate and test the block chain, we will use the functions from the previous article.
Installation
Create a .env file in your main directory and add the line:
ADDR=9000 Save the TCP port number that we want to use (in our case, 9000) in the environment variable called ADDR .
If you have not done so already, install the following packages:
go get github.com/davecgh/go-spew/spew for beautiful print of our block chain to console
go get github.com/joho/godotenv to read variables from our .env file.
Create an empty main.go file. There we place our code.
Imports
Package declaration and import we need:
package main import ( "bufio" "crypto/sha256" "encoding/hex" "encoding/json" "io" "log" "net" "os" "strconv" "time" "github.com/davecgh/go-spew/spew" "github.com/joho/godotenv" ) Overview
The following code snippets are well described in the first part.
Let's create our Block structure and declare a slice of blocks, this will be our block chain.
type Block struct { Index int Timestamp string BPM int Hash string PrevHash string } var Blockchain []Block We will also declare our hashing function, which we will need when creating new blocks.
func calculateHash(block Block) string { record := string(block.Index) + block.Timestamp + string(block.BPM) + block.PrevHash h := sha256.New() h.Write([]byte(record)) hashed := h.Sum(nil) return hex.EncodeToString(hashed) } And the function of creating blocks:
func generateBlock(oldBlock Block, BPM int) (Block, error) { var newBlock Block t := time.Now() newBlock.Index = oldBlock.Index + 1 newBlock.Timestamp = t.String() newBlock.BPM = BPM newBlock.PrevHash = oldBlock.Hash newBlock.Hash = calculateHash(newBlock) return newBlock, nil } We can make sure that our new block is correct, for this we check that the PrevHash field refers to the Hash field from the previous block.
func isBlockValid(newBlock, oldBlock Block) bool { if oldBlock.Index+1 != newBlock.Index { return false } if oldBlock.Hash != newBlock.PrevHash { return false } if calculateHash(newBlock) != newBlock.Hash { return false } return true } Now we guarantee that we take the longest chain as the correct one:
func replaceChain(newBlocks []Block) { if len(newBlocks) > len(Blockchain) { Blockchain = newBlocks } } Wonderful! Got the basic functionality for working with a chain of blocks. Now we can go on to create a network interaction.
Networking
Let's create a network that can transmit new blocks, integrate them into a chain and broadcast a new chain for the network.
Let's start with the main function, but before that let's declare the global variable bcServer , which is the channel that accepts incoming blocks.
var bcServer chan []Block Note: Channels are one of the most popular tools in Go and provide a nice implementation of reading / writing data and are most often used to prevent race conditions. They become a powerful tool when several Go-rutins competitively (not to be confused with parallelism) are written in the same channel. Usually in Java and other C-like languages you will have to block and unlock a mutex to access data. The channels in Go make this much easier, although there are also mutexes in Go. You can read more about it here .
Now let's declare our main function and load the environment variables from our .env file, which is in the root directory. And also we will launch a copy of our bcServer in the function main.
func main() { err := godotenv.Load() if err != nil { log.Fatal(err) } bcServer = make(chan []Block) // create genesis block t := time.Now() genesisBlock := Block{0, t.String(), 0, "", ""} spew.Dump(genesisBlock) Blockchain = append(Blockchain, genesisBlock) } Now we need to create a TCP server. Remember that TCP servers are similar to HTTP servers, but not enough to work with the TCP browser. All data will be displayed via the console. We will handle several connections to our TCP port. Add this to our main function:
server, err := net.Listen("tcp", ":"+os.Getenv("ADDR")) if err != nil { log.Fatal(err) } defer server.Close() This code will launch our TCP server on port 9000. It is important to do defer server.Close() so that the connection is closed when there is no longer a need for it. You can read more about defer here .
Now we need to create a new connection every time we receive a request to establish a connection, and we will need to process it. Add more code:
for { conn, err := server.Accept() if err != nil { log.Fatal(err) } go handleConn(conn) } We create an infinite loop in which we accept new connections. For competitive processing, we start each connection in the handler in Go by the go handleConn(conn) routine, so do not stop our cycle. Thus, we can simultaneously listen to several connections concurrently.
The attentive reader will notice that the handleConn handler handleConn not declared. We have so far created our main function, main . The whole thing looks like this:
func main() { err := godotenv.Load() if err != nil { log.Fatal(err) } bcServer = make(chan []Block) // create genesis block t := time.Now() genesisBlock := Block{0, t.String(), 0, "", ""} spew.Dump(genesisBlock) Blockchain = append(Blockchain, genesisBlock) // start TCP and serve TCP server server, err := net.Listen("tcp", ":"+os.Getenv("ADDR")) if err != nil { log.Fatal(err) } defer server.Close() for { conn, err := server.Accept() if err != nil { log.Fatal(err) } go handleConn(conn) } } Let's write our handleConn function handleConn . It takes only one argument, this is the net.Conn interface. In our opinion, the interfaces in Go are striking and they distinguish it from all C-like languages. Competitiveness and Go routines advertise a language, but the interfaces and the fact that they can not implement the interface explicitly is the most powerful function of the language. If you are not yet using Go interfaces, familiarize yourself with them as soon as you can. Interfaces are your next step to becoming a Go Developer.
Place a deferred closing of the connection defer in the handler function's workpiece, so as not to forget to close it when we finish the work.
func handleConn(conn net.Conn) { defer conn.Close() } Now we need to allow the client to add new blocks to the chain. For the data we will use the pulse rate, as in the first part. Measure your pulse for a minute and remember this number. This will be the BPM parameter (beats per minute)
To implement the above, we need:
- ask the customer to enter their BPM
- request this value from client via
stdin - create a new block with this data using the generateBlock, isBlockValid and replaceChain functions
- put a new chain of blocks in the channel created earlier for transmission over the network
- allow the client to enter a new BMP value
The code that implements the above described functionality:
io.WriteString(conn, "Enter a new BPM:") scanner := bufio.NewScanner(conn) go func() { for scanner.Scan() { bpm, err := strconv.Atoi(scanner.Text()) if err != nil { log.Printf("%v not a number: %v", scanner.Text(), err) continue } newBlock, err := generateBlock(Blockchain[len(Blockchain)-1], bpm) if err != nil { log.Println(err) continue } if isBlockValid(newBlock, Blockchain[len(Blockchain)-1]) { newBlockchain := append(Blockchain, newBlock) replaceChain(newBlockchain) } bcServer <- Blockchain io.WriteString(conn, "\nEnter a new BPM:") } }() Create a new scanner. for scanner.Scan() is a loop that works competitively in the Go routine and separately from other connections. We make a quick string conversion of the BMP value (which will always be an integer type, so we check it). We perform standard block generation, block validation and adding a new block to the chain.
The bcServer <- Blockchain syntax simply means that we are throwing our new chain into the channel we created earlier. Then we offer the customer to enter a new BPM value to create the next block.
Broadcast channel
We need to send out a new block chain for all connections on our TCP server. Since we are programming on one computer, we need to simulate how data will be transmitted to all clients. In the handleConn function we need to add:
- converting our block chain into json format that it was readable
- writing a new block chain to the console for each of the connections
- setting a timeout period so that our block chain does not constantly spam. In existing systems, this happens every X minutes. We will use 30 seconds
- outputting the main block chain at the first terminal so that we can see what is happening. So we will make sure that the blocks added by different nodes are really integrated into the main block chain.
Here is the code that does everything in the right order:
go func() { for { time.Sleep(30 * time.Second) output, err := json.Marshal(Blockchain) if err != nil { log.Fatal(err) } io.WriteString(conn, string(output)) } }() for _ = range bcServer { spew.Dump(Blockchain) } Wonderful! Our handleConn function handleConn ready. In fact, the whole program is ready and we have kept its compactness in 200 lines of code. This is nice, isn't it?
Entirely with all the code, can be found here !
Interesting stuff
Let's move to the directory with our code and run our program by running: go run main.go

As expected, we see our base unit. At the same time, we launched a TCP server on port 9000, which can accept several connections.
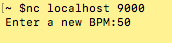
Open a new terminal window and connect to our TCP server using nc localhost 9000 . We will use a different color in the terminals, so that it would be clear that these are different clients. Do this several times with different terminal sessions to run multiple clients.
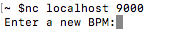
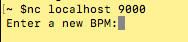
Now enter BPM on any of the clients. We see that the new unit is added to the first terminal! The network is working!
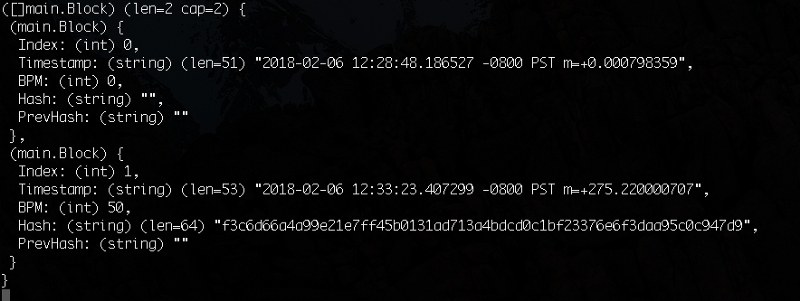
We are waiting for 30 seconds. Go to one of the other clients, and you will see that the new block chain has been transferred to all clients, even if these clients have never entered BPM!

Next steps
Congratulations! You not only created your own blockchain from the last lesson, but also added networking. Now there are several directions to move on:
- To get a large network running locally, create several directories that store a copy of the application. Each copy should have different TCP ports. For each terminal session, listen to the TCP port and connect to another one so that you can receive and send your data.
- Combine data from multiple ports. This is a topic for another lesson, but it is done easily. All this is blockchain. It must receive data as well as transmit data.
- You can try it with friends, set up a server in the cloud using your favorite hosting provider. Ask your friends to connect to it and send data. At this point you can add a bit of security. If there are requests, we will make a tutorial on this material.
You already understand many aspects of blockchain. We recommend reading algorithms like Proof of Work or Proof of Stake.
Or you can just wait while we write a new blog post :-)
Recall that to tell us what you want to see, join our Telegram chat! You may be able to change our opinion on what to write in the further lessons. You can follow us on Twitter as well.
To learn more about Coral Health and how we use blockchain in medical research, visit our website .
PS The author of the translation will be grateful for the errors and inaccuracies of the translation.
')
Source: https://habr.com/ru/post/348624/
All Articles