Tutorial on Unreal Engine: C ++
Blueprints is a very popular way to create gameplay in the Unreal Engine 4. However, if you’ve been programming and prefer code for a long time, C ++ is perfect for you. With C ++ you can even make changes to the engine and create your own plugins.
In this tutorial you will learn the following:
- Create C ++ Classes
- Add components and make them visible for Blueprints
- Create a Blueprint class based on the C ++ class
- Add variables and make them editable from Blueprints
- Associate axis and action bindings with functions
- Redefine C ++ Functions in Blueprints
- Associate a collision event with a function
It is worth considering that this is not a tutorial on learning C ++. We will focus on working with C ++ in the context of the Unreal Engine.
')
Note: this tutorial assumes that you are already familiar with the basics of the Unreal Engine. If you're new to the Unreal Engine, first learn the ten-part Unreal Engine tutorial for beginners .
Getting Started
If you have not done this yet, then you will need to install Visual Studio . Follow the instructions from Epic's official guide for setting up Visual Studio for the Unreal Engine 4. (You can use alternative IDEs, but this tutorial uses Visual Studio because Unreal is designed to work with it.)
Then download the project blank and unpack it. Navigate to the project folder and open CoinCollector.uproject . If the application is asked to rebuild the modules, then click Yes .

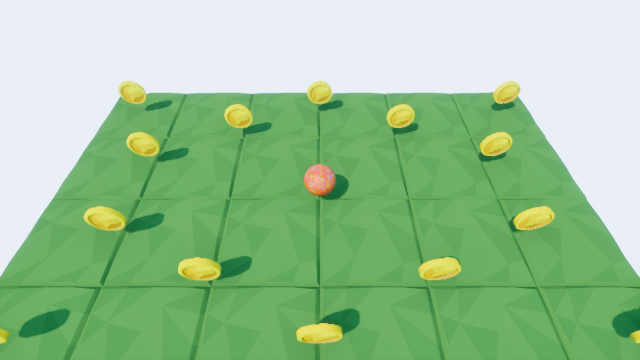
When finished with this, you will see the following scene:

In this tutorial, we will create a ball that the player will move to collect coins. In previous tutorials, we used player-driven characters using Blueprints. In this tutorial, we will create it using C ++.
Creating a C ++ Class
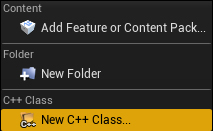
To create a C ++ class, go to the Content Browser and select Add New \ New C ++ Class .
This will open the C ++ Class Wizard. First, you will need to choose which class we will inherit from. Since the class must be a controlled player, we will need a pawn. Select Pawn and click Next .

On the next screen, you can specify the name and path to the .h and .cpp files. Replace Name with BasePlayer and click on Create Class .

This will create files and compile the project. After compiling, Unreal will open Visual Studio. If BasePlayer.cpp and BasePlayer.h are not open, go to Solution Explorer and open them. They are located in the Games \ CoinCollector \ Source \ CoinCollector folder .

Before moving on, you need to learn about the Unreal reflection system . This system manages various parts of the engine, such as the Details panel and garbage collection. When creating a class using C ++ Class Wizard, the Unreal engine adds three lines to the header:
#include "TypeName.generated.h"UCLASS()GENERATED_BODY()
The Unreal engine needs these lines in order for the class to be visible to the reflection system. If this is not clear to you, then do not worry. You only need to know that the reflection system allows you to do such things as expanding the functions and variables of Blueprints and the editor.
You may also notice that the class is called
ABasePlayer , not BasePlayer . When creating a class of type actor, Unreal prefixes the class name with the name A (from the word actor ). For the reflection system to work, it needs the classes to have the appropriate prefixes. Read more about prefixes in the Epic Code Design Standard .Note: prefixes are not displayed in the editor. For example, if you need to create a variable of type ABasePlayer , then you need to look for BasePlayer .
That's all you need to know about the reflection system. Now we need to add a player model and a camera. For this you need to use components .
Add components
For a pawn player, we need to add three components:
- Static Mesh: it allows you to select a mesh that is a player’s model.
- Spring Arm: This component is used as a camera tripod. One end will be attached to the mesh, and a camera will be attached to the other.
- Camera: Unreal shows the player everything that the camera sees.
First, we need to add headers for each type of component. Open BasePlayer.h and add the following lines above
#include "BasePlayer.generated.h" : #include "Components/StaticMeshComponent.h" #include "GameFramework/SpringArmComponent.h" #include "Camera/CameraComponent.h" Note: It is important to add the last .generated.h file. In our case, include directives should look like this:#include "CoreMinimal.h" #include "GameFramework/Pawn.h" #include "Components/StaticMeshComponent.h" #include "GameFramework/SpringArmComponent.h" #include "Camera/CameraComponent.h" #include "BasePlayer.generated.h"
If it is not the last one to include, then we will get an error when compiling.
Now we need to declare variables for each component. Add the following lines after
SetupPlayerInputComponent() : UStaticMeshComponent* Mesh; USpringArmComponent* SpringArm; UCameraComponent* Camera; The name used here will be the name of the component in the editor. In our case, the components will be displayed as Mesh , SpringArm and Camera .
Next, we need to make each variable visible to the reflection system. To do this, add
UPROPERTY() over each variable. Now the code should look like this: UPROPERTY() UStaticMeshComponent* Mesh; UPROPERTY() USpringArmComponent* SpringArm; UPROPERTY() UCameraComponent* Camera; You can also add
UPROPERTY() to UPROPERTY() ) . They will control the behavior of the variable in various aspects of the engine.Add
VisibleAnywhere and BlueprintReadOnly inside the brackets of each UPROPERTY() . Separate each descriptor with a comma. UPROPERTY(VisibleAnywhere, BlueprintReadOnly) VisibleAnywhere will allow each component to be visible in the editor (including Blueprints).BlueprintReadOnly allows you to get a reference to a component using Blueprint nodes. However, it will not allow us to set the component. For components, it is important to be read-only, because their variables are pointers. We do not want users to ask them, otherwise they may indicate a random place in memory. It is worth noting that BlueprintReadOnly still allows you to set variables inside the component, and it is for this behavior that we seek.Note: For variables that are not pointers (int, float, boolean, etc.), useEditAnywhereandBlueprintReadWrite.
Now that we have variables for each component, we need to initialize them. For this you need to create them inside the constructor .
Component initialization
You can use
CreateDefaultSubobject<Type>("InternalName") to create components. Open BasePlayer.cpp and add the following lines to ABasePlayer() : Mesh = CreateDefaultSubobject<UStaticMeshComponent>("Mesh"); SpringArm = CreateDefaultSubobject<USpringArmComponent>("SpringArm"); Camera = CreateDefaultSubobject<UCameraComponent>("Camera"); This will create a component of each type, and then assign them an address in the memory of the passed variable. The string argument is the internal name of the component used by the engine ( and not the display name, despite the fact that in our case they are the same).
Then we need to set up a hierarchy (select the root component, and so on). Add after the previous code the following:
RootComponent = Mesh; SpringArm->SetupAttachment(Mesh); Camera->SetupAttachment(SpringArm); The first line makes
Mesh root component. The second line will attach SpringArm to Mesh . Finally, the third line will attach the Camera to the SpringArm .After completing the component code, we need to compile. Choose one of the following compilation methods:
- In Visual Studio, select Build \ Build Solution.
- In the Unreal Engine, click on Compile in the Toolbar
Then we need to specify which mesh to use and the rotation of the spring lever. It is recommended to do this in Blueprints, because it is undesirable to specify the paths to resources in C ++. For example, in C ++, to set a static mesh, you need to do something like this:
static ConstructorHelpers::FObjectFinder<UStaticMesh> MeshToUse(TEXT("StaticMesh'/Game/MyMesh.MyMesh"); MeshComponent->SetStaticMesh(MeshToUse.Object); However, in Blueprints, simply select a mesh from the drop-down list.
If you move a resource to another folder, Blueprints will not spoil anything. However, in C ++ you will have to change every link to this resource.
To set the rotation of the mesh and spring arm in Blueprints, you will need to create a Blueprint based on the BasePlayer .
Note: It is usually practiced to create base classes in C ++ and then create a subclass of Blueprint. It simplifies changing classes for artists and designers.
Highlighting subclasses of C ++ classes
In the Unreal Engine, go to the Blueprints folder and create the Blueprint Class . Expand the All Classes section and locate the BasePlayer . Select BasePlayer , and then click on Select .

Rename it to BP_Player , and then open it.
First we set the mesh. Select the Mesh component and set its Static Mesh to SM_Sphere .

Then we need to set the rotation and length of the spring arm. Our game will be with a top view, so the camera must be above the player.
Select the SpringArm component and set the Rotation value to (0, -50, 0) . This will rotate the spring lever so that the camera will look at the mesh from top to bottom.

Since the spring arm is a child of the mesh, it begins to rotate when the ball begins to rotate.
Gif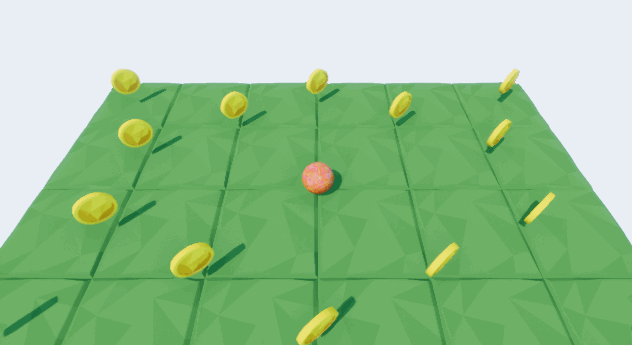
To fix this, we need to make the turn of the lever absolute . Click on the arrow next to Rotation and select World .
Gif
Then set the Target Arm Length to 1000 . So we move the camera away by 1000 units from the mesh.

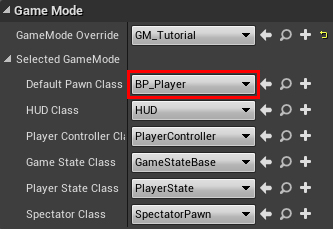
Then you need to set the Default Pawn Class to use our Pawn. Click on Compile and return to the editor. Open World Settings and set the Default Pawn value to BP_Player .
Click on Play to see the pawn in the game.
The next step is to add features to the player so that he can move.
Implementation of the movement
Instead of adding displacement for motion, we will move with the help of physics! First we need a variable indicating the magnitude of the force applied to the ball.
Return to Visual Studio and open BasePlayer.h . Add the following after the variable components:
UPROPERTY(EditAnywhere, BlueprintReadWrite) float MovementForce; EditAnywhere allows EditAnywhere to change the MovementForce in the Details panel. BlueprintReadWrite will allow you to set and read the MovementForce using Blueprint nodes.Next we need to create two functions. One for moving up and down, the other for moving left and right.
Creating motion functions
Add the following function declarations under
MovementForce : void MoveUp(float Value); void MoveRight(float Value); We will later bind the axle mapping to these functions. Due to this, axis bindings will be able to transfer their scale (therefore, the function needs the
float Value parameter).Note: If you are unfamiliar with axis and scale bindings, check out the Blueprints tutorial.
Now we need to create an implementation for each function. Open BasePlayer.cpp and add the following to the end of the file:
void ABasePlayer::MoveUp(float Value) { FVector ForceToAdd = FVector(1, 0, 0) * MovementForce * Value; Mesh->AddForce(ForceToAdd); } void ABasePlayer::MoveRight(float Value) { FVector ForceToAdd = FVector(0, 1, 0) * MovementForce * Value; Mesh->AddForce(ForceToAdd); } MoveUp() adds physical strength for Mesh along the x axis . The magnitude of the force is given by the MovementForce . By multiplying the result by Value (axis binding scale), the mesh can move in positive or negative directions.MoveRight() does the same thing as MoveUp() , but along the Y axis .Having completed the creation of motion functions, we must associate axes with them.
Linking axis bindings to functions
For the sake of simplicity, I have already created the axis bindings. They are in the Project Settings , in the Input section.

Note: Axis bindings are not required to have the same name as the functions with which we associate them.
Add the following code inside
SetupPlayerInputComponent() : InputComponent->BindAxis("MoveUp", this, &ABasePlayer::MoveUp); InputComponent->BindAxis("MoveRight", this, &ABasePlayer::MoveRight); So we will bind the bindings of the MoveUp and MoveRight axes to
MoveUp() and MoveRight() .At this point we are done with the functions of the movement. Now we need to enable physics for the Mesh component.
Turning on physics
Add the following lines to
ABasePlayer() : Mesh->SetSimulatePhysics(true); MovementForce = 100000; The first line will allow
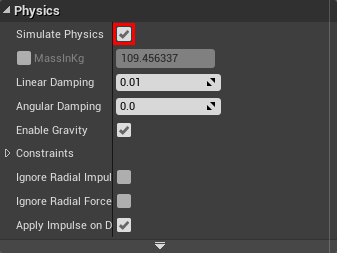
Mesh to influence physical forces. The second line sets the MovementForce value to 100,000 . This means that as the ball moves, 100,000 strength will be added. By default, physical objects weigh about 110 kilograms, so moving them takes a lot of power!If we create a subclass, some properties will not change, even if we change them in the base class. In our case, BP_Player will not enable Simulate Physics . However, now in all created subclasses it will be enabled by default.
Compile and return to the Unreal Engine. Open BP_Player and select the Mesh component. Then turn on Simulate Physics .
Click Compile , and then on Play . Press W , A , S and D to move the ball.
Gif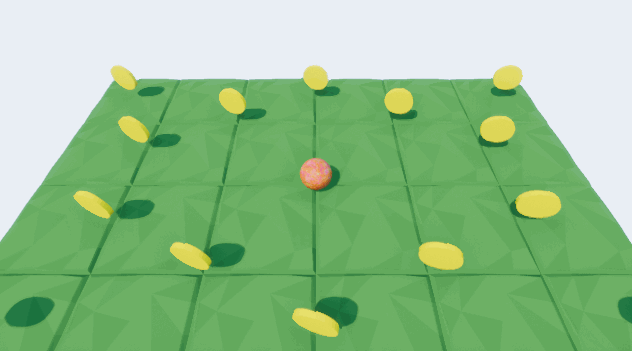
Next, we declare a C ++ function that can be implemented using Blueprints. This will allow designers to create functionality without using C ++. To learn this, we will create a jump function.
Creating a jump function
First we need to bind the jump to the function binding. In this tutorial we will assign a jump to the space bar .

Return to Visual Studio and open BasePlayer.h . Add the following lines under
MoveRight() : UPROPERTY(EditAnywhere, BlueprintReadWrite) float JumpImpulse; UFUNCTION(BlueprintImplementableEvent) void Jump(); The first is the float variable named
JumpImpulse . We can use it in the implementation of the jump. It uses EditAnywhere so that it can be edited in the editor. It also uses BlueprintReadWrite so that we can read and write it using Blueprint nodes.Next comes the jump function.
UFUNCTION() makes Jump() visible to the reflection system. BlueprintImplementableEvent allows Blueprints to implement Jump() . If the implementation is absent, then Jump() calls will lead to nothing.Note: If you want to create a default implementation in C ++, use BlueprintNativeEvent . Below we describe how to do this.Since Jump is an action binding, the binding method is slightly different. Close BasePlayer.h and open BasePlayer.cpp . Add the
SetupPlayerInputComponent() to SetupPlayerInputComponent() : InputComponent->BindAction("Jump", IE_Pressed, this, &ABasePlayer::Jump); So we will associate the Jump binding with
Jump() . It will be executed only when you press the jump key. If you want to execute it when you release the key, then use IE_Released .Next we will redefine
Jump() in Blueprints.Redefinition of functions in Blueprints
Compile and close BasePlayer.cpp . Then go back to the Unreal Engine and open the BP_Player . Go to the My Blueprints panel and hover your mouse over the Functions so that the Override drop-down list appears. Click on it and select Jump . So we will create an event jump .
Gif
Note: Overriding will be an event if there is no return type. If the return type exists, it will be a function.
Next we will create the following schema:

So we will add a Mesh impulse ( JumpImpulse ) along the Z axis . Note that in this implementation the player can jump endlessly.
Next we need to set the JumpImpulse value. Click on Class Defaults in the Toolbar, and then go to the Details panel. Set the JumpImpulse value to 100000 .

Click on Compile , and then close BP_Player . Click on Play and try to jump with the spacebar .
Gif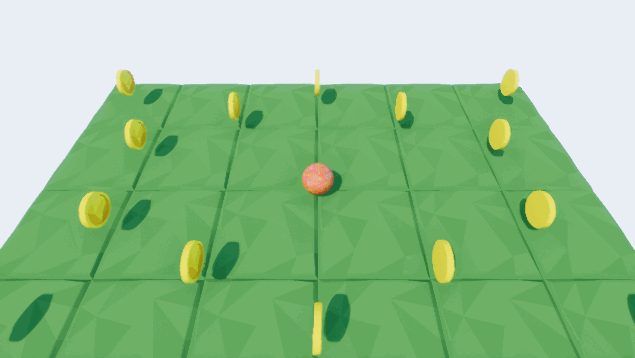
In the next section, we will make the coins disappear on contact with the player.
Collecting coins
To handle collisions, we need to associate a function with an overlay event. To do this, the function must meet two requirements. The first is that the function must have the
UFUNCTION() macro. The second requirement is that the function must have the correct signature. In this tutorial, we will use the OnActorBeginOverlap event. This event requires the function to have the following signature: FunctionName(AActor* OverlappedActor, AActor* OtherActor) Return to Visual Studio and open BaseCoin.h . Add the following lines under
PlayCustomDeath() : UFUNCTION() void OnOverlap(AActor* OverlappedActor, AActor* OtherActor); After binding,
OnOverlap() will be executed when a different actor is overlaid. OverlappedActor will be a coin, and OtherActor be another actor.Next, we need to implement
OnOverlap() .Implementation of overlays
Open BaseCoin.cpp and add the following to the end of the file:
void ABaseCoin::OnOverlap(AActor* OverlappedActor, AActor* OtherActor) { } Since we want to recognize only player overlays, we need to bring
OtherActor to ABasePlayer . Before performing the cast, we need to add a header for the ABasePlayer . Add the following to #include "BaseCoin.h" : #include "BasePlayer.h" Now we need to perform a cast. In the Unreal Engine, the cast can be done as follows:
Cast<TypeToCastTo>(ObjectToCast); If the cast is successful, it will return a pointer to
ObjectToCast . If unsuccessful, it will return nullptr . By checking the result on nullptr , we can determine if the object had the desired type.Add the
OnOverlap() to OnOverlap() : if (Cast<ABasePlayer>(OtherActor) != nullptr) { Destroy(); } Now that
OnOverlap() is executed, it will check if OtherActor type ABasePlayer . If so, then it will destroy the coin.Next we need to bind
OnOverlap() .Binding overlay function
To associate a function with an overlay event, we need to use the
AddDynamic() event. Add the ABaseCoin() to ABaseCoin() : OnActorBeginOverlap.AddDynamic(this, &ABaseCoin::OnOverlap); So we associate
OnOverlap() with the OnActorBeginOverlap event. This event always happens when the actor is superimposed on another actor.Compile and return to the Unreal Engine. Click Play and start collecting coins. Upon contact with the coin, it will be destroyed, which leads to its disappearance.
Gif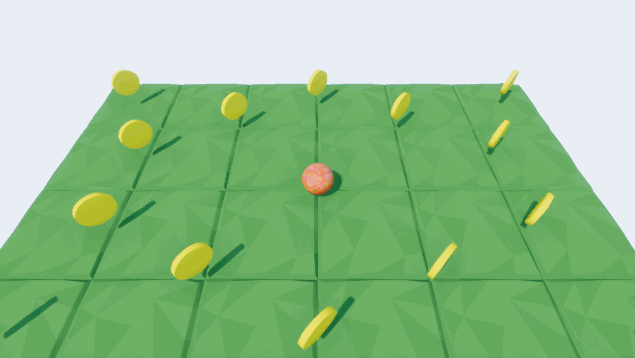
Note: If the coins do not disappear, try restarting the editor to complete full recompilation. Some changes require a restart to work.
In the next section, we will create another overridden C ++ function. However, this time we will also create a default implementation. To demonstrate this, we will use
OnOverlap() .Create default function implementation
To create a function with a default implementation, you need to use the
BlueprintNativeEvent handle. Return to Visual Studio and open BaseCoin.h . Add for OnOverlap()in
UFUNCTION() BlueprintNativeEvent : UFUNCTION(BlueprintNativeEvent) void OnOverlap(AActor* OverlappedActor, AActor* OtherActor); To make the function the default implementation, we need to add the
_Implementation suffix. Open BaseCoin.cpp and replace OnOverlap with OnOverlap_Implementation : void ABaseCoin::OnOverlap_Implementation(AActor* OverlappedActor, AActor* OtherActor) Now if the child Blueprint does not implement
OnOverlap() , then this implementation will be used.The next step is to implement
OnOverlap() in BP_Coin .Creating an implementation in Blueprint
To implement in Blueprint, we will call
PlayCustomDeath() . This C ++ feature will increase the rotational speed of the coin. After 0.5 seconds, the coin will destroy itself.To call the C ++ function from Blueprints, we need to use the
BlueprintCallable handle. Close BaseCoin.cpp and open BaseCoin.h . Add the PlayCustomDeath() : UFUNCTION(BlueprintCallable) Compile and exit Visual Studio. Return to the Unreal Engine and open BP_Coin . Override On Overlap and create the following schema:
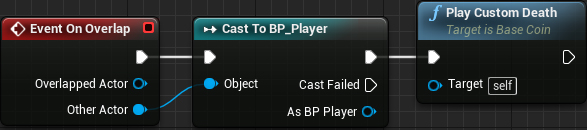
Now when a player overlays a coin, Play Custom Death will be performed.
Click on Compile and close BP_Coin . Click Play and collect some coins to test the new implementation.
Gif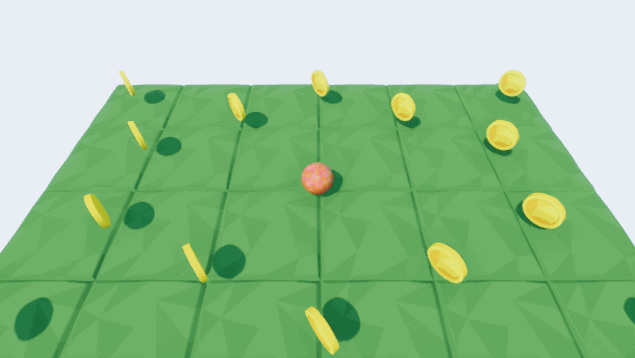
Where to go next?
You can download the finished project from here .
As you can see, working with C ++ in the Unreal Engine is quite simple. Although we have already achieved something in C ++, you still need to learn a lot! I recommend exploring Epic's tutorial series on creating a top-down shooter using C ++.
If you're new to the Unreal Engine, then learn our ten-part beginner tutorial series . In this series, you will learn about various systems such as Blueprints, materials, and particle systems.
Source: https://habr.com/ru/post/348600/
All Articles