The most correct implementation of splash screen
In general, this is a translation of my article from medium.com, the original is here , subscribe, put likes, as they say.
In general, I have already seen quite a few articles on how to properly splash splash on Android, but they all have the same problem - they’re developed that native applications may not even have a single entry point - I ran into this back in 2009 when I first started my way as a developer. Imagine that you are developing some client for some social sphere and besides
To begin with, we will create a basic apa theme with a custom `android: windowBackground`, which will contain a picture for our splash. The basic theme should be applied to all entry points at least, but I usually do all the activations of the app with it:
And I added the
')
The demo project will have 3 activites: the main screen, authorization and the screen through which you can rummage around. All of them, with the exception of authorization, will inherit from
We simply start the authorization, wait for the result and re-create ourselves if the authorization is successful. In general, I don’t really like to
I usually use
In addition to any beautiful animation, the activit checks the user's input, shows errors and actually saves the login and password. But, if the user clicks “Cancel” or the “Back” button, the activation finishes with the Activity.RESULT_CANCELLED result code, the
As you can see, nothing special in
And what happened now in general?
We announced that all our activations will be rendered with a theme that looks like a splash screen and all of them will be inherited from
Thus, if a user logs on Google Play, installs our application and immediately decides to share any content through this app, it will get to the login screen, but after it he will not lose the content that he wants to share. I know by myself, I install the applications, but I don’t immediately enter them, so such a pattern of user behavior is quite possible.
Here the link to the project with an example from this article.
In general, I have already seen quite a few articles on how to properly splash splash on Android, but they all have the same problem - they’re developed that native applications may not even have a single entry point - I ran into this back in 2009 when I first started my way as a developer. Imagine that you are developing some client for some social sphere and besides
android.intent.action.MAIN there may be a dozen other activities in your manifesto through which you can run app-sharing of pictures, text, notification. And in a good way everywhere you need splash!Theme
To begin with, we will create a basic apa theme with a custom `android: windowBackground`, which will contain a picture for our splash. The basic theme should be applied to all entry points at least, but I usually do all the activations of the app with it:
<resources> <style name="AppTheme" parent="Theme.AppCompat.Light.NoActionBar"> <item name="colorPrimary">@color/colorPrimary</item> <item name="colorPrimaryDark">@color/colorPrimaryDark</item> <item name="colorAccent">@color/colorAccent</item> </style> <style name="AppTheme.SplashScreen" parent="AppTheme"> <item name="android:windowBackground">@drawable/splash</item> <item name="android:windowTranslucentStatus">true</item> <item name="android:windowTranslucentNavigation">true</item> </style> ... </resources> And I added the
android:windowTranslucentStatus and android:windowTranslucentNavigation to make the splash look even cooler! The android:windowBackground contains a android:windowBackground image that will also be the background on the authorization screen, I pulled it off from unsplash.com so I’ll mention the author kazuend .')
Activit
The demo project will have 3 activites: the main screen, authorization and the screen through which you can rummage around. All of them, with the exception of authorization, will inherit from
SplashedActivity to check the status of authorization. private const val ACTIVITY_AUTH = 1000 abstract class SplashedActivity : AppCompatActivity() { override fun onCreate(savedInstanceState: Bundle?) { if (!isAuthenticated()) { startActivityForResult(Intent(this, AuthActivity::class.java), ACTIVITY_AUTH) } setTheme(R.style.AppTheme_Base) super.onCreate(savedInstanceState) } private fun isAuthenticated(): Boolean { return getUser() != null } private fun onAuthenticatedCallback(resultCode: Int, data: Intent?) { when (resultCode) { Activity.RESULT_CANCELED -> finish() Activity.RESULT_OK -> recreate() } } override fun onActivityResult(requestCode: Int, resultCode: Int, data: Intent?) { when (requestCode) { ACTIVITY_AUTH -> onAuthenticatedCallback(resultCode, data) } super.onActivityResult(requestCode, resultCode, data) } } We simply start the authorization, wait for the result and re-create ourselves if the authorization is successful. In general, I don’t really like to
recreate() , however, many developers initialize the UI in onCreate() and after recreate() it will be called again without losing the Intent which the Activity was launched.Authorization
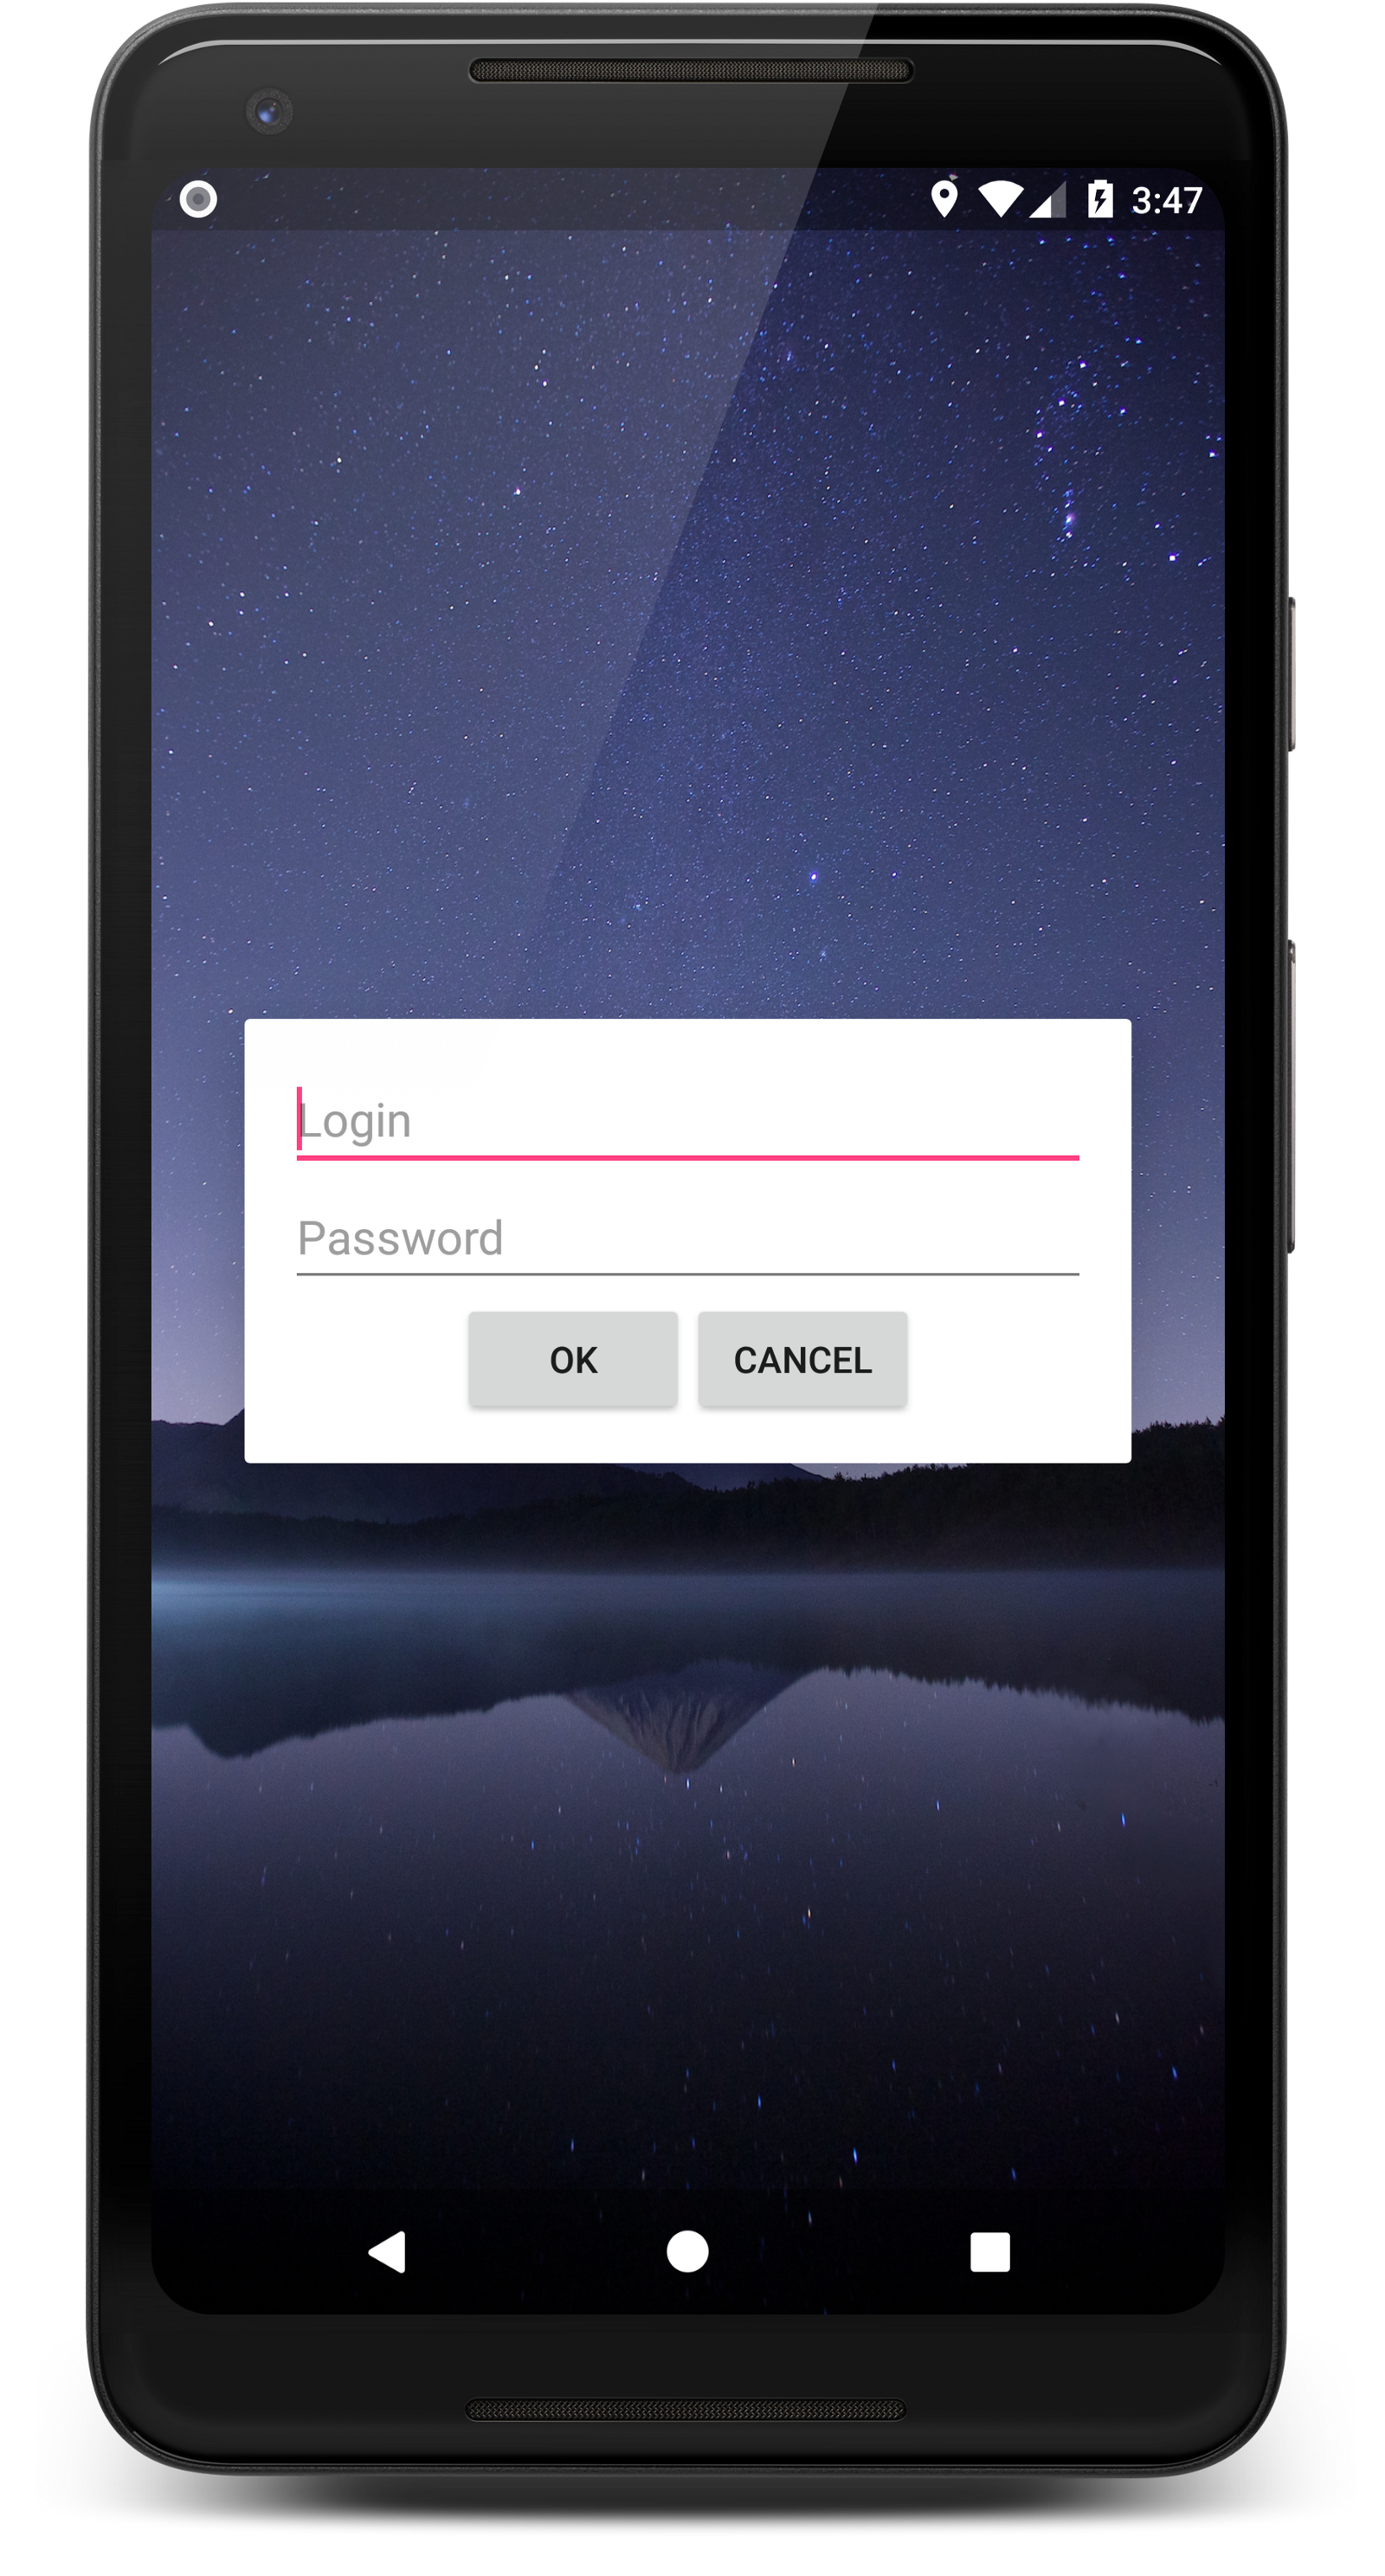
I usually use
AccountManager , but too many boilerplates need to be used, so everything will be stored in SharedPreferences . class AuthActivity : AppCompatActivity() { private val authCardView by lazy { findViewById<CardView>(R.id.authCardView) } private val okButton by lazy { findViewById<Button>(R.id.okButton) } private val cancelButton by lazy { findViewById<Button>(R.id.cancelButton) } private val loginEditText by lazy { findViewById<EditText>(R.id.loginEditText) } private val passwordEditText by lazy { findViewById<EditText>(R.id.passwordEditText) } override fun onCreate(savedInstanceState: Bundle?) { super.onCreate(savedInstanceState) setContentView(R.layout.activity_auth) authCardView.animate() .setDuration(500L) .setInterpolator(AccelerateDecelerateInterpolator()) .alpha(1F) .setListener(object : Animator.AnimatorListener { override fun onAnimationRepeat(p0: Animator?) { } override fun onAnimationCancel(p0: Animator?) { } override fun onAnimationStart(p0: Animator?) { authCardView.alpha = 0F authCardView.visibility = View.VISIBLE } override fun onAnimationEnd(p0: Animator?) { authCardView.visibility = View.VISIBLE } }) okButton.setOnClickListener { performInputChecksAndSaveUser { login, password -> saveUser(User(login, password)) setResult(Activity.RESULT_OK) finish() } } cancelButton.setOnClickListener { finish() } } private fun performInputChecksAndSaveUser(successCallback: (String, String) -> Unit) { if (loginEditText.text.isBlank()) { loginEditText.error = getText(R.string.errorEmptyLogin) } if (passwordEditText.text.isBlank()) { passwordEditText.error = getText(R.string.errorEmptyPassword) } if (loginEditText.text.isNotBlank() && passwordEditText.text.isNotBlank()) { successCallback.invoke(loginEditText.text.toString(), passwordEditText.text.toString()) } } } In addition to any beautiful animation, the activit checks the user's input, shows errors and actually saves the login and password. But, if the user clicks “Cancel” or the “Back” button, the activation finishes with the Activity.RESULT_CANCELLED result code, the
ActivityManager will return up the stack and will also complete the activation that caused the authorization. The idea of this is that it becomes unimportant who caused the authorization - as soon as any activation code that needs authorization is launched, it will check if user data is available and, if not, simply see it there after the successful result of the authorization process.Sharing
<?xml version="1.0" encoding="utf-8"?> <manifest xmlns:android="http://schemas.android.com/apk/res/android" package="org.nixan.splashscreenexample"> ... <activity android:name=".ShareActivity"> <intent-filter> <action android:name="android.intent.action.SEND" /> <category android:name="android.intent.category.DEFAULT" /> <data android:mimeType="text/plain" /> </intent-filter> </activity> ... </manifest> class ShareActivity : SplashedActivity() { private val helloText by lazy { findViewById<TextView>(R.id.helloText) } override fun onCreate(savedInstanceState: Bundle?) { super.onCreate(savedInstanceState) setContentView(R.layout.activity_main) getUser()?.let { helloText.text = "${it.login}\n${intent.getStringExtra(Intent.EXTRA_TEXT)}" } } } As you can see, nothing special in
AndroidManifest.xml , nor in the activation class is just the usual Intent processing. Merit in recreate() - because of it, we just write all the activations as always.Conclusion
And what happened now in general?
ActivityManager usually takes some time from the moment the user clicks on the app icon, until the target Activity calls the onCreate() . In order to disguise such a time lag, the system takes the android:theme from the activation and renders it without any content, and only then control is transferred to the written class and the application starts working.We announced that all our activations will be rendered with a theme that looks like a splash screen and all of them will be inherited from
SplashedActivity to perform authorization checks and run any additional initialization screens - in our case, this is only AuthActivity , in which the user is authorized. Another SplashedActivity will process the result of this authorization and decide to continue to show the app content to the user or close.Thus, if a user logs on Google Play, installs our application and immediately decides to share any content through this app, it will get to the login screen, but after it he will not lose the content that he wants to share. I know by myself, I install the applications, but I don’t immediately enter them, so such a pattern of user behavior is quite possible.
Here the link to the project with an example from this article.
Source: https://habr.com/ru/post/348136/
All Articles