Partial wow effects: magic with simple words
There is a category of sites that we usually call “wow sites.” They are not intended for direct consumption of content, but rather impress the visitor. These sites are usually unique in their design, contain experimental solutions for interacting with the user, break stereotypes and are full of different animations. Of particular interest are the various tricks with SVG and animations based on a large number of particles, which will be discussed in this article.
In general, the idea of recreating various objects in the form of a set of particles has existed for a long time. But due to the fact that the practical application of this idea is very limited, and each specific implementation is tied to specific content, there is no single structured knowledge base in which one could quickly become familiar with all the techniques. As a result, many developers do not understand that at the heart of everything are very simple ideas. They can be implemented by anyone who is more or less familiar with JS.
We will try to make out the basic approach to creating animations from particles in 2d and see a couple of practical examples, without delving into the low-level optimizations and features of specific libraries for working with canvas. All further reasoning will be based on the assumption that the reader is familiar with the basics of working with canvas. If not, it is better to stop at this moment and get acquainted. Code examples will be slightly simplified to convey ideas, rather than specific recipes for copy-paste, so it will be helpful to be in context.
')
A small digression: there will be people who say that all this eats up processor resources, a new MacBook lags, and in general, in general, you can’t do this on the site. On the one hand, this remark is true. Modern JS in the browser is not a good basis for complex calculations, especially when it comes to the average website. But we're not talking about regular sites, are we?
In most cases, particles cannot be very small. This is a performance issue. On an average laptop, we will not be able to count the entire screen by one pixel and have at the same time at least 30fps, not to mention 60. It is necessary to reduce the number of particles. In practice, animations usually use either small particles of 2-3px, if you are working with a small image, or large ones, tens of pixels in size, and intended to fill a large area of the screen.
On the other hand, the particles cannot be too large. This is a matter of adaptability. It makes sense to remember that on the phone the screen is smaller and larger particles will simply create an unreadable mess. A good choice would be to bind the size of the particles to the size of the canvas with which we work.

We need a foundation. No complicated animation will be done in a reasonable time without a base. There are two options. Either we base image or text. The text may be a title, a clock, an error number, or just some word on the fence.
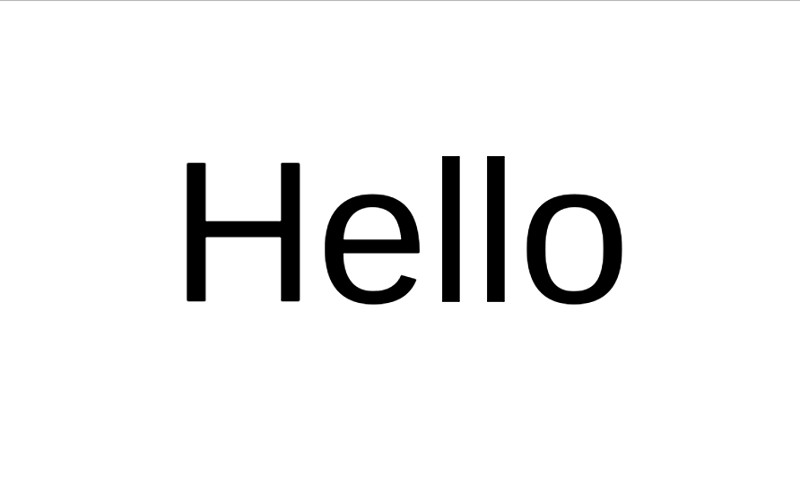
Basis, whatever it is, must be transferred to the canvas. The text is simple: once you write it with the standard fillText, we get a black and white scheme for positioning the particles. This is exactly what we need.
It is worth noting that pre-filling the background with white will not be unnecessary. Yes, in modern browsers the background will be formally white, but not in Safari. If someone did not hear, then this is our new donkey, which in its own way works with transparencies, both in CSS gradients and on canvas. Because of this, it may appear completely different colors that we expect. And breakdowns occur in different faiths of the browser in different ways.
Having received the color scheme of the location of the particles, we can easily create a set of these particles, each of which will have its own coordinates. In the future, we will add additional parameters to them. Here and below, height and width are the dimensions of the canvas, particles are an array of particles, step is the initial distance between particles.
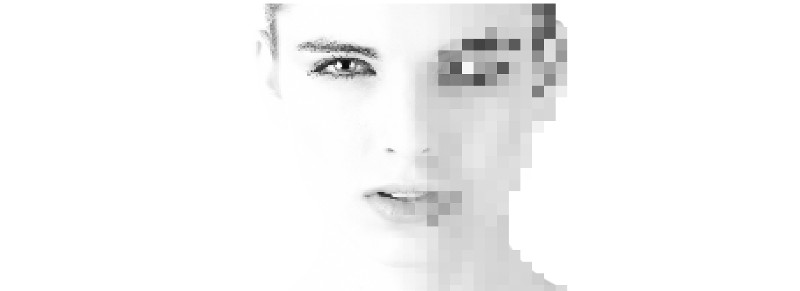
We just go around the entire canvas by pixels with a certain step, which determines the distance between the particles, and save the particles that fall on the letters. Since the scheme consists of two colors, it does not matter with which one to compare. But when using a picture as a basis, it can be convenient to compare it with the background, especially if it is a product or stock person on a white background. In some cases, such sampling is not performed at all and the particle is stored at each step of the cycle.
No one bothers to make the particles more complex, for example, you can add a color to them that will match the color of the pixel from the original image or calculate the average color from the neighboring pixels, although this is likely to be redundant.
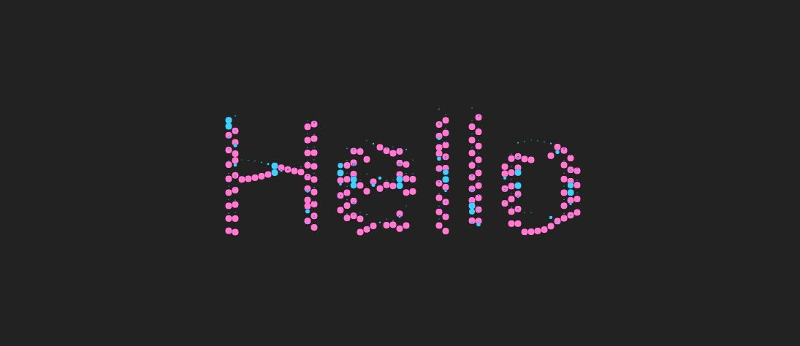
Now we can clear the canvas and fill it with particles, for example, by drawing squares at their locations:
This will not give a particularly interesting effect, just our picture or text is slightly pixelated. Or turn into a set of any other geometric shapes, if we draw not squares. But when you add motion, you get interesting results:
In general, the particles have the following basic parameters:
In most cases, we will have a time counter, which we will use to determine particle parameters. In other words, everything that will change, we try to tie to time. This has an interesting feature - we can increase or decrease the counter, thereby changing the course of time and returning the animation to the roots.
One of the most simple but loved by many animations is the random movement of particles around their original coordinates. It works well with lyrics. The more random the movement, the sharper, more jerky the result will be. If the motion is tied to something more or less uniform, for example, to a small circle (recalling sine and cosine), the effect will be smoother, flowing, especially if the particle size is slightly changed.
This example shows what happens if you keep a large particle size on a small screen (compare with the previous example). This is the question of adaptability.
The main thing here is to add variety so that the particles change their parameters not quite synchronously. This can be done in different ways, but usually for each particle is made some kind of factor to change its parameters, depending on the sequence number in the array of particles. It is often enough to multiply the argument of the same sine by the ordinal number of the particle. This approach allows you to achieve an acceptable level of accidents without much mental effort. From the point of view of the mathematician-cryptographer, this will not look like a random sequence, but for animation it is quite enough - the viewer will have time to be impressed and go further before significant synchronization occurs in the movement of particles.
Good advice about color for beginners: if you need to smoothly change the color of the particles over time - forget about RGB and switch to HSL. This will allow not to bother and smoothly change only one of the parameters for changing the tone. With saturation the same. And even with care in black or white, you will not need to think about the fact that the color scheme floats a little like on an old TV.

Another spectacular thing is to create some semblance of a waterfall, or rather, a landslide. Particles begin to move in one direction with random acceleration, increasing in height. They leave a trace behind them. Similar techniques work well with pictures.
To put a picture on canvas, we use the standard drawImage method. If necessary, you can arrange images using behavior similar to the object-fit property: cover or contain. The network has ready-made solutions for this case.
But back to the effect itself. It is easy to make from the previous example. We need to add new parameters to the particles - size and speed.
If you have ever written a random number generator, you probably already thought that the combination of two prime numbers (5 and 7) resembles something very familiar, only very small numbers. One could recall the theory, but in practice, when creating such effects, the numerical coefficients are usually selected by trial and error — it is difficult to say in advance what the visual effect will be as a result. And it is he who is important.
Similar animations can be used to effectively replace one picture with another, when one flows in one direction and the other flows from the opposite side. In order to make such a change of pictures, you need to calculate in advance the position of the particles for the second picture and start the time counter for it in the opposite direction. The most convenient way to do this is by expressing all the parameters of the particles through the time counter in an explicit form.
We have considered the simplest methods of applying particles in animations. This is just the tip of the iceberg. The best way to learn to do these things is to start doing them. On CodePen regularly appear interesting demos, which will be useful to get acquainted. Novice developers want to give advice: pay more attention to the ideas embodied in the examples that you are studying, rather than specific implementations, and do not be afraid to experiment.
In general, the idea of recreating various objects in the form of a set of particles has existed for a long time. But due to the fact that the practical application of this idea is very limited, and each specific implementation is tied to specific content, there is no single structured knowledge base in which one could quickly become familiar with all the techniques. As a result, many developers do not understand that at the heart of everything are very simple ideas. They can be implemented by anyone who is more or less familiar with JS.
We will try to make out the basic approach to creating animations from particles in 2d and see a couple of practical examples, without delving into the low-level optimizations and features of specific libraries for working with canvas. All further reasoning will be based on the assumption that the reader is familiar with the basics of working with canvas. If not, it is better to stop at this moment and get acquainted. Code examples will be slightly simplified to convey ideas, rather than specific recipes for copy-paste, so it will be helpful to be in context.
')
A small digression: there will be people who say that all this eats up processor resources, a new MacBook lags, and in general, in general, you can’t do this on the site. On the one hand, this remark is true. Modern JS in the browser is not a good basis for complex calculations, especially when it comes to the average website. But we're not talking about regular sites, are we?
Thought number one. Size matters
In most cases, particles cannot be very small. This is a performance issue. On an average laptop, we will not be able to count the entire screen by one pixel and have at the same time at least 30fps, not to mention 60. It is necessary to reduce the number of particles. In practice, animations usually use either small particles of 2-3px, if you are working with a small image, or large ones, tens of pixels in size, and intended to fill a large area of the screen.
On the other hand, the particles cannot be too large. This is a matter of adaptability. It makes sense to remember that on the phone the screen is smaller and larger particles will simply create an unreadable mess. A good choice would be to bind the size of the particles to the size of the canvas with which we work.
Thought number two. Need a ready-made arrangement of particles.
We need a foundation. No complicated animation will be done in a reasonable time without a base. There are two options. Either we base image or text. The text may be a title, a clock, an error number, or just some word on the fence.
Basis, whatever it is, must be transferred to the canvas. The text is simple: once you write it with the standard fillText, we get a black and white scheme for positioning the particles. This is exactly what we need.
ctx.fillStyle = '#fff'; ctx.fillRect(0, 0, width, height); ctx.fillStyle = '#000'; ctx.font = `${fontSize}px Arial`; ctx.textAlign = 'center'; ctx.fillText('Hello', width/2, height/2 + fontSize/4); It is worth noting that pre-filling the background with white will not be unnecessary. Yes, in modern browsers the background will be formally white, but not in Safari. If someone did not hear, then this is our new donkey, which in its own way works with transparencies, both in CSS gradients and on canvas. Because of this, it may appear completely different colors that we expect. And breakdowns occur in different faiths of the browser in different ways.
Having received the color scheme of the location of the particles, we can easily create a set of these particles, each of which will have its own coordinates. In the future, we will add additional parameters to them. Here and below, height and width are the dimensions of the canvas, particles are an array of particles, step is the initial distance between particles.
const data = ctx.getImageData(0, 0, width, height).data; const data32 = new Uint32Array(data.buffer); for (let x = 0; x < width; x += step) { for (let y = 0; y < height; y += step) { const color = data32[y * width + x]; if (color != 0xFFFFFFFF) { particles.push({ x, y }); } } } We just go around the entire canvas by pixels with a certain step, which determines the distance between the particles, and save the particles that fall on the letters. Since the scheme consists of two colors, it does not matter with which one to compare. But when using a picture as a basis, it can be convenient to compare it with the background, especially if it is a product or stock person on a white background. In some cases, such sampling is not performed at all and the particle is stored at each step of the cycle.
No one bothers to make the particles more complex, for example, you can add a color to them that will match the color of the pixel from the original image or calculate the average color from the neighboring pixels, although this is likely to be redundant.
Now we can clear the canvas and fill it with particles, for example, by drawing squares at their locations:
particles.forEach((particle) => { ctx.fillStyle = particle.color; ctx.fillRect( particle.x, particle.y, step, step ); }); This will not give a particularly interesting effect, just our picture or text is slightly pixelated. Or turn into a set of any other geometric shapes, if we draw not squares. But when you add motion, you get interesting results:
OK. And what movement to add?
In general, the particles have the following basic parameters:
- Coordinates
- The size
- The form
- Colour
In most cases, we will have a time counter, which we will use to determine particle parameters. In other words, everything that will change, we try to tie to time. This has an interesting feature - we can increase or decrease the counter, thereby changing the course of time and returning the animation to the roots.
One of the most simple but loved by many animations is the random movement of particles around their original coordinates. It works well with lyrics. The more random the movement, the sharper, more jerky the result will be. If the motion is tied to something more or less uniform, for example, to a small circle (recalling sine and cosine), the effect will be smoother, flowing, especially if the particle size is slightly changed.
This example shows what happens if you keep a large particle size on a small screen (compare with the previous example). This is the question of adaptability.
The main thing here is to add variety so that the particles change their parameters not quite synchronously. This can be done in different ways, but usually for each particle is made some kind of factor to change its parameters, depending on the sequence number in the array of particles. It is often enough to multiply the argument of the same sine by the ordinal number of the particle. This approach allows you to achieve an acceptable level of accidents without much mental effort. From the point of view of the mathematician-cryptographer, this will not look like a random sequence, but for animation it is quite enough - the viewer will have time to be impressed and go further before significant synchronization occurs in the movement of particles.
Good advice about color for beginners: if you need to smoothly change the color of the particles over time - forget about RGB and switch to HSL. This will allow not to bother and smoothly change only one of the parameters for changing the tone. With saturation the same. And even with care in black or white, you will not need to think about the fact that the color scheme floats a little like on an old TV.
The sands of Time…
Another spectacular thing is to create some semblance of a waterfall, or rather, a landslide. Particles begin to move in one direction with random acceleration, increasing in height. They leave a trace behind them. Similar techniques work well with pictures.
To put a picture on canvas, we use the standard drawImage method. If necessary, you can arrange images using behavior similar to the object-fit property: cover or contain. The network has ready-made solutions for this case.
But back to the effect itself. It is easy to make from the previous example. We need to add new parameters to the particles - size and speed.
particles.forEach((particle) => { ctx.fillStyle = particle.color; ctx.fillRect( particle.x, particle.y, particle.width, particle.height ); particle.speed += timeCounter * Math.abs(Math.sin(5 * particle.x + 7)); particle.y += particle.speed; particle.height += particle.speed; }); timeCounter++; If you have ever written a random number generator, you probably already thought that the combination of two prime numbers (5 and 7) resembles something very familiar, only very small numbers. One could recall the theory, but in practice, when creating such effects, the numerical coefficients are usually selected by trial and error — it is difficult to say in advance what the visual effect will be as a result. And it is he who is important.
Similar animations can be used to effectively replace one picture with another, when one flows in one direction and the other flows from the opposite side. In order to make such a change of pictures, you need to calculate in advance the position of the particles for the second picture and start the time counter for it in the opposite direction. The most convenient way to do this is by expressing all the parameters of the particles through the time counter in an explicit form.
Where to go next?
We have considered the simplest methods of applying particles in animations. This is just the tip of the iceberg. The best way to learn to do these things is to start doing them. On CodePen regularly appear interesting demos, which will be useful to get acquainted. Novice developers want to give advice: pay more attention to the ideas embodied in the examples that you are studying, rather than specific implementations, and do not be afraid to experiment.
Source: https://habr.com/ru/post/347962/
All Articles