Wireshark to view real-time traffic
Sometimes I needed to get on the linux server and be able to view the current traffic in real time. How did I do before? On the target server was installed tcpdump, the exhaust of which was written in the file. Next, the file through scp was pulled to the local computer under Windows and opened in Wireshark.
At a certain point, I wanted a more convenient solution and I, having found the opportunity to run Wireshark on Windows (locally) in conjunction with tcpdump on the server (remotely) on the Internet, and having slightly filed this implementation, I decided to share with you.
A working bundle (which I checked) consists of:
')
And although, as it seems to me, these programs will work on most versions the same way as now, I think it is worth mentioning the working configuration.
Install the necessary software and settings on the server and desktop with Windows.
On this side of Linux finished.
Next, for Windows, you need to install putty (and plink is required with it), and also wireshark
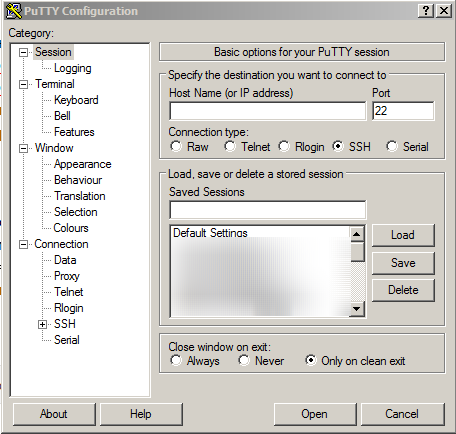
Open putty
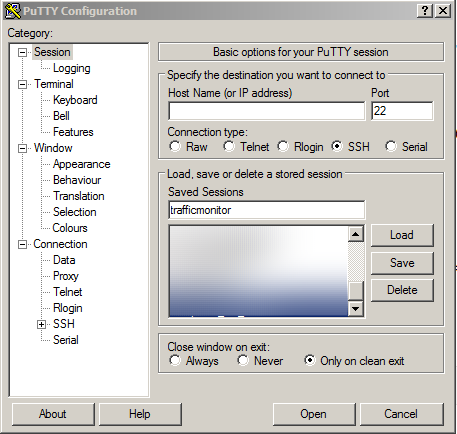
Create a new trafficmonitor session and leave it empty. Hostname
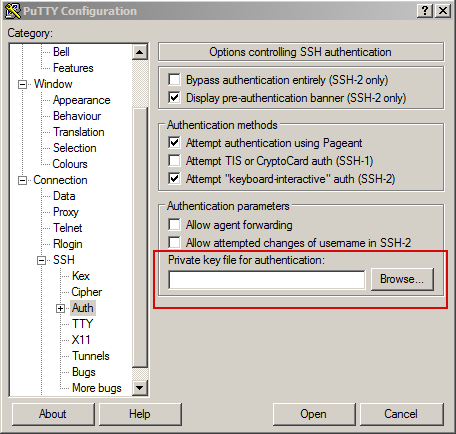
Go to the authorization settings and add the previously stretched key (which we don’t forget to stretch through puttygen to fit the putty)
Save the session in the main window.
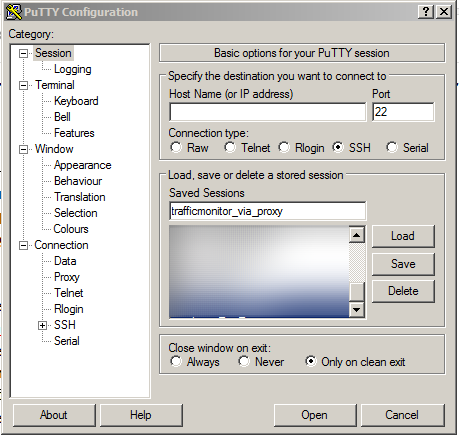
I want to clarify that I also had the need to configure this functionality through a socks5 proxy with authorization, so I will show how to do it, but for this we need another session for putty ( trafficmonitor_via_proxy ):
Also prescribe key
And we set up a proxy (in my case, type, IP-port, username-password)
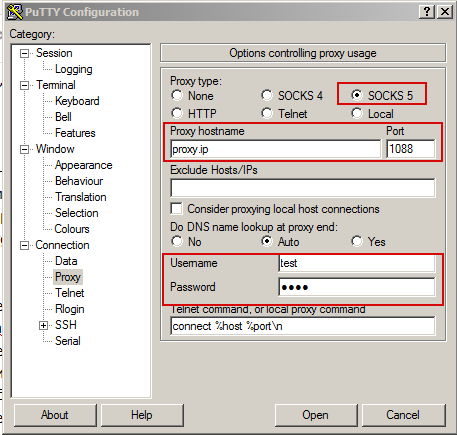
We save.
Actually Putty is ready, and after all from it we will pull these saved sessions for plink.
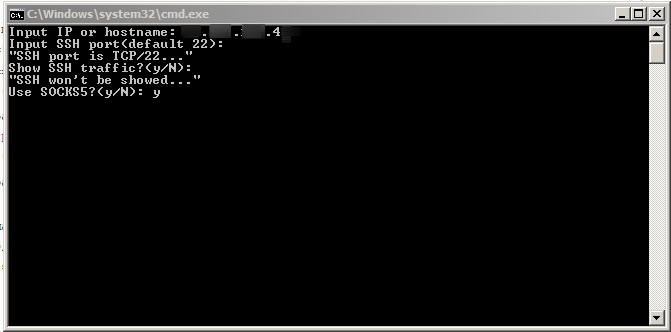
Now it's cmd:
Now, after starting this cmd, you can directly monitor traffic on the server, without unnecessary red tape. For convenience, you can also correct the cmd file so that it takes already existing sessions from the settings putty.
So, for example, the work of this script looks like:
1. We answer questions
2. Choose an interface

3. Enjoying
It should be noted that the stream in Wireshark can be filtered, but it cannot be stopped - it will not resume. As a result, it is also convenient to save a piece of traffic that interests us into a pcap file.
That's all and thanks to all.
UPD1. If there are more than 1 servers, then in each it is necessary to do the procedure of adding the user trafficmonitor and placing in its home directory the public key id_rsa.pub (authorized_keys) earlier created by us on the path ~ / .ssh / with 755 rights to the directory and 644 to the file, respectively. And also attend to the presence of sudoers records
At a certain point, I wanted a more convenient solution and I, having found the opportunity to run Wireshark on Windows (locally) in conjunction with tcpdump on the server (remotely) on the Internet, and having slightly filed this implementation, I decided to share with you.
A working bundle (which I checked) consists of:
')
tcpdump: version 4.9.2 wireshark: version 2.4.4 (v2.4.4-0-g90a7be11a4) plink: release 0.67 Windows 7 64 Bit And although, as it seems to me, these programs will work on most versions the same way as now, I think it is worth mentioning the working configuration.
Install the necessary software and settings on the server and desktop with Windows.
Linux (I have debian)
# apt-get install sudo tcpdump -y # SSH adduser trafficmonitor # su trafficmonitor # ssh-keygen ( .ssh) ssh-keygen # scp/winscp mv ~/.ssh/id_rsa.pub ~/.ssh/authorized_keys # chmod 755 ~/.ssh && chmod 644 ~/.ssh/authorized_keys # sudoers... nano /etc/sudoers # ... trafficmonitor sudo : trafficmonitor ALL=NOPASSWD: /usr/sbin/tcpdump trafficmonitor ALL=NOPASSWD: /sbin/ip addr show # ssh ( , , ) service ssh restart On this side of Linux finished.
Windows
Next, for Windows, you need to install putty (and plink is required with it), and also wireshark
Open putty
Create a new trafficmonitor session and leave it empty. Hostname
Go to the authorization settings and add the previously stretched key (which we don’t forget to stretch through puttygen to fit the putty)
Save the session in the main window.
I want to clarify that I also had the need to configure this functionality through a socks5 proxy with authorization, so I will show how to do it, but for this we need another session for putty ( trafficmonitor_via_proxy ):
Also prescribe key
And we set up a proxy (in my case, type, IP-port, username-password)
We save.
Actually Putty is ready, and after all from it we will pull these saved sessions for plink.
Now it's cmd:
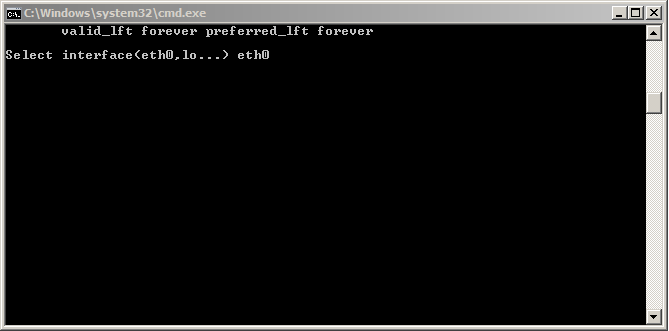
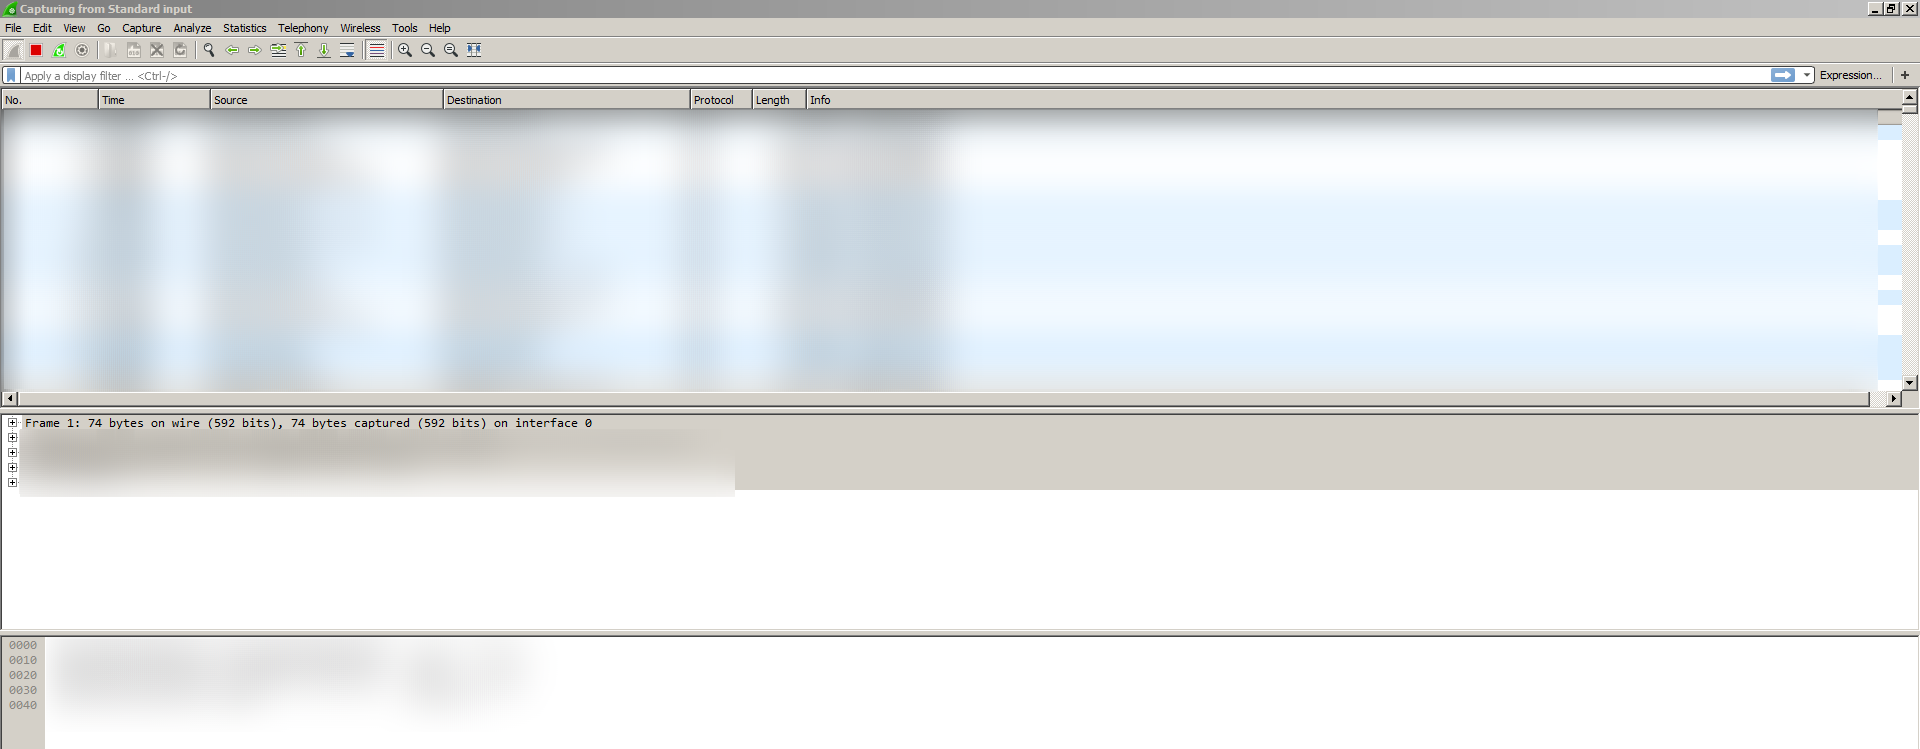
@echo off :: ip/hostname linux- set /P ip="Input IP or hostname: " :: TCP- SSH set /P port="Input SSH port(default 22): " IF "%port%"=="" ( SET port=22 echo "SSH port is TCP/22..." ) ELSE (echo "SSH port is TCP/%port%...") :: SSH , , set /P ssh="Show SSH traffic?(y/N): " IF "%ssh%"=="y" (echo "SSH will be showed...") ELSE ( SET visible_ssh='not port 22' echo "SSH won't be showed..." ) :: socks5 set /p socks="Use SOCKS5?(y/N): " IF "%socks%"=="y" ( echo "SOCKS5 will be used..." SET params=-load trafficmonitor_via_proxy ) ELSE ( echo "Direct connection will be used..." SET params=-load trafficmonitor ) :: , ( ) plink %params% trafficmonitor@%ip% -P %port% "sudo ip addr show" @echo. set /P int="Select interface(eth0,lo...) " :: wireshark pipe tcpdump plink %params% trafficmonitor@%ip% -P %port% "sudo tcpdump -i %int% -U -s0 -w - %visible_ssh%" | "C:\Program Files\Wireshark\Wireshark.exe" -k -i - Conclusion
Now, after starting this cmd, you can directly monitor traffic on the server, without unnecessary red tape. For convenience, you can also correct the cmd file so that it takes already existing sessions from the settings putty.
So, for example, the work of this script looks like:
1. We answer questions
2. Choose an interface
3. Enjoying
It should be noted that the stream in Wireshark can be filtered, but it cannot be stopped - it will not resume. As a result, it is also convenient to save a piece of traffic that interests us into a pcap file.
That's all and thanks to all.
UPD1. If there are more than 1 servers, then in each it is necessary to do the procedure of adding the user trafficmonitor and placing in its home directory the public key id_rsa.pub (authorized_keys) earlier created by us on the path ~ / .ssh / with 755 rights to the directory and 644 to the file, respectively. And also attend to the presence of sudoers records
Source: https://habr.com/ru/post/347888/
All Articles