Elm Developer Tools
A year and a half has passed since the publication of the article Basics of Developing in Elm Language (Beginner Toolkit Guide) . During this time, there have been numerous changes in the toolkit for the Elm web interface development language: a more convenient build system has emerged with the ability to generate a new project; for the Atom editor, a set of add-ons in some ways is now better than for the then popular LightTable editor among Elm developers; earned an application status inspector. Let's go through this set with a simple example.
Elm Basic
Elm can be installed as an NPM package:
npm install -g elm There are other ways to install Elm. They are described in the official manual .
Check the version of the newly installed Elm:
elm --version 0.18.0 elm is a wrapper for invoking individual utilities:
elm-make: build code for Elm;elm-package:elm-packagemanagement on Elm;elm-reactor: an Elm code tracking utility to recompile and reload it in a browser;elm-repl: REPL for Elm.
Managing Elm code with Brunch
Brunch seems to be one of the most convenient controls on Elm. Brunch is installed as an NPM package:
npm install -g brunch Check out the version of Brunch you just installed:
brunch --version 2.10.12 Call Brunch to generate the code for our example project on Elm:
brunch new --skeleton MattCheely/elm-brunch-skeleton demo-application After generating the code, Brunch will also immediately download all the necessary NPM and Elm packages.
Consider the generated directory tree:
app\: application sourcesassets\:index.html: the minimum HTML5 document that will be the container for our applicationcss\:style.css: styles for sample applicationelm\: Elm source codeMain.elm: the main application module on Elmjs\: javascript codeapp.js: sample code running separately from Elm code
elm-stuff\: downloaded packages on Elmnode_modules\: downloaded NPM packages.gitignoreREADME.mdbrunch-config.js: settings for Brunch with support for Elmelm-packages.json: settings for Elm, including a list of used packagespackage-lock.json: NPM dependency list (NPM generated automatically)package.json: settings for NPM
Already we can put together our project:
cd demo-application npm build After building the project, a public folder will also appear in which all parts of our web application will be located.
Let's run the application in debug mode:
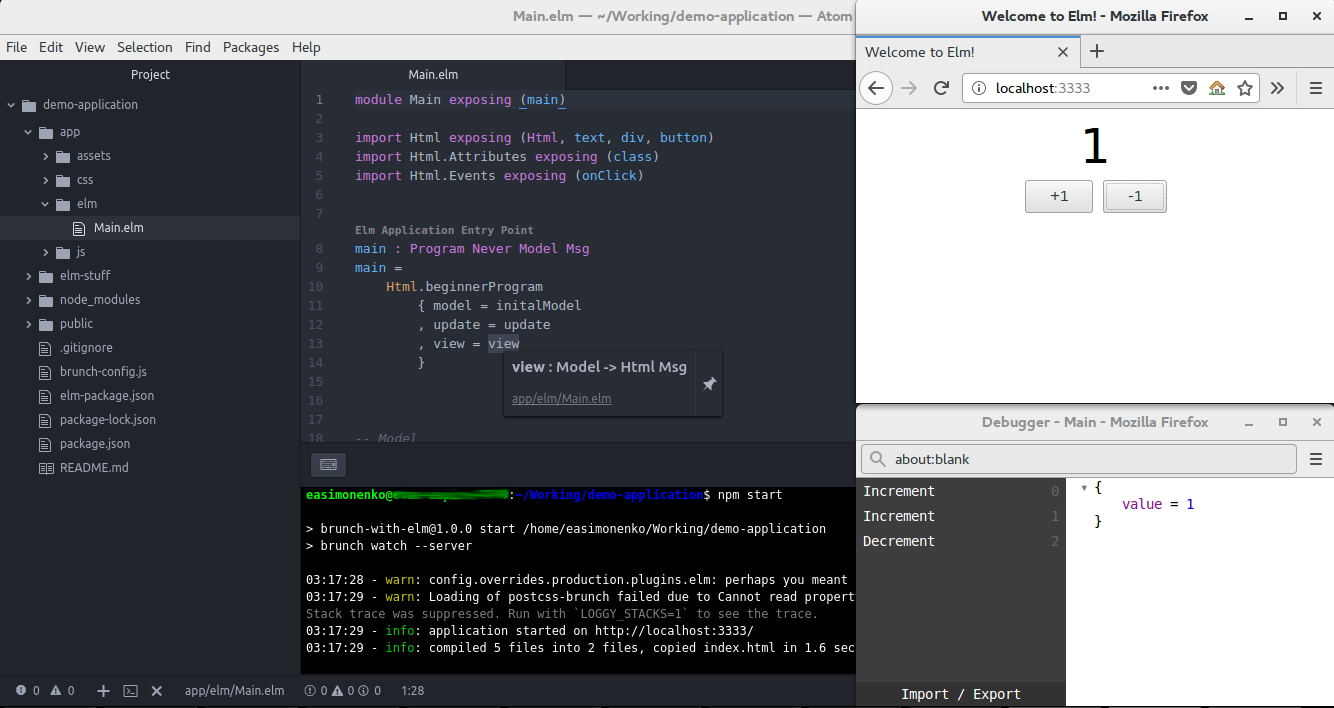
npm start Open the http://localhost:3333/ link in the browser and admire the wonderful web application:
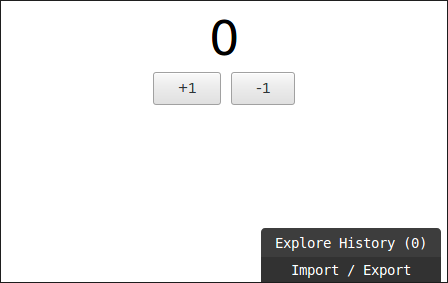
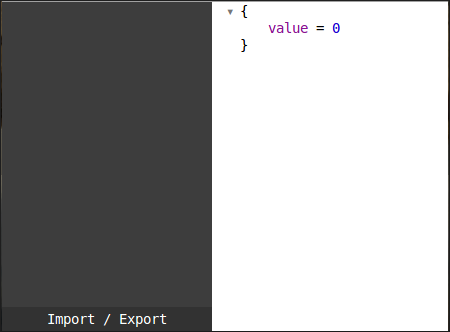
In the lower right corner is the application status inspector interface. Click on it. Now the value counter is set to 0 :
Click on the buttons +1 and -1 and see how the state changes:

We can return to any previous state:

And even return to the latter, simply by clicking on the Resume button.
Unsophisticated the viewer It will probably be interesting for the reader to also find out how the application works on Elm, but first let's set up the editor to study the source code of the application was more pleasant and comfortable.
Configuring Atom to work with Elm
Development support for Elm is for many editors, but here we will look at only one, Atom , since in the author’s opinion there is the most functional set of add-ons for him, which makes it easier to work with Elm. We will proceed from the fact that you have already installed Atom (although I’ll tell you where you can download it from ).
First of all, let's install language-elm add -on :
apm install language-elm This add-on will provide basic Elm support, such as syntax highlighting.
To support transitions to definitions and tooltips with expression types, install the atom-ide-ui package.
apm install atom-ide-ui To support autocompletion, we put autocomplete-plus :
apm install autocomplete-plus If you are using abbreviated code, put snippets :
apm install snippets Finally we are ready to install Elmjutsu :
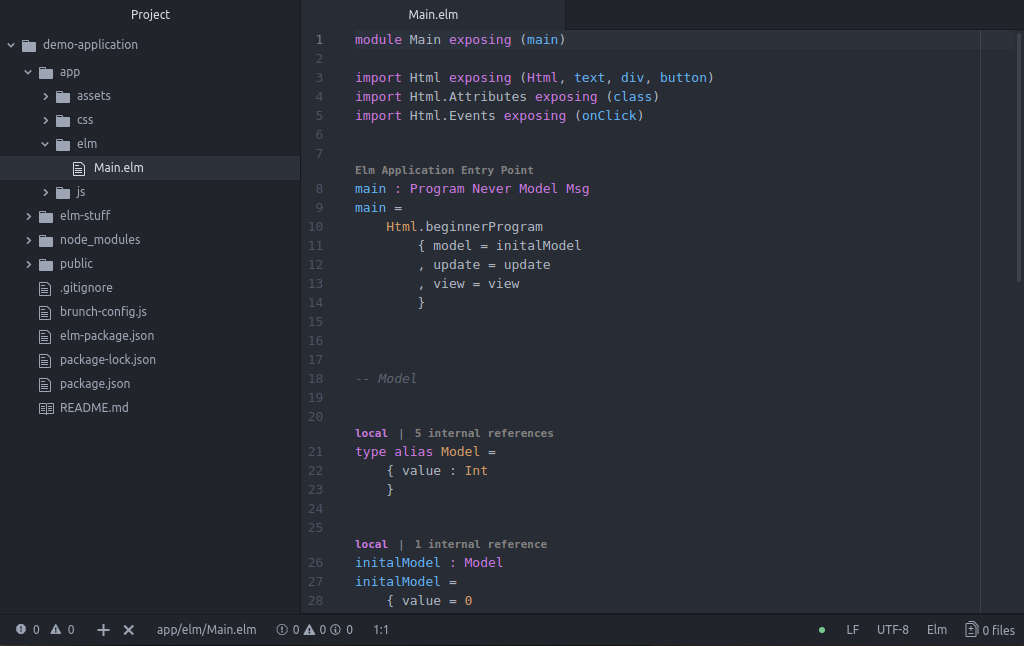
apm install elmjutsu Now we can open our Atom project:
For a tutorial on how to configure and use Elmjutsu, be sure to check out the page for this add-on, and don't forget to set all the necessary parameters in Atom.
Additional but important toolkit
Perhaps the most important additional tool is elm-format . With the help of this utility, you can bring the appearance of the program to the standard (generally accepted) form. Install it:
npm install -g elm-format Also install the appropriate Atom elm-format add -on :
apm install elm-format Thanks to this addition, every time we save our code, elm-format will format it. If there is a syntax error in the code, the utility will detect it, and we will know about it, although it is still better to use the compiler to find out if there are any errors. And in this we will be helped by the addition for Atom linter-elm-make .
Put it:
apm install linter apm install linter-elm-make Do not forget to also go into the settings of these add-ons and set all the necessary parameters.
The elm-lens add -on shows directly in the code for functions and types whether they are exhibited or are local, and how many times they are referenced. To install an add-on, simply call:
apm install elm-lens To support REPL in Atom, you can install the elm-instant add -on :
apm install elm-instant If you want to work with the terminal directly in Atom, I recommend installing the platformio-ide-terminal add -on :
apm install platformio-ide-terminal Let's experiment
To begin, open the terminal window in Atom by clicking the + button at the bottom of the window, and start tracking our code on Elm:
npm start 
Let's add an error to the code:
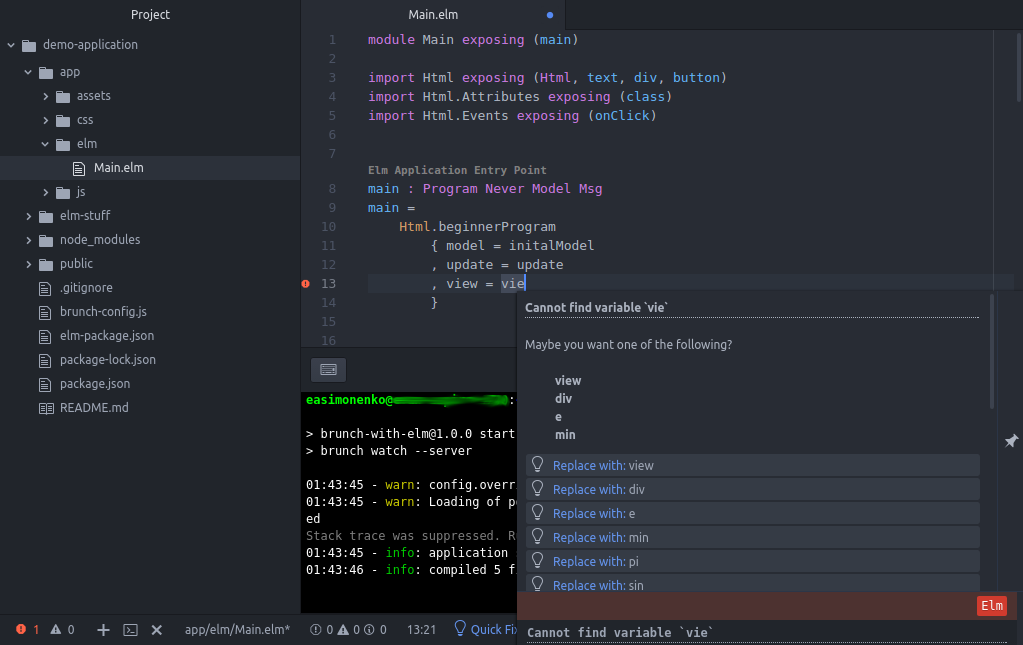
It can be noted that, firstly, the error was discovered without manual launching of the compilation, secondly, options were offered for correcting the error.
For the uninitiated
As promised, I’ll tell you a little how the application code on Elm works. Let's take a look at the source code that Brunch generated for us:
module Main exposing (main) import Html exposing (Html, text, div, button) import Html.Attributes exposing (class) import Html.Events exposing (onClick) main : Program Never Model Msg main = Html.beginnerProgram { model = initalModel , update = update , view = view } -- Model type alias Model = { value : Int } initalModel : Model initalModel = { value = 0 } -- Update type Msg = Increment | Decrement update : Msg -> Model -> Model update msg model = case msg of Increment -> { model | value = model.value + 1 } Decrement -> { model | value = model.value - 1 } -- View view : Model -> Html Msg view model = div [] [ div [ class "counter" ] [ text (toString model.value) ] , div [ class "controls" ] [ button [ onClick Increment ] [ text "+1" ] , button [ onClick Decrement ] [ text "-1" ] ] ] The application on Elm is designed as a Main module, exposing the main function. This we see in the first line of code. Next comes the import of modules. Some modules are imported by default, but the Html , Html.Attributes and Html.Events need to be imported. Here they are imported with the exposure of individual functions and types. This is done not to qualify the name of the module, for example, instead of Html.Attributes.class we will write just the class .
Below, the main function is declared and defined. The ad defines its type. The type of the function is indicated after the symbol : definition occurs after the = sign. As we shall see below, the indication of the names of the parameters and their types is carried out separately. Elm supports type inference, but for top-level functions, manual typing is considered good form.
In our case, the main function calls the Html.beginnerProgram function, which receives a structure with three fields as input: model , update , view . This function will start the message loop. The model parameter gets the initial state of the application, which is set in the initialModel function. The update function is called whenever an event occurs and the corresponding message is transmitted. After processing the message, the view function is invoked, which forms the new DOM tree.
Next, the Model type is determined, more precisely, a synonym for the type of the structure consisting of the value field of the Int type. The Int type, as you might guess, represents integers.
As already mentioned, the initialModel function returns an initial state value that contains one value field with a value of 0 . A state type can be any type, not just a structure.
Next, the message type of the Msg determined. This is an enumeration type with two possible values: Increment and Decrement .
The update function receives the message and application status as input. Typically, the code for this function includes the pattern matching operator case .. of .. Here the state changes depending on the incoming message: the value of the value field either increases by 1 or decreases by 1 .
Finally, the view function takes the state of the application and forms the required DOM tree using the functions of the Html , Html.Attributes and Html.Events modules.
Installing Elm Extra Packages
And last but not least, to install additional Elm packages, you need to call the elm-package command. For example, install the elm-community/list-extra package:
elm package install elm-community/list-extra Please note that the package identifier consists of two parts, that is, not just list-extra , but elm-community/list-extra .
The project file is associated with this command elm-package.json . It records the names and versions of the packages to be installed in the dependencies section. For example, the Brunch-generated elm-package.json file looks like this:
{ "version": "1.0.0", "summary": "helpful summary of your project, less than 80 characters", "repository": "https://github.com/user/project.git", "license": "BSD3", "source-directories": ["app/elm"], "exposed-modules": [], "dependencies": { "elm-lang/core": "5.0.0 <= v < 6.0.0", "elm-lang/dom": "1.1.1 <= v < 2.0.0", "elm-lang/html": "2.0.0 <= v < 3.0.0" }, "elm-version": "0.18.0 <= v < 0.19.0" } The package repository can be viewed here .
What's next
Perhaps the best source of information about Elm is his home site:
You should probably also re-read the Elm Basics article (beginner's toolkit guide) .
Poll
Like last time I will conduct a survey, but I will reorient it a little, if I may say so. Indeed, last time the author invited to the survey only those who are already programming in functional languages, but now the audience is expanding to everyone who is developing web applications.
Summarize also the results of the last survey. So, to the question "If you are programming in functional languages, what is your opinion about Elm", the alignment was received like this:
- 28.2%: I hear it the first time, but it looks good
- 21.1%: not needed
- 20.5%: good, I'm already programming on it
- 15.8%: cheese for production
- 14.1%: good, but I'm not going to write on it
170 voted, abstained 147. Read article 13,9k, added to bookmarks 51.
It will probably be interesting to compare it with the voting results recorded by the author a week after the publication of that article:
- 31%: not needed
- 18%: I hear it for the first time, but it looks good
- 18%: cheese for production
- 18%: good, but I'm not going to write on it
- 15%: good, I'm already programming on it
Voted 99, abstained 76. Read article 5,5k, added to bookmarks 41.
There is noticeable growth in favor for Elm, the number of those who believed that Elm is not needed has significantly decreased, the number of those who are already programming on it has also increased significantly. At the same time, the number of those who consider the language to be suitable has also increased, but is not going to write on it.
Community
Since the publication of the previous version of the article (May 30, 2016), there has been a Russian-speaking community on Vkontakte . The number of community members at the time of this writing is 179. Join us!
Links
© Simonenko Evgeny, 2018
')
Source: https://habr.com/ru/post/347730/
All Articles