Azure ML Workbench: Getting Started
Most recently, we announced a new workplace optimization tool for Data Scientist. Since there is very little written about him now, especially in Russian, we decided to release a series of materials for you, in which we will tell you how to use it. In this part you will learn about the installation and the first test run on local resources.

I give the word to the author.
')
Today I would like to talk a little about the new hybrid cross-platform tool Azure Machine Learning Workbench , which is in the preview-status. This tool, complete with cross-platform Visual Studio Code, fills the gap between local work with data analysis and cloud scripts.
I would like to note that under the cross-platform application, we will understand Windows and macOS. I think with the time and exit from the preview status will come the turn of Linux. Let's start with a small visual diagram about the capabilities of the tool.
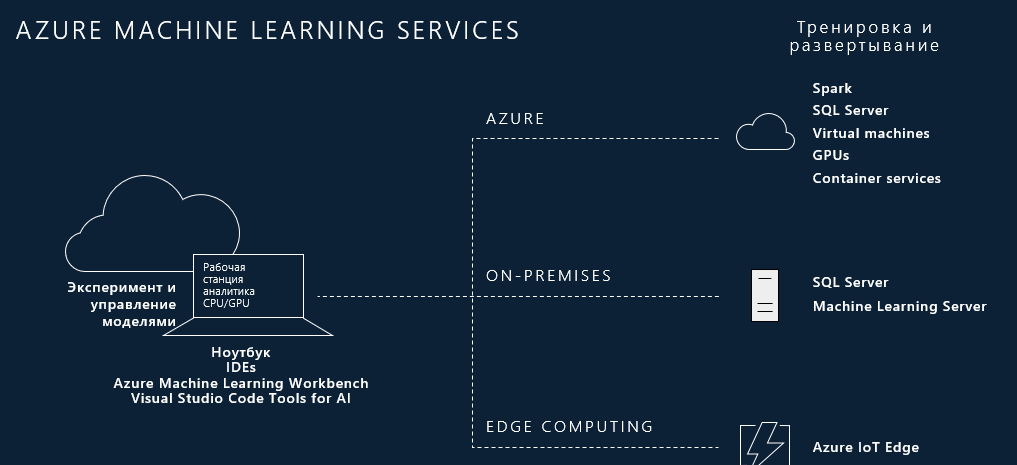
The idea is very simple. We have a shell with a set of tools for working with data and the ability to run Python, Docker, both locally and in the cloud using the Azure CLI toolkit. Go to the details.
The installation of AzureML Workbench occurs by default in the directory C: \ Users \ User \ AppData \ Local \ amlworkbench, where User is the name of the computer user. In addition to the tool itself, there is the installation of other components, Python with libraries for machine learning, Azure CLI in this directory. A complete list of components to be installed is given in the Resources section as a URL link.

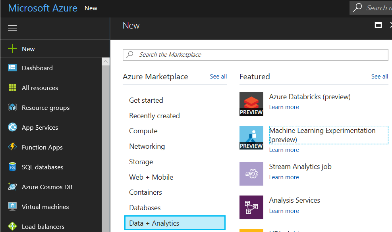
Immediately, we note that AzureML Workbench is part of the cloud toolkit and will not work if there is no access to the cloud or no account. He needs an account in the cloud in the Azure ML part of the Experimentation Service. To perform this task, we first start an ordinary test recording in the cloud, and who has it, you can skip this step. Next, go to the portal.azure.com section and select New \ Data-Analytics \ Machine learning Experimentation (preview).
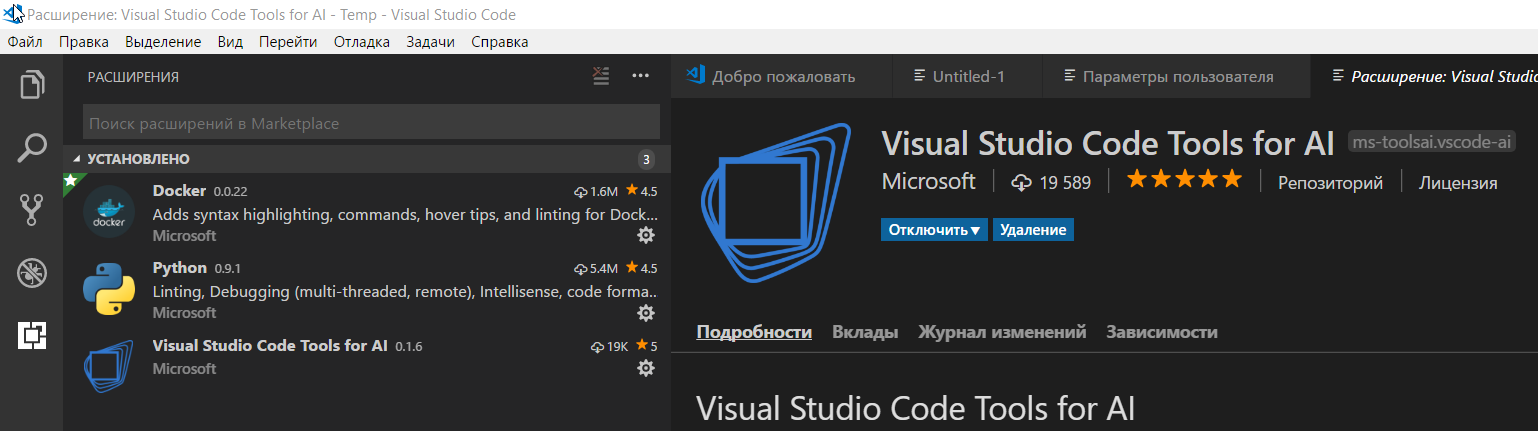
Then we set the account parameters, while paying special attention to the choice of a subscription plan and the number of seats (seat) equal to 2 for a free subscription plan. The resources at the end of the article provide a detailed account creation guide. After that, you can run the tool, but for full work it is recommended to install Docker and Visual Studio Code with AI, Docker, Python components.
After launch, we will select a test project based on the Simple Linear Regression template, specify its location, for example, from: \ temp \ slr and open this directory in the Visual Studuo Code with installed components (AI, Docker, Python). We see a set of files of the Simple Linear Regression project, including a data file and a Python file with an algorithm, as well as the environment that describes the startup environment.
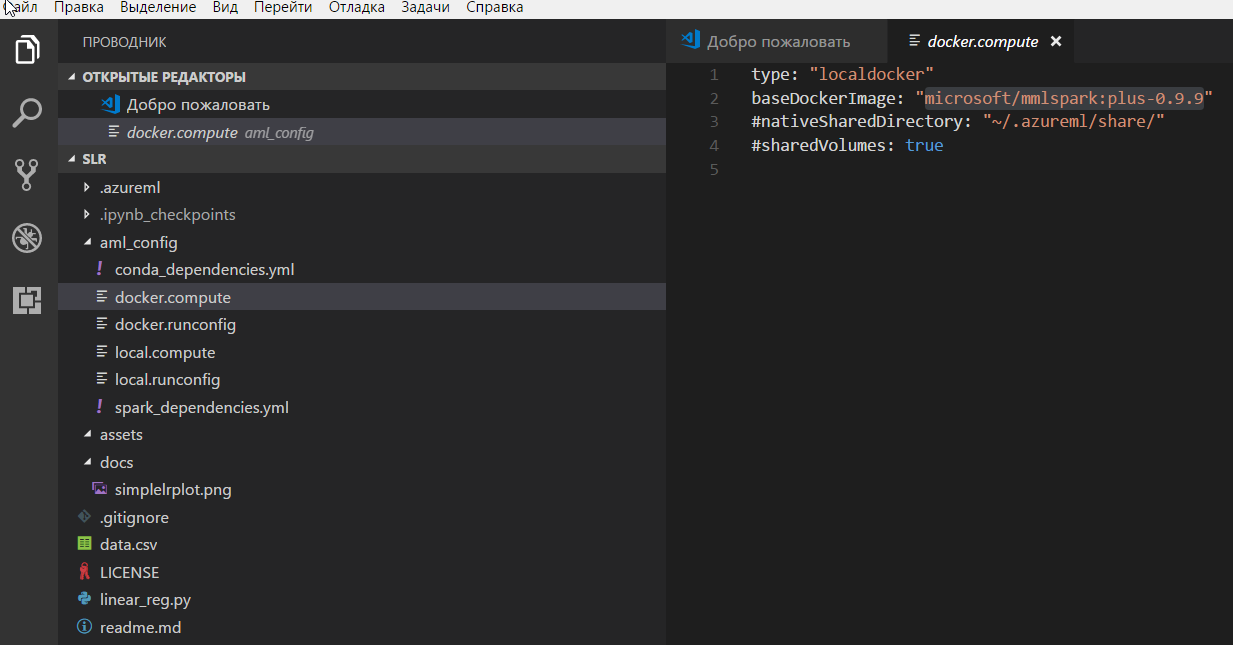
In one case, the startup environment — installed by Python, in the other — more interesting case — is the docker container based on the microsoft / mmlspark template: plus-0.9.9.
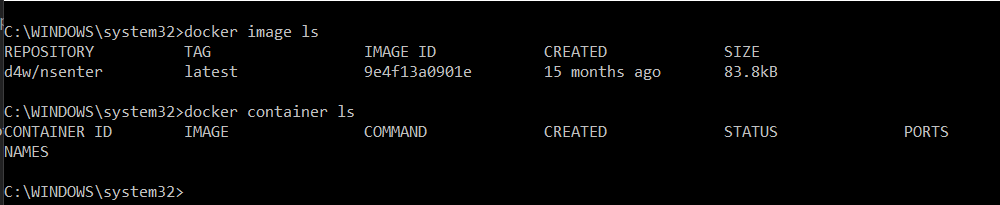
Before executing the project in the Docker container, we will look at the initial state of the Docker environment and make sure that there are no images and containers associated with the AzureML Workbench.
After the first execution of the project on the local Docker, we see that the download of the image template for the Docker container has begun.
And after the project was completed, the images for the containers appeared, as well as during the execution of the project a working container with Python.
Also pay attention to the time of the project. The first launch was about 11 minutes and included downloading the image, the second - less than 2 minutes, the rest - a few seconds.
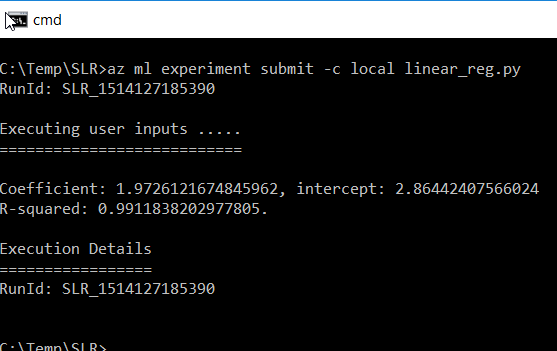
For the purity of the experiment, we will do a few runs on a locally installed Python to make sure that everything works. As we can see below, the results are approximately the same due to the obviously very simple example and the small amount of data.

Also note the presence of the command line with pre-configured environment variables.
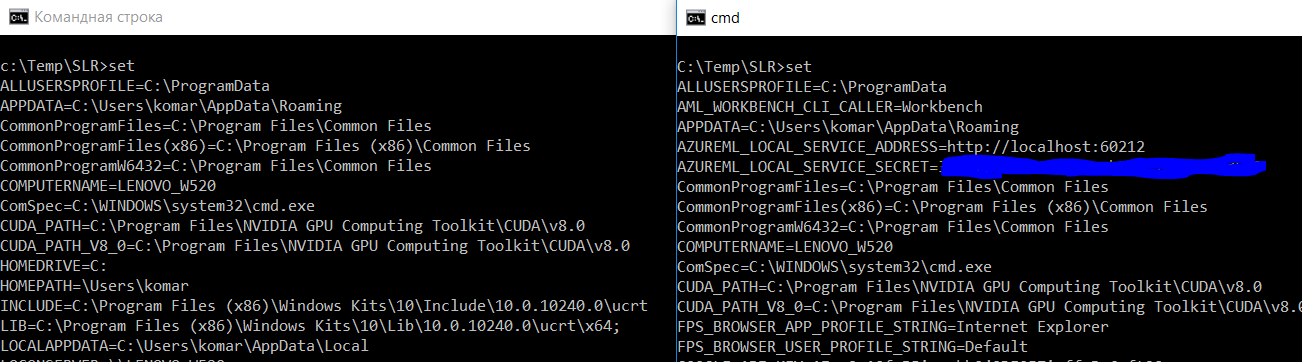
This allows you to run projects from the command line, which are also displayed in the history.
On this positive note, we finish the review of the local part of the instrument. In the next part we will consider the launch of projects from cloud services.
 Mikhail Komarov - is engaged in the support of existing and implementation of new systems aimed at improving the efficiency of work in the corporate segment. Before working in a large corporate sector, he worked as an information technology coach. The general experience in the field of IT is more than 20 years. Of interest, virtualization, infrastructure, data analysis and machine learning. MVP on Cloud and Data Center Management since 2011.
Cycle of articles "Azure Machine Learning Workbench"
Articles:
1. Azure ML Workbench: Getting Started .
2. Loading ...
I give the word to the author.
')
Introduction
Today I would like to talk a little about the new hybrid cross-platform tool Azure Machine Learning Workbench , which is in the preview-status. This tool, complete with cross-platform Visual Studio Code, fills the gap between local work with data analysis and cloud scripts.
I would like to note that under the cross-platform application, we will understand Windows and macOS. I think with the time and exit from the preview status will come the turn of Linux. Let's start with a small visual diagram about the capabilities of the tool.
Let's start
The idea is very simple. We have a shell with a set of tools for working with data and the ability to run Python, Docker, both locally and in the cloud using the Azure CLI toolkit. Go to the details.
The installation of AzureML Workbench occurs by default in the directory C: \ Users \ User \ AppData \ Local \ amlworkbench, where User is the name of the computer user. In addition to the tool itself, there is the installation of other components, Python with libraries for machine learning, Azure CLI in this directory. A complete list of components to be installed is given in the Resources section as a URL link.
Immediately, we note that AzureML Workbench is part of the cloud toolkit and will not work if there is no access to the cloud or no account. He needs an account in the cloud in the Azure ML part of the Experimentation Service. To perform this task, we first start an ordinary test recording in the cloud, and who has it, you can skip this step. Next, go to the portal.azure.com section and select New \ Data-Analytics \ Machine learning Experimentation (preview).
Then we set the account parameters, while paying special attention to the choice of a subscription plan and the number of seats (seat) equal to 2 for a free subscription plan. The resources at the end of the article provide a detailed account creation guide. After that, you can run the tool, but for full work it is recommended to install Docker and Visual Studio Code with AI, Docker, Python components.
After launch, we will select a test project based on the Simple Linear Regression template, specify its location, for example, from: \ temp \ slr and open this directory in the Visual Studuo Code with installed components (AI, Docker, Python). We see a set of files of the Simple Linear Regression project, including a data file and a Python file with an algorithm, as well as the environment that describes the startup environment.
In one case, the startup environment — installed by Python, in the other — more interesting case — is the docker container based on the microsoft / mmlspark template: plus-0.9.9.
Before executing the project in the Docker container, we will look at the initial state of the Docker environment and make sure that there are no images and containers associated with the AzureML Workbench.
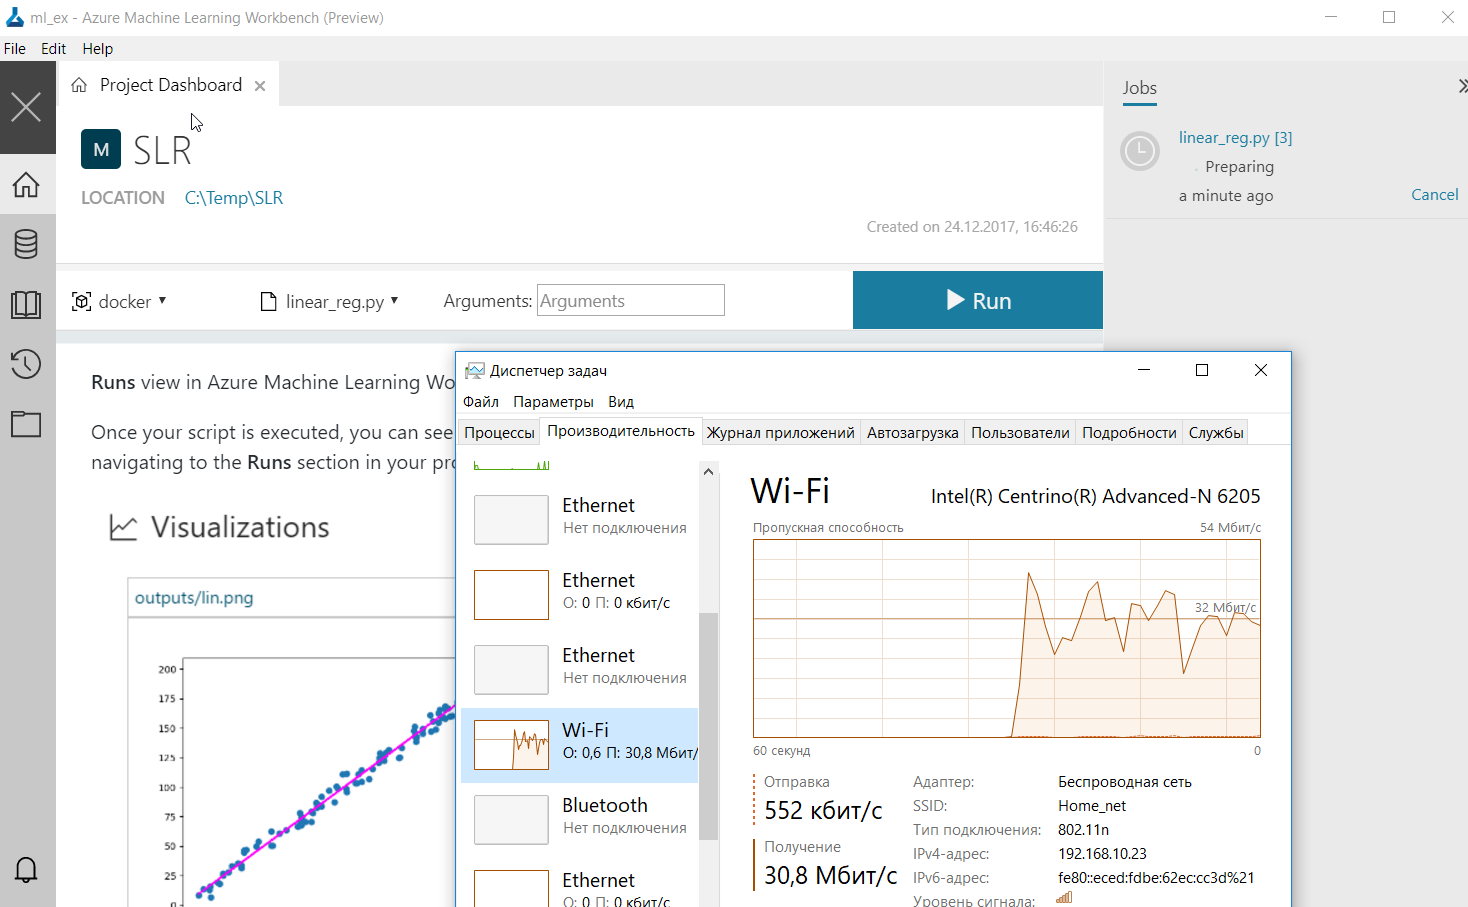
After the first execution of the project on the local Docker, we see that the download of the image template for the Docker container has begun.
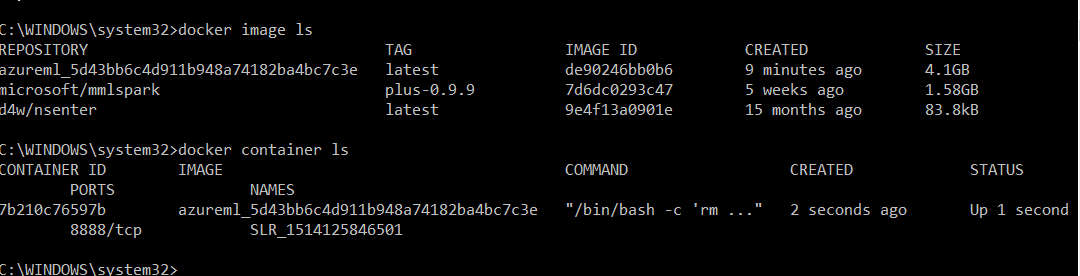
And after the project was completed, the images for the containers appeared, as well as during the execution of the project a working container with Python.
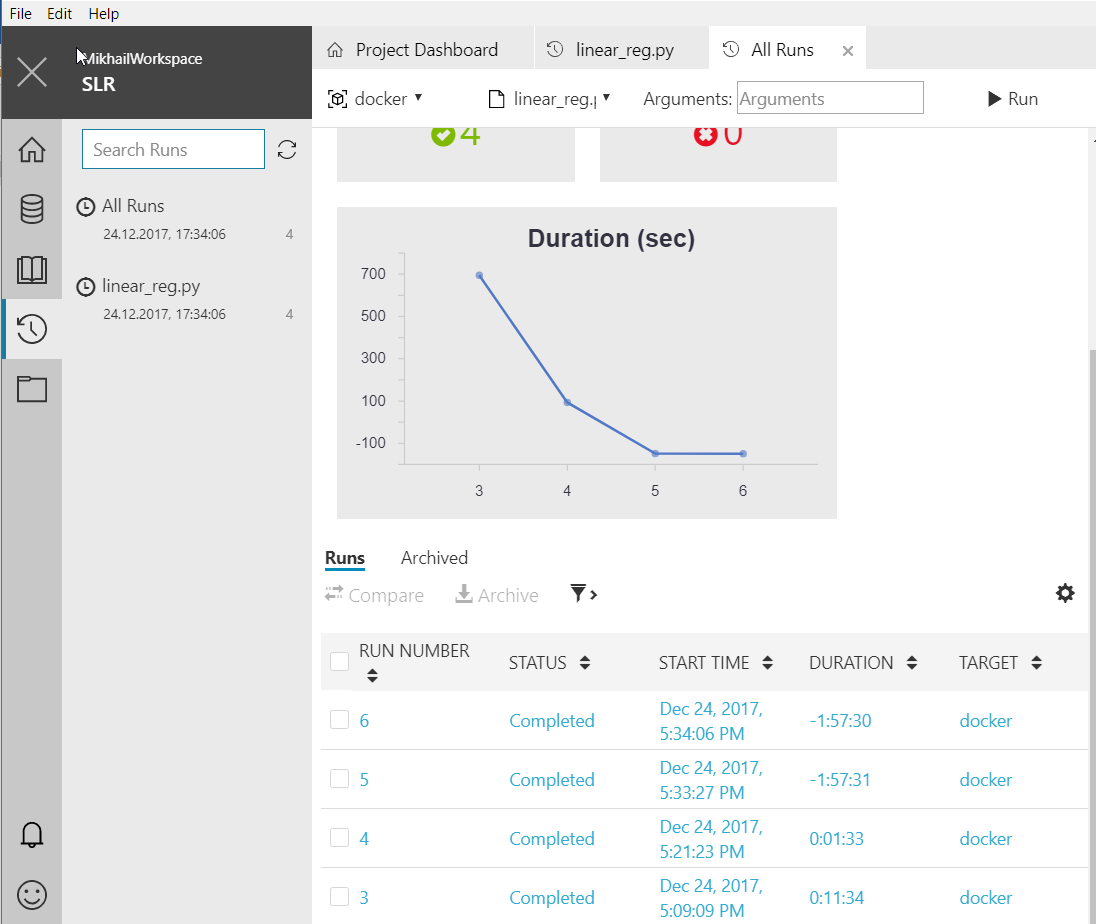
Also pay attention to the time of the project. The first launch was about 11 minutes and included downloading the image, the second - less than 2 minutes, the rest - a few seconds.
For the purity of the experiment, we will do a few runs on a locally installed Python to make sure that everything works. As we can see below, the results are approximately the same due to the obviously very simple example and the small amount of data.
Also note the presence of the command line with pre-configured environment variables.
This allows you to run projects from the command line, which are also displayed in the history.
Conclusion, but not the end
On this positive note, we finish the review of the local part of the instrument. In the next part we will consider the launch of projects from cloud services.
Resources
- The list of installed components AzureML Workbench
- Create a free Azure account
- A guide to setting up an account for AzureML Workbench and links to the distribution.
- Visual studio code
- Docker
- Digital business platform (Azure Machine Learning from laptop to cloud)
- Azure Certification
Author
Mikhail Komarov - is engaged in the support of existing and implementation of new systems aimed at improving the efficiency of work in the corporate segment. Before working in a large corporate sector, he worked as an information technology coach. The general experience in the field of IT is more than 20 years. Of interest, virtualization, infrastructure, data analysis and machine learning. MVP on Cloud and Data Center Management since 2011.Source: https://habr.com/ru/post/346888/
All Articles