Office 365. Web application development. Authorization ADAL JS, New Microsoft Graph API
 In this article we will give an introduction to the development of web applications for Office 365:
- registration of the application in corporate Azure
- user authorization
- retrieving data from Office 365 services
The main goal: to learn how to make Office 365 applications that can be sold in the Microsoft AppSource Marketplace .
For example, let's make a minimalist Single Page web application in JavaScript, displaying a list of letters. Without Angular, TypeScript, without collectors, without command lines and without server code.
If you want to immediately get a working code - an example on GitHub .
')
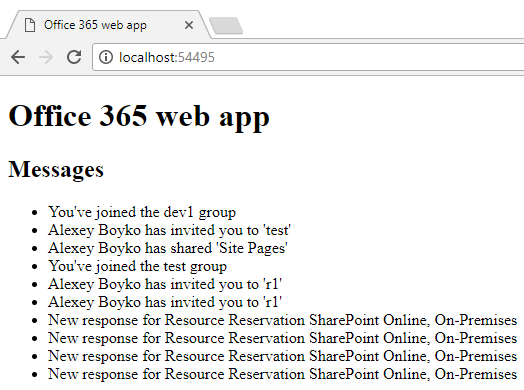
The result is this:
We will need
- Office 365 subscription
- local web server, for example, IIS Express in Visual Studio
Terminology, which Office 365 applications are
There is a lot of information on Office 365 applications, it's hard to start right away. Therefore, we give a few keywords and terms for googling.
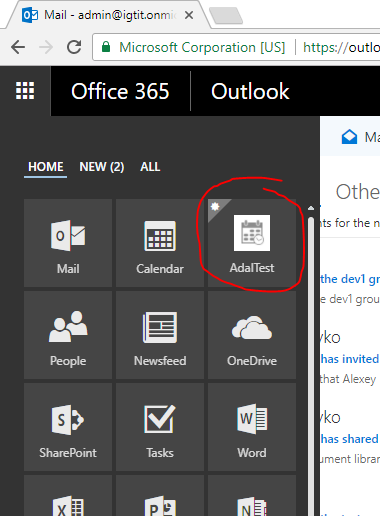
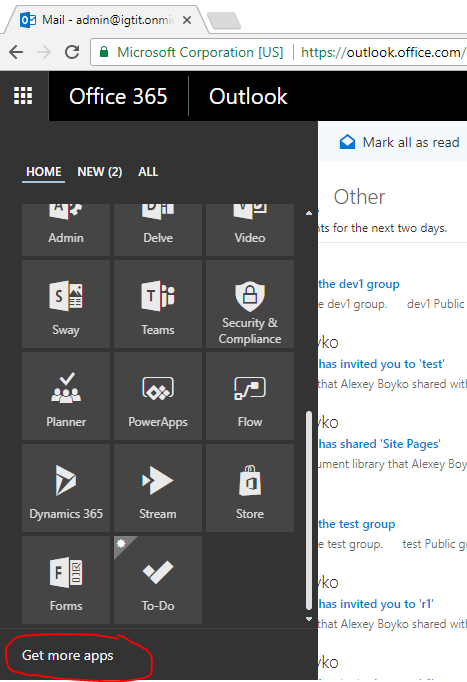
Office 365 app launcher - shown in the image below. Clicking on "Get more apps" we get to the store .
We want to make an application that can be published in this store.
Among Office 365 applications, you can highlight:
- Office 365 Add-in
- Office 365 web app, also known as the Azure AD web app
The Office 365 Add-in is an add-on integrated into the UI of the Office 365 services. For example, it can be an additional panel with information when viewing a letter, a SharePoint web part, a button in Excel. Note that add-ons can work not only in web versions (for example, Outlook Web Access), but also in desktop applications (Outlook).
Office 365 web app is
- stand-alone web application
- opens on your domain
- with your hosting
- communicates with Office 365 services (such as Outlook, SharePoint) using web APIs (such as Microsoft Graph API , but not only - see below)
Those. This is a separate site, with Office 365 it is connected by the fact that it receives / changes data of Office 365 users. In order for this site to access the Office 365 API, it must be registered with Office 365 (Azure AD). A link to the application can be placed in the app launcher.
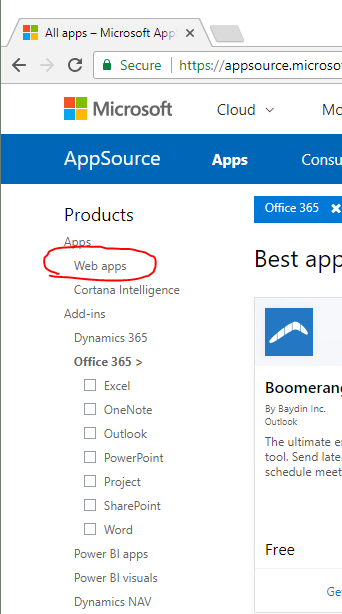
Registration administrator can do manually or installing the application from the store. When registering, the rights of the application on the parts of the API are indicated (for example, access to mail). Office 365 web apps are displayed in this section of the store:
In this article we will make the Office 365 web app, we will register manually.
Multi-Tenant, single-organization (Single-Tenant) web-apps - Multi-Tenant is an application that can work with several organizations. Single organization - applications developed for one company. For the store, of course, only Multi-Tenant is suitable.
Register web app in Azure
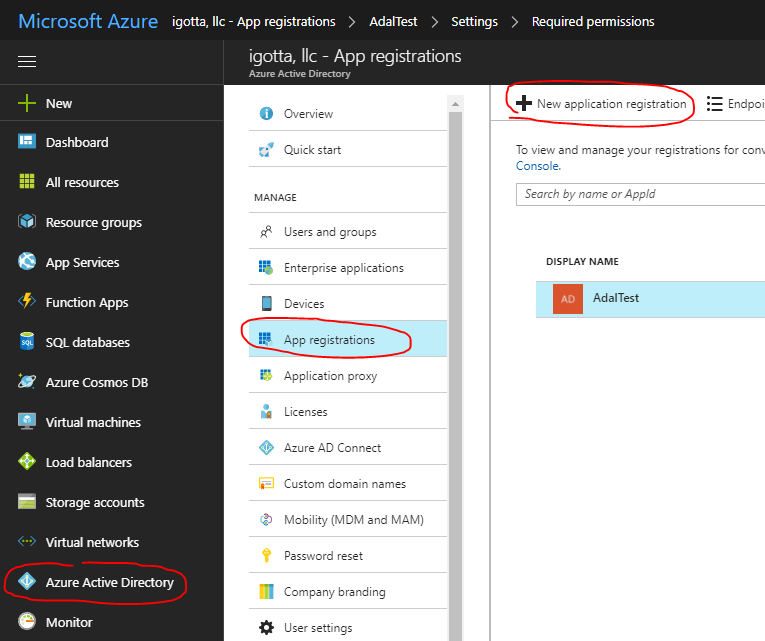
In order for our Office 365 web app (our site) to use the Office 365 API, it must be registered. The manual registration process is shown below.
Go to the admin panel Azure .
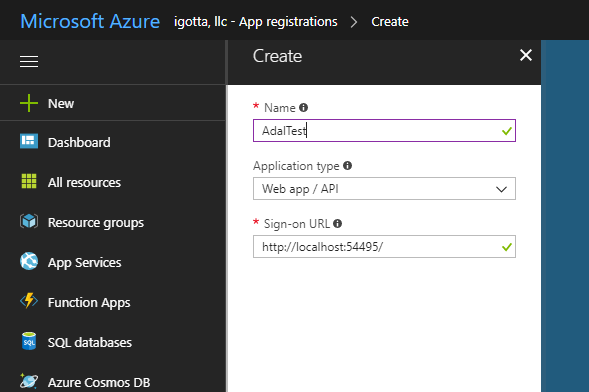
In the Sign-on URL field, enter the URL of the site; in our case, the test application is hosted on localhost:
In the application manifest, you need to set the parameter “oauth2AllowImplicitFlow”: true.
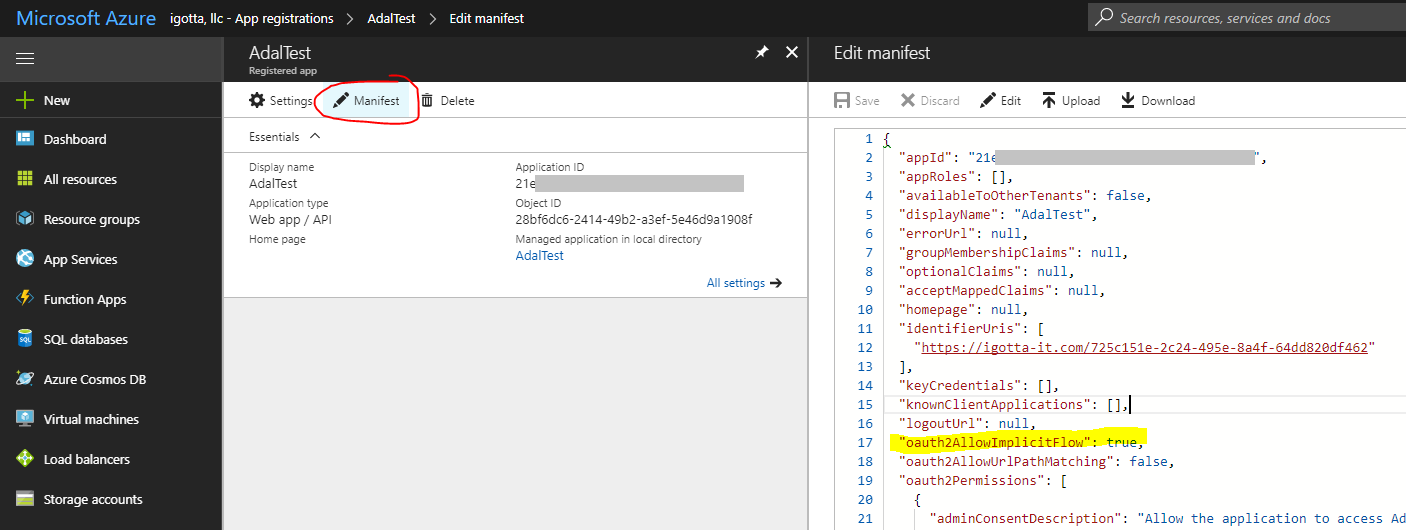
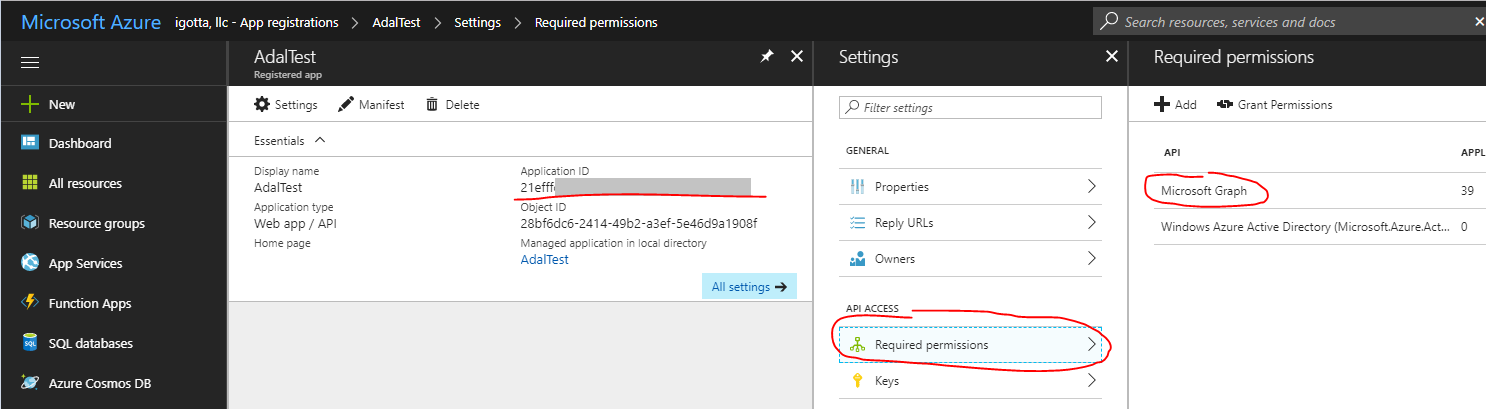
After registration, the application will receive an Application ID, we will need it later. Do not forget to give rights to Microsoft Graph.
Authorization, Microsoft Graph API
Office 365 offers many different web APIs. Microsoft Graph API is a modern API that allows you to work with all Office 365 services. Wherever you can use Microsoft Graph, only resort to more specialized APIs if necessary.
Microsoft Graph API is a separate topic, we just note that it is convenient and allows you to make simple REST requests.
Each API request must contain a secret token, thanks to which the Microsoft Graph API understands which user the request came from and what actions are allowed to be performed.
Token issues an “Azure AD Authorization Endpoint”. Token has a limited lifespan.
In our case, a single page web application, without server code, the token is obtained as follows:
1. The user opens the site (we have http: // localhost: 54495 /)
2. JavaScript sends the user to the Microsoft authorization page (let's call this “Azure AD Authorization Endpoint”), and passes the application ID (see earlier Application ID)
3. “Azure AD Authorization Endpoint” generates a token, redirects the user back to the site in the url after # indicates token.
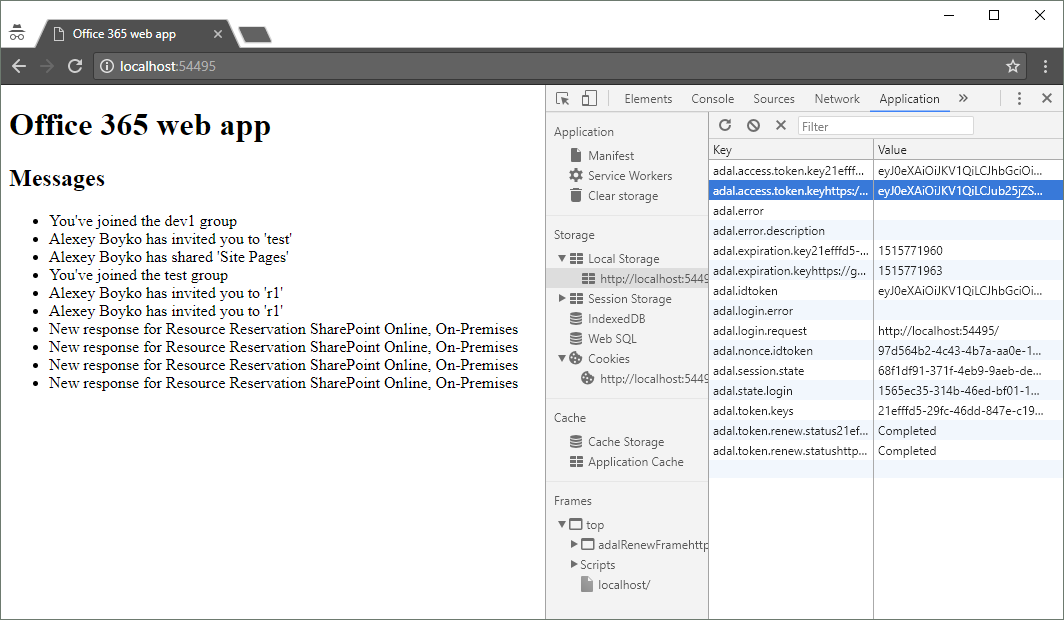
4. JavaScript site saves token (for example in local storage). Now you can make requests to the Office 365 API passing token.

The process is described in more detail in the article Authentication Scenarios for Azure AD .
Our application does not contain server code. Pay attention to the scheme Browser only once calls the Web Application to get the HTML and JS code, the remaining requests the Browser makes to the Office 365 API.
But you can make your ASP.NET MVC application, which, like the Office 365 API, will check this same token. And not in the browser, but on the server to use the Office 365 API. You don’t have to manually parse the HTTP headers - Microsoft took care of everything. An example of such an application is “ Integrating Azure AD into an AngularJS single page app ”.
ADAL JS
Above, for understanding, we reviewed the process of obtaining and using token. Active Directory Authentication Library (ADAL) for JavaScript (ADAL JS) does all this for us. You just need to connect it to the page. An example of using ADAL JS:
// create config and get AuthenticationContext window.config = { tenant: "igtit.onmicrosoft.com", clientId: "21XXXXXX-XXXX-XXXX-XXXX-XXXXXXXXXXXX", postLogoutRedirectUri: window.location.origin, endpoints: { graphApiUri: "https://graph.microsoft.com", }, cacheLocation: "localStorage" }; var authContext = new AuthenticationContext(config); var isCallback = authContext.isCallback(window.location.hash); authContext.handleWindowCallback(); if (isCallback && !authContext.getLoginError()) { window.location = authContext._getItem(authContext.CONSTANTS.STORAGE.LOGIN_REQUEST); } // check if user need to login var user = authContext.getCachedUser(); var token = authContext.getCachedToken(config.clientId); if (!user || !token) { authContext.login(); } // use token authContext.acquireToken(config.endpoints.graphApiUri, function (error, token) { if (error || !token) { // TODO: for some error call authContext.login() console.log("ADAL error: " + error); return; } // TODO: USE token here, request graph Api }); In our example, the token will be stored in local storage.
When requesting the Graph API, you need to pass token
var url = config.endpoints.graphApiUri + "/v1.0/me/messages"; $.ajax({ type: "GET", url: url, headers: { "Authorization": "Bearer " + token } }).done(function (response) { // messages var items = response.value; console.log(items); }).fail(function () { console.log("Error"); }); Full GitHub example.
Links
Have your app appear in the Office 365 app launcher
Authentication Scenarios for Azure AD
ADAL.js with Multi-Tenant Azure Active Directory
Active Directory Authentication Library (ADAL) for JavaScript
Authenticate an Office 365 user with ADAL JS
Microsoft Graph API
Source: https://habr.com/ru/post/346552/
All Articles