Overview of the procurement of web applications on the Zend Framework 3
The article is an overview and does not carry any how-to-tutorials. If you accidentally "ran into" it on the network, then I warn you right away that it will not teach you to use Zend Framework 3 (hereinafter referred to as ZF3).
Hello, reader! I decided to announce my brainchild on the wonderful Habrahabr resource. I am not a regular reader, but I understand that the main part of people who are looking for something interesting will certainly come across here. He came here as a specialist for traffic, because there is no strength to watch the death of his creations anymore.
Introduction
Having looked at my GitHub profile once again, I realized that all my work is being lost. They disappear due to the fact that nobody knows about these repositories. Because of this, very good, in my opinion, repositories "die". I try to support some, but most of them still slowly and painfully sinking in the depths of complete ignorance. The same happens with zf-app-blank . Though some people know about this project, but I don’t know if it is being used. Now, many simply simply do not see any point in writing something using ZF3. And I decided to change it, because this is a very good framework and it unfairly remains in the shadow or is used exclusively by geeks.
The idea of creating zf-app-blank was the love of the framework and the envy of other frameworks that have some ready-made solutions in order to “start developing yesterday”. Zend Framework 3 doesn’t have that at all. There is a ZendSkeletonApplication over which you need to pretty sweat to give something worthwhile, because ZF itself is positioning itself as "do it yourself", i.e. every developer is free to do as he needs. And that's great, actually. This is what I like about him.
What's inside
I shoved inside only the most necessary packages, in my opinion, in order to get started. Here, not all planned, but most of them. And also made it all together.
At the time of writing, zf-app-blank version 1.6.2 has the following on board:
- PHP 7.1 is the minimum version. What about 7.2 - it is not clear, since tests are needed, but there is an assumption on this score: it is too early to move;
- Zend Framework 3 - the framework itself;
- Twitter Bootstrap 4 - HTML, JS and CSS library;
- Doctrine ORM 2 - ORM to work with the database;
- Debug Bar - the debug panel;
- Twig - template engine;
- Assetic Management - manager of CSS, JS and other resources;
- RBAC - access control;
- Form - forms;
- Vagrant support - virtual work environment;
- Composer support - batch manager for PHP;
- Yarn support - package manager for JS;
- PostgreSQL as DB - database;
- MySQL as a database - a database;
- YUI Comressor - compressor for CSS;
- UglifyJS2 - compressor for JS;
- PHP Coding Standarts Fixer - PHP code checker and fixer;
- XDebug - PHP debug, configured to work from the web and cli;
- Mailgun - service for sending Email;
- Multilanguage (English and Russian);
- Simple demo:
- entrance
- check in
- Output
- Email Verification
- Password recovery
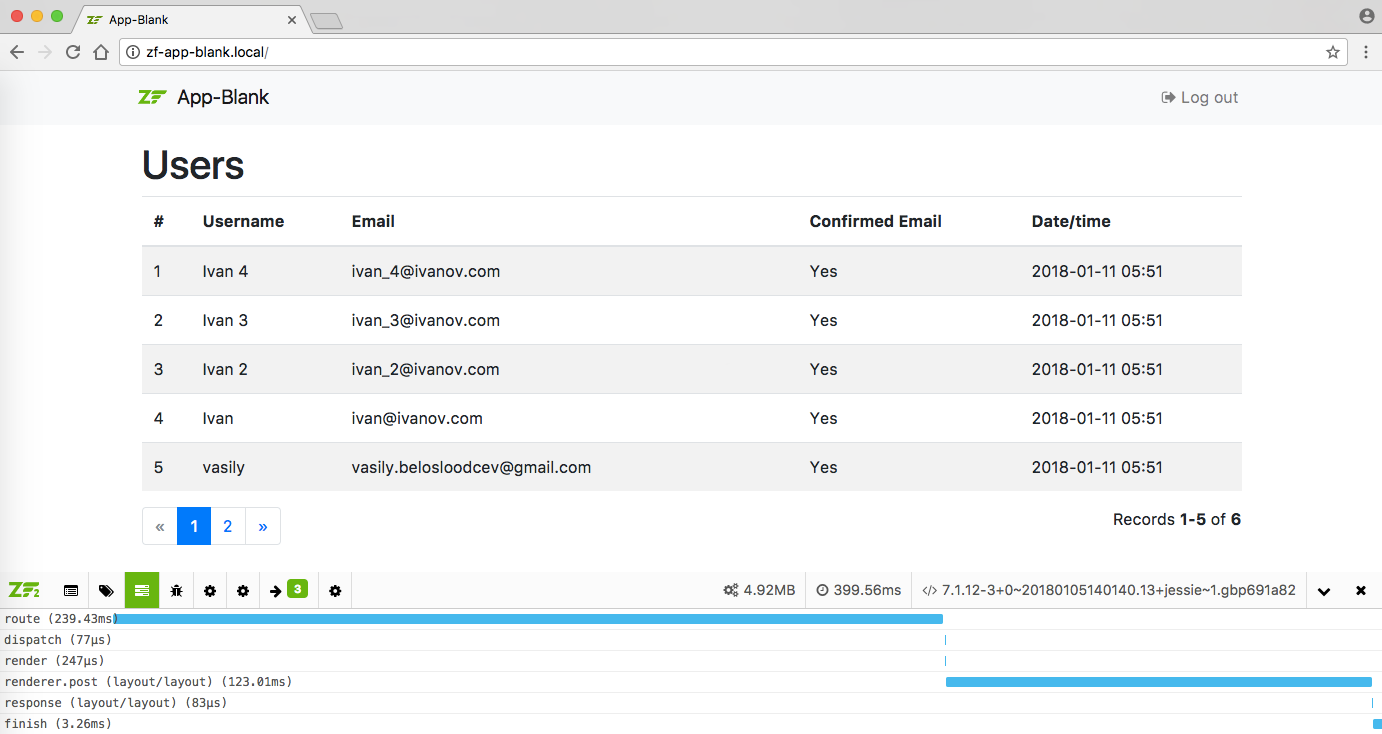
- A list of users;
- Symfony CLI - CLI;
- Codeception - testing;
- Sass - Preprocessor for CSS.
I will try to sometime explain how this all interacts in the documentation (which is not present).
Unfortunately...
zf-app-blank does not fully solve the problem with the frontend, because:
- procurement focused on PHP;
- the problem is solved only related to ZF3;
- in the world of frontend, everything develops very quickly;
- there is no time and desire to support it;
- for 19 stars on the project it is meaningless.
With a decent community around the workpiece, you can think of something other than PHP, but so far everything is completely wrong.
zf-app-blank has no documentation, so it’s completely unclear to the “green” user how to use it. At the moment, it will be able to use it only when absolutely necessary and savvy developers with experience using the Zend Framework. And it's sad, because there is nothing complicated here, but you cannot tell right away without documentation.
The current prepared Vagrant environment only works on unix-like systems. If you are the owner of Windows - quickly you will not deploy the project, as it seems to me. You can deploy using your environment and ensure that all tests for environmental requirements are passed by running php bin/requirements from the project.

There are a lot of fine points in the workpiece, for example, jQuery is used only for the debug panel. Otherwise, this is good old Javascript without anything overhead. For the JS part of Twitter Bootstrap, Bootstrap Native is used . It would be nice to have a debug panel without jQuery at all, since in 2018 jQuery presence is unjustified and causes problems.
I try to support the project and not to disregard it. In addition to what has been implemented and posted, I still have a lot of things that I have not published. For example: classes for working Intl, improved i18n, useful Twig extentions, working environment for Docker, etc. Unfortunately, I can not throw all the strength on this project and bring it to mind.
Installation
The installation will be performed using the configured Vagrant environment. For those who have Windows - sorry, until this method has been tested and configured for this OS. I remind you that you can deploy the project using your environment and ensure that all tests for the environment requirements are passed by running php bin/requirements from the project.
At the time of writing, I have Vagrant version 2.0.0. If you are lower, I recommend upgrading.
To find out your version enter the following:
$ vagrant --version Vagrant 2.0.0 The whole installation boils down to the fact that you just need to follow the instructions from the README.md repository.
Install Vagrant plugins:
$ vagrant plugin install vagrant-vbguest $ vagrant plugin install vagrant-hostmanager Clone the repository:
$ git clone https://github.com/bupy7/zf-app-blank.git Modify .gitignore in the project root:
Delete the following lines:
# delete before to create own project /yarn.lock /composer.lock Run the installation process environment:
$ vagrant up After entering this command, we will be asked to slightly tweak the workenv/config/vagrant-local.yml , namely, to specify the Github token. How to get a token can be found here .
We indicate our token:
github_token: 62dbd9a1ee8c89d9127aee31234b51e6 And change the server time zone to Moscow:
server_time_zone: Europe/Moscow Or you can change it to your own.
You can also change the database to PostgreSQL if you want (MySQL is used by default):
db_type: pgsql There are other interesting settings that I will talk about next time. =)
After this we introduce again:
$ vagrant up and the process will resume. Be patient, wait for the end and an invitation to start work (see image below):
We do not run away, because you will need to enter the password of the user from under which you launched Vagrant.

Configuring the connection to the database for those who have selected the PostgreSQL database:
In the /config/autoload/local.php file, /config/autoload/local.php need to comment out the 8, 15 and 19 lines. Uncomment 7, 14 and 18 line. Those. should be something like this:
use Doctrine\DBAL\Driver\PDOPgSql\Driver as PgSqlDriver; //use Doctrine\DBAL\Driver\PDOMySql\Driver as MySqlDriver; return [ 'doctrine' => [ 'connection' => [ 'orm_default' => [ 'driverClass' => PgSqlDriver::class, // 'driverClass' => MySqlDriver::class, 'params' => [ 'host' => '127.0.0.1', 'port' => 5432, // 'port' => 3306, 'user' => 'zf_app_blank', 'password' => '1234', 'dbname' => 'zf_app_blank' . (APP_ENV_TEST ? '_test' : ''), ], ], ], ], ... Change the interface language to Russian:
The default is English.
Add to the /config/autoload/local.php file:
'translator' => [ 'locale' => 'ru', ], Change the time zone of the application to Moscow:
Default is Europe / London.
Add to the /config/autoload/local.php file:
'time_zone' => [ 'time_zone' => 'Europe/Moscow', ], Create a new Postbin to receive Email messages:
In README.md, they are still asked to register in Mailgun and insert the key and domain into the settings, but Postbin is enough at the development stage.
Follow the link http://bin.mailgun.net/ and copy the resulting URL in /config/autoload/local.php :
'mailgun' => [ 'debug' => true, // 'key' => 'key-example', // 'endpoint' => ' URL', ], 'mail' => [ 'domain' => 'example.mailgun.org', // ], If you already have Mailgun and wish to register all settings, then additionally disable debug mode to receive messages to the mailbox. Postbin then you do not need to specify:
'mailgun' => [ 'debug' => false, // false 'key' => ' MAILGUN', 'endpoint' => 'http://bin.mailgun.net/not-create', // ], 'mail' => [ 'domain' => ' MAILGUN', ], Finally, create a database schema:
$ vagrant ssh -c 'php bin/console orm:schema-tool:create' A green message should appear:
[OK] Database schema created successfully! Significant success of the operation.
Done! Now you can visit our website at: http: //zf-app-blank.local

Demo
There is a small demo in this template that demonstrates some basic functionality. I suggest a little familiar with it.
We will register a new user and confirm his Email.
Go to the registration page: http: //zf-app-blank.local/signup
Enter your username, email and password.
If you decide to use Postbin, then Email, you can enter any that will pass the validation. If not, then a real Email, where the letter could come.
After clicking on the "Register" button, we will see a message on the successful completion of the operation.
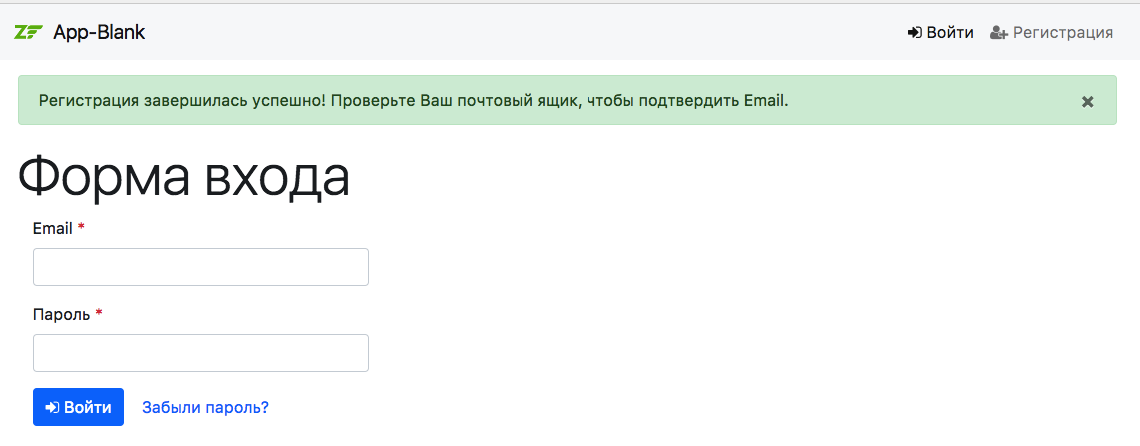
And in Postbin (or by e-mail) we will be waiting for the message that we need to confirm our Email address.

In this letter, we are interested in what is highlighted in red or a link for those who prefer to send to a real Email. This is our route that leads to the Email Confirmation page. Perform the transition: http: //zf-app-blank.local/confirm-email/example@example1.ru/29ha%5Ezzvs5b25gxwjv
After that they will tell us that we have successfully confirmed Email. It remains to enter the username and password.

Conclusion
It was a mini-presentation of the ZF3 web application development. For more information, visit the project repository . In the next article (if this one doesn’t go away in the minus) I will tell you how to create a simple CRUD application.
Lovers of Zend Framework and its ideology, or just those who want and are ready to help with something - I will be glad of any activity in the project.
PS Stars on the project is also active.
Links
UPD
- 01/12/2018 12:46 PM - Explained the problem more clearly about the environment prepared by Vagrant and Windows.
')
Source: https://habr.com/ru/post/346486/
All Articles