Writing a Python clicker bot for Lineage 2
Foreword
How can you have fun in the New Year holidays? Play computer games? Not! It is better to write a bot that it will do for you, and go yourself to sculpt a snowman and drink mulled wine.
Once in school, he was fascinated by one of the most popular MMORPGs - Lineage 2. In the game, you can unite into clans, groups, make friends and fight with rivals, but in general the game is filled with monotonous actions: completing quests and farming (collecting resources, gaining experience ).
As a result, I decided that the bot should solve one problem: farm. For control, emulated mouse clicks and keystrokes of the keyboard will be used, and for orientation in space - computer vision, programming language - Python.
In general, the creation of a bot for L2 is not new and there are quite a lot of them ready. They are divided into 2 main groups: those that are embedded in the work of the client and clickers.
The first is a hard cheat, in terms of games, using them is too unsportsmanlike. The second option is more interesting, given that it can be applied with some modifications to any other game, and the implementation will be more interesting. Those clickers that I found did not work for various reasons, or they were unstable.
Attention: all the information here is for educational purposes only. Especially for game developers to help them better deal with bots.
So, to the point.
Work with the window
It's simple. We will work with screenshots from the game window.
To do this, we define the coordinates of the window. We work with the window using the win32gui module. The desired window is determined by the title - “Lineage 2”.
def get_window_info(): # set window info window_info = {} win32gui.EnumWindows(set_window_coordinates, window_info) return window_info # EnumWindows handler # sets L2 window coordinates def set_window_coordinates(hwnd, window_info): if win32gui.IsWindowVisible(hwnd): if WINDOW_SUBSTRING in win32gui.GetWindowText(hwnd): rect = win32gui.GetWindowRect(hwnd) x = rect[0] y = rect[1] w = rect[2] - x h = rect[3] - y window_info['x'] = x window_info['y'] = y window_info['width'] = w window_info['height'] = h window_info['name'] = win32gui.GetWindowText(hwnd) win32gui.SetForegroundWindow(hwnd) Get the picture of the desired window using ImageGrab:
def get_screen(x1, y1, x2, y2): box = (x1 + 8, y1 + 30, x2 - 8, y2) screen = ImageGrab.grab(box) img = array(screen.getdata(), dtype=uint8).reshape((screen.size[1], screen.size[0], 3)) return img Now we will work with the content.
Monster search
The most interesting. Those implementations that I found did not suit me. For example, in one of the popular and even paid it is done through the game macro. And the “player” must for each type of monster register in a macro like “/ target Monster Name Bla Bla”.
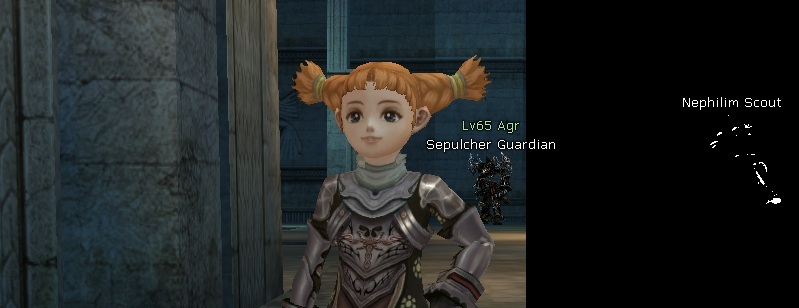
In our case, we will follow this logic: first of all, we will find all the white texts on the screen. White text can be not only the name of the monster, but also the name of the character himself, the name of the NPC or other players. Therefore, we must hover the cursor on the object and if the backlight appears with the pattern we need, then we can attack the target.
Here is the original picture with which we will work:
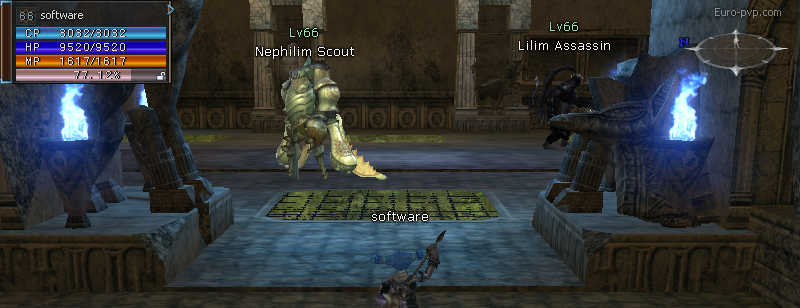
Paint black with your name so as not to interfere and translate the image into b / w. The original picture in RGB - each pixel is an array of three values from 0 to 255, when b / w is one value. So we will significantly reduce the amount of data:
img[210:230, 350:440] = (0, 0, 0) gray = cv2.cvtColor(img, cv2.COLOR_BGR2GRAY) 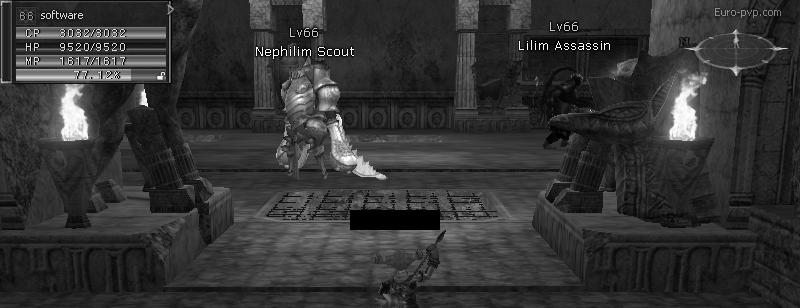
Find all the objects in white (this is white text with the names of monsters)
ret, threshold1 = cv2.threshold(gray, 252, 255, cv2.THRESH_BINARY) 
Morphological transformations:
- Filter by 50x5 rectangle. Such a rectangle fits best.
- We remove the noise inside the rectangles with the text (in fact, we paint everything between the letters with white)
- Once again we remove the noise, eroding and stretching using the filter
kernel = cv2.getStructuringElement(cv2.MORPH_RECT, (50, 5)) closed = cv2.morphologyEx(threshold1, cv2.MORPH_CLOSE, kernel) closed = cv2.erode(closed, kernel, iterations=1) closed = cv2.dilate(closed, kernel, iterations=1) 
Find the middle of the resulting spots.
(_, centers, hierarchy) = cv2.findContours(closed, cv2.RETR_TREE, cv2.CHAIN_APPROX_SIMPLE) It works, but you can make it more fun (for example, for monsters whose names are not visible, because they are far away) - using TensorFlow Object Detection, like this , but sometime in the next life.
Now we hover over the found monster and see if the backlight has appeared using the cv2.matchTemplate method. It remains to press the LMB and the attack button.
Cry
With the search for a monster figured out, the bot can already find the targets on the screen and hover them. To attack a target, you need to click the left mouse button and press "attack" (you can bind the attack on the "1" button). Right-click is needed to rotate the camera.
On the server where I tested the bot, I called a click through AutoIt, but for some reason it did not work.
As it turned out, games are protected from auto-clickers in various ways:
- search for processes that emulate clicks
- recording clicks and determining what color the object on which the bot clicks
- click pattern definition
- definition of the bot on the frequency of clicks
And some applications, as a client of this server, can determine the source of the click at the OS level. (it will be great if someone tells you exactly how).
Some frameworks that might click (including pyautogui, the robot framework and something else) were tried, but none of the options worked. The thought slipped to build a device that would press a button (someone even did it). It seems that you need a click as hard as possible. As a result, I began to look towards writing my driver.
On the Internet, a way to solve the problem was found: a usb device that can be programmed to feed the desired signal - Digispark.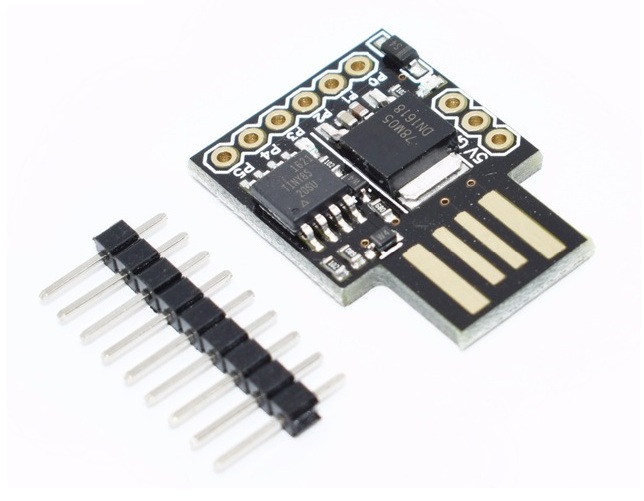
I do not want to wait a few weeks with Aliexpress, so the search continued.
As a result, a wonderful C library was found.
Found for her and a wrapper in Python
The library did not start up on Python 3.6 - the Access violation error was thrown there. So I had to jump on the python 2.7, everything worked like a charm.
Cursor movement
The library can send any commands, including where to move the mouse. But it looks like teleportation cursor. We need to make the cursor move smoothly so that we are not banned.
In essence, the task is to move the cursor from point A to point B using the AutoHotPy wrapper. Do you have to remember the math?
After a little thought, I decided to google. It turned out that there is no need to invent anything - the problem is solved by the Bresenham algorithm, one of the oldest algorithms in computer graphics:
Directly from Wikipedia you can take and implementation
Work logic
All the tools are there, the only thing left is to write a script.
- If the monster is alive, we continue to attack
- If there is no goal, find the target and start attacking
- If we could not find the target, we will turn a little
- If 5 times you could not find anyone - go to the side and start anew
From more or less interesting I will describe how I obtained the health status of the victim. In general terms: using a pattern using OpenCV, we find a control showing the health status of the target, take a strip of one pixel height and calculate in percent how many are filled with red.
def get_targeted_hp(self): """ return victim's hp or -1 if there is no target """ hp_color = [214, 24, 65] target_widget_coordinates = {} filled_red_pixels = 1 img = get_screen( self.window_info["x"], self.window_info["y"], self.window_info["x"] + self.window_info["width"], self.window_info["y"] + self.window_info["height"] - 190 ) img_gray = cv2.cvtColor(img, cv2.COLOR_BGR2GRAY) template = cv2.imread('img/target_bar.png', 0) # w, h = template.shape[::-1] res = cv2.matchTemplate(img_gray, template, cv2.TM_CCOEFF_NORMED) threshold = 0.8 loc = np.where(res >= threshold) if count_nonzero(loc) == 2: for pt in zip(*loc[::-1]): target_widget_coordinates = {"x": pt[0], "y": pt[1]} # cv2.rectangle(img, pt, (pt[0] + w, pt[1] + h), (255, 255, 255), 2) if not target_widget_coordinates: return -1 pil_image_hp = get_screen( self.window_info["x"] + target_widget_coordinates['x'] + 15, self.window_info["y"] + target_widget_coordinates['y'] + 31, self.window_info["x"] + target_widget_coordinates['x'] + 164, self.window_info["y"] + target_widget_coordinates['y'] + 62 ) pixels = pil_image_hp[0].tolist() for pixel in pixels: if pixel == hp_color: filled_red_pixels += 1 percent = 100 * filled_red_pixels / 150 return percent Now the bot understands how much HP the victim has and if she still lives.
The basic logic is ready, so now it looks like in action:
For busy, I sped up at 1.30
Stop work
All work with the cursor and keyboard is done through an autohotpy object, which can be stopped at any time by pressing the ESC button.
The problem is that all the time the bot is busy executing a cycle, responsible for the logic of the character's actions and the object's event handlers and autohotpy do not start listening to events until the cycle ends. The program does not stop using the mouse, because the bot controls it and takes the cursor where it needs it.
It does not suit us, so we had to divide the bot into 2 streams: listening to events and performing the logic of the character’s actions.
Create 2 threads
# init bot stop event self.bot_thread_stop_event = threading.Event() # init threads self.auto_py_thread = threading.Thread(target=self.start_auto_py, args=(auto_py,)) self.bot_thread = threading.Thread(target=self.start_bot, args=(auto_py, self.bot_thread_stop_event, character_class)) # start threads self.auto_py_thread.start() self.bot_thread.start() and now hang the handler on ESC:
auto_py.registerExit(auto_py.ESC, self.stop_bot_event_handler) pressing ESC sets the event
self.bot_thread_stop_event.set() and in the cycle of character logic we check if the event is set:
while not stop_event.is_set(): Now calmly stop the bot by pressing the ESC button.
Conclusion
It would seem, why waste time on a product that does not bring any practical benefits?
In fact, a computer game from the point of view of computer vision is almost the same as the reality that was filmed on a camera, and there the possibilities for application are enormous. An excellent example is described in the article about underwater robots that laser shoot at salmon . Also, the article can help game developers in the fight against bot.
Well, I got acquainted with Python, touched computer vision, wrote my first idiot artificial intelligence and got a lot of pleasure.
I hope it was interesting to you.
PS Link to repository
')
Source: https://habr.com/ru/post/346258/
All Articles