"Hello Christmas - New Year!" Or program NanoCAD with Visual Basic .NET
The other day, looking through the documentation for the NanoCAD API that comes bundled with the SDK, I suddenly noticed that the description of the class members for the .NET API and the MultiCAD.NET API is given in both C # and Visual Basic . And I thought: “But it's great that there is a description for VB!”
And although honestly I don’t know VB at all, and the code on the good old BASIC was last seen about 100 years ago, but this is one of the languages in which people start learning the basics of programming, so I decided to make a small contribution to popularizing the program.
I must say that Habré already has a good article on the use of VB for NanoCAD , there is considered a bundle of NanoCAD with Excel and how it can ultimately facilitate construction design.
')
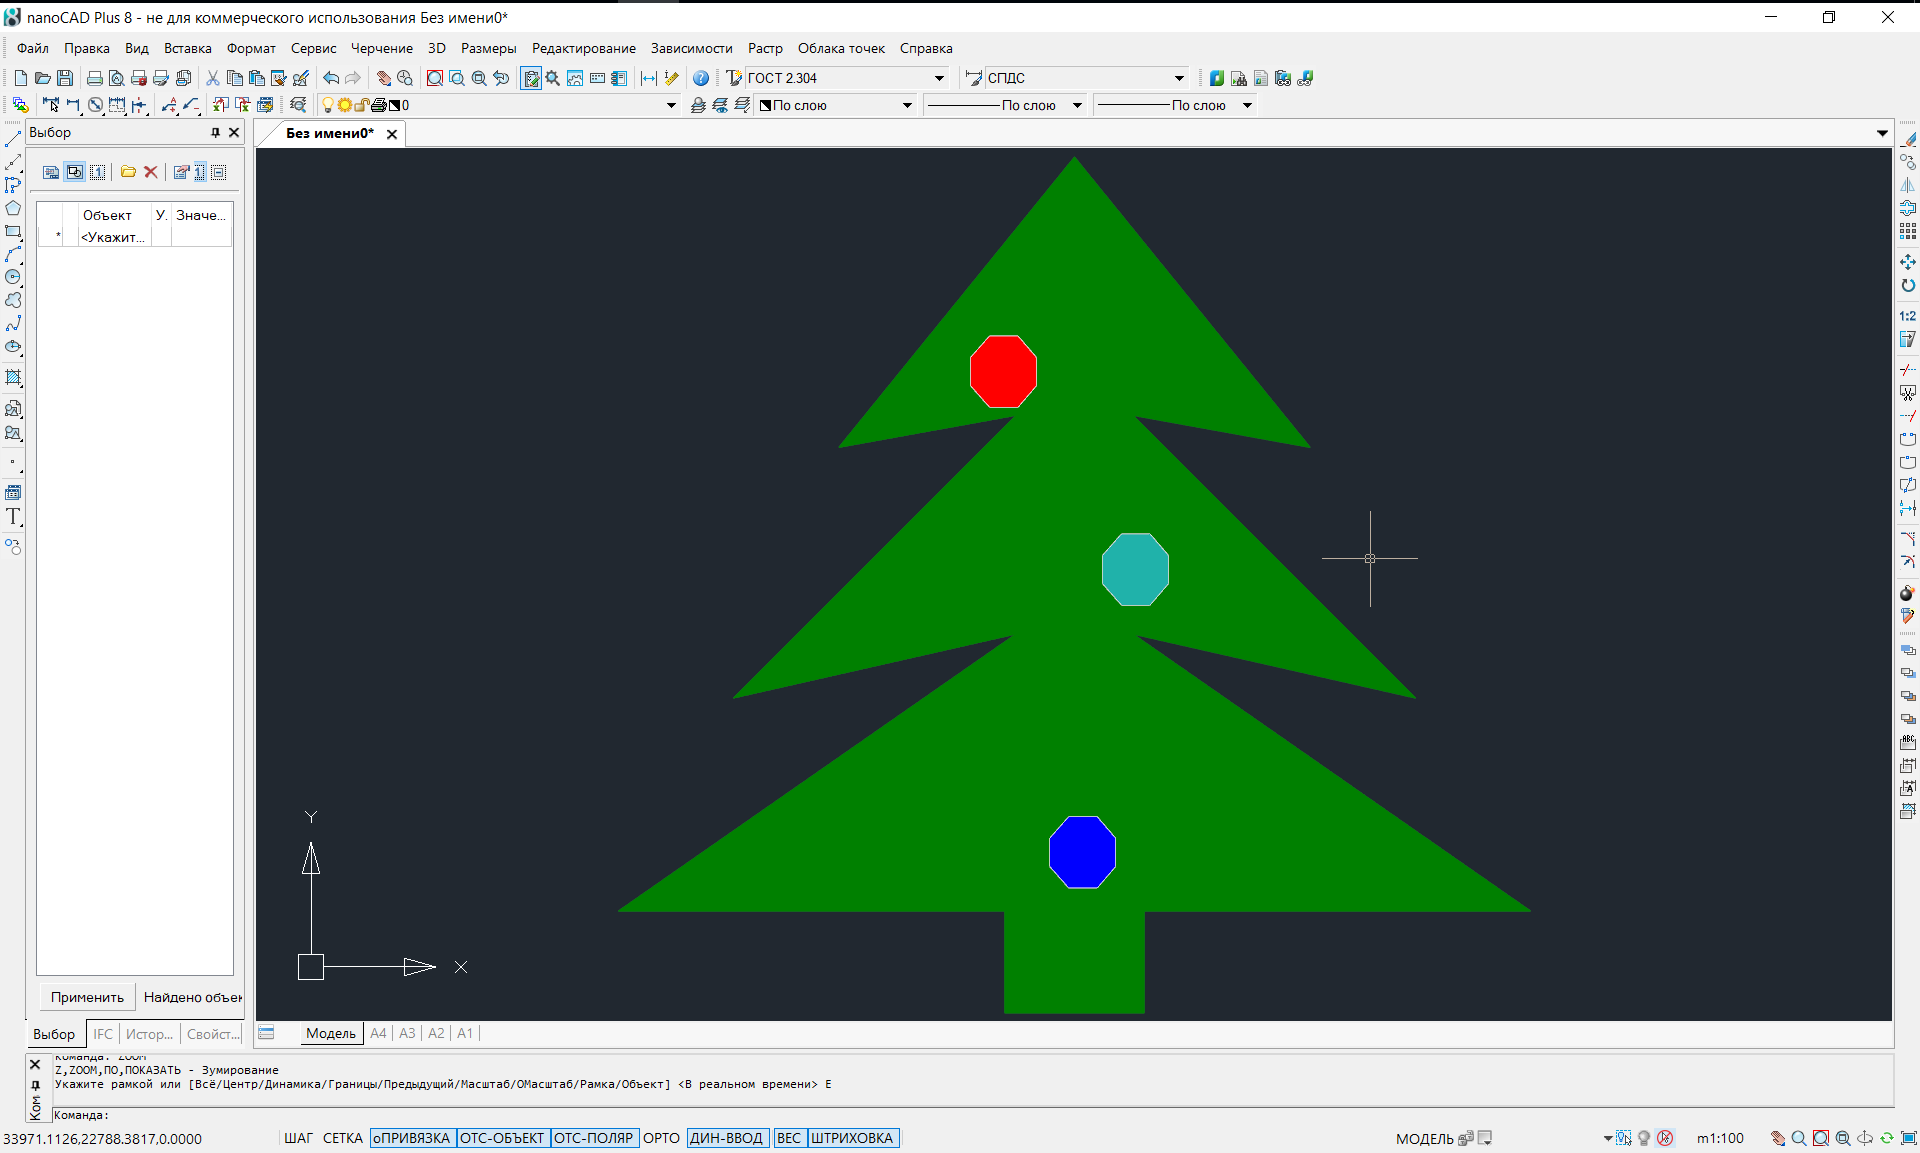
We will solve another, simpler and festive problem with you, draw a Christmas tree and congratulate the user with the new year. Despite the fact that the article is devoted to VB, the C # code will also be.
And since “New Year” is a costly holiday, we will be guided by the version of NanoCAD 5.1, which is free for commercial use (but, in theory, it should work without problems with NC 8.X).
Also, let's not ignore the Linux users , since the C # code can be compiled and run on it using Mono and Wine.
To be honest, I myself just recently started learning the NanoCAD API, and therefore my last holiday article this year is somewhat like a warm graphic graphic artist “Kengurenok (ROO)” , but if that doesn’t stop you, you are welcome to …

PS This is the first letter of the word "Habrahabr" - I didn’t have enough for more =)
Since, my new hobby, is already turning into a small cycle of articles, just in case, I will provide links to all previous articles under the spoiler:
To begin with, as usual, let me remind you that I am not a programmer and therefore not all of my thoughts in this article can be 100% correct, and also that I have nothing to do with the developers of NanoCAD , just for ideological reasons I popularize a native CAD system.
By the end of the year I don’t want to produce a mountain of text, so the article will be short, that’s what we’ll make out.
Content:
Part I: Introduction
Part II: we write code on C #
Part III: write code in VB
Part IV: with the Coming!
How to create a new project in Visual Studio 2015 for NC 8.5, I have already told before .
This time, for the sake of curiosity, let's create a project in a more lightweight IDE Xamarin Studio ( MonoDevelop ).
I will hide the whole process under the spoiler.
Similar manipulations can be done under Linux, we need Wine to run NanoCAD 5.1, and to program MonoDevelop. I described in more detail in the last article .
Unfortunately, there I had some problems with Wine and the colors of NanoCAD were broken in some places, so our Christmas tree for Linux will look like this:
The C # code will not be parsed in detail in chunks; we practically do nothing new.
In short, we create a team that draws polylines and hatches them.
The code is under the spoiler and on GitHub (there is also a version for VB).
In theory, this code should work and in NC 8.X you only need to select .NET Framework 4.0 to include mapibasetypes.dll and mapimgd.dll in the project from the include folder of the corresponding bitness (x64 or x86) and replace one line (where is the corresponding comment, and also comment or delete the DrawThreeBalls method
It turns out like this:
Despite the fact that the process of creating a project in Visual Studio 2015 for VB.NET is almost completely identical to the creation of a project for C # given that people who lack the necessary skills can read the article, we’ll still analyze this point in more detail.
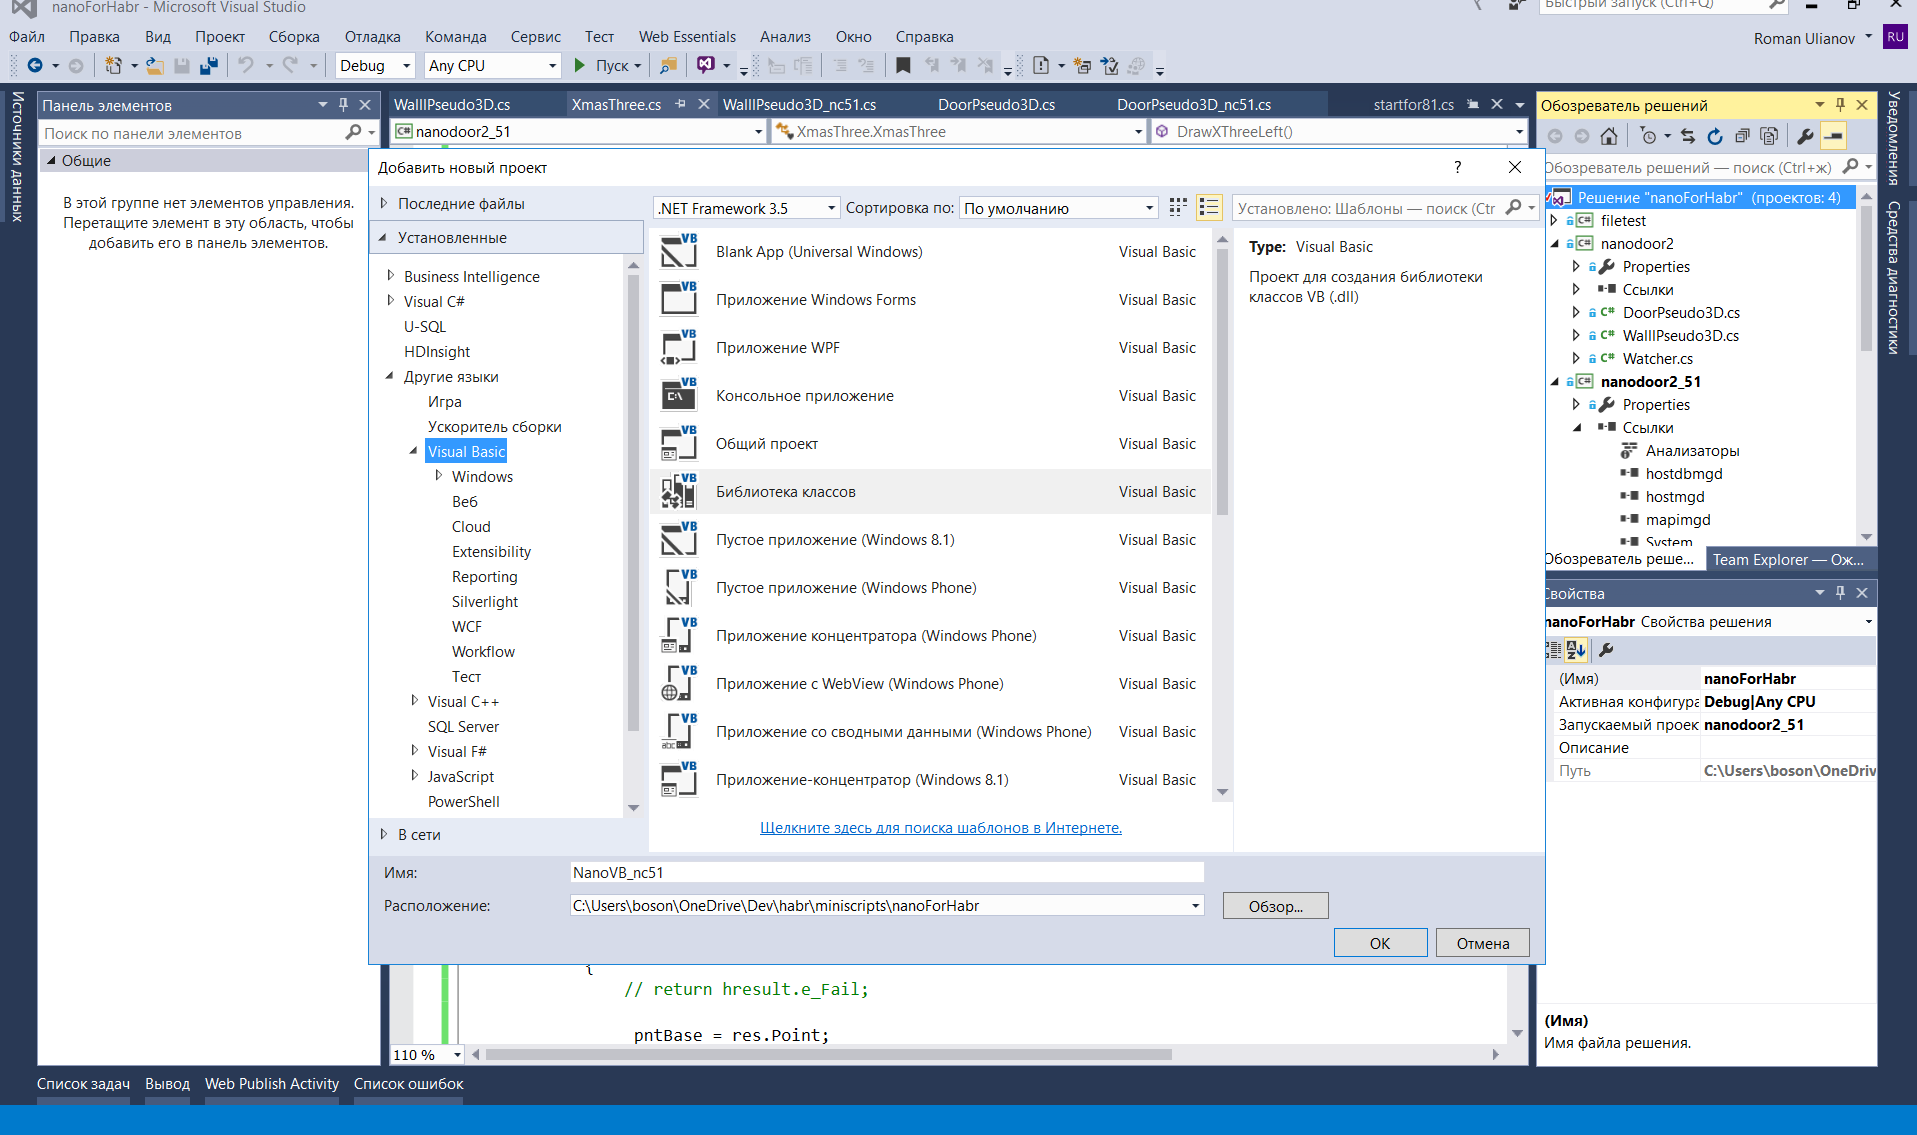
To begin with, we will create a new project, select the VB.NET class library and select .NET Framework 3.5 (for NC 8.X version 4.0)
Then click RMB on the “links” button on the right and add links to the libraries that you installed along with the SDK for any version of NanoCAD.
For this project, we only need mapimgd (for NC 8.5, we also need mapibasetypes).
You will also need to download the standard System.Windows.Forms and System.Drawing
Do not forget to remove the checkmark from the property "copy locally"

Then we will configure the project by clicking on it with PKM and selecting the "properties" button
And for the convenience of debugging, we will configure the launch of the Nanocad by pressing the “F5” key
(each time you make changes to the code, the Nankad will need to be restarted completely)
To load your library, enter the Netload command in the NanoCAD console and select the compiled dll (usually lies in the project folder, for example, C: \ Users \ b \ Dev \ habr \ XMTree \ XMTree \ bin \ Debug)
In order not to do this each time, we’ll go to C: \ ProgramData \ Nanosoft \ nanoCAD 5.1 \ DataRW (you may be different) and find or create a load.config file with the following content:
Then the libraries will be loaded automatically when the program starts.
As I said, I don’t know VB.NET at all, but as it turned out, if you know a little C # and let all the rough work to do the code converter from C # to VB (for example, this one ), then for our task there is no special knowledge will need, it will remain only a little tweak.
I will place the full command code under the spoiler, and then analyze it in parts.
Despite the fact that the code is simple, let's analyze it in detail and in parts, for we have not done this for VB before.
Import the namespaces of the MultiCAD.NET API library to draw, as well as the Windows libraries to display a window and assign colors to the hatching.
Define namespace and class name
Create a command that will then be entered into the command line Nanocad and actually draw our Christmas tree.
<CommandMethod ("DXThree"> - the name of the command, as we will call it from Nanocad, you can specify any, but better in short, in the appointment of the remaining flags, I'm not sure.
Public Sub DrawXThreeLeft () - the name of the function (method) for the command is already the internal logic invisible to the CAD user.
We create class fields (variables) in order to store the coordinates of the insertion point and the coordinates of the insertion buffer point for Christmas tree decorations.
Create a new object for input into the console and give the user an invitation to click the mouse on the screen to determine the insertion point.
If the input is successful, then the tree is drawn further; if not, nothing is done.
Create a list with points that define the vertices of the polyline (the left half of the tree)
First we create the geometry (not visible on the screen) for the left half of the tree, and then we create the document object, which we end up with in the drawing model space with the XThreeLeft.DbEntity.AddToCurrentDocument () command.
In order to make the right half of the tree, simply mirror the left one (analogue of the mirror command in NanoCAD itself). To do this, call the Mirror method at the polyline with the left half of the tree and do not forget to cast the type to Polyline3d using the DirectCast command.
Strangely enough, I didn’t find hatching references directly in the MultiCAD.NET API help in the NC 5.1 SDK, although they are in the documentation for the usual .NET API, but nonetheless the hatching seems to be implemented in the MultiCAD.NET API so the code below at least works fine for me.
To begin with, we merge the points of the left and right half of the tree, and in order for the line to close in the correct order, the array of vertices for the right half must be “flipped” so that the vertices go in the reverse order.
Then, using the list of points, create the geometry of poly lines using the usual way.
Here the code is a bit redundant, you can rewrite it yourself neatly
Create a geometry for hatching, using our complete spruce contour. As the type of hatching, select the solid fill (the names of the hatchings can be spied on in the Nanocad itself by selecting the “hatching” command).
Now we will create a drawing object, which we will place in the model space, having previously set it a green color.
We will hang out our Christmas tree toys. It was originally supposed to shade the balls, but the advice on shading the circle from the developers forum only works for the C # version of the code and only in NC 5.1, so we will hatch the 8 squares.
The whole process is identical to what we did earlier, the only difference is that in order to reduce the amount of code we created the polyline for the octagon in a separate method DrawThreeOctogonPl
There will be three such “balls” (red, green, blue), I think it makes no sense to separate them separately.
The last thing left is to bring out a window with congratulations.
As a result, we get the following picture.
For NC 5.1
For NC 8.1
Well, maybe someone will say that we have now made useless and useless “nonsense” to anyone ...

And that this is again another article for beginners, which has no place on Habré.
, , , - , Basic ( Pascal) . Basic , SmallBasic
, NC 5.1 , NanoCAD , .
, NC API, «»
, 2018 !
, 2018 NanoCAD, API NET Framework.
PS ! API Nanocad 8.X.
Windows 10 64 NanoCAD ( ). C# « ».
32 , , Windows 10 .
And although honestly I don’t know VB at all, and the code on the good old BASIC was last seen about 100 years ago, but this is one of the languages in which people start learning the basics of programming, so I decided to make a small contribution to popularizing the program.
I must say that Habré already has a good article on the use of VB for NanoCAD , there is considered a bundle of NanoCAD with Excel and how it can ultimately facilitate construction design.
')
We will solve another, simpler and festive problem with you, draw a Christmas tree and congratulate the user with the new year. Despite the fact that the article is devoted to VB, the C # code will also be.
And since “New Year” is a costly holiday, we will be guided by the version of NanoCAD 5.1, which is free for commercial use (but, in theory, it should work without problems with NC 8.X).
Also, let's not ignore the Linux users , since the C # code can be compiled and run on it using Mono and Wine.
To be honest, I myself just recently started learning the NanoCAD API, and therefore my last holiday article this year is somewhat like a warm graphic graphic artist “Kengurenok (ROO)” , but if that doesn’t stop you, you are welcome to …
PS This is the first letter of the word "Habrahabr" - I didn’t have enough for more =)
Since, my new hobby, is already turning into a small cycle of articles, just in case, I will provide links to all previous articles under the spoiler:
Other articles of the cycle
- Scarless Face or First Steps in Multicad.NET API 7 (for Nanocad 8.1)
- “Like a ram on a new gate” or custom “pseudo-3D” objects in NanoCAD using the MultiCAD.NET API
- “I am watching you” or how to make SCADA from CADa (MultiCAD.NET API)
- “Truth in wine” or try programming NanoCAD under Linux (MultiCAD.NET API)
To begin with, as usual, let me remind you that I am not a programmer and therefore not all of my thoughts in this article can be 100% correct, and also that I have nothing to do with the developers of NanoCAD , just for ideological reasons I popularize a native CAD system.
By the end of the year I don’t want to produce a mountain of text, so the article will be short, that’s what we’ll make out.
Content:
Part I: Introduction
Part II: we write code on C #
Part III: write code in VB
Part IV: with the Coming!
Part II: we write code on C #
How to create a new project in Visual Studio 2015 for NC 8.5, I have already told before .
This time, for the sake of curiosity, let's create a project in a more lightweight IDE Xamarin Studio ( MonoDevelop ).
I will hide the whole process under the spoiler.
How to create a C # project for NanoCAD 5.1 in IDE Xamarin Studio
First, create a new project and select the class library C #
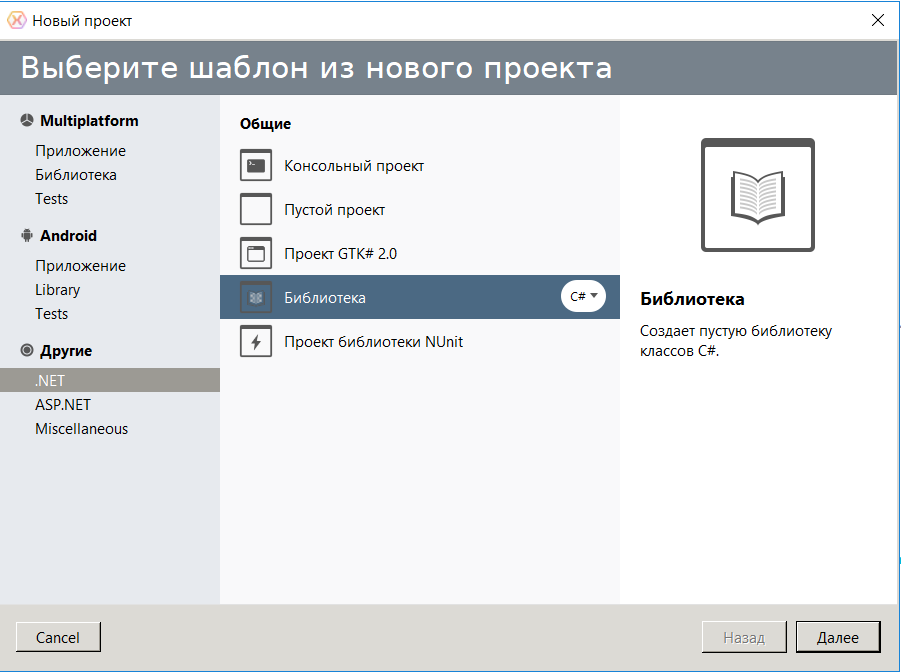
Give him some name

Then we will configure the project by clicking on it with the RMB and selecting the “Parameters” button

Choose version .Net 3.5

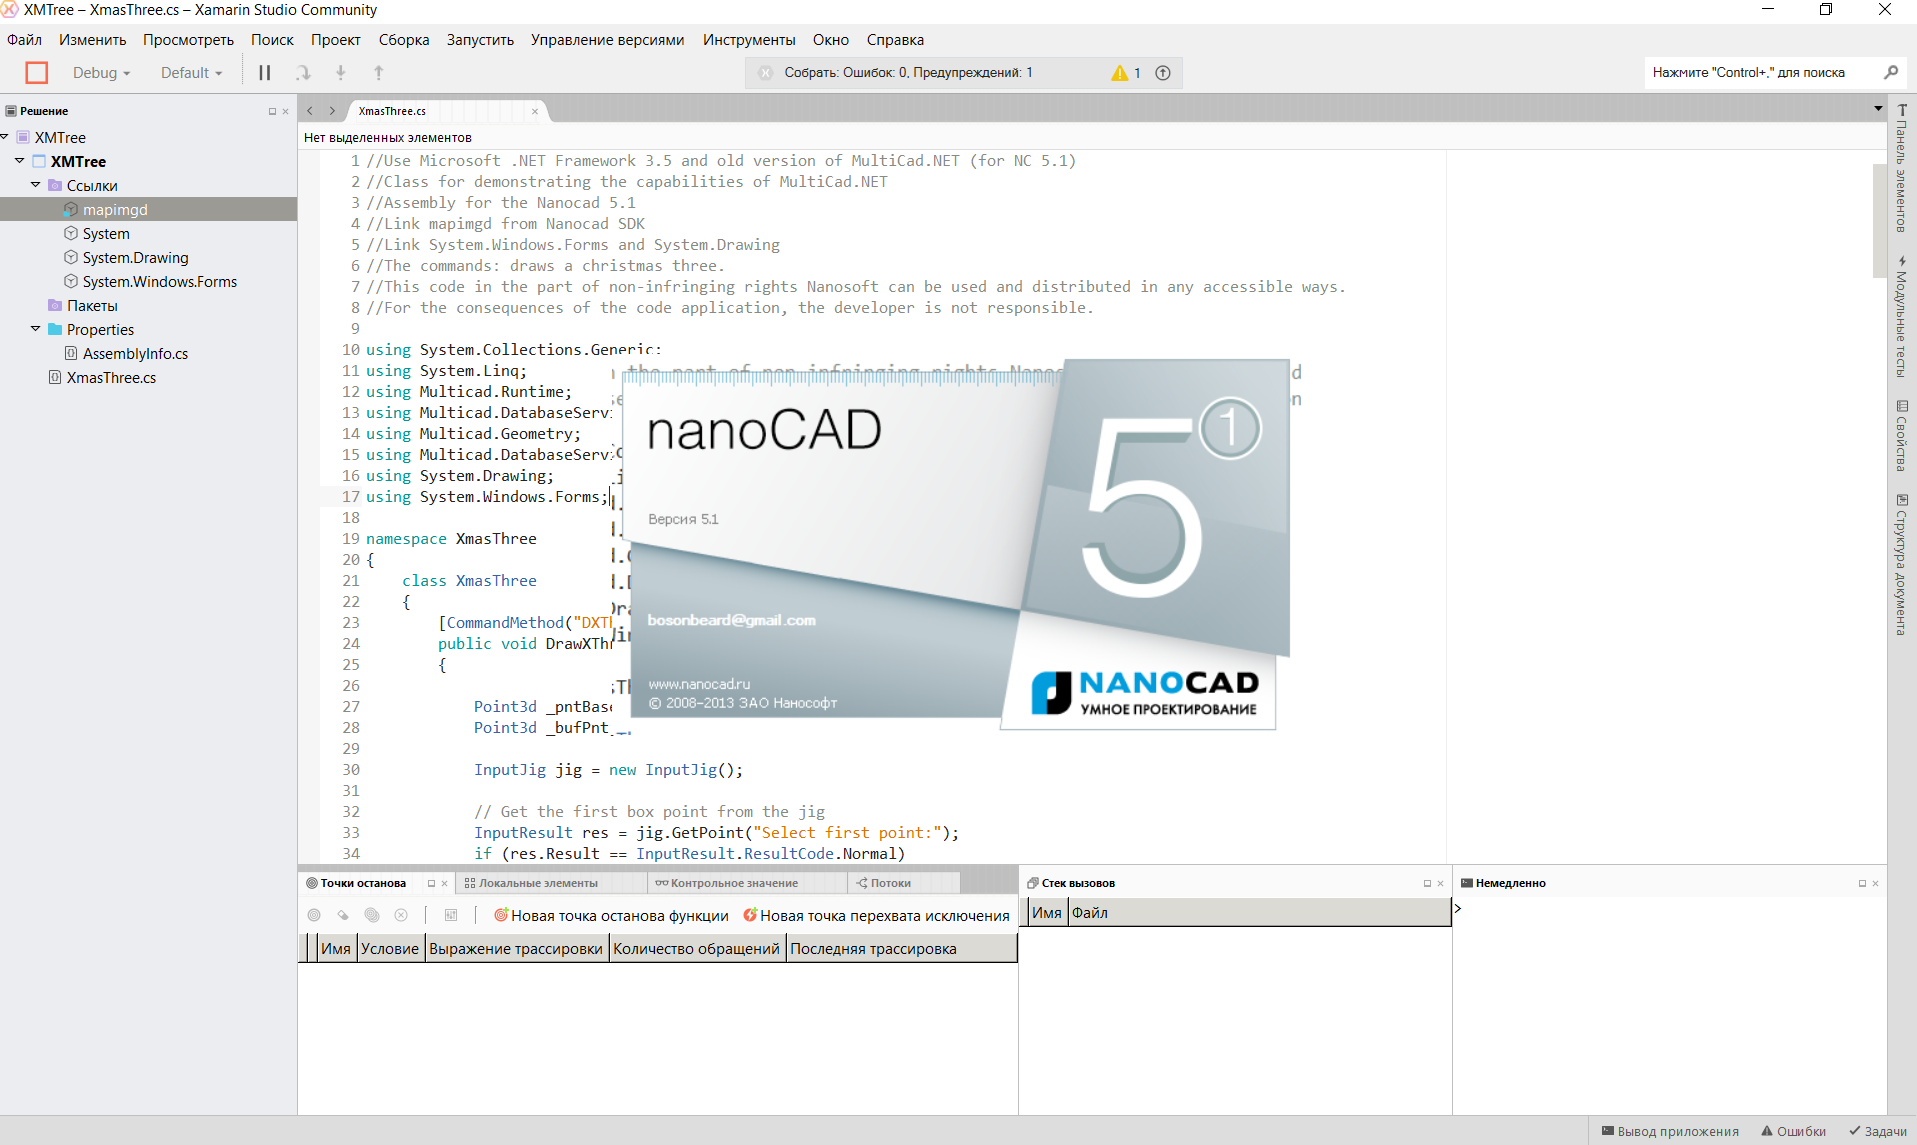
Then, for the convenience of debugging, we will configure the launch of the Nanocad by pressing the F5 key
(each time you make changes to the code, the Nankad will need to be restarted completely)

Then we load the links to the libraries, we need those that are displayed on the right in the picture.

Do not forget to remove the checkmark from the “copy locally” item in the mapimgd library
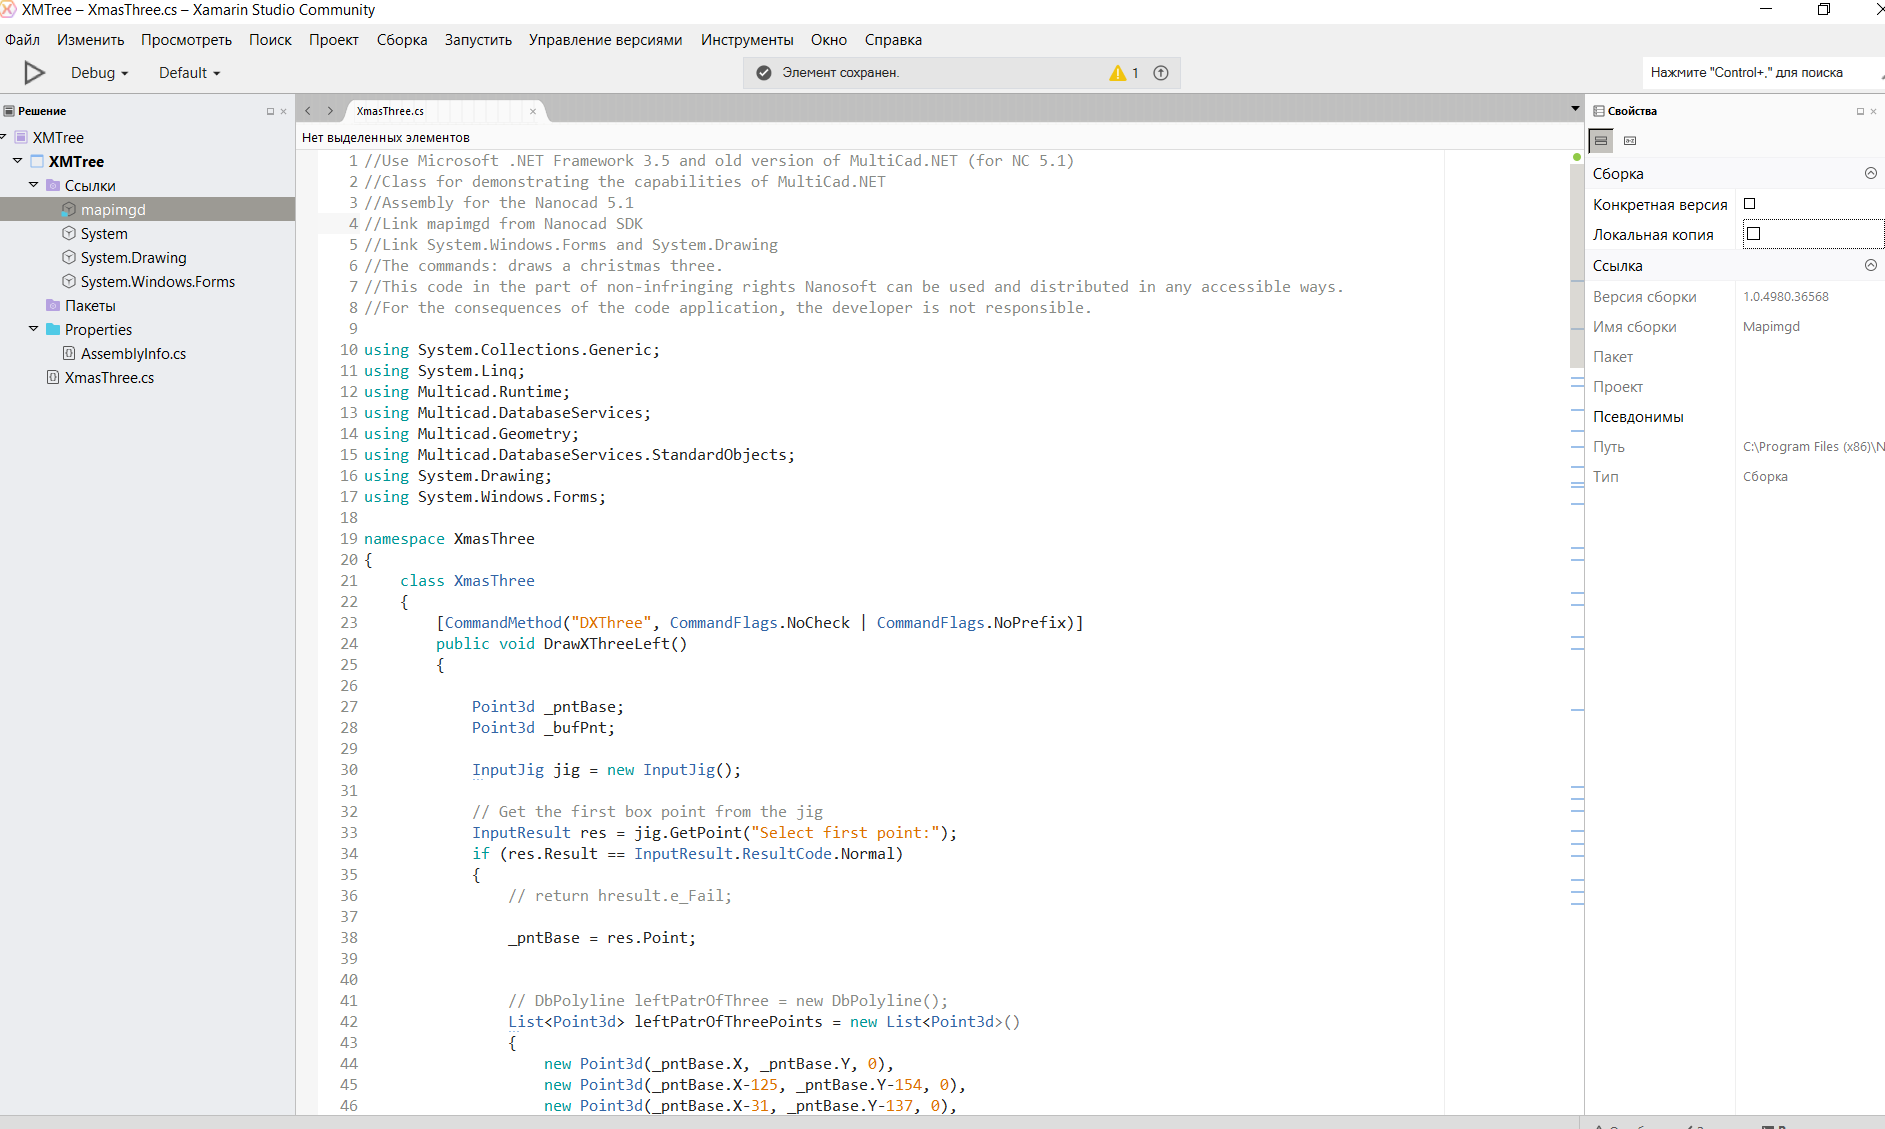
Well, actually it remains to write the code, press F5 and see that everything starts.
To load your library, enter the Netload command in the NanoCAD console and select your dll (as a rule it lies in the project folder, for example, C: \ Users \ b \ Dev \ habr \ XMTree \ XMTree \ bin \ Debug)
In order not to do it every time
Let's go to the address C: \ ProgramData \ Nanosoft \ nanoCAD 5.1 \ DataRW (you may differ) and find or create the load.config file with the following content
Then the libraries will be loaded automatically when the program starts.
Give him some name
Then we will configure the project by clicking on it with the RMB and selecting the “Parameters” button
Choose version .Net 3.5
Then, for the convenience of debugging, we will configure the launch of the Nanocad by pressing the F5 key
(each time you make changes to the code, the Nankad will need to be restarted completely)
Then we load the links to the libraries, we need those that are displayed on the right in the picture.
Do not forget to remove the checkmark from the “copy locally” item in the mapimgd library
Well, actually it remains to write the code, press F5 and see that everything starts.
To load your library, enter the Netload command in the NanoCAD console and select your dll (as a rule it lies in the project folder, for example, C: \ Users \ b \ Dev \ habr \ XMTree \ XMTree \ bin \ Debug)
In order not to do it every time
Let's go to the address C: \ ProgramData \ Nanosoft \ nanoCAD 5.1 \ DataRW (you may differ) and find or create the load.config file with the following content
<root> <list> <module path="C:\Users\...\bin\Debug\ .dll"/> </list> </root> Then the libraries will be loaded automatically when the program starts.
Similar manipulations can be done under Linux, we need Wine to run NanoCAD 5.1, and to program MonoDevelop. I described in more detail in the last article .
Unfortunately, there I had some problems with Wine and the colors of NanoCAD were broken in some places, so our Christmas tree for Linux will look like this:
Spruce under linux
The C # code will not be parsed in detail in chunks; we practically do nothing new.
In short, we create a team that draws polylines and hatches them.
The code is under the spoiler and on GitHub (there is also a version for VB).
Full code for NC 5.1 in C #
//Use Microsoft .NET Framework 3.5 and old version of MultiCad.NET (for NC 5.1) //Class for demonstrating the capabilities of MultiCad.NET //Assembly for the Nanocad 5.1 //Link mapimgd from Nanocad SDK //Link System.Windows.Forms and System.Drawing //The commands: draws a christmas three. //This code in the part of non-infringing rights Nanosoft can be used and distributed in any accessible ways. //For the consequences of the code application, the developer is not responsible. //The code was not tested with NANOCAD 8.X. // However, it should work, if you update SDK libraries and include NC 8.X dll using System.Collections.Generic; using System.Linq; using Multicad.Runtime; using Multicad.DatabaseServices; using Multicad.Geometry; using Multicad.DatabaseServices.StandardObjects; using System.Drawing; using System.Windows.Forms; namespace XmasThree { class XmasThree { [CommandMethod("DXThree", CommandFlags.NoCheck | CommandFlags.NoPrefix)] public void DrawXThree() { Point3d _pntBase; Point3d _bufPnt; //prompts for installation point entry InputJig jig = new InputJig(); // Get the first box point from the jig InputResult res = jig.GetPoint("Select first point:"); //It works only if input was successful if (res.Result == InputResult.ResultCode.Normal) { // The base point is taken from the entry point (click with mouse) _pntBase = res.Point; //Draw the outline of the left half of the Christmas tree //Create base points for the polyline List<Point3d> leftPatrOfThreePoints = new List<Point3d>() { new Point3d(_pntBase.X, _pntBase.Y, 0), new Point3d(_pntBase.X-125, _pntBase.Y-154, 0), new Point3d(_pntBase.X-31, _pntBase.Y-137, 0), new Point3d(_pntBase.X-181, _pntBase.Y-287, 0), new Point3d(_pntBase.X-31, _pntBase.Y-253, 0), new Point3d(_pntBase.X-242, _pntBase.Y-400, 0), new Point3d(_pntBase.X-37, _pntBase.Y-400, 0), new Point3d(_pntBase.X-37, _pntBase.Y-454, 0), new Point3d(_pntBase.X, _pntBase.Y-454, 0) }; //Create a polyline (geometry) Polyline3d leftPatrOfThree = new Polyline3d(leftPatrOfThreePoints); //Create a polyline object and place it on the drawing DbPolyline XThreeLeft = new DbPolyline(); XThreeLeft.Polyline = new Polyline3d(leftPatrOfThree); XThreeLeft.Polyline.SetClosed(false); XThreeLeft.DbEntity.Color = Color.Green; XThreeLeft.DbEntity.AddToCurrentDocument(); //The right part of the tree is obtained by mirroring the left DbPolyline XThreeRight = new DbPolyline(); XThreeRight.DbEntity.Color = Color.Green; XThreeRight.Polyline = (Polyline3d)XThreeLeft.Polyline.Mirror(new Plane3d(_pntBase, new Vector3d(10, 0, 0))); XThreeRight.DbEntity.AddToCurrentDocument(); //From the right and left sides we make a single contour for hatching DbPolyline XThreeR = new DbPolyline(); XThreeR.DbEntity.Color = Color.Green; //XThreeR.Polyline = XThreeRight.Polyline.Clone() as Polyline3d; for NC 8.5 XThreeR.Polyline = XThreeRight.Polyline.GetCopy() as Polyline3d; //FOR NC 5.1 XThreeR.DbEntity.AddToCurrentDocument(); List<Point3d> hatchPoints = new List<Point3d>(); hatchPoints.AddRange(leftPatrOfThreePoints); hatchPoints.AddRange(XThreeR.Polyline.Points.Reverse().ToList()); Polyline3d hatchContur = new Polyline3d(hatchPoints); //We will create on the basis of a contour a hatch (geometry) with continuous filling Hatch hatch = new Hatch(hatchContur, 0, 10, true); hatch.PattType = PatternType.PreDefined; hatch.PatternName = "SOLID"; //Based on the geometry of the hatch, we create the document object, set its color properties - green DbGeometry dbhatch = new DbGeometry(); dbhatch.Geometry = new EntityGeometry(hatch); dbhatch.DbEntity.Color = Color.Green; dbhatch.DbEntity.AddToCurrentDocument(); // if you want you can try to draw balls with circles use // DrawThreeBalls(_pntBase); //Similarly, make a Christmas tree toy (octagon) //red _bufPnt = _pntBase.Subtract(new Vector3d(30, 95, 0)); DbPolyline dbOctoRed = DrawThreeOctogonPl(_bufPnt);//implicit dbOctoRed.DbEntity.AddToCurrentDocument(); Hatch hatchCirkRed = new Hatch(dbOctoRed.Polyline, 0, 1, false); hatchCirkRed.PattType = PatternType.PreDefined; hatchCirkRed.PatternName = "SOLID"; DbGeometry dbhatchCirkRed = new DbGeometry(); dbhatchCirkRed.Geometry = new EntityGeometry(hatchCirkRed); dbhatchCirkRed.DbEntity.Color = Color.Red; dbhatchCirkRed.DbEntity.AddToCurrentDocument(); //green _bufPnt = _pntBase.Subtract(new Vector3d(-40, 200, 0)); DbPolyline dbOctoGreen = DrawThreeOctogonPl(_bufPnt);//implicit dbOctoGreen.DbEntity.AddToCurrentDocument(); Hatch hatchCirkGreen = new Hatch(dbOctoGreen.Polyline, 0, 1, false); hatchCirkGreen.PattType = PatternType.PreDefined; hatchCirkGreen.PatternName = "SOLID"; DbGeometry dbhatchCirkGreen = new DbGeometry(); dbhatchCirkGreen.Geometry = new EntityGeometry(hatchCirkGreen); dbhatchCirkGreen.DbEntity.Color = Color.LightSeaGreen; dbhatchCirkGreen.DbEntity.AddToCurrentDocument(); //blue _bufPnt = _pntBase.Subtract(new Vector3d(-12, 350, 0)); DbPolyline dbOctoBlue = DrawThreeOctogonPl(_bufPnt);//implicit dbOctoBlue.DbEntity.AddToCurrentDocument(); Hatch hatchCirkBlue = new Hatch(dbOctoBlue.Polyline, 0, 1, false); hatchCirkBlue.PattType = PatternType.PreDefined; hatchCirkBlue.PatternName = "SOLID"; DbGeometry dbhatchCirkBlue = new DbGeometry(); dbhatchCirkBlue.Geometry = new EntityGeometry(hatchCirkBlue); dbhatchCirkBlue.DbEntity.Color = Color.Blue; dbhatchCirkBlue.DbEntity.AddToCurrentDocument(); //display the text with congratulations MessageBox.Show("I Wish You A Merry Christmas And Happy New Year!"); } } public Polyline3d DrawThreeOctogonPl(Point3d _pntB) { //Create points for an octagon List<Point3d> octoPoints = new List<Point3d>() { new Point3d(_pntB.X, _pntB.Y, 0), new Point3d(_pntB.X-15, _pntB.Y, 0), new Point3d(_pntB.X-25, _pntB.Y-11.3, 0), new Point3d(_pntB.X-25, _pntB.Y-26.3, 0), new Point3d(_pntB.X-15, _pntB.Y-37.6, 0), new Point3d(_pntB.X, _pntB.Y-37.6, 0), new Point3d(_pntB.X+9.7, _pntB.Y-26.3, 0), new Point3d(_pntB.X+9.7, _pntB.Y-11.3, 0), new Point3d(_pntB.X, _pntB.Y, 0) }; return new Polyline3d(octoPoints); } //Draws three balls instead of an octagon, can not earn in NanoCAD 8.X public void DrawThreeBalls(Point3d _pntB) { CircArc3d circarcRed = new CircArc3d(_pntB.Subtract(new Vector3d(30, 100, 0)), Vector3d.ZAxis, 15); DbCircArc dbCircarcRed = circarcRed;//implicit dbCircarcRed.DbEntity.AddToCurrentDocument(); Hatch hatchCirkRed = new Hatch(circarcRed, 0, 1, false); hatchCirkRed.PattType = PatternType.PreDefined; hatchCirkRed.PatternName = "SOLID"; DbGeometry dbhatchCirkRed = new DbGeometry(); dbhatchCirkRed.Geometry = new EntityGeometry(hatchCirkRed); dbhatchCirkRed.DbEntity.Color = Color.Red; dbhatchCirkRed.DbEntity.AddToCurrentDocument(); CircArc3d circarcGreen = new CircArc3d(_pntB.Subtract(new Vector3d(-40, 200, 0)), Vector3d.ZAxis, 15); DbCircArc dbCircarcGreen = circarcGreen;//implicit dbCircarcGreen.DbEntity.AddToCurrentDocument(); Hatch hatchCirkGreen = new Hatch(circarcGreen, 0, 1, false); hatchCirkGreen.PattType = PatternType.PreDefined; hatchCirkGreen.PatternName = "SOLID"; DbGeometry dbhatchCirkGreen = new DbGeometry(); dbhatchCirkGreen.Geometry = new EntityGeometry(hatchCirkGreen); dbhatchCirkGreen.DbEntity.Color = Color.LightSeaGreen; dbhatchCirkGreen.DbEntity.AddToCurrentDocument(); CircArc3d circarcBlue = new CircArc3d(_pntB.Subtract(new Vector3d(-12, 350, 0)), Vector3d.ZAxis, 15); DbCircArc dbCircarcBlue = circarcBlue;//implicit dbCircarcBlue.DbEntity.AddToCurrentDocument(); Hatch hatchCirkBlue = new Hatch(circarcBlue, 0, 1, false); hatchCirkBlue.PattType = PatternType.PreDefined; hatchCirkBlue.PatternName = "SOLID"; DbGeometry dbhatchCirkBlue = new DbGeometry(); dbhatchCirkBlue.Geometry = new EntityGeometry(hatchCirkBlue); dbhatchCirkBlue.DbEntity.Color = Color.Blue; dbhatchCirkBlue.DbEntity.AddToCurrentDocument(); } } } In theory, this code should work and in NC 8.X you only need to select .NET Framework 4.0 to include mapibasetypes.dll and mapimgd.dll in the project from the include folder of the corresponding bitness (x64 or x86) and replace one line (where is the corresponding comment, and also comment or delete the DrawThreeBalls method
It turns out like this:
Full code for NC 8.X on C #
//Use Microsoft .NET Framework 4 and old version of MultiCad.NET (for NC 8.X) //Class for demonstrating the capabilities of MultiCad.NET //Assembly for the Nanocad 8.X //Link mapimgd and mapibasetypes from Nanocad SDK //Link System.Windows.Forms and System.Drawing //The commands: draws a christmas three. //This code in the part of non-infringing rights Nanosoft can be used and distributed in any accessible ways. //For the consequences of the code application, the developer is not responsible. using System.Collections.Generic; using System.Linq; using Multicad.Runtime; using Multicad.DatabaseServices; using Multicad.Geometry; using Multicad.DatabaseServices.StandardObjects; using System.Drawing; using System.Windows.Forms; namespace XmasThree { class XmasThree { [CommandMethod("DXThree", CommandFlags.NoCheck | CommandFlags.NoPrefix)] public void DrawXThree() { Point3d _pntBase; Point3d _bufPnt; //prompts for installation point entry InputJig jig = new InputJig(); // Get the first box point from the jig InputResult res = jig.GetPoint("Select first point:"); //It works only if input was successful if (res.Result == InputResult.ResultCode.Normal) { // The base point is taken from the entry point (click with mouse) _pntBase = res.Point; //Draw the outline of the left half of the Christmas tree //Create base points for the polyline List<Point3d> leftPatrOfThreePoints = new List<Point3d>() { new Point3d(_pntBase.X, _pntBase.Y, 0), new Point3d(_pntBase.X-125, _pntBase.Y-154, 0), new Point3d(_pntBase.X-31, _pntBase.Y-137, 0), new Point3d(_pntBase.X-181, _pntBase.Y-287, 0), new Point3d(_pntBase.X-31, _pntBase.Y-253, 0), new Point3d(_pntBase.X-242, _pntBase.Y-400, 0), new Point3d(_pntBase.X-37, _pntBase.Y-400, 0), new Point3d(_pntBase.X-37, _pntBase.Y-454, 0), new Point3d(_pntBase.X, _pntBase.Y-454, 0) }; //Create a polyline (geometry) Polyline3d leftPatrOfThree = new Polyline3d(leftPatrOfThreePoints); //Create a polyline object and place it on the drawing DbPolyline XThreeLeft = new DbPolyline(); XThreeLeft.Polyline = new Polyline3d(leftPatrOfThree); XThreeLeft.Polyline.SetClosed(false); XThreeLeft.DbEntity.Color = Color.Green; XThreeLeft.DbEntity.AddToCurrentDocument(); //The right part of the tree is obtained by mirroring the left DbPolyline XThreeRight = new DbPolyline(); XThreeRight.DbEntity.Color = Color.Green; XThreeRight.Polyline = (Polyline3d)XThreeLeft.Polyline.Mirror(new Plane3d(_pntBase, new Vector3d(10, 0, 0))); XThreeRight.DbEntity.AddToCurrentDocument(); //From the right and left sides we make a single contour for hatching DbPolyline XThreeR = new DbPolyline(); XThreeR.DbEntity.Color = Color.Green; XThreeR.Polyline = XThreeRight.Polyline.Clone() as Polyline3d; // for NC 8.5 //XThreeR.Polyline = XThreeRight.Polyline.GetCopy() as Polyline3d; //FOR NC 5.1 XThreeR.DbEntity.AddToCurrentDocument(); List<Point3d> hatchPoints = new List<Point3d>(); hatchPoints.AddRange(leftPatrOfThreePoints); hatchPoints.AddRange(XThreeR.Polyline.Points.Reverse().ToList()); Polyline3d hatchContur = new Polyline3d(hatchPoints); //We will create on the basis of a contour a hatch (geometry) with continuous filling Hatch hatch = new Hatch(hatchContur, 0, 10, true); hatch.PattType = PatternType.PreDefined; hatch.PatternName = "SOLID"; //Based on the geometry of the hatch, we create the document object, set its color properties - green DbGeometry dbhatch = new DbGeometry(); dbhatch.Geometry = new EntityGeometry(hatch); dbhatch.DbEntity.Color = Color.Green; dbhatch.DbEntity.AddToCurrentDocument(); // if you want you can try to draw balls with circles use // DrawThreeBalls(_pntBase); //Similarly, make a Christmas tree toy (octagon) //red _bufPnt = _pntBase.Subtract(new Vector3d(30, 95, 0)); DbPolyline dbOctoRed = DrawThreeOctogonPl(_bufPnt);//implicit dbOctoRed.DbEntity.AddToCurrentDocument(); Hatch hatchCirkRed = new Hatch(dbOctoRed.Polyline, 0, 1, false); hatchCirkRed.PattType = PatternType.PreDefined; hatchCirkRed.PatternName = "SOLID"; DbGeometry dbhatchCirkRed = new DbGeometry(); dbhatchCirkRed.Geometry = new EntityGeometry(hatchCirkRed); dbhatchCirkRed.DbEntity.Color = Color.Red; dbhatchCirkRed.DbEntity.AddToCurrentDocument(); //green _bufPnt = _pntBase.Subtract(new Vector3d(-40, 200, 0)); DbPolyline dbOctoGreen = DrawThreeOctogonPl(_bufPnt);//implicit dbOctoGreen.DbEntity.AddToCurrentDocument(); Hatch hatchCirkGreen = new Hatch(dbOctoGreen.Polyline, 0, 1, false); hatchCirkGreen.PattType = PatternType.PreDefined; hatchCirkGreen.PatternName = "SOLID"; DbGeometry dbhatchCirkGreen = new DbGeometry(); dbhatchCirkGreen.Geometry = new EntityGeometry(hatchCirkGreen); dbhatchCirkGreen.DbEntity.Color = Color.LightSeaGreen; dbhatchCirkGreen.DbEntity.AddToCurrentDocument(); //blue _bufPnt = _pntBase.Subtract(new Vector3d(-12, 350, 0)); DbPolyline dbOctoBlue = DrawThreeOctogonPl(_bufPnt);//implicit dbOctoBlue.DbEntity.AddToCurrentDocument(); Hatch hatchCirkBlue = new Hatch(dbOctoBlue.Polyline, 0, 1, false); hatchCirkBlue.PattType = PatternType.PreDefined; hatchCirkBlue.PatternName = "SOLID"; DbGeometry dbhatchCirkBlue = new DbGeometry(); dbhatchCirkBlue.Geometry = new EntityGeometry(hatchCirkBlue); dbhatchCirkBlue.DbEntity.Color = Color.Blue; dbhatchCirkBlue.DbEntity.AddToCurrentDocument(); //display the text with congratulations MessageBox.Show("I Wish You A Merry Christmas And Happy New Year!"); } } public Polyline3d DrawThreeOctogonPl(Point3d _pntB) { //Create points for an octagon List<Point3d> octoPoints = new List<Point3d>() { new Point3d(_pntB.X, _pntB.Y, 0), new Point3d(_pntB.X-15, _pntB.Y, 0), new Point3d(_pntB.X-25, _pntB.Y-11.3, 0), new Point3d(_pntB.X-25, _pntB.Y-26.3, 0), new Point3d(_pntB.X-15, _pntB.Y-37.6, 0), new Point3d(_pntB.X, _pntB.Y-37.6, 0), new Point3d(_pntB.X+9.7, _pntB.Y-26.3, 0), new Point3d(_pntB.X+9.7, _pntB.Y-11.3, 0), new Point3d(_pntB.X, _pntB.Y, 0) }; return new Polyline3d(octoPoints); } } } Part III: write code in VB
Despite the fact that the process of creating a project in Visual Studio 2015 for VB.NET is almost completely identical to the creation of a project for C # given that people who lack the necessary skills can read the article, we’ll still analyze this point in more detail.
To begin with, we will create a new project, select the VB.NET class library and select .NET Framework 3.5 (for NC 8.X version 4.0)
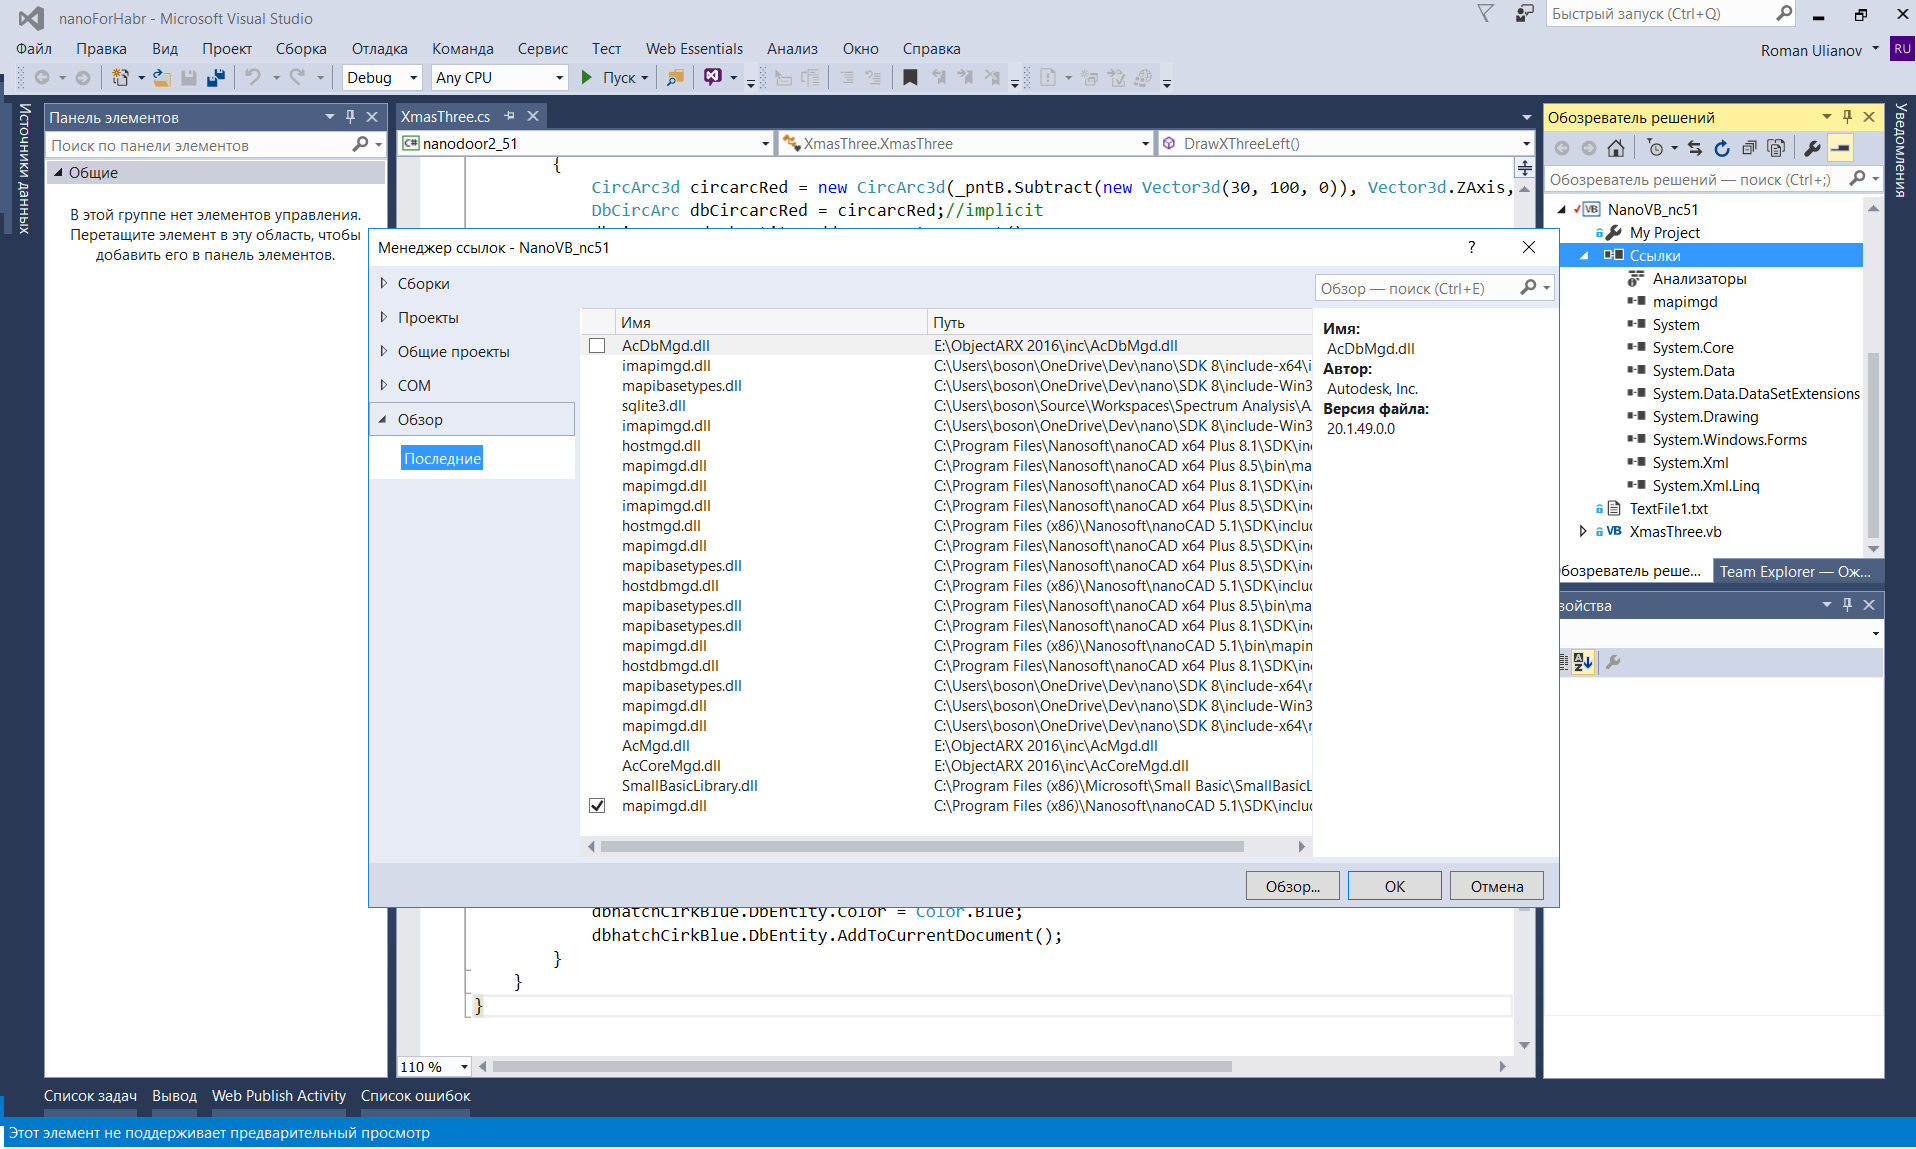
Then click RMB on the “links” button on the right and add links to the libraries that you installed along with the SDK for any version of NanoCAD.
For this project, we only need mapimgd (for NC 8.5, we also need mapibasetypes).
You will also need to download the standard System.Windows.Forms and System.Drawing
Do not forget to remove the checkmark from the property "copy locally"
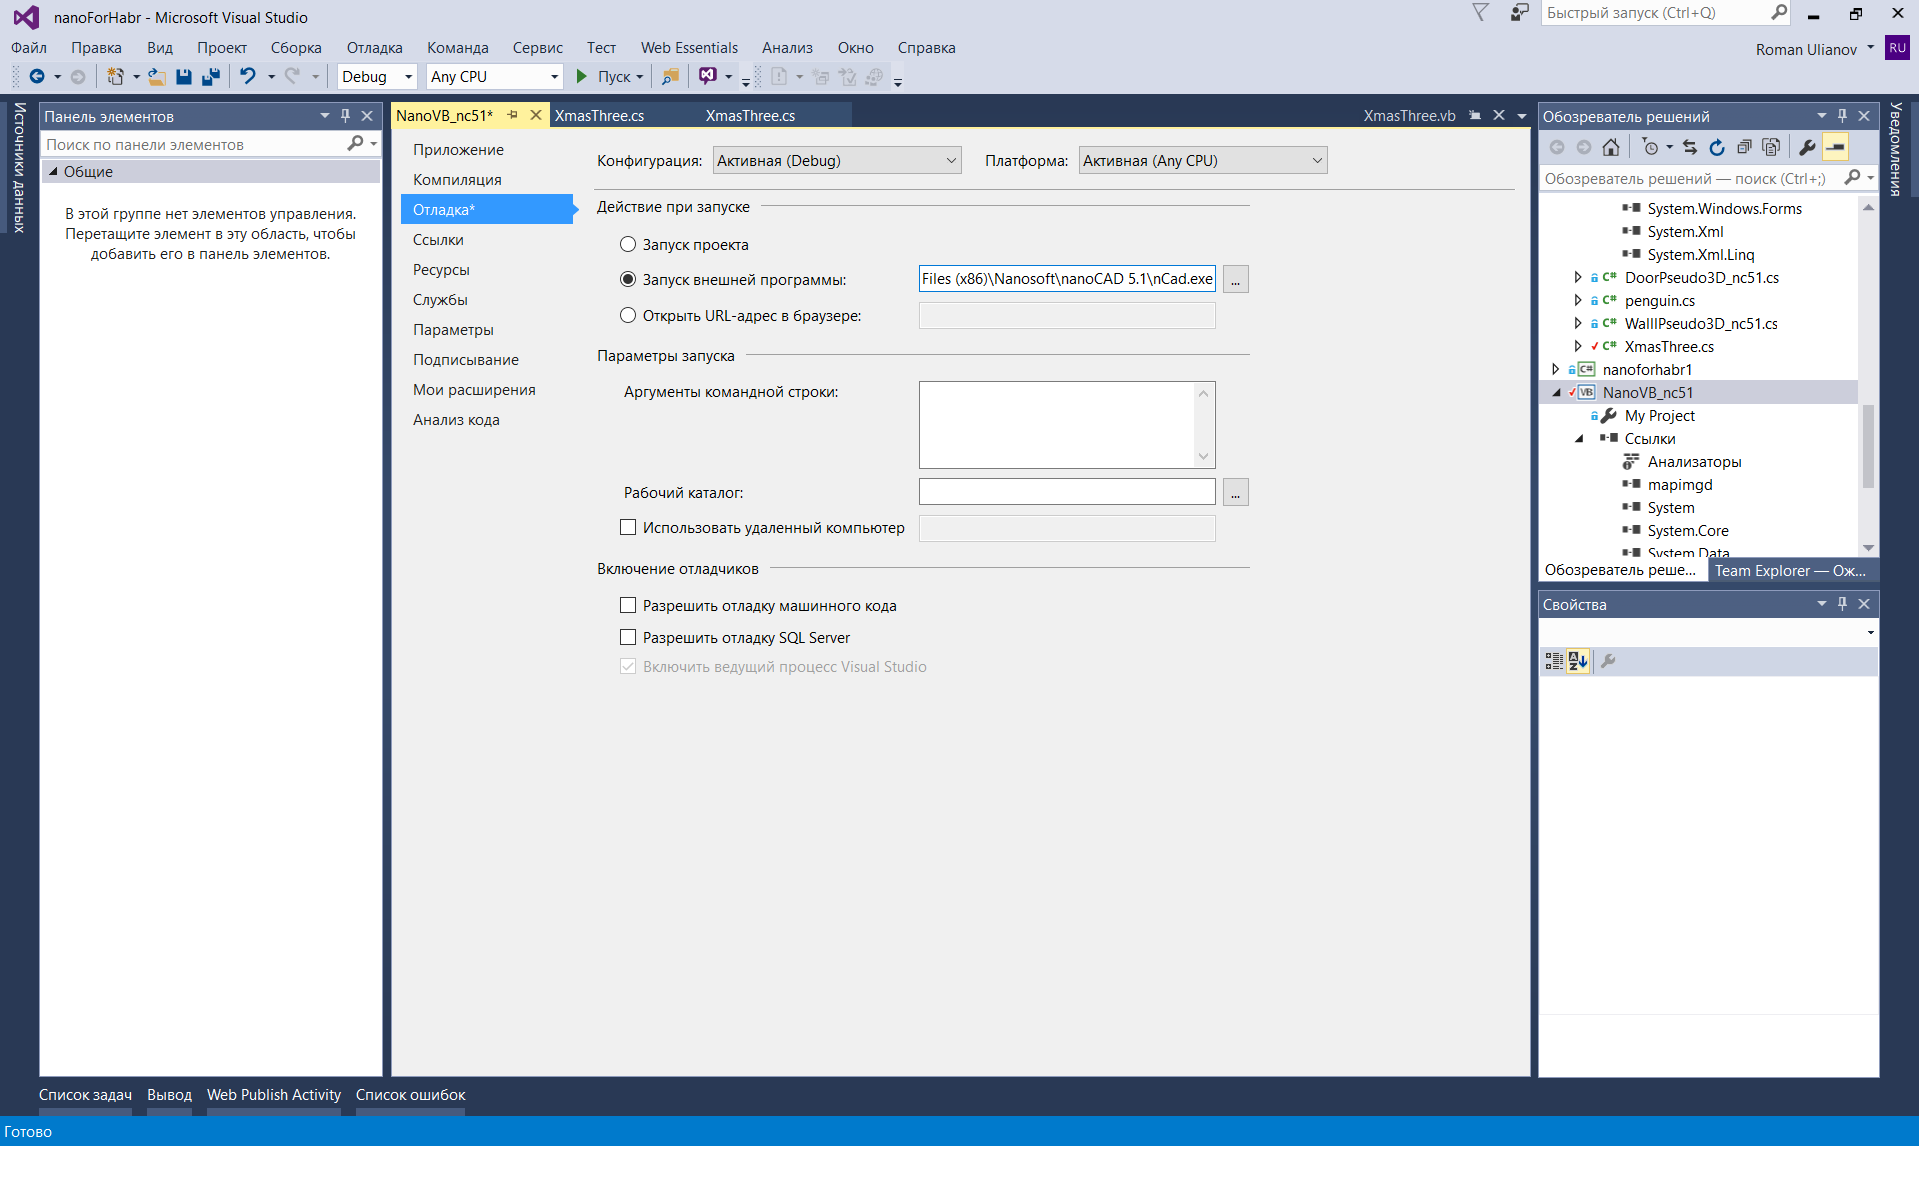
Then we will configure the project by clicking on it with PKM and selecting the "properties" button
And for the convenience of debugging, we will configure the launch of the Nanocad by pressing the “F5” key
(each time you make changes to the code, the Nankad will need to be restarted completely)
To load your library, enter the Netload command in the NanoCAD console and select the compiled dll (usually lies in the project folder, for example, C: \ Users \ b \ Dev \ habr \ XMTree \ XMTree \ bin \ Debug)
In order not to do this each time, we’ll go to C: \ ProgramData \ Nanosoft \ nanoCAD 5.1 \ DataRW (you may be different) and find or create a load.config file with the following content:
<root> <list> <module path="C:\Users\...\bin\Debug\ .dll"/> </list> </root> Then the libraries will be loaded automatically when the program starts.
As I said, I don’t know VB.NET at all, but as it turned out, if you know a little C # and let all the rough work to do the code converter from C # to VB (for example, this one ), then for our task there is no special knowledge will need, it will remain only a little tweak.
I will place the full command code under the spoiler, and then analyze it in parts.
Full code for NC 5.1 on VB.NET
Imports System.Collections.Generic Imports Multicad.Runtime Imports Multicad.DatabaseServices Imports Multicad.Geometry Imports Multicad.DatabaseServices.StandardObjects Imports System.Drawing Imports System.Windows.Forms Namespace XmasThree Class XmasThree <CommandMethod("DXThree", CommandFlags.NoCheck Or CommandFlags.NoPrefix)> Public Sub DrawXThree() Dim _pntBase As Point3d Dim _bufPnt As Point3d Dim jig As New InputJig() 'prompts for installation point entry Dim res As InputResult = jig.GetPoint("Select first point:") If res.Result = InputResult.ResultCode.Normal Then 'The base point is taken from the entry point (click with mouse) _pntBase = res.Point 'Draw the outline of the left half of the Christmas tree 'Create base points for the polyline Dim leftPatrOfThreePoints As New List(Of Point3d)() From { New Point3d(_pntBase.X, _pntBase.Y, 0), New Point3d(_pntBase.X - 125, _pntBase.Y - 154, 0), New Point3d(_pntBase.X - 31, _pntBase.Y - 137, 0), New Point3d(_pntBase.X - 181, _pntBase.Y - 287, 0), New Point3d(_pntBase.X - 31, _pntBase.Y - 253, 0), New Point3d(_pntBase.X - 242, _pntBase.Y - 400, 0), New Point3d(_pntBase.X - 37, _pntBase.Y - 400, 0), New Point3d(_pntBase.X - 37, _pntBase.Y - 454, 0), New Point3d(_pntBase.X, _pntBase.Y - 454, 0) } 'Create a polyline (geometry) Dim leftPatrOfThree As New Polyline3d(leftPatrOfThreePoints) 'Create a polyline object and place it on the drawing Dim XThreeLeft As New DbPolyline() XThreeLeft.Polyline = New Polyline3d(leftPatrOfThree) XThreeLeft.Polyline.SetClosed(False) XThreeLeft.DbEntity.Color = Color.Green XThreeLeft.DbEntity.AddToCurrentDocument() Dim XThreeRight As New DbPolyline() XThreeRight.DbEntity.Color = Color.Green XThreeRight.Polyline = DirectCast(XThreeLeft.Polyline.Mirror(New Plane3d(_pntBase, New Vector3d(10, 0, 0))), Polyline3d) XThreeRight.DbEntity.AddToCurrentDocument() 'From the right and left sides we make a single contour for hatching Dim XThreeR As New DbPolyline() XThreeR.DbEntity.Color = Color.Green XThreeR.Polyline = TryCast(XThreeRight.Polyline.GetCopy(), Polyline3d) XThreeR.DbEntity.AddToCurrentDocument() Dim hatchPoints As New List(Of Point3d)() hatchPoints.AddRange(leftPatrOfThreePoints) hatchPoints.AddRange(XThreeR.Polyline.Points.Reverse().ToList()) Dim hatchContur As New Polyline3d(hatchPoints) 'We will create on the basis of a contour a hatch (geometry) with continuous filling Dim hatch As New Hatch(hatchContur, 0, 10, True) hatch.PattType = PatternType.PreDefined hatch.PatternName = "SOLID" 'Based on the geometry of the hatch, we create the document object, set its color properties - green Dim dbhatch As New DbGeometry() dbhatch.Geometry = New EntityGeometry(hatch) dbhatch.DbEntity.Color = Color.Green dbhatch.DbEntity.AddToCurrentDocument() 'Similarly, make a Christmas tree toy (octagon) 'red _bufPnt = _pntBase.Subtract(New Vector3d(30, 95, 0)) Dim dbOctoRed As DbPolyline = DrawThreeOctogonPl(_bufPnt) dbOctoRed.DbEntity.AddToCurrentDocument() Dim hatchCirkRed As New Hatch(dbOctoRed.Polyline, 0, 1, False) hatchCirkRed.PattType = PatternType.PreDefined hatchCirkRed.PatternName = "SOLID" Dim dbhatchCirkRed As New DbGeometry() dbhatchCirkRed.Geometry = New EntityGeometry(hatchCirkRed) dbhatchCirkRed.DbEntity.Color = Color.Red dbhatchCirkRed.DbEntity.AddToCurrentDocument() 'green _bufPnt = _pntBase.Subtract(New Vector3d(-40, 200, 0)) Dim dbOctoGreen As DbPolyline = DrawThreeOctogonPl(_bufPnt) dbOctoGreen.DbEntity.AddToCurrentDocument() Dim hatchCirkGreen As New Hatch(dbOctoGreen.Polyline, 0, 1, False) hatchCirkGreen.PattType = PatternType.PreDefined hatchCirkGreen.PatternName = "SOLID" Dim dbhatchCirkGreen As New DbGeometry() dbhatchCirkGreen.Geometry = New EntityGeometry(hatchCirkGreen) dbhatchCirkGreen.DbEntity.Color = Color.LightSeaGreen dbhatchCirkGreen.DbEntity.AddToCurrentDocument() 'blue _bufPnt = _pntBase.Subtract(New Vector3d(-12, 350, 0)) Dim dbOctoBlue As DbPolyline = DrawThreeOctogonPl(_bufPnt) dbOctoBlue.DbEntity.AddToCurrentDocument() Dim hatchCirkBlue As New Hatch(dbOctoBlue.Polyline, 0, 1, False) hatchCirkBlue.PattType = PatternType.PreDefined hatchCirkBlue.PatternName = "SOLID" Dim dbhatchCirkBlue As New DbGeometry() dbhatchCirkBlue.Geometry = New EntityGeometry(hatchCirkBlue) dbhatchCirkBlue.DbEntity.Color = Color.Blue dbhatchCirkBlue.DbEntity.AddToCurrentDocument() MessageBox.Show("I Wish You A Merry Christmas And Happy New Year!!!") End If End Sub Public Function DrawThreeOctogonPl(_pntB As Point3d) As Polyline3d 'Create points for an octagon Dim octoPoints As New List(Of Point3d)() From { New Point3d(_pntB.X, _pntB.Y, 0), New Point3d(_pntB.X - 15, _pntB.Y, 0), New Point3d(_pntB.X - 25, _pntB.Y - 11.3, 0), New Point3d(_pntB.X - 25, _pntB.Y - 26.3, 0), New Point3d(_pntB.X - 15, _pntB.Y - 37.6, 0), New Point3d(_pntB.X, _pntB.Y - 37.6, 0), New Point3d(_pntB.X + 9.7, _pntB.Y - 26.3, 0), New Point3d(_pntB.X + 9.7, _pntB.Y - 11.3, 0), New Point3d(_pntB.X, _pntB.Y, 0) } Return New Polyline3d(octoPoints) End Function End Class End Namespace Despite the fact that the code is simple, let's analyze it in detail and in parts, for we have not done this for VB before.
Imports System.Collections.Generic Imports Multicad.Runtime Imports Multicad.DatabaseServices Imports Multicad.Geometry Imports Multicad.DatabaseServices.StandardObjects Imports System.Drawing Imports System.Windows.Forms Import the namespaces of the MultiCAD.NET API library to draw, as well as the Windows libraries to display a window and assign colors to the hatching.
Namespace XmasThree Class XmasThree Define namespace and class name
<CommandMethod("DXThree", CommandFlags.NoCheck Or CommandFlags.NoPrefix)> Public Sub DrawXThreeLeft() Create a command that will then be entered into the command line Nanocad and actually draw our Christmas tree.
<CommandMethod ("DXThree"> - the name of the command, as we will call it from Nanocad, you can specify any, but better in short, in the appointment of the remaining flags, I'm not sure.
Public Sub DrawXThreeLeft () - the name of the function (method) for the command is already the internal logic invisible to the CAD user.
Dim _pntBase As Point3d Dim _bufPnt As Point3d We create class fields (variables) in order to store the coordinates of the insertion point and the coordinates of the insertion buffer point for Christmas tree decorations.
Dim jig As New InputJig() Dim res As InputResult = jig.GetPoint("Select first point:") Create a new object for input into the console and give the user an invitation to click the mouse on the screen to determine the insertion point.
If res.Result = InputResult.ResultCode.Normal Then _pntBase = res.Point If the input is successful, then the tree is drawn further; if not, nothing is done.
Dim leftPatrOfThreePoints As New List(Of Point3d)() From { New Point3d(_pntBase.X, _pntBase.Y, 0), New Point3d(_pntBase.X - 125, _pntBase.Y - 154, 0), New Point3d(_pntBase.X - 31, _pntBase.Y - 137, 0), New Point3d(_pntBase.X - 181, _pntBase.Y - 287, 0), New Point3d(_pntBase.X - 31, _pntBase.Y - 253, 0), New Point3d(_pntBase.X - 242, _pntBase.Y - 400, 0), New Point3d(_pntBase.X - 37, _pntBase.Y - 400, 0), New Point3d(_pntBase.X - 37, _pntBase.Y - 454, 0), New Point3d(_pntBase.X, _pntBase.Y - 454, 0) } Create a list with points that define the vertices of the polyline (the left half of the tree)
'Create a polyline (geometry) Dim leftPatrOfThree As New Polyline3d(leftPatrOfThreePoints) 'Create a polyline object and place it on the drawing Dim XThreeLeft As New DbPolyline() XThreeLeft.Polyline = New Polyline3d(leftPatrOfThree) XThreeLeft.Polyline.SetClosed(False) XThreeLeft.DbEntity.Color = Color.Green XThreeLeft.DbEntity.AddToCurrentDocument() First we create the geometry (not visible on the screen) for the left half of the tree, and then we create the document object, which we end up with in the drawing model space with the XThreeLeft.DbEntity.AddToCurrentDocument () command.
Dim XThreeRight As New DbPolyline() XThreeRight.DbEntity.Color = Color.Green XThreeRight.Polyline = DirectCast(XThreeLeft.Polyline.Mirror(New Plane3d(_pntBase, New Vector3d(10, 0, 0))), Polyline3d) XThreeRight.DbEntity.AddToCurrentDocument() In order to make the right half of the tree, simply mirror the left one (analogue of the mirror command in NanoCAD itself). To do this, call the Mirror method at the polyline with the left half of the tree and do not forget to cast the type to Polyline3d using the DirectCast command.
Dim XThreeRight As New DbPolyline() XThreeRight.DbEntity.Color = Color.Green XThreeRight.Polyline = DirectCast(XThreeLeft.Polyline.Mirror(New Plane3d(_pntBase, New Vector3d(10, 0, 0))), Polyline3d) XThreeRight.DbEntity.AddToCurrentDocument() Strangely enough, I didn’t find hatching references directly in the MultiCAD.NET API help in the NC 5.1 SDK, although they are in the documentation for the usual .NET API, but nonetheless the hatching seems to be implemented in the MultiCAD.NET API so the code below at least works fine for me.
Dim XThreeR As New DbPolyline() XThreeR.DbEntity.Color = Color.Green XThreeR.Polyline = TryCast(XThreeRight.Polyline.GetCopy(), Polyline3d) XThreeR.DbEntity.AddToCurrentDocument() Dim hatchPoints As New List(Of Point3d)() hatchPoints.AddRange(leftPatrOfThreePoints) hatchPoints.AddRange(XThreeR.Polyline.Points.Reverse().ToList()) Dim hatchContur As New Polyline3d(hatchPoints) To begin with, we merge the points of the left and right half of the tree, and in order for the line to close in the correct order, the array of vertices for the right half must be “flipped” so that the vertices go in the reverse order.
Then, using the list of points, create the geometry of poly lines using the usual way.
Here the code is a bit redundant, you can rewrite it yourself neatly
'We will create on the basis of a contour a hatch (geometry) with continuous filling Dim hatch As New Hatch(hatchContur, 0, 10, True) hatch.PattType = PatternType.PreDefined hatch.PatternName = "SOLID" Create a geometry for hatching, using our complete spruce contour. As the type of hatching, select the solid fill (the names of the hatchings can be spied on in the Nanocad itself by selecting the “hatching” command).
Dim dbhatch As New DbGeometry() dbhatch.Geometry = New EntityGeometry(hatch) dbhatch.DbEntity.Color = Color.Green dbhatch.DbEntity.AddToCurrentDocument() Now we will create a drawing object, which we will place in the model space, having previously set it a green color.
We will hang out our Christmas tree toys. It was originally supposed to shade the balls, but the advice on shading the circle from the developers forum only works for the C # version of the code and only in NC 5.1, so we will hatch the 8 squares.
'Similarly, make a Christmas tree toy (octagon) 'red _bufPnt = _pntBase.Subtract(New Vector3d(30, 95, 0)) Dim dbOctoRed As DbPolyline = DrawThreeOctogonPl(_bufPnt) dbOctoRed.DbEntity.AddToCurrentDocument() Dim hatchCirkRed As New Hatch(dbOctoRed.Polyline, 0, 1, False) hatchCirkRed.PattType = PatternType.PreDefined hatchCirkRed.PatternName = "SOLID" Dim dbhatchCirkRed As New DbGeometry() dbhatchCirkRed.Geometry = New EntityGeometry(hatchCirkRed) dbhatchCirkRed.DbEntity.Color = Color.Red dbhatchCirkRed.DbEntity.AddToCurrentDocument() The whole process is identical to what we did earlier, the only difference is that in order to reduce the amount of code we created the polyline for the octagon in a separate method DrawThreeOctogonPl
There will be three such “balls” (red, green, blue), I think it makes no sense to separate them separately.
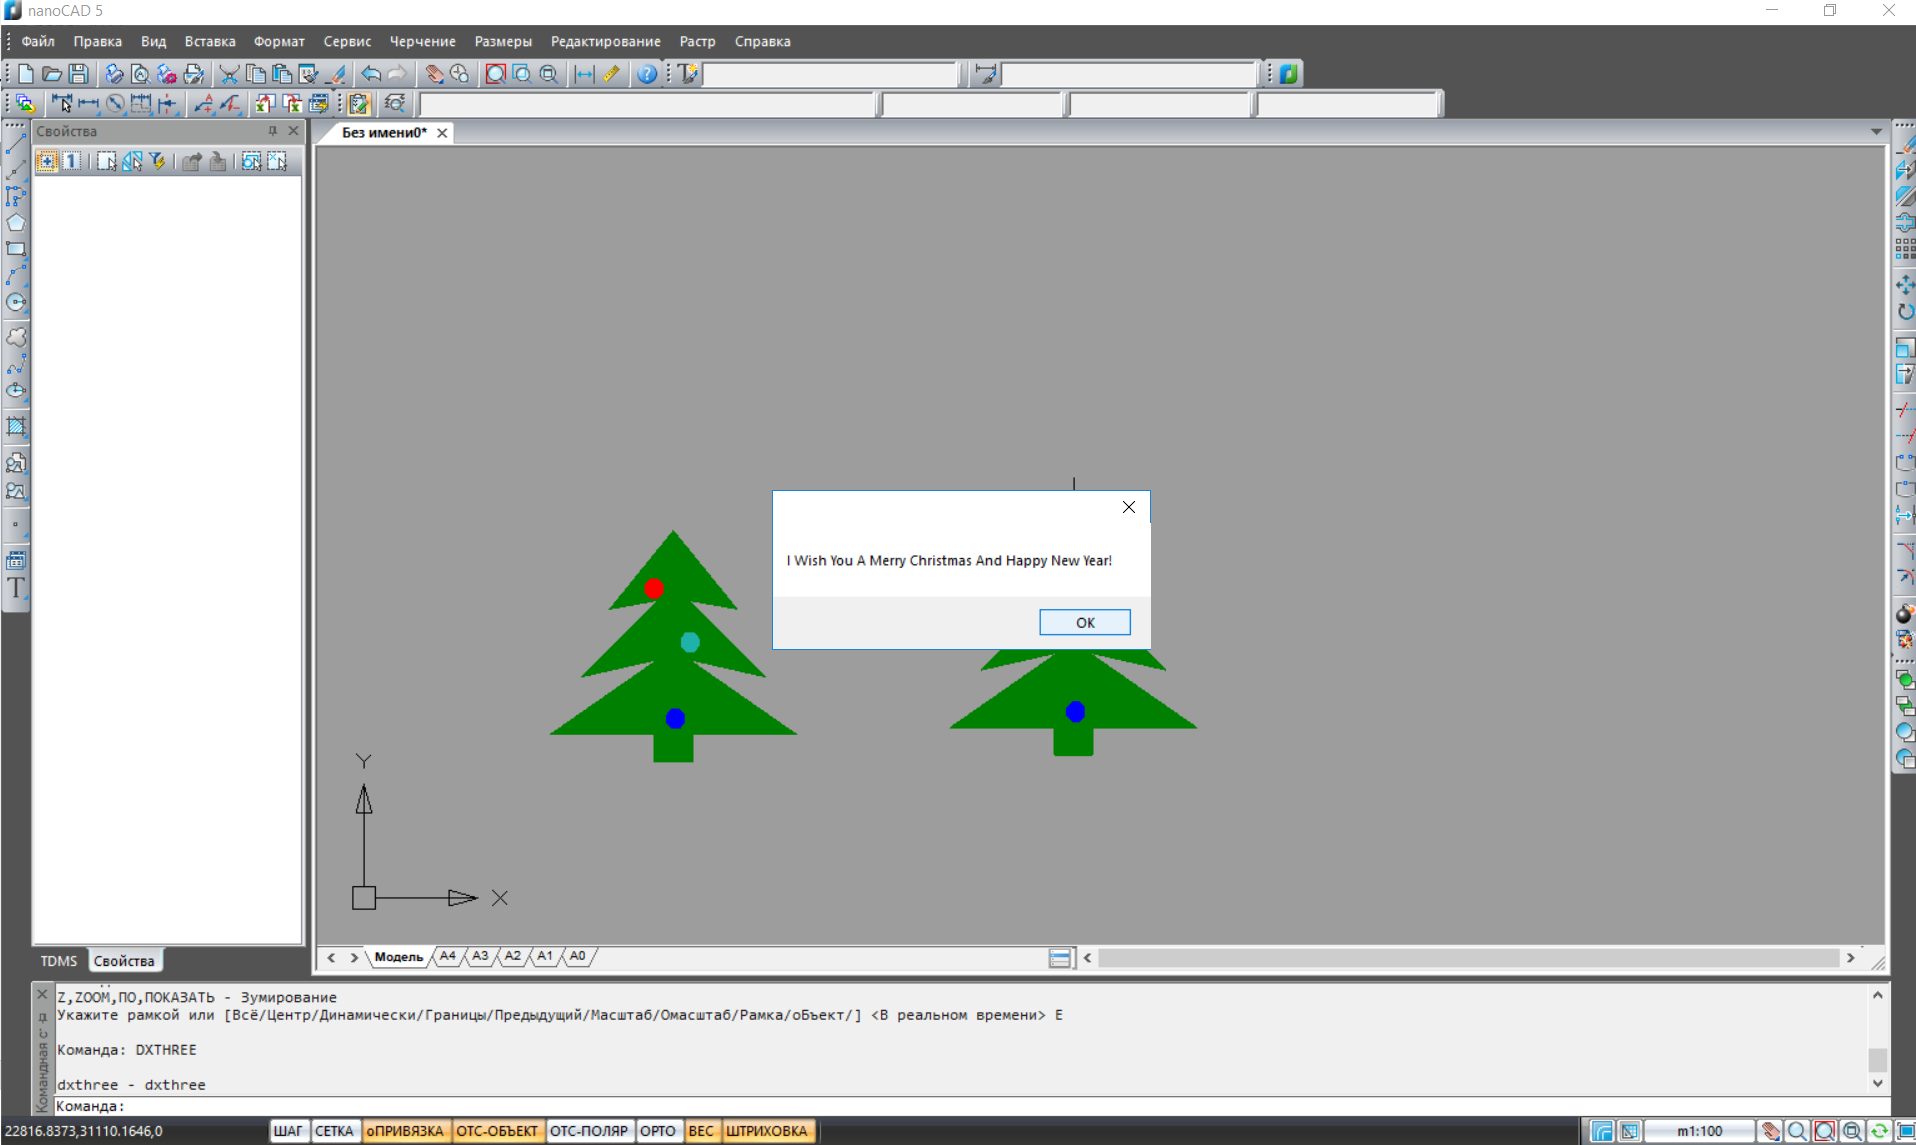
The last thing left is to bring out a window with congratulations.
MessageBox.Show("I Wish You a Merry Christmas and Happy New Year!!!") End If End Sub As a result, we get the following picture.
For NC 5.1
For NC 8.1
Part IV: with the Coming!
Well, maybe someone will say that we have now made useless and useless “nonsense” to anyone ...
And that this is again another article for beginners, which has no place on Habré.
, , , - , Basic ( Pascal) . Basic , SmallBasic
, NC 5.1 , NanoCAD , .
, NC API, «»
, 2018 !
, 2018 NanoCAD, API NET Framework.
PS ! API Nanocad 8.X.
Windows 10 64 NanoCAD ( ). C# « ».
32 , , Windows 10 .
Source: https://habr.com/ru/post/345834/
All Articles