Adding 3D objects to video
Today we look at one of the ways to combine 3D graphics and video. For this we need:
Pay attention to how and where you will shoot your video. Consider that the more details you have in your video, the easier it will be for the program to track the points to which the 3D object will later become attached.
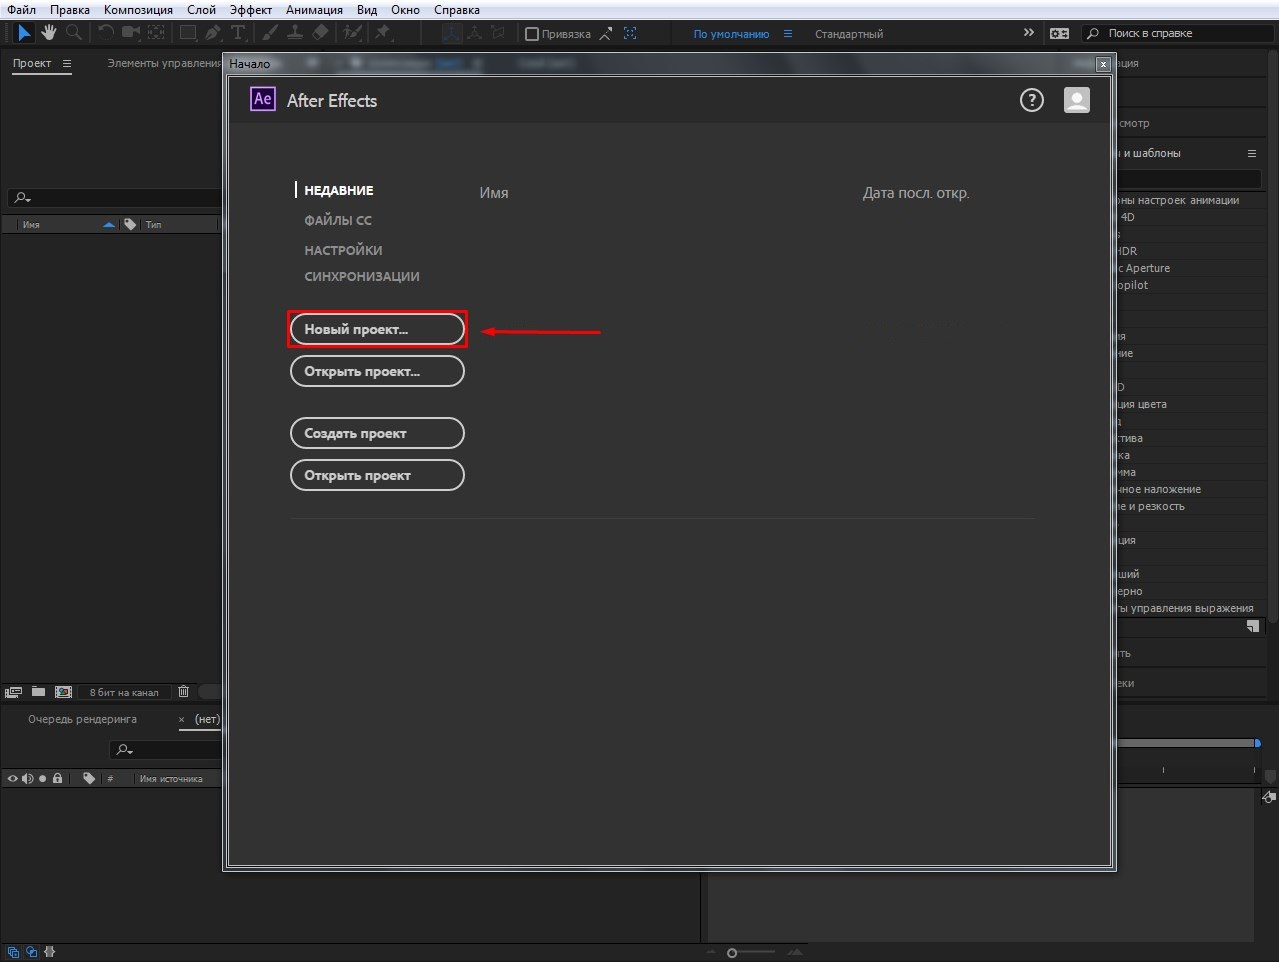
First, open Adobe After Effects. In the window that appears, click New Project ...
')
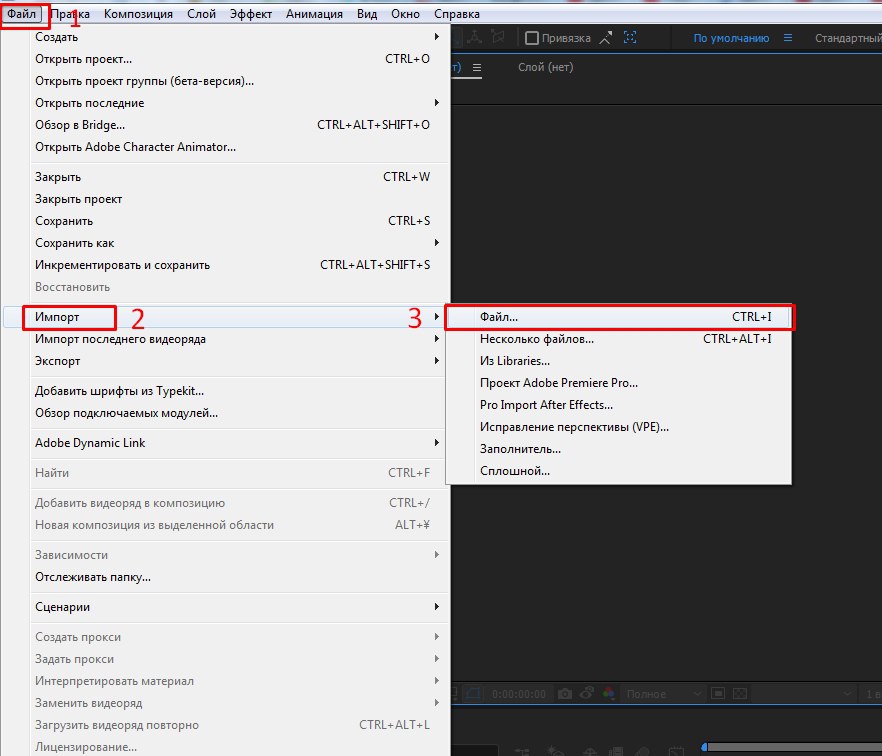
Next we need to import our video into which we will add 3D graphics. File> Import> File ...> Select a video.
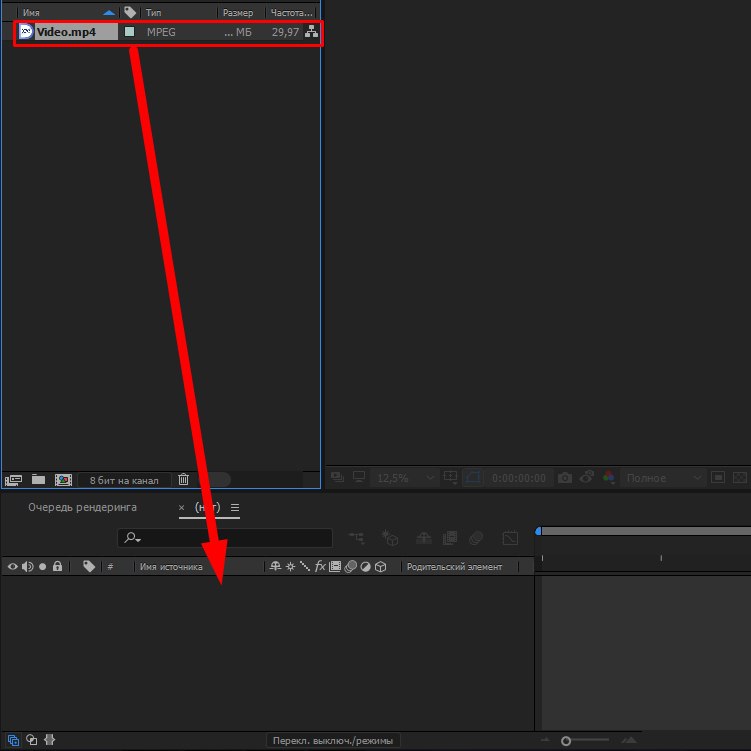
Drag the imported file into the timeline window.
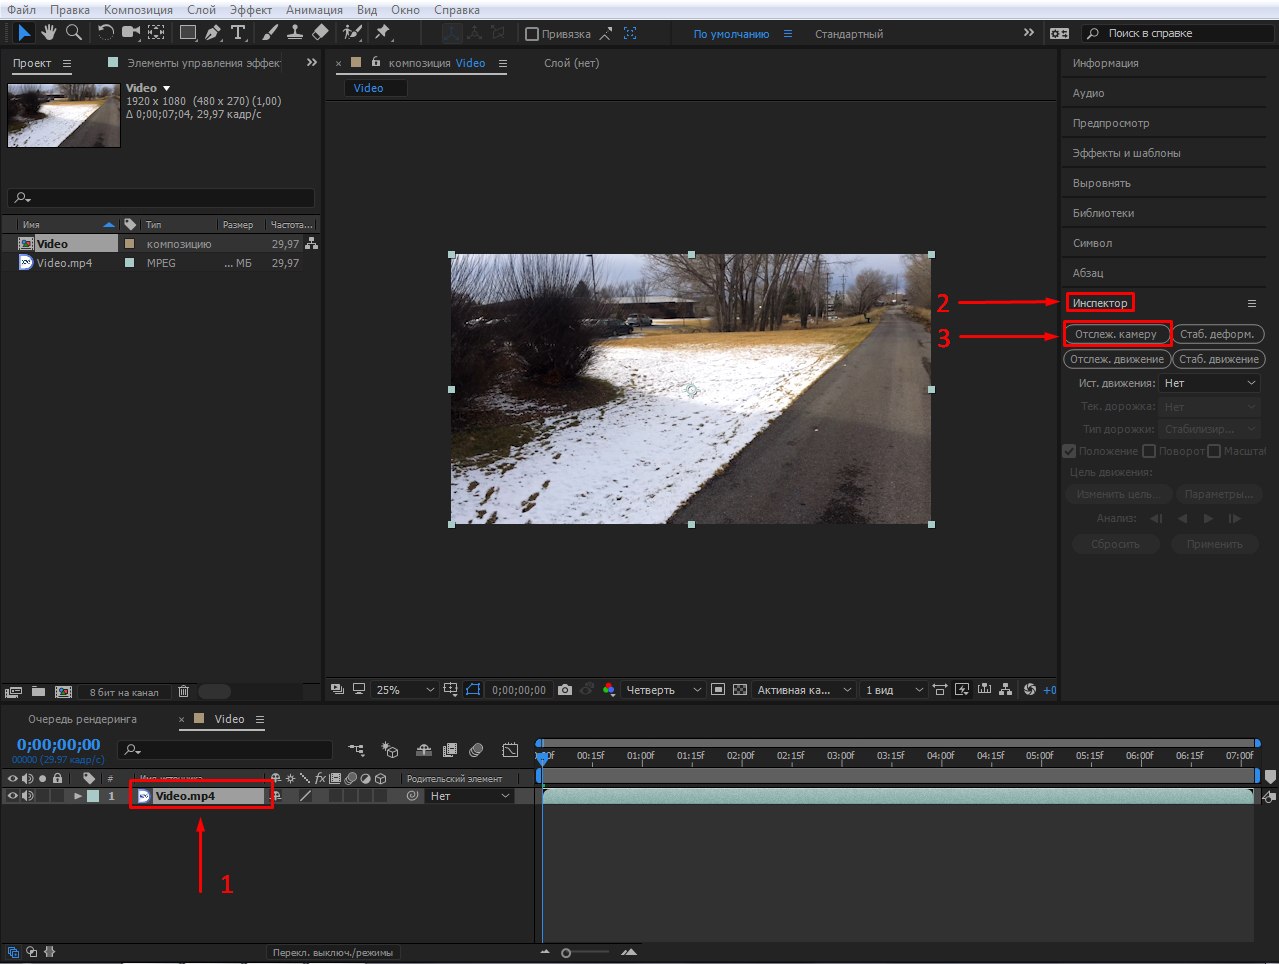
Now you need to make tracking points to which the 3D model will be attached. Be sure to click on the video in the timeline window so that the program will understand with which element we will work. Then, in the Inspector window, select Camera Tracking . If you do not have the Inspector window, simply activate it through the Window tab.
The tracking process is running. We can only wait until the program finishes processing the video and calculates all possible points for anchoring the object.
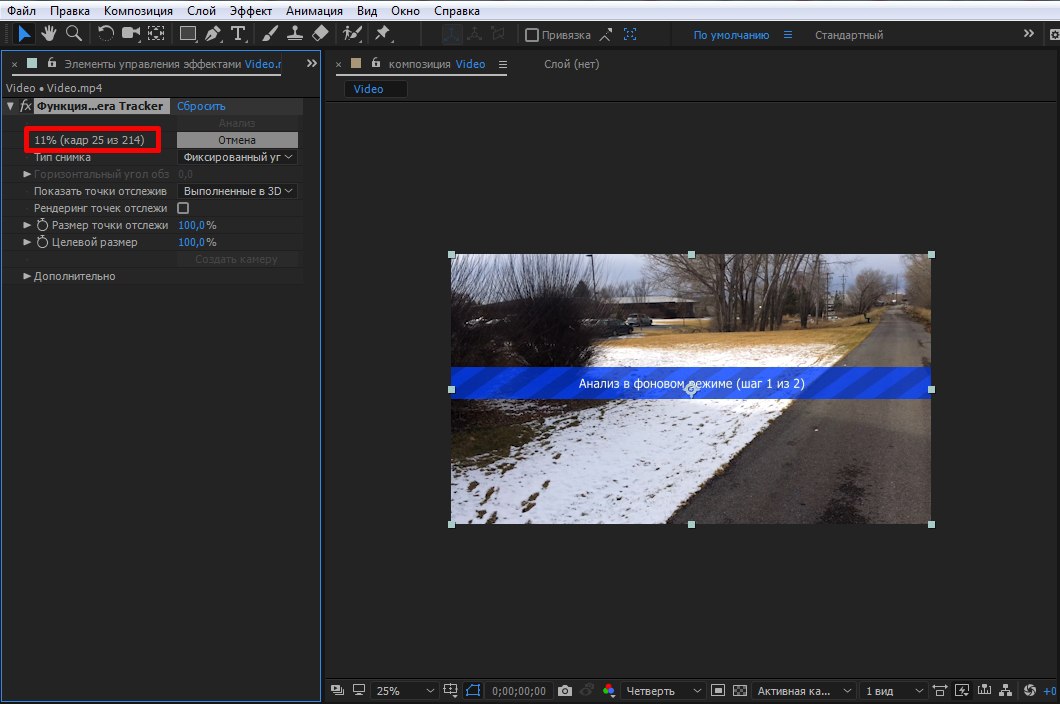
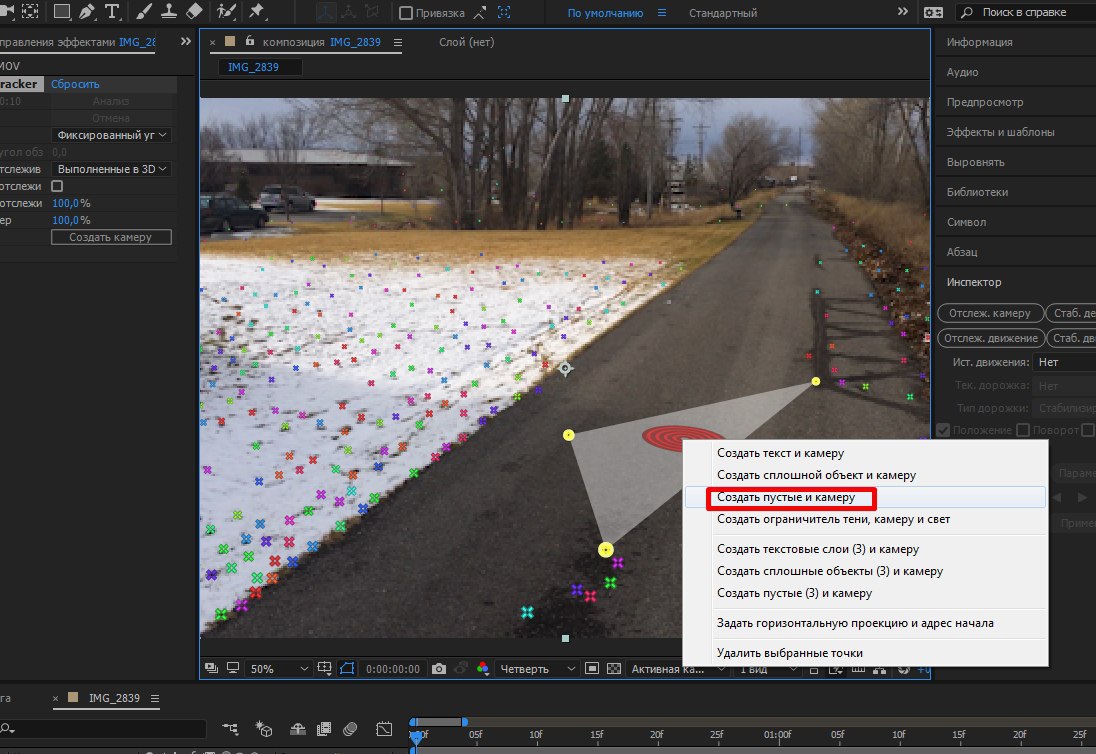
As soon as the program has finished a miscalculation, we need to select at least 3 of the most successful points that are on the plane we need, that is, on the surface where the 3D graphics will be. If you hold the mouse cursor over all points, then you will notice that the program will automatically offer various bundles of three adjacent “markers”. Select one of the options by clicking on the space between the points, after which they should be highlighted in yellow. Then we right-click on the same plane and click Create Empty and Camera (My layer is signed as Track Empty 1 ).
Now you can attach 3D graphics to the newly created Empty Object ( Track Empty 1 ), which will clearly follow the plane, tightly nailed dots to the surface we need. To work with 3D graphics, we will use the Element 3D plugin, through which you can import the model you need into After Effects.
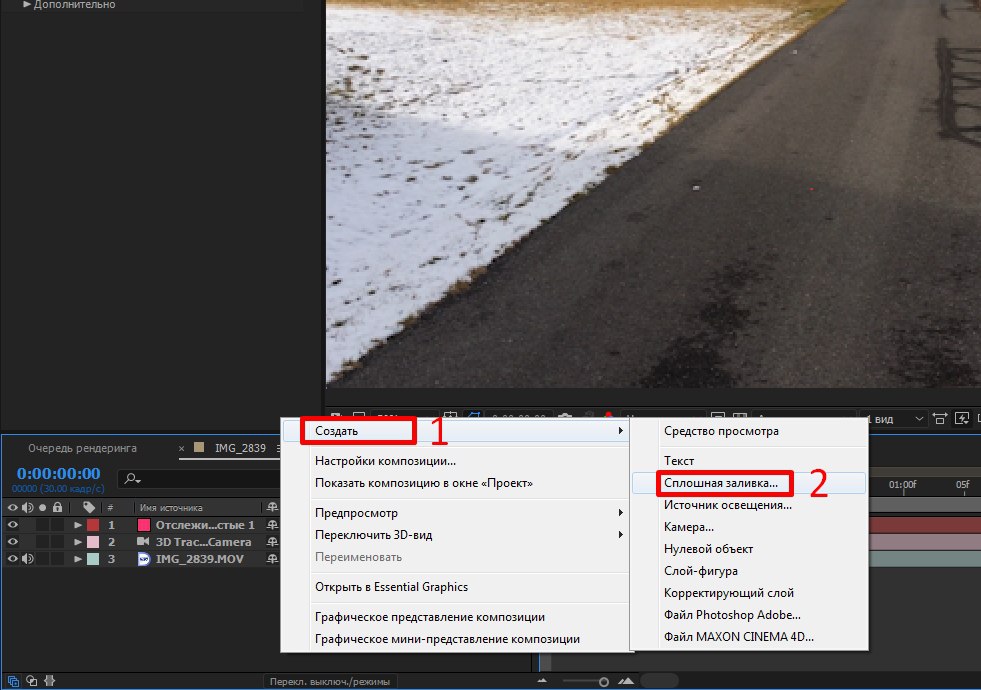
Create a continuous layer. Right-click on the empty space in the timeline window, select New> Solid fill ...> ok .
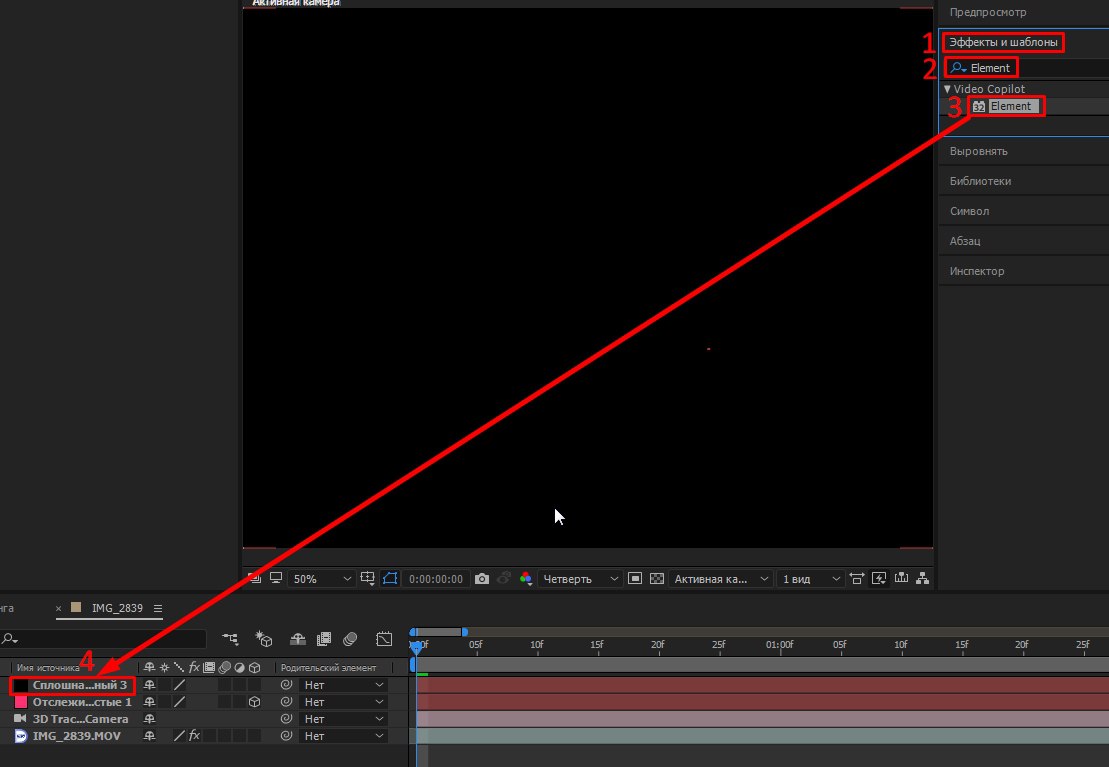
Apply Element 3D effect on a continuous layer. In the Effects and Templates tab, we search for Element and drag it onto the Solid layer .
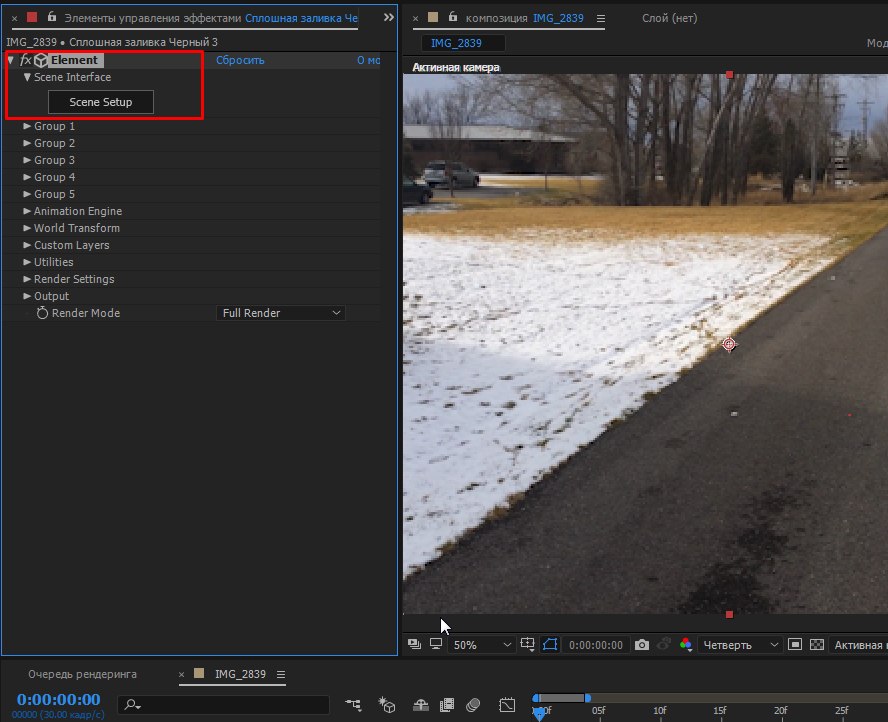
Click on the solid layer. In the Effect Controls window, click Element> Scene Intreface> Scene Setup .
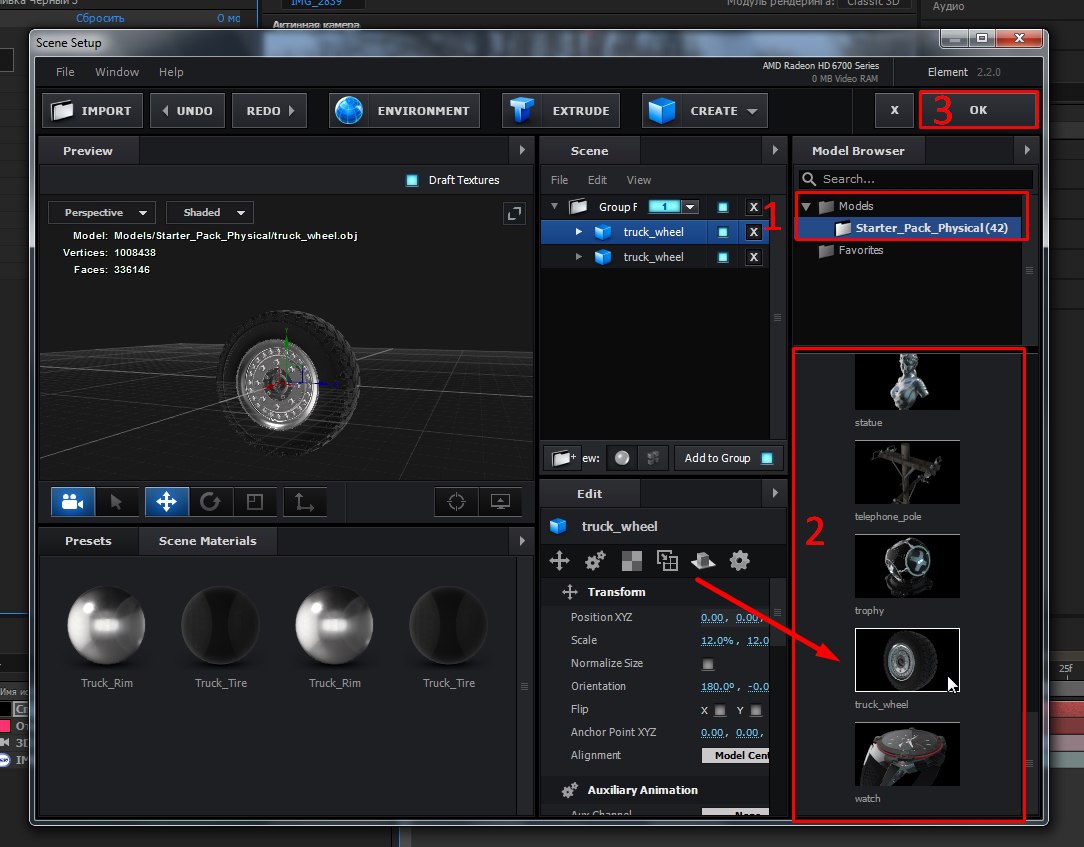
In the window that appears, select the model we need.
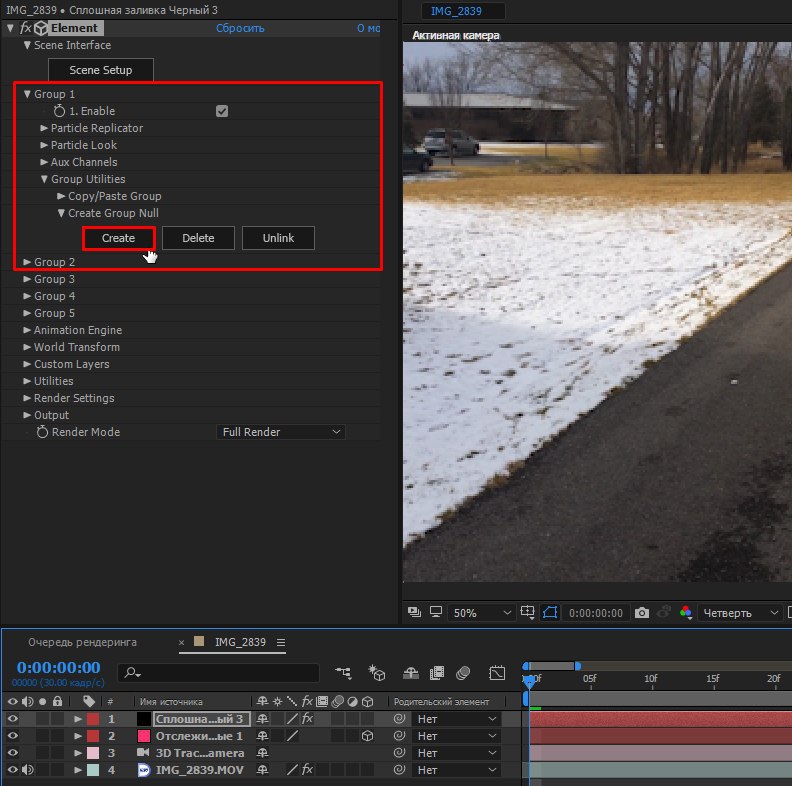
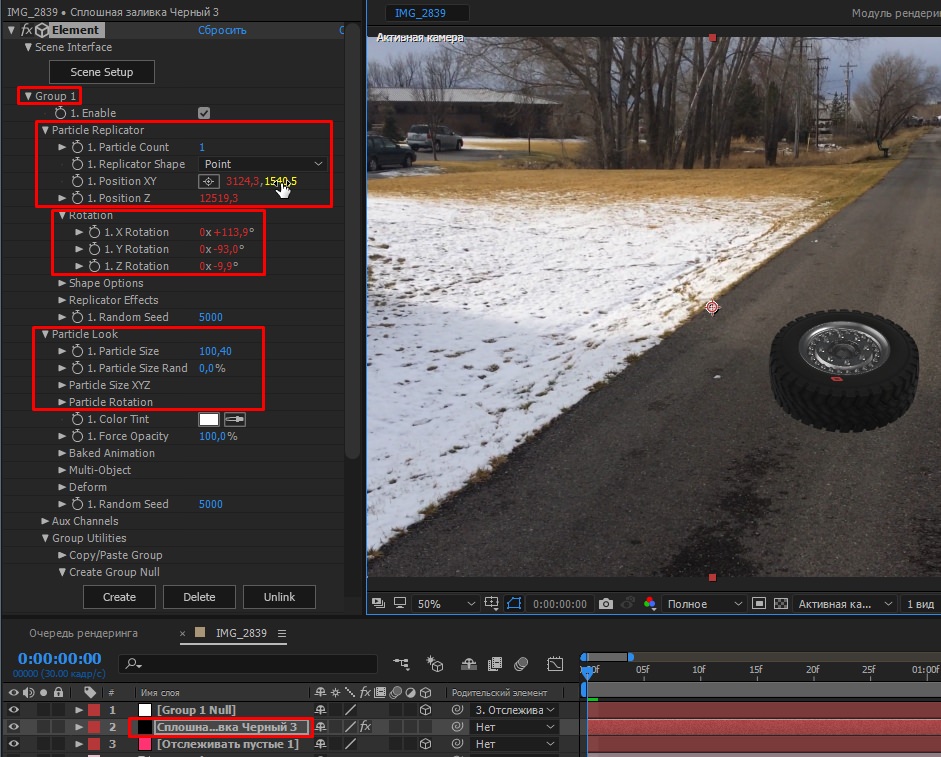
Next, we need to bind the 3D model to the Empty object we created before . But for starters, let's create an Empty Object for the 3D model too. We open the Group 1 tab, in the Effects Controls window, since in our case the 3D model is in this group. Then, under the Create Group Null tab, click Create (I have the layer signed as Group 1 Null ).
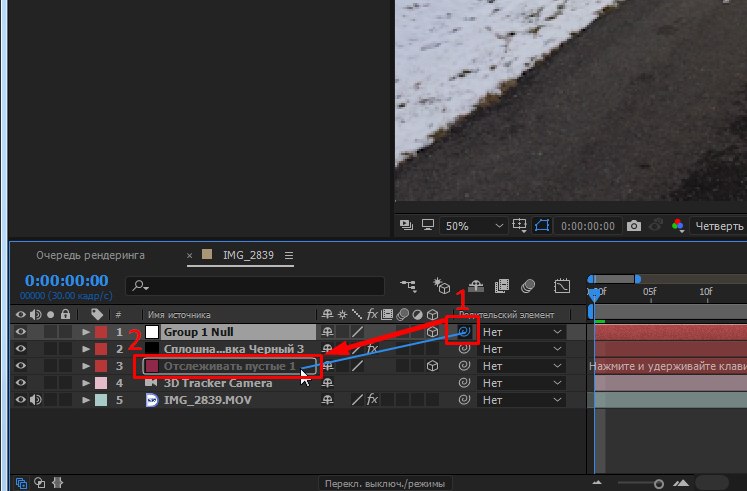
Next, we need to bind the Empty object of the model to the Empty object of the video. Hold Shift, and with the left mouse button drag the helix icon next to the layer you just created for the 3D model ( Group 1 Null ) onto the layer with the Empty video object ( Track empty 1 ).
Most likely, the object will decrease after this procedure. Simply increase it and move it to the right place using the parameters located in the Group 1 tab. In the Group 1 tab, expand Particle Replicator > Rotation . Changing the parameters there, you can move and twist your object in the desired position. Then expand the Particle Look tab to resize the 3D object.
Is done. We added a 3D model to our video, while it is completely nailed to the plane it needs and throughout the composition the object is in the same position relative to the surface to which we attached our graphics. So, when moving the camera, the 3D model will be fixed.
- Video
- Adobe After Effects program (I will demonstrate on CC 2017)
- Element 3D Plugin
- Required 3D model
Pay attention to how and where you will shoot your video. Consider that the more details you have in your video, the easier it will be for the program to track the points to which the 3D object will later become attached.
First, open Adobe After Effects. In the window that appears, click New Project ...
')
Next we need to import our video into which we will add 3D graphics. File> Import> File ...> Select a video.
Drag the imported file into the timeline window.
Now you need to make tracking points to which the 3D model will be attached. Be sure to click on the video in the timeline window so that the program will understand with which element we will work. Then, in the Inspector window, select Camera Tracking . If you do not have the Inspector window, simply activate it through the Window tab.
The tracking process is running. We can only wait until the program finishes processing the video and calculates all possible points for anchoring the object.
As soon as the program has finished a miscalculation, we need to select at least 3 of the most successful points that are on the plane we need, that is, on the surface where the 3D graphics will be. If you hold the mouse cursor over all points, then you will notice that the program will automatically offer various bundles of three adjacent “markers”. Select one of the options by clicking on the space between the points, after which they should be highlighted in yellow. Then we right-click on the same plane and click Create Empty and Camera (My layer is signed as Track Empty 1 ).
Now you can attach 3D graphics to the newly created Empty Object ( Track Empty 1 ), which will clearly follow the plane, tightly nailed dots to the surface we need. To work with 3D graphics, we will use the Element 3D plugin, through which you can import the model you need into After Effects.
Create a continuous layer. Right-click on the empty space in the timeline window, select New> Solid fill ...> ok .
Apply Element 3D effect on a continuous layer. In the Effects and Templates tab, we search for Element and drag it onto the Solid layer .
Click on the solid layer. In the Effect Controls window, click Element> Scene Intreface> Scene Setup .
In the window that appears, select the model we need.
Next, we need to bind the 3D model to the Empty object we created before . But for starters, let's create an Empty Object for the 3D model too. We open the Group 1 tab, in the Effects Controls window, since in our case the 3D model is in this group. Then, under the Create Group Null tab, click Create (I have the layer signed as Group 1 Null ).
Next, we need to bind the Empty object of the model to the Empty object of the video. Hold Shift, and with the left mouse button drag the helix icon next to the layer you just created for the 3D model ( Group 1 Null ) onto the layer with the Empty video object ( Track empty 1 ).
Most likely, the object will decrease after this procedure. Simply increase it and move it to the right place using the parameters located in the Group 1 tab. In the Group 1 tab, expand Particle Replicator > Rotation . Changing the parameters there, you can move and twist your object in the desired position. Then expand the Particle Look tab to resize the 3D object.
Is done. We added a 3D model to our video, while it is completely nailed to the plane it needs and throughout the composition the object is in the same position relative to the surface to which we attached our graphics. So, when moving the camera, the 3D model will be fixed.
Source: https://habr.com/ru/post/345350/
All Articles