We spread the application in the App Store. Even if you are not a developer

Previously wrote about the stage of preparation for release . Now we will tell about the publication of the application in the AppStore. Step-by-step guide will be useful for beginners who have not previously encountered the morals police from Cupertino.
In order to put the application in the App Store, you need a paid developer account, Xcode development environment and the source code of your application. We divide the process into four stages:
- Account setup
- App Store Design
- Project customization, assembly and unloading
- Sending to review
Account setup
All applications before uploading to the App Store must be signed with a developer certificate. It is necessary for App Store users to be sure that they are downloading a specific application from a particular developer, and not a fake on behalf of someone else. The code signing procedure of the application allows the operating system to find out who the developer is. And make sure that the application has not been changed since the build. More precisely, from the moment the developer signed it. Three objects are involved in this procedure: developer certificate, AppID and Provisioning profile.
Certificate
A certificate is a pair of asymmetric encryption keys: private and public. During the build process, Xcode generates a digital signature for the build based on the private key data. You can verify the signature using the public key, which is also available for Apple, which issued this certificate.
One certificate is enough to display an unlimited number of applications.
To create a certificate, you need:
- Go to developer.apple.com, go to the "certificates" section, click on the plus sign
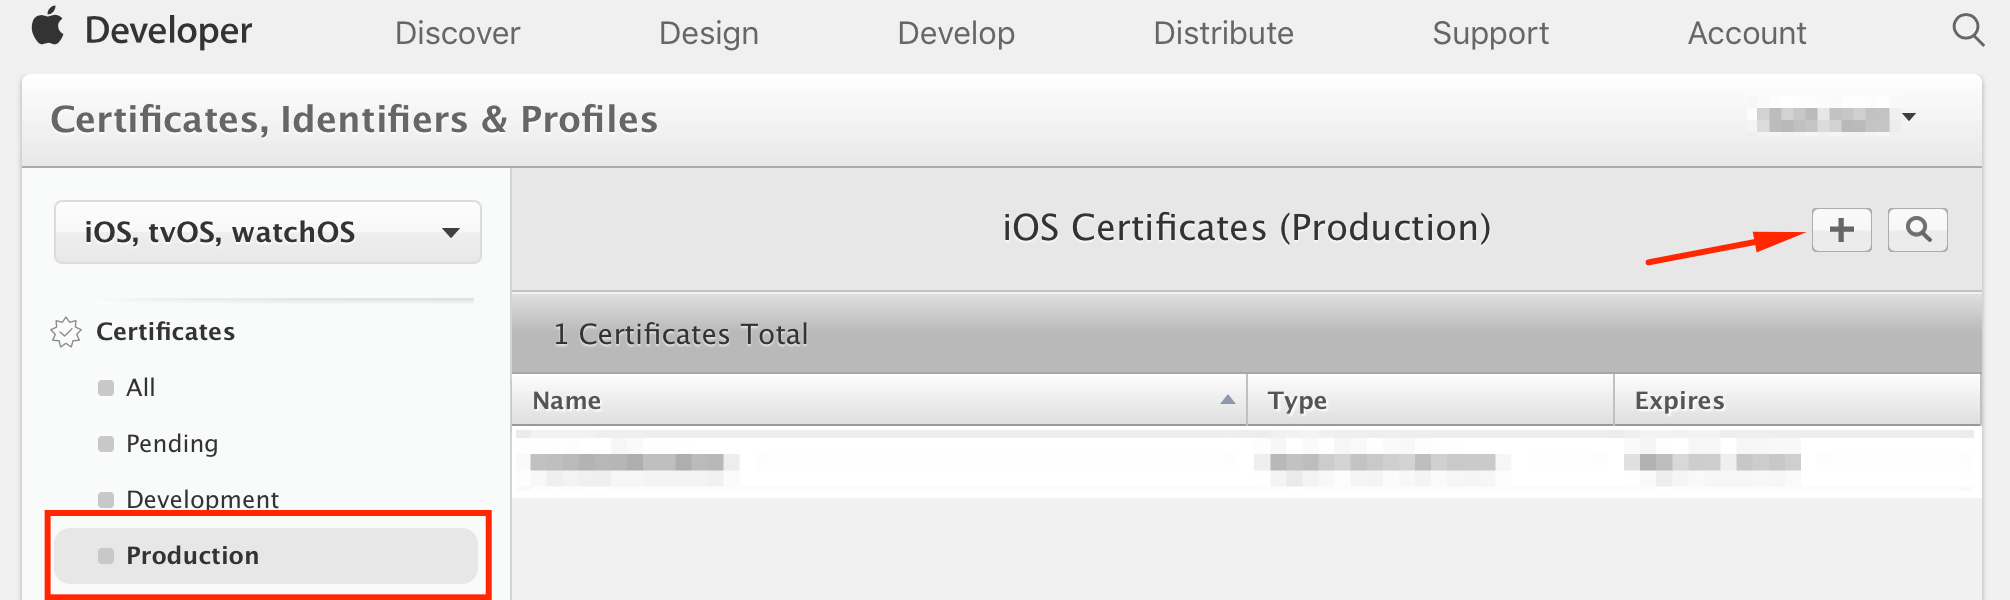
- Select Type of Production Certificate - App Store and Ad Hoc
- Following the instructions given form a Certificate request and upload it to the portal.
Save the generated certificate to the computer, open it (double click). The certificate will be placed in the system storage and is available for Xcode.
AppID
This is a unique string application identifier among all applications. It is needed for unique identification in all systems: iTunes Connect, App Store, etc. It consists of two parts: TeamID and BundleID. TeamID - developer ID, issued by Apple at the stage of registration of a developer account and does not change. BundleID is set by the developer when registering the application in the account.

Create it:
- Go to the AppIDs section ( link ), click on the plus sign in the upper right
- Fill in the field App ID Description - a provisional name of the application for the developer that is not visible in the App Store, for example TestApplication
- Fill in the Explicit App ID field - the same BundleID, for example ru.myStartup.testApplication
- In the App Services section, connect those services that were needed during the application development process. If you do not understand what it is about - leave it as it is.
Provisioning profile
This is a profile that uniquely binds AppID and developer certificate (public key of the certificate). In the case of the development provisioning profile, it also contains the UDID of all devices on which the application can be launched.
Create it:
- Go to the iOS Provisioning Profiles section ( link ), click on the plus sign in the upper right
- Profile Type - App Store
- Then you must specify the AppID for which the profile is created - specify the previously created AppID
- The next step is to choose a certificate. Tick the certificate we created earlier
- The last step is to name the profile, for example, TestApplicationStoreProfile
Save the generated profile to your computer, open it by double clicking. Now the certificate is available for Xcode.
App Store Design
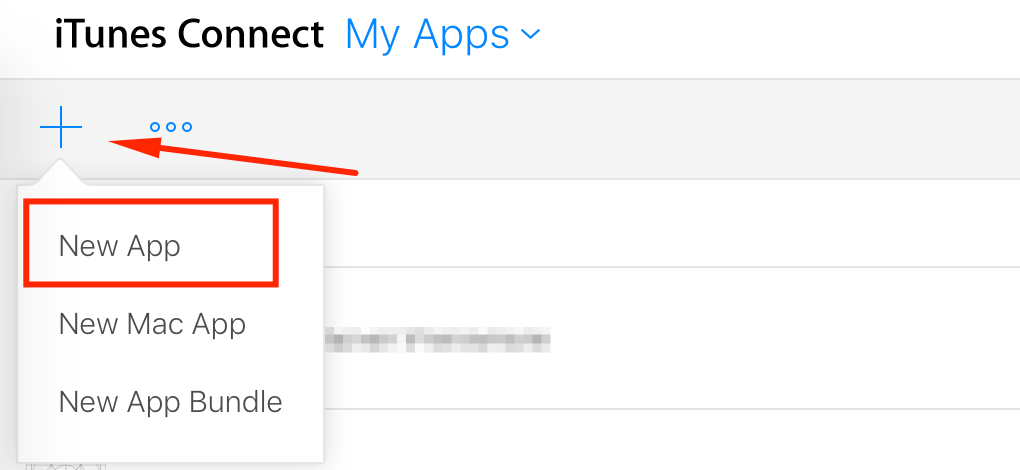
Now you need to add the application to iTunes Connect.
Move on https://itunesconnect.apple.com in the MyApps section. To add an application, click the plus sign in the upper left:
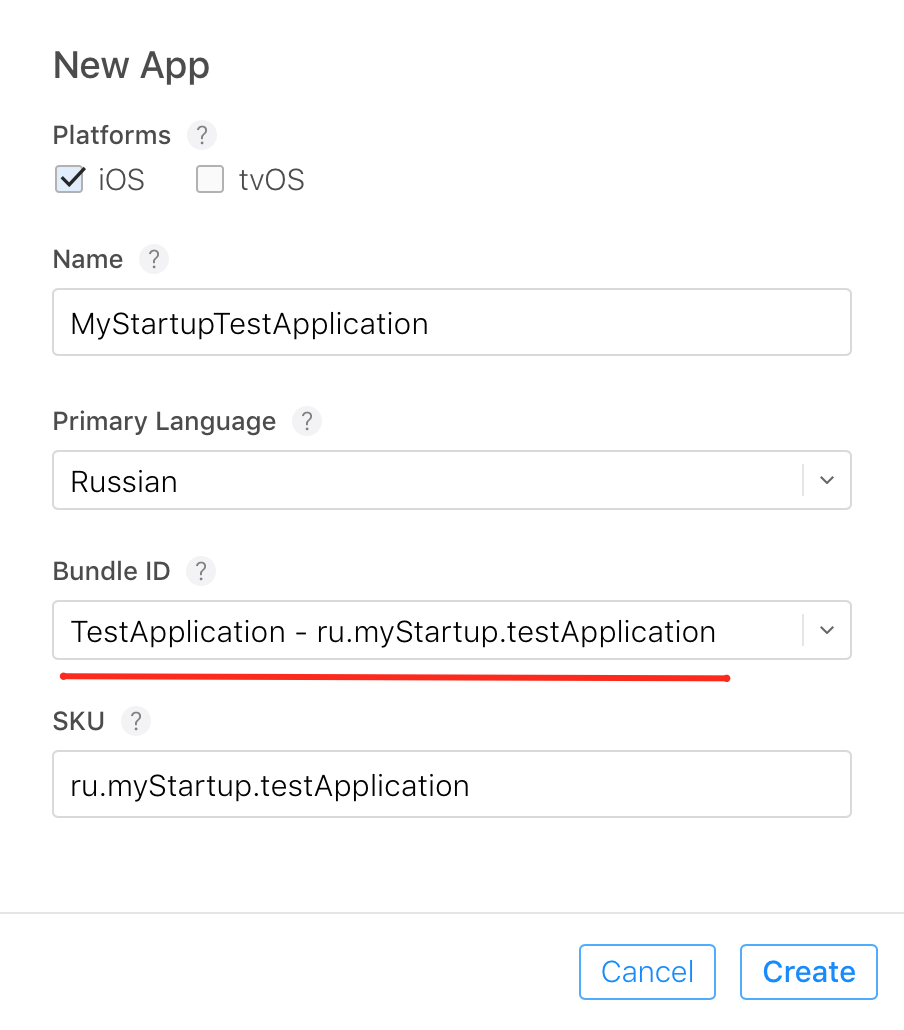
Fill in the opened form:
- We specify a platform - iOS
- The name of the application will be displayed in the App Store. Up to 30 characters.
- Primary language of the application
- Select from the AppID drop-down list.
* SKU is a unique identifier for financial statements and analytics. Can be made the same as BundleID above
If everything is filled in correctly, we get to the application page.
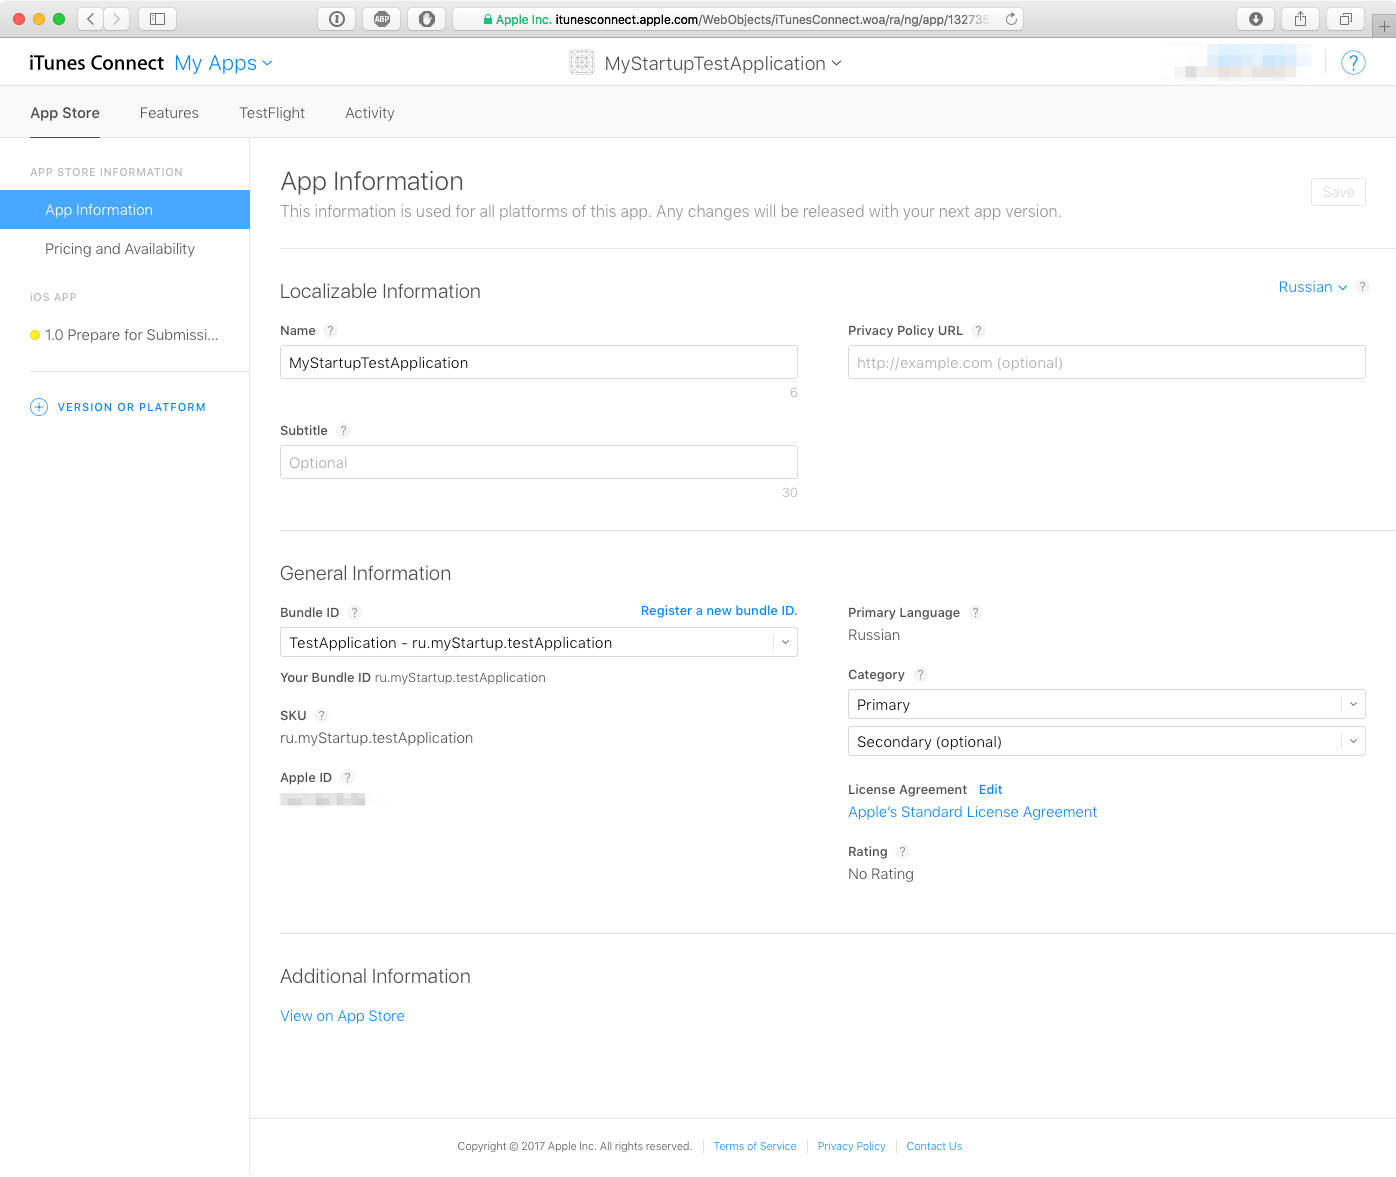
On the left tab of the "Pricing and Availability" fill in information about the cost of the application in the store. On the left tab with the version number, fill in the marketing information:
- video previews and screenshots for various devices
- store search keywords
- description
- age rating
- title holder
- contact information in case the reviewer has any questions.
We described how to prepare marketing information in the previous article .
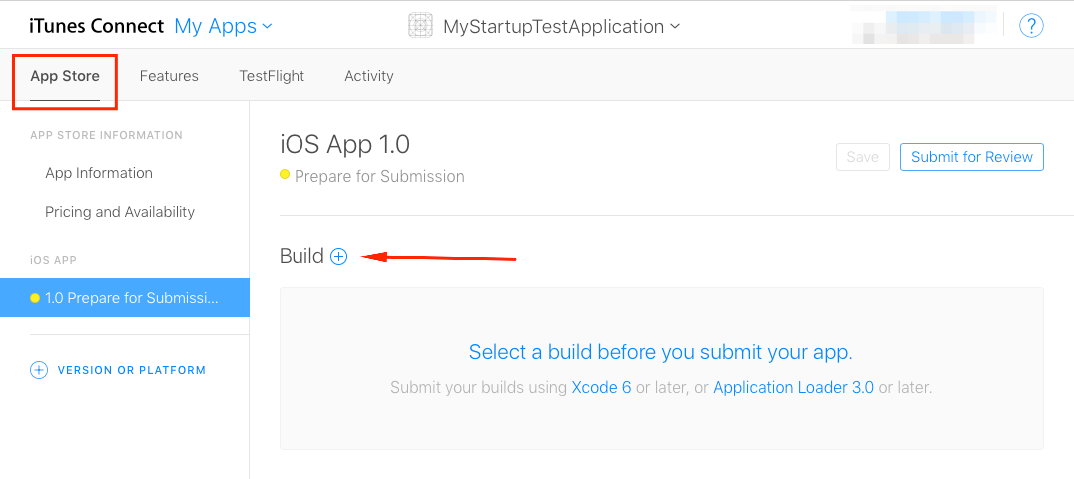
There is also a section so that you can specify a specific assembly that is sent to the review, and then to the stop. The choice is not available until we have downloaded a single application build in iTunes Connect. We will return to this section later:

To save changes, use the Save button at the top:

Project customization, assembly and unloading
Open your application's project in Xcode, go to project settings. It is necessary that the Bundle Identifier match the BundleID that you specified when creating the AppID. You also need to disable the automatic control of signing in Xcode. In the Provisioning Profile drop-down list, select the one that was recently created.
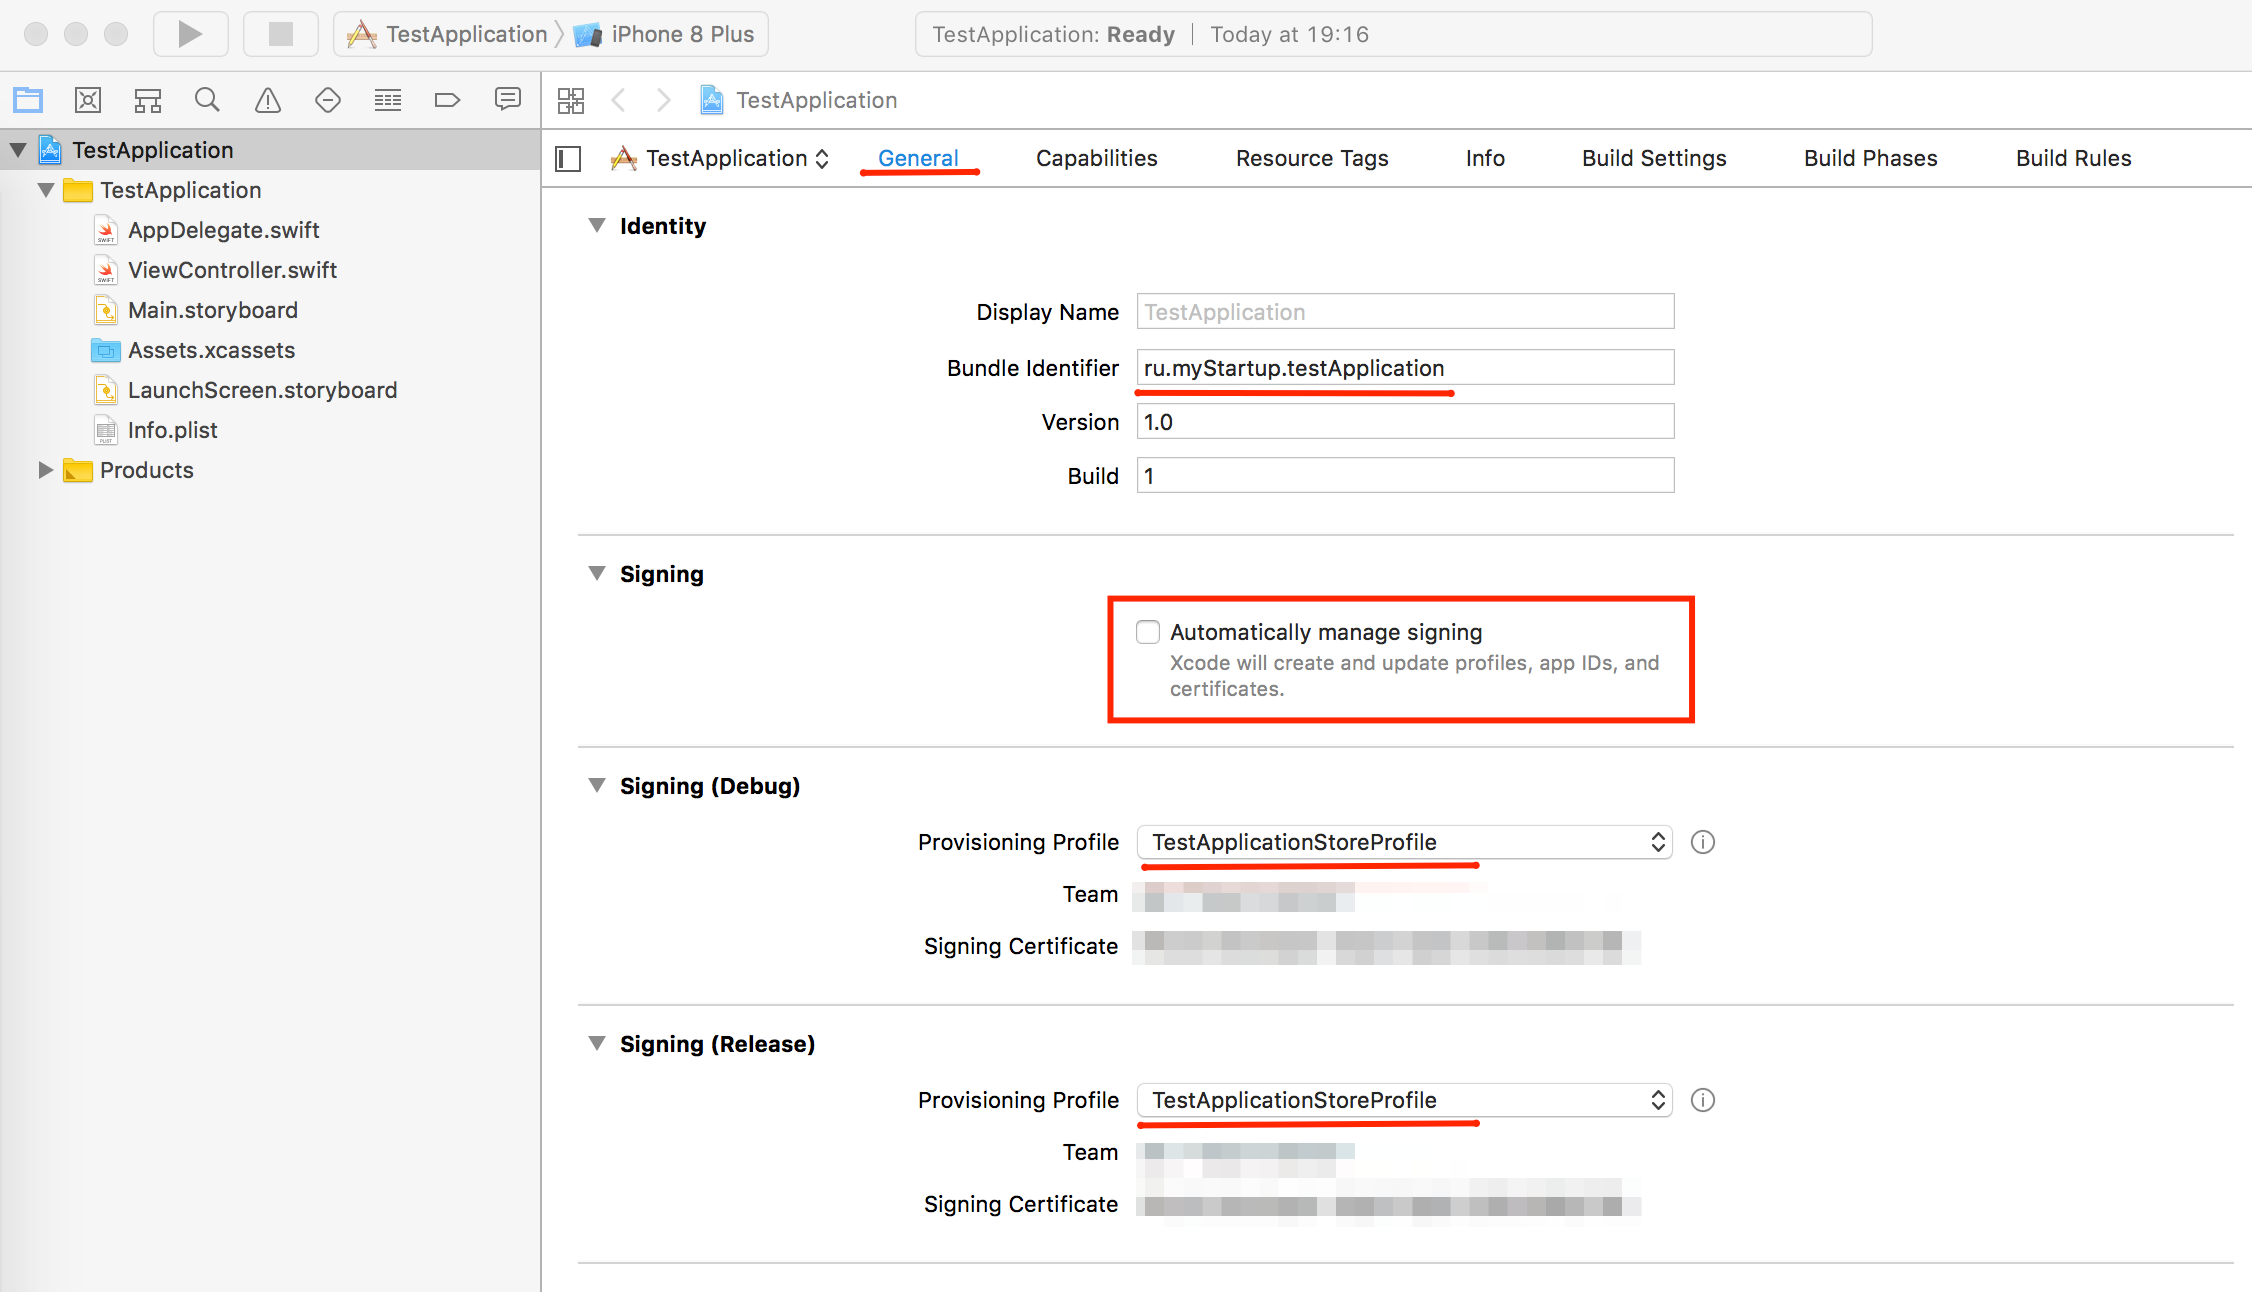
Please note: without all the necessary icons (including an icon for a store with a side of 1024 points), the application build will not automatically check in iTunes Connect.
Now the project can be collected and sent to iTunes Connect. To do this, click the menu Product - Archive. Following the results of the assembly, the Xcode organizer window will be displayed, click the Upload To App Store button there:

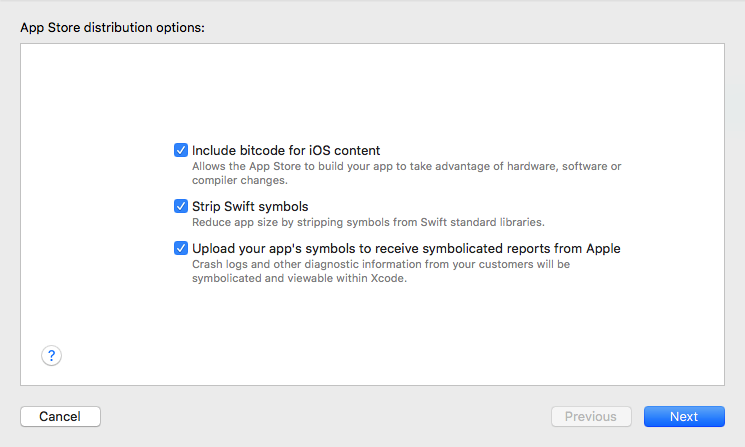
The upload settings window in the App Store opens. Learn more about bitcode , symbols stripping . We leave the settings unchanged.
In the next step, select the provisioning profile from the drop-down list of suitable ones:

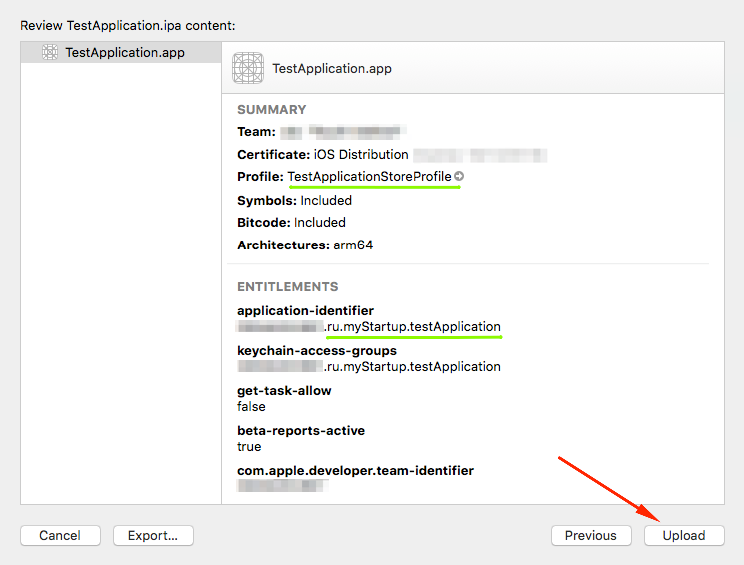
Xcode will then prepare the archive for download to iTunes Connect. On this screen, pay attention to the parameters that we set. Click Upload.
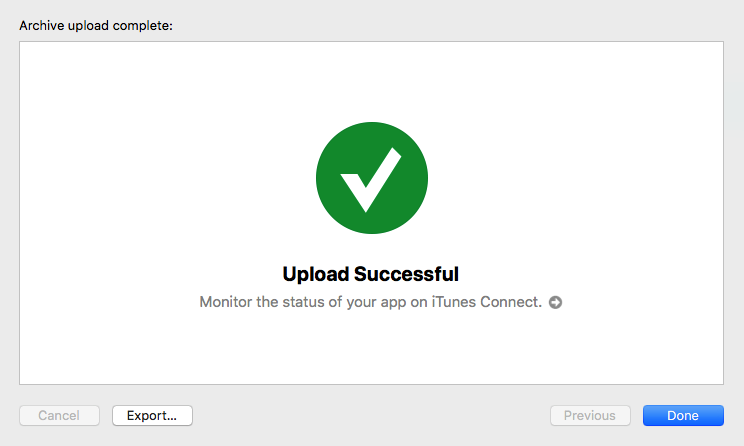
Depending on the connection speed, you will need to wait some time. If all goes well, Xcode will report the successful download to iTunes Connect. You can go to the last stage.
Sending to review
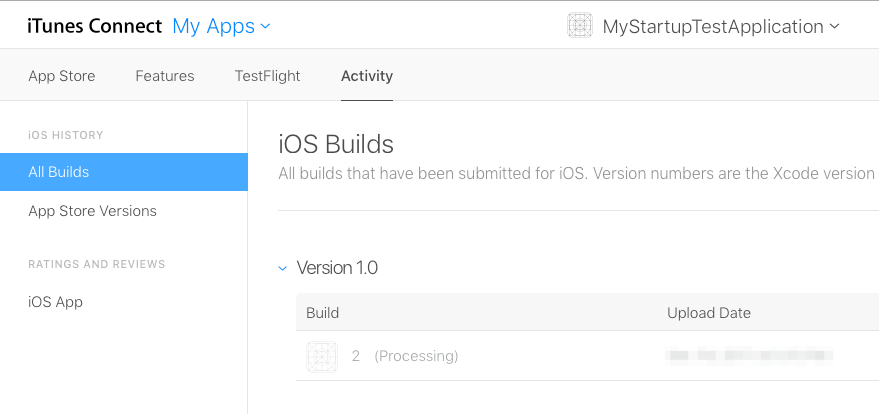
In iTunes Connect, on the Activity tab, you can see the posted assembly. For projects on Swift, an automatic assembly check takes about half an hour. Until then, the assembly will be Processing:
After the verification is completed, the assembly is available for selection on the application version information page:
Choosing an assembly:
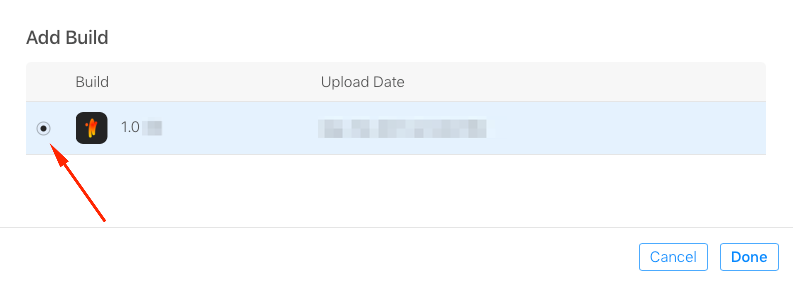
After that, the application in iTunes Connect icon will appear. Save the changes. Now you can send the assembly for review.

Done! You did everything you could. Wait for a response within a few days. Do not forget that from December 23 to December 27, iTunes Connect is on vacation. Developers will not be able to update and add new applications to the App Store and change price tags. All other iTunes Connect features will be available.
')
Source: https://habr.com/ru/post/345336/
All Articles