Headache from RecyclerView.Adapter - there is a way out
Hi, Habr! Today on our blog is Max Tuev, Surf Architect, one of our certified studios. The guys are engaged in custom development, so the timing is no less important than the quality of the code. Approaches and technologies that slow down development are not suitable here. A good example of this is the RecyclerView.Adapter. Under the cut, Max will tell you how to save time and nerves. The word max.

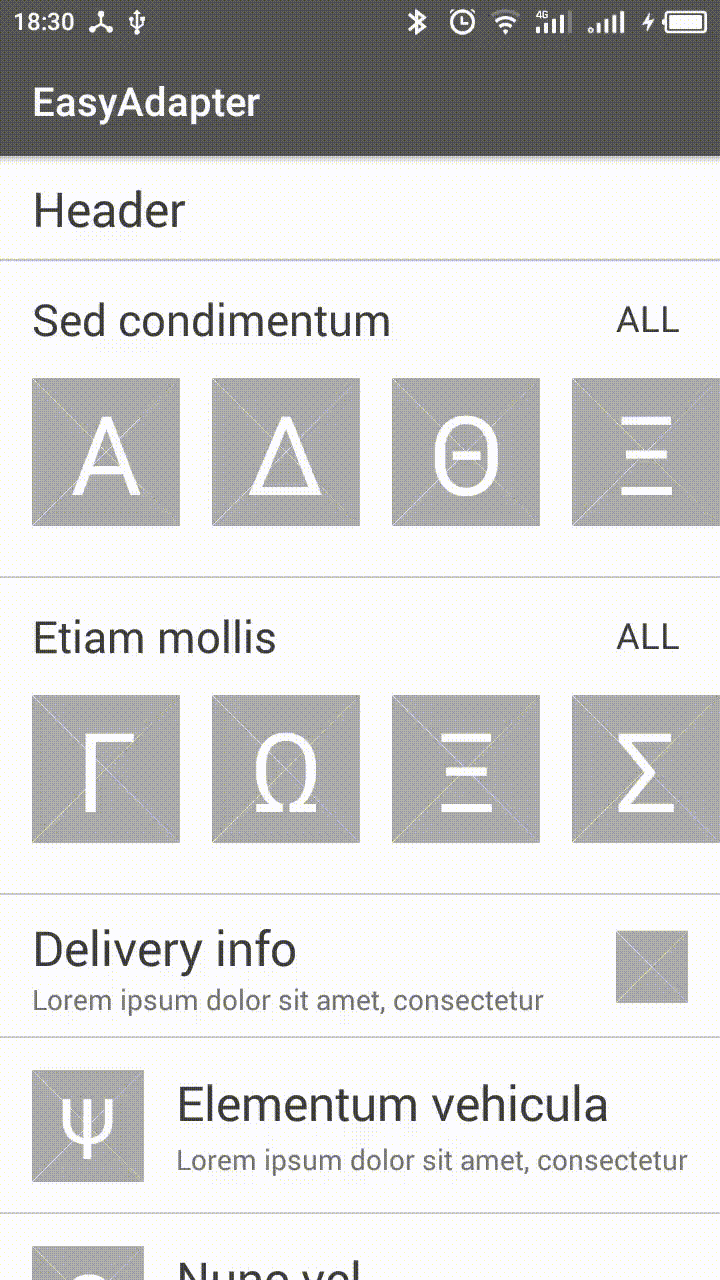
With simple lists RecyclerView.Adapter copes with a bang. But the attempt to implement an adapter for complex cases with several types of cells sometimes leads to the birth of monsters, which the developers try to forget as soon as possible and not touch them anymore. But it happens that the new update brings a couple of cells to this barely living adapter. If this sounds familiar - welcome under cat. I'll tell you how we solved these problems in the studio. In particular, I will show you how to learn how to manage a list using only 10 lines of code. An example is on the gif below.
Where do monster legs grow from? The main problems are 2 features of the adapter:
')
This problem can be solved using notifyDataSetChanged (). But then it will not be possible to use ItemAnimator, which was unacceptable for us.
DiffUtil, which recently appeared in the Support Library, helped solve this. This class allows you to determine what has changed in the list and notify the adapter about changes. For this you need to transfer to it the old and new lists. Here is a good example .
The problem with notify, it would seem, is solved. But everything is not so simple. For example, if we change one field of an object from the list, then DiffUtil will not work. And this code is very common. If you look closely, you will notice that for work he does not need the entire object as a whole. All that is needed is the element id for the
From each data block of each cell id and hash are extracted with each change. Then, the resulting list of these “dried” objects is compared with DiffUtil with the same list collected from the previous adapter data. From the outside it looks like this:
When data is transferred to the adapter, it automatically calls the notify methods for parts of the list that have changed. In addition, the animations are saved whenever you change the list, be it adding a new item, deleting an item, or moving an item. There is nothing more to add here, the example clearly shows everything. And we will return to the shortcomings of the approach at the end of the article.
The most difficult to implement and especially support the adapter with multiple cells is the methods
Now imagine that you need to quickly add three more types of cells, and the presence of the third depends on the presence of the first two. It is necessary to modify and, the most unpleasant, to debug all 4 methods.
To greatly simplify the adapter, you can use a list of objects that extend one base class or interface, and take the logic of element layout to a higher level. But for this, you will need wrapper objects for the data of each cell type. This is too cumbersome when required, for example, to add one header.
We took this approach for our solution, but used universal wrapper objects. This class looks like this:
ItemController here is responsible, roughly speaking, for all interaction with the cell. To him we will return.
In the end, everything turned out a bit more complicated, but the essence remained the same.
Responsibility for creating an Item list is transferred to the Activity or Fragment. Now there is no need to extend the RecyclerView.Adapter, since A universal EasyAdapter was created to implement this solution. For clarity, I will immediately give an example of the Activity method that updates the adapter:
The list in the gif above, by the way, is governed by this method.
The ItemList class is needed to make lists more convenient. A number of its features make it possible to greatly simplify this task and make the code more declarative:
When calling
There is another important method in ItemList - fun addAll (data: Collection, itemControllerProvider: ItemControllerProvider): ItemList. It allows you to configure the Adapter from a list of objects that extend one base class or interface. It is useful if the logic for constructing a list is non-trivial and it makes sense to transfer it to the Presenter.
Let's return to ItemController and immediately see an example implementation:
The first thing that catches the eye is the complete encapsulation of all interactions with the cell. This allows you to quickly and safely make changes to the list, and completely reuse all the logic of interaction with the cell on other screens. Another ItemController is responsible for extracting from the data id and hash, necessary for the correct operation of the automatic call methods notify.
This structure simplifies one more thing:
This method allows many times to simplify the implementation of lists and unify work with all adapters in the project. You can implement complex screens, which previously had to do with ScrollView. This allows you to gain time at the start and reduce the amount of code in the Activity. In addition, it is easy enough to convert an existing adapter to this style. We usually do this when we need to slightly change the existing large adapter in the old project.
There are, however, several drawbacks. For example,
I hope my note to some of you come in handy and will allow you to spend less time and nerves to work with RecyclerView.
An example implementation with examples of use here . There is also an ItemController template for AndroidStudio and a basic adapter for pagination based on the described approaches.
Many thanks to the Surf developers, especially Fedor Atyakshin (@rereverse), for their help in the development.
With simple lists RecyclerView.Adapter copes with a bang. But the attempt to implement an adapter for complex cases with several types of cells sometimes leads to the birth of monsters, which the developers try to forget as soon as possible and not touch them anymore. But it happens that the new update brings a couple of cells to this barely living adapter. If this sounds familiar - welcome under cat. I'll tell you how we solved these problems in the studio. In particular, I will show you how to learn how to manage a list using only 10 lines of code. An example is on the gif below.
Where do monster legs grow from? The main problems are 2 features of the adapter:
')
- Item position control (getItemViewType, onBindViewHolder, ...)
- Determining which items to call notifyItem methods ...
Let's start with the second paragraph
This problem can be solved using notifyDataSetChanged (). But then it will not be possible to use ItemAnimator, which was unacceptable for us.
DiffUtil, which recently appeared in the Support Library, helped solve this. This class allows you to determine what has changed in the list and notify the adapter about changes. For this you need to transfer to it the old and new lists. Here is a good example .
The problem with notify, it would seem, is solved. But everything is not so simple. For example, if we change one field of an object from the list, then DiffUtil will not work. And this code is very common. If you look closely, you will notice that for work he does not need the entire object as a whole. All that is needed is the element id for the
areItemsTheSame() method and the hash from the element data for the areContentTheSame() method. This feature was used for our solution.From each data block of each cell id and hash are extracted with each change. Then, the resulting list of these “dried” objects is compared with DiffUtil with the same list collected from the previous adapter data. From the outside it looks like this:
fun render(items: List<Foo>) { adapter.setData(items) } When data is transferred to the adapter, it automatically calls the notify methods for parts of the list that have changed. In addition, the animations are saved whenever you change the list, be it adding a new item, deleting an item, or moving an item. There is nothing more to add here, the example clearly shows everything. And we will return to the shortcomings of the approach at the end of the article.
Item Position Management
The most difficult to implement and especially support the adapter with multiple cells is the methods
getItemCount() , getItemViewType() , onBindViewHolder() , onCreateViewHolder() . They are interconnected and have very specific logic. Here's what one of them might look like for a list with an optional footer and header: @Override public int getItemCount() { int numHeaders = userInfo == null ? 0 : 1; return data.size() == 0 ? numHeaders : data.size() + numHeaders + 1; } Now imagine that you need to quickly add three more types of cells, and the presence of the third depends on the presence of the first two. It is necessary to modify and, the most unpleasant, to debug all 4 methods.
To greatly simplify the adapter, you can use a list of objects that extend one base class or interface, and take the logic of element layout to a higher level. But for this, you will need wrapper objects for the data of each cell type. This is too cumbersome when required, for example, to add one header.
We took this approach for our solution, but used universal wrapper objects. This class looks like this:
class Item<T, H : RecyclerView.ViewHolder>( val itemController: BaseItemController<T, H>, val data: T ) ItemController here is responsible, roughly speaking, for all interaction with the cell. To him we will return.
In the end, everything turned out a bit more complicated, but the essence remained the same.
Responsibility for creating an Item list is transferred to the Activity or Fragment. Now there is no need to extend the RecyclerView.Adapter, since A universal EasyAdapter was created to implement this solution. For clarity, I will immediately give an example of the Activity method that updates the adapter:
fun render(screenModel: MainScreenModel) { val itemList = ItemList.create() .addIf(screenModel.hasHeader(), headerController) .addAll(screenModel.carousels, carouselController) .addIf(!screenModel.isEmpty(), deliveryController) .addIf(screenModel.hasCommercial, commercialController) .addAll(screenModel.elements, elementController) .addIf(screenModel.hasBottomCarousel(), screenModel.bottomCarousel, carouselController) .addIf(screenModel.isEmpty(), emptyStateController) adapter.setItems(itemList) } The list in the gif above, by the way, is governed by this method.
The ItemList class is needed to make lists more convenient. A number of its features make it possible to greatly simplify this task and make the code more declarative:
- Chained fill style.
- No explicit creation of Item objects.
- Methods for adding cells without data.
- Methods for adding cells with a predicate.
- Methods for adding both single cells and a list of cells.
When calling
adapter.setItems() , the necessary notify methods will be called, as mentioned earlier.There is another important method in ItemList - fun addAll (data: Collection, itemControllerProvider: ItemControllerProvider): ItemList. It allows you to configure the Adapter from a list of objects that extend one base class or interface. It is useful if the logic for constructing a list is non-trivial and it makes sense to transfer it to the Presenter.
Let's return to ItemController and immediately see an example implementation:
class ElementController( val onClickListener: (element: Element) -> Unit ) : BindableItemController<Element, ElementController.Holder>() { override fun createViewHolder(parent: ViewGroup): Holder = Holder(parent) override fun getItemId(data: Element): Long = data.id.hashCode().toLong() inner class Holder(parent: ViewGroup) : BindableViewHolder<Element>(parent, R.layout.element_item_layout) { private lateinit var data: Element private val nameTv: TextView private val coverView: ElementCoverView init { itemView.setOnClickListener { onClickListener.invoke(data) } nameTv = itemView.findViewById(R.id.name_tv) coverView = itemView.findViewById(R.id.cover_view) } override fun bind(data: Element) { this.data = data nameTv.text = data.name coverView.render(data.cover) } } } The first thing that catches the eye is the complete encapsulation of all interactions with the cell. This allows you to quickly and safely make changes to the list, and completely reuse all the logic of interaction with the cell on other screens. Another ItemController is responsible for extracting from the data id and hash, necessary for the correct operation of the automatic call methods notify.
This structure simplifies one more thing:
- No need to implement methods onBindViewHolder, getItemHash.
- No need to forward Listener inside Holder.
- ItemController for a cell without data will be even easier.
- No need to think up names for Holder and Listener (if you are still using java).
- You can use the ItemController template for a quick implementation.
This method allows many times to simplify the implementation of lists and unify work with all adapters in the project. You can implement complex screens, which previously had to do with ScrollView. This allows you to gain time at the start and reduce the amount of code in the Activity. In addition, it is easy enough to convert an existing adapter to this style. We usually do this when we need to slightly change the existing large adapter in the old project.
There are, however, several drawbacks. For example,
getChangePayload in DiffUtil.Callback is ignored, and Item and ItemInfo objects are created for each cell when changing the list (which, in principle, can be solved if necessary). If you are going to use giant lists, measure the performance (you can read about the performance of DiffUtil here ). But most of the problems with this approach you will not have.I hope my note to some of you come in handy and will allow you to spend less time and nerves to work with RecyclerView.
An example implementation with examples of use here . There is also an ItemController template for AndroidStudio and a basic adapter for pagination based on the described approaches.
Many thanks to the Surf developers, especially Fedor Atyakshin (@rereverse), for their help in the development.
Source: https://habr.com/ru/post/345172/
All Articles