Tutorial on the Unreal Engine. Part 4: UI
Video game developers use graphics and text to display relevant information, such as health or glasses. This is called a user interface (UI).
The UI in Unreal Engine 4 is created using Unreal Motion Graphics (UMG). UMG allows you to conveniently build UI by dragging UI elements, such as buttons and text labels.
In this part of the tutorial, you will learn the following:
')
- Create a HUD display that displays a counter and timer
- Display HUD on screen
- Update counter and timer to display variable values
It is worth considering that we will use Blueprints in this part. If you need to refresh your knowledge, then re-read the part of the tutorial on Blueprints .
Note: This article is one of the eight parts of the Unreal Engine tutorial:
- Part 1: Introduction to the engine
- Part 2: Blueprints
- Part 3: Materials
- Part 4: UI
- Part 5: How to create a simple game
- Part 6: Animation
- Part 7: Sound
- Part 8: Particle Systems
- Part 9: Artificial Intelligence
- Part 10: How to create a simple FPS
Getting Started
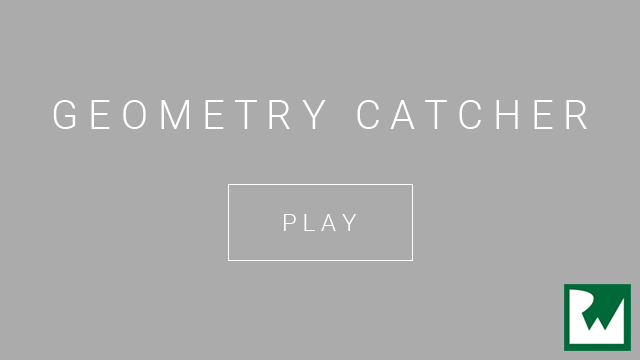
Download the project blank and unpack it. Navigate to the project folder and open GeometryCatcher.uproject .
Note: if a window opens indicating that the project was created in an earlier version of the Unreal editor, then everything is fine (the engine is often updated). You can either choose the option to create a copy, or the option to convert the project itself.
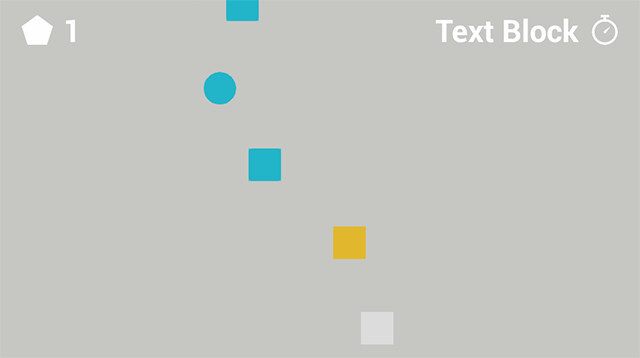
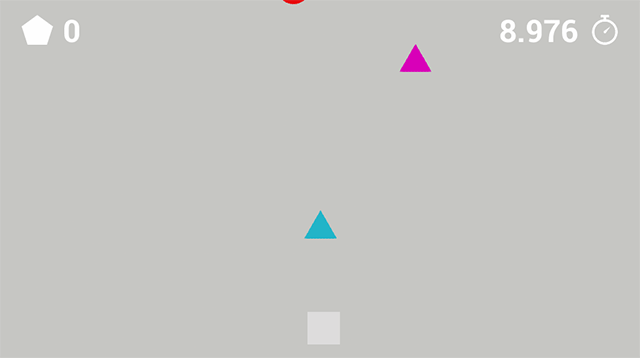
Click on Play to start controlling the white cube and try to catch the falling shapes. The cube can be moved horizontally with the mouse. After ten seconds, the figures cease to be created.
The first thing to do is create a HUD display that displays two things:
- A counter that tracks the number of pieces collected by the player.
- Timer that displays the number of seconds remaining to complete the creation of figures
To create all this, we need widgets .
About widgets
A widget is a UI element that provides UI visual functions. For example, the Button widget provides an object that the user can see and click on it.

The widget itself does not have to be visible. For example, the Grid Panel widget evenly divides its space between its contents. The user can not see the Grid Panel, but sees its impact.

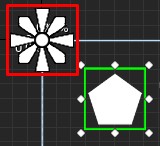
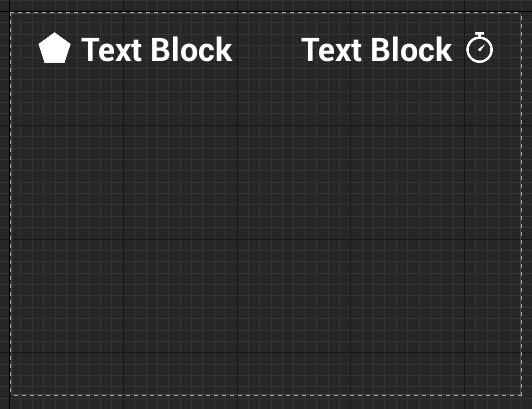
In addition, widgets may contain other widgets. Here is an example of a widget containing a Text widget (Name label) and a Text Box widget:

You can even create a widget that is a whole interface, for example, a menu screen. Below is an example of a widget designed to look like the initial game screen. All elements of the UI are also widgets and are contained within the home screen widget.
So, we learned what widgets are. Now you can create a widget for the HUD.
Creating a widget
Go to the Content Browser and locate the UI folder. Click on the Add New button and select User Interface \ Widget Blueprint . Rename new asset to WBP_HUD .

Double click on WBP_HUD to open it in UMG UI Designer.
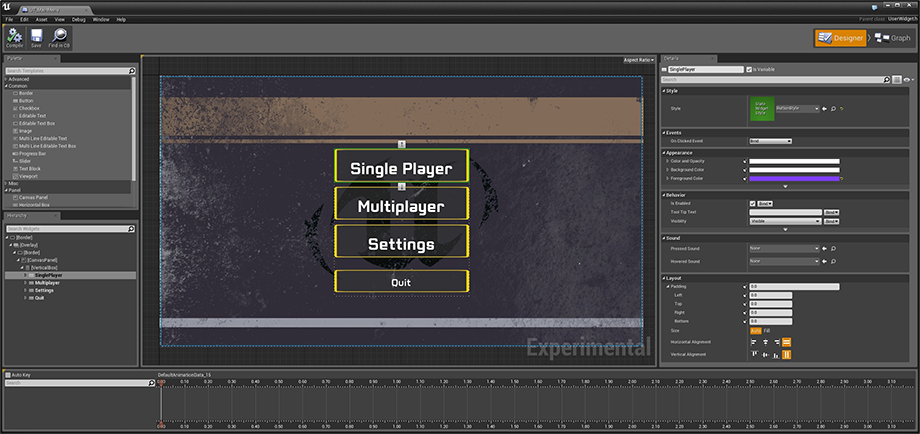
UMG UI Designer
UMG UI Designer consists of seven main elements:
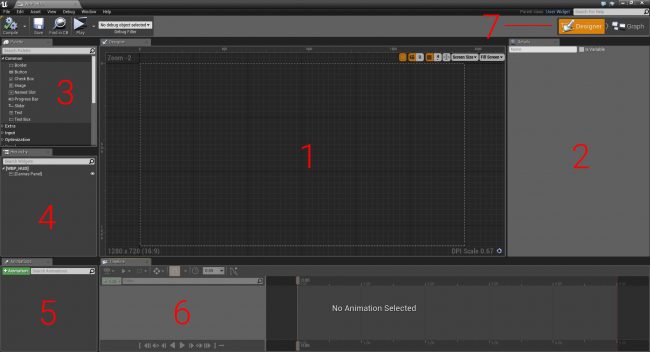
- Designer: this area presents the visual display of the widget. You can navigate through it by holding the right mouse button and moving the mouse . Scaling is done by scrolling the mouse wheel .
- Details: the properties of the selected widget are displayed here.
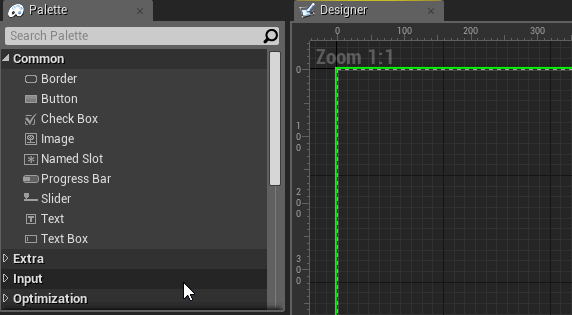
- Palette: A list of all the widgets you can use. All user created widgets also appear here.
- Hierarchy: a list of all widgets already used
- Animations: some widget properties may have animation, for example, location and size. This panel lists all the animations.
- Timeline: when you select an animation, this panel shows animated properties and keyframes.
- Editor Mode: here you can switch between Designer and Graph modes. Graph mode is almost the same as Event Graph for Blueprint.
Creating a Text widget
Text widgets are great for displaying numeric information, such as a counter and a timer.
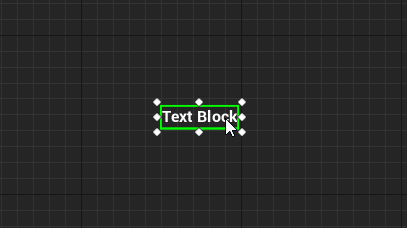
Go to the Palette panel and find the Text widget. Add a widget by dragging it to the Designer panel.
The content of the text does not interest us yet, we will change it later.
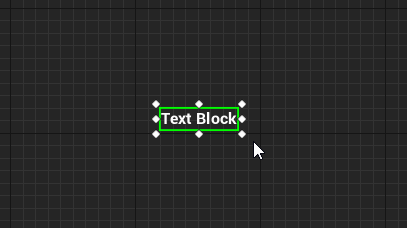
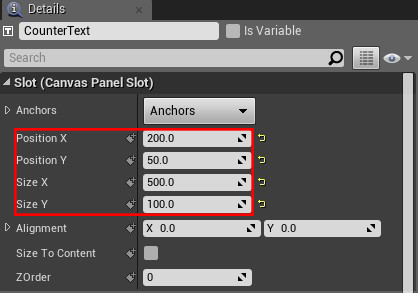
Rename the widget to CounterText . This can be done by selecting the Text widget and going to the Details panel. Enter CounterText in the text box at the top.

Widgets can be moved by dragging them with the left mouse button in the Designer panel.
You can also resize widgets by dragging the border with the left mouse button . Resizing allows you to set the borders of the widget. Unreal will not render anything beyond the boundaries.
Or you can set the position and size by changing the values in the Details panel. Set the following properties and values for CounterText :
- Position X: 200
- Position Y: 50
- Size X: 500
- Size Y: 100
At the moment, the text occupies only a small part of the field.

You can increase the font size by going to the Details panel and to the Appearance section. To the right of the Font property there is a text box for setting the font size.

Enter size 68 .

Let's make the counter more beautiful by adding an icon to it.
Creating an Image Widget
Image widgets are a simple way to display graphics in a UI, for example, icons.
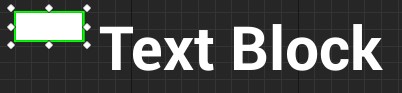
Create an Image widget and name it CounterIcon . Set Position X to 75 , and Position Y to 50 . The widget will be located next to CounterText .
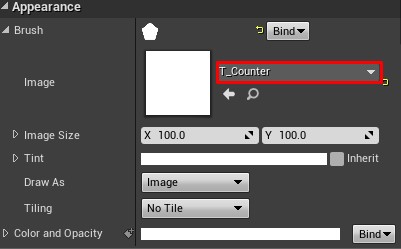
To set the image, go to the Details panel and go to the Appearance section. Expand the Brush property, and then click on the drop-down list next to Image . Select T_Counter .
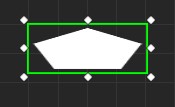
The image will look stretched because the size of the widget is different from the image size.
Instead of resizing the widget, we can use the Size To Content option. This option automatically resizes the widget to fit its content.
From the Details panel, go to the Slot (Canvas Panel Slot) section. Check the box next to Size To Content .
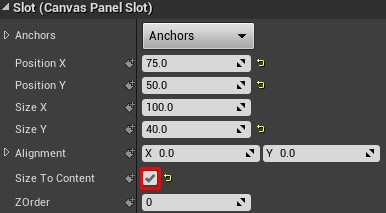
Widget itself will adjust its size under the image.
If the game will be launched with different screen sizes, the UI must move the widgets accordingly. To save the UI layout, you need to use bindings .
Bindings
The anchor point specifies the location relative to which the position of the widget is determined. By default, widgets are tied to the upper left corner of their parent element. Therefore, when we set the position of the widget, we actually indicate the position relative to this anchor point.
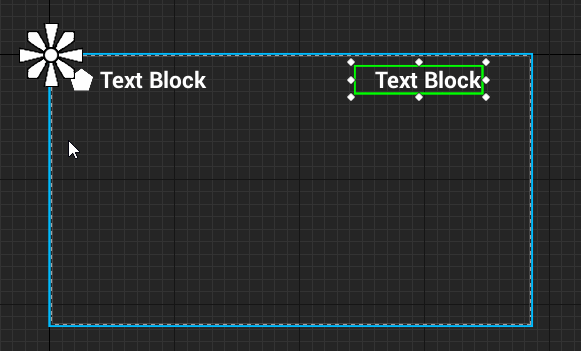
In the example below, each image is tied to one point (to the nearest corner).

Notice that each image maintains a position relative to its binding. Thanks to the UI bindings will have the same location for different screen sizes.
You can also use snaps to automatically resize widgets. In the case of snapping to two or more points, the widget will change its size to maintain relative size.
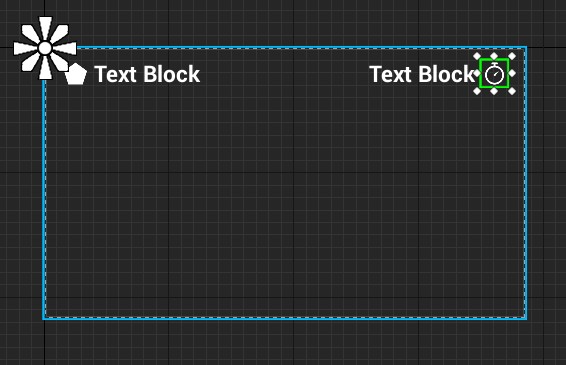
In the example below, the indicator is tied to the upper left and upper right corners.

The indicator moves vertically, but does not change its size, because there is only one reference on the Y axis (above). However, the indicator horizontally changes size because it has two anchor points along the X axis.
Anchor Medallion displays the location of the anchor. It appears when choosing a widget.
The CounterText and CounterIcon bindings are already in the right place, so you do not need to set them.
Now we will create one more Text and Image widgets for the timer. However, this time we will place them on the right.
Timer creation
Create a Text widget and name it TimerText . Set the following properties:
- Position X: 1225
- Position Y: 50
- Size X: 500
- Size Y: 100
- Font Size: 68
- Justification: Align Text Right (this aligns the text on the right side of the widget)

Now we want to set the binding in the upper right corner. This can be done by dragging the circle in Anchor Medallion . Move Anchor Medallion to the upper right corner .
Notice how the position is updated relative to the binding.

Create an Image widget and name it TimerIcon . Set the following properties:
- Position X: 1750
- Position Y: 50
- Size To Content: Checked
- Brush \ Image: T_Timer
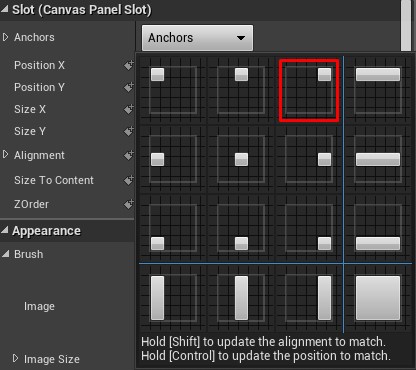
Instead of specifying a binding using Anchor Medallion, you can use predefined values. Go to the Details panel and click on the drop-down list next to Anchors to open the preset values. Select the third scheme (with a square in the upper right corner).
The creation of the UI scheme is now complete. You can ensure that the bindings work by emulating different screen sizes. Go to the Designer panel and click on the Screen Size drop-down list.

Selecting an option will resize the WBP_HUD to match the option. The following shows how the HUD will look on iPad Air. Notice that the widgets are closer together.
In the next section, we will learn how to display a WBP_HUD widget.
HUD mapping
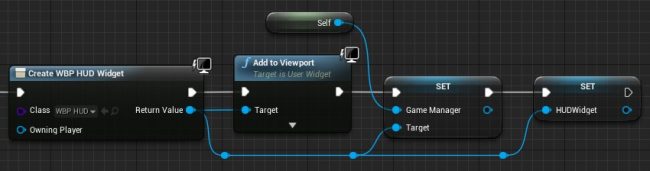
Click on Compile , and then return to the main editor. Navigate to the Blueprints folder and double-click on BP_GameManager to open it.
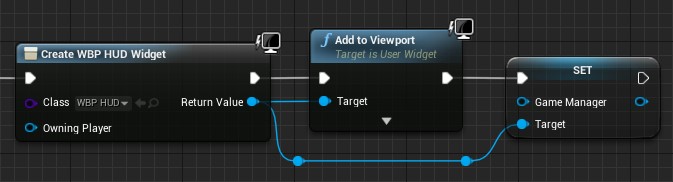
The HUD should become visible after starting the game. To do this, you can use the Event BeginPlay node.
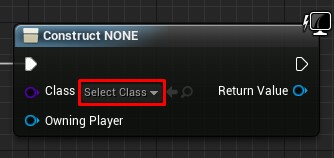
Find the Event BeginPlay node and add the Create Widget node to the end of the node chain. This node creates an instance of the specified widget.

Click on the drop-down list next to Class and select WBP_HUD .
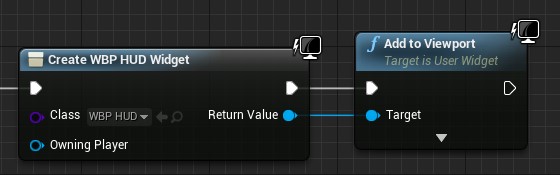
To display a HUD, you must use the Add to Viewport node. Drag the left mouse button to the contact Return Value node Create Widget . Release the left mouse button in the empty space to open the context menu. Add a node Add to Viewport .
Let's deal with the order of events:
- When Unreal spun BP_GameManager , the Restart and SetUpCamera functions are executed . These functions set up several variables and a camera. If you do not know what a function is, then do not worry, soon we will consider them.
- Create Widget node creates an instance of WBP_HUD
- The node Add to Viewport displays WBP_HUD
Click on Compile and return to the main editor. Click on Play to start the game with the new HUD.

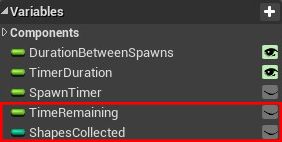
To display the values of the counter and timer, we need variables to store this information. These variables can be found in BP_GameManager .
To use these variables. we need a way to access BP_GameManager from WBP_HUD . For this, you can use a reference variable .
Reference variables
Storing links is useful because they allow convenient access to instances.
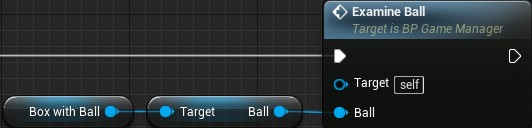
Imagine that you have one box in which the ball lies. If we need to find and examine the ball, it will be easy, because we have only one box.
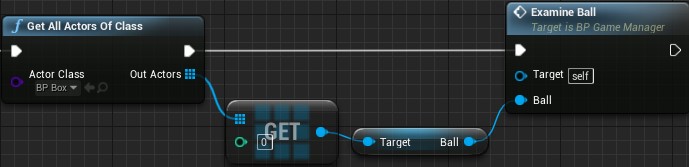
Now imagine that we have a hundred boxes, but there is only one ball. We will need to check every box until we find a box with a ball.

Every time we need to examine the ball, we will have to perform this operation. This will quickly lead to performance problems.
Thanks to the links you can track the box with the ball. So we don’t have to check every box.
Creating a reference variable
Open WBP_HUD and switch to Graph mode by going to Editor Mode and choosing Graph .

Go to the My Blueprint tab and create a new GameManager variable.
Go to the Details panel and click on the drop-down list next to the Variable Type . Find the BP_GameManager and select the BP Game Manager \ Object Reference .

Setting reference variable
Click on Compile and open BP_GameManager .
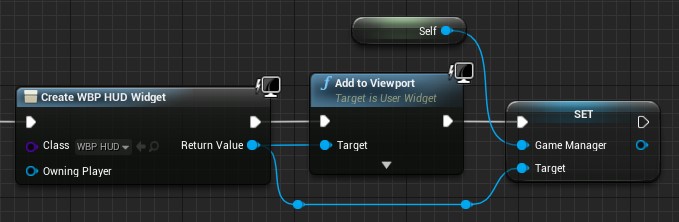
Find the Create Widget node and left-click to drag the Return Value contact. Release the left key on the empty space and select Set Game Manager from the menu.
Then connect the Add to Viewport node to the Set Game Manager node.
Note: You can redirect the “wires” by double clicking on them to create the Reroute node. Drag the Reroute node with the left mouse button to redirect the “wire”.
Then create a Self node and connect it to the left contact of the Set Game Manager node. Self node will be listed as Get a reference to self .
Now that WBP_HUD has already been created, we will have a link to BP_GameManager .
In the next section, we will learn how to update a widget using functions .
Functions
Functions in Blueprints are graphs similar to Event Graph. Unlike Event Graph, functions can be called using nodes. Why then may you need it?
Orderliness
One of the reasons for using functions is consistency. Thanks to the functions, you can connect several nodes into one.
Look at the Event BeginPlay section in BP_GameManager . There are two functions here: Restart and SetUpCamera .

Here’s what this section will look like without functions:
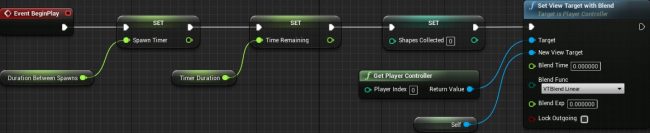
As you can see, thanks to its features, it looks much cleaner.
Reuse
Another reason for using features is reuse . For example, if you need to reset the counter and the timer, this can be easily done using the Restart function.

This saves time by recreating the nodes each time you need to reset these variables.
We got acquainted with the functions and can now use them to update the CounterText widget.
Widget update
When creating a widget, a link variable to this widget is also automatically created. However, by default, Text widgets have no reference variables. This means that we cannot set their Text property. Fortunately, this is easy to fix.
Click on Compile and open WBP_HUD . Switch to Designer mode.
Select CounterText , and then go to the Details panel. Make sure there is an Is Variable at the top.

Now we can update CounterText . The next step is to create a function to update the text.
Create update function
Switch back to Graph mode and go to the My Blueprint tab. Click the + icon to the right of the Functions section.
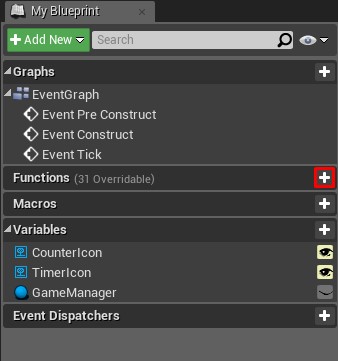
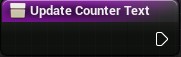
A new function will be created and you will go to its column. Rename the function to UpdateCounterText .
By default, the graph will contain an Entry node. When performing a function, it will start from this node.
In order for CounterText to display the ShapesCollected variable, we need to connect them.
Drag the GameManager variable into the graph. Drag the contact with the left mouse button and release it on an empty space. From the menu, select Get Shapes Collected .

To set the text, you will need to use the SetText (Text) node. Drag the CounterText variable into the graph. Drag the contact with the left mouse button and release it on the empty space. In the menu, add a SetText (Text) node.

SetText (Text) can receive Text input data. However, the ShapesCollected variable is of type Integer . Fortunately, Unreal automatically performs the conversion when the Integer is connected to the Text input.
Connect the ShapesCollected variable to the In Text contact of the Set Text (Text) node. Unreal will automatically create a ToText (int) node.
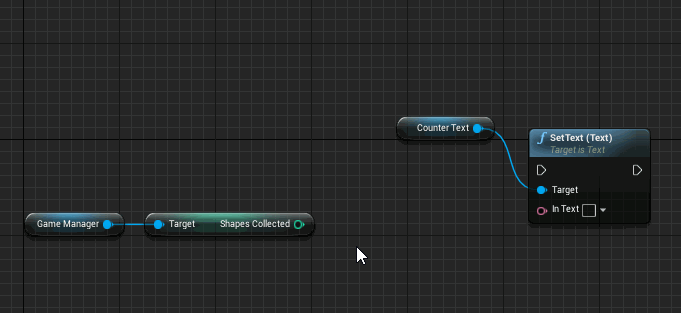
To complete the function, connect the Entry node to the Set Text (Text) node.
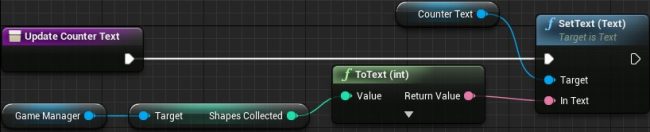
Event Order:
- When calling UpdateCounterText, the function gets the ShapesCollected variable from BP_GameManager
- The ToText (int) node converts the ShapesCollected value to type Text
- SetText (Text) sets the text CounterText from the value ToText (int)
Now we need to learn how to call UpdateCounterText when a player catches a figure.
Call update function
It is best to call UpdateCounterText immediately after the game increases the ShapesCollected value. I created the function IncrementShapesCollected , which performs the increment counter. The pieces call this function when faced with a player.
Click on Compile and return to BP_GameManager .
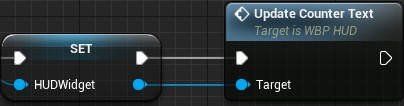
Before calling UpdateCounterText , we need a link to WBP_HUD . Try creating a link variable yourself!
Solution inside
- Find the section in which we created and displayed WBP_HUD .
- Drag the Contact Return Value of the Create Widget node.
- Release the left mouse button on the empty space and select Promote to variable in the menu.
- Add a new node to the end of the node chain.
After creating the variable, change its name to HUDWidget .
Then drag the right contact of the Set HUDWidget node and release on the empty space. Add an UpdateCounterText node. Thanks to this, CounterText will display the ShapesCollected value when the game starts.
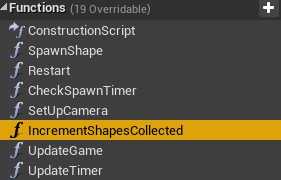
Then go to the My Blueprint panel and go to the Functions section. Double click on IncrementShapesCollected to open its graph.
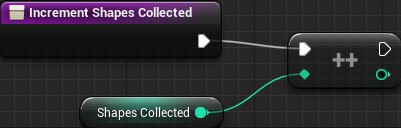
Drag a HUDWidget variable into the graph. Drag his contact and release on empty space. Add an UpdateCounterText node and connect it as follows:
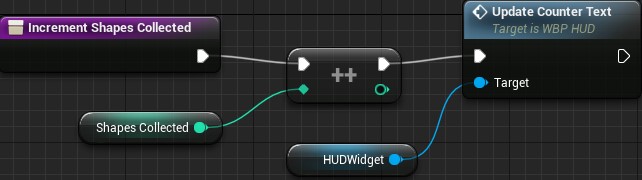
Now, when performing IncrementShapesCollected, it will increase ShapesCollected , and then call UpdateCounterText . This function will then update the CounterText with the ShapesCollected value.
Click on Compile and close BP_GameManager . Click on Play and collect several shapes to see how the CounterText widget is updated .
Now we need to learn how to update the TimerText widget, just in a different way, which is called anchoring .
Bindings
Bindings allow you to automatically update certain properties of widgets. To be able to bind, the property must have a Bind drop-down list .
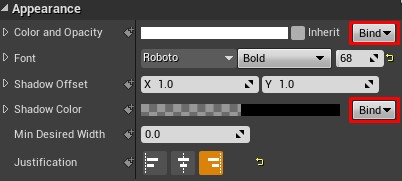
You can bind properties to a function or to a variable stored inside the widget. A binding permanently receives a value from a function or variable and assigns that value to the bound property.
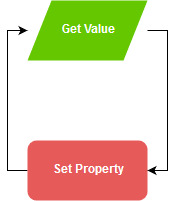
You are probably wondering why it is impossible to constantly use bindings. Bindings are ineffective because they are constantly updated. This means that the game spends time updating the properties, even if there is no new information. Compare this with the previous method, in which the widget is updated only when necessary.
Given this, bindings are well suited for frequently changing elements, such as timers. Let's create a binding for TimerText .
Creating a binding
Open WBP_HUD and switch to Designer mode.
Select TimerText , and then go to the Content section of the Details panel. You will see that the Text property has the ability to bind. Click on the Bind drop-down list and select Create Binding .
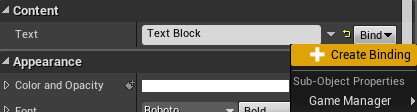
A new function will be created and the transition to its graph will be executed. Rename the function to UpdateTimerText .
The function will have a Return node with a Return Value contact of type Text . TimerText will display any text that you connect to this contact.

Drag GameManager onto the graph and get the TimeRemaining variable from it.
Connect the TimeRemaining variable with the Return Value of the Return node. Like last time, Unreal will automatically add a transform node.

Summarize:
- The binding will constantly call the UpdateTimerText function .
- The function gets the TimeRemaining variable from BP_GameManager
- The ToText (float) node converts a value from TimeRemaining to a Text type.
- The converted value is then output to the Return node.
Our HUD is finally ready. Click on Compile and close WBP_HUD . Click on Play to see the final results.
Where to go next?
The finished project can be downloaded here .
Now you know the basics of UMG and simply can create more complex interfaces. Try experimenting with other widgets and panel widgets.
If you want to know what other widgets are doing, then read the Widget Type Reference page in the Unreal Engine documentation.
To continue exploring, read the following tutorial in which I will show you how to put everything together to create a simple game!
Source: https://habr.com/ru/post/344600/
All Articles