We build in-app purchase into our app
 In the second part of the article about my New Year's toy, I will tell you about in-game purchases inside. I do not like advertising in applications at all, on this issue of embedding advertising in my application, for me it disappeared immediately. My experience of laying out paid games in Gooogle Play says that the number of people who want to download this game drops dramatically, this option of selling the game has also disappeared. And since I don’t want to make a fortune from a game, but I do it more for my own pleasure, I decided that let users decide whether to pay something or not.
Yes, I decided to use donates in the game. If then suddenly there will be interesting statistics on donations in the game, then I will definitely share it in the next article.
To work with embedded purchases, I stopped at a very simple, in my opinion, but quite functional Anjlab library (link to GitHub ).
There are two types of products in Google play:
')
- Product - purchased one-time, prior to sale, does not have a validity period.
- Subscription - can be purchased regularly, has a validity period.
Buying goods works asynchronously, that is, first make a purchase request, then you receive an answer about a successful purchase or an error code.
To connect the library to our application is necessary in the file build.gradle (Module: app)
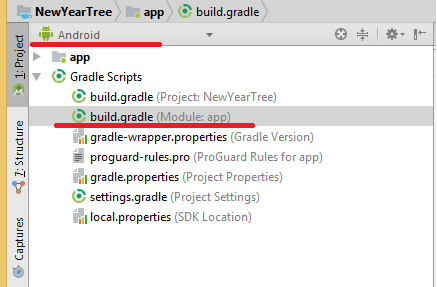
Add the line compile 'com.anjlab.android.iab.v3: library: 1.0.44' to the dependencies section (Don't forget, after making changes, click Sync Now in the upper right corner of the window.)
apply plugin: 'com.android.application' android { compileSdkVersion 26 defaultConfig { applicationId "ru.crazyprojects.android.newyeartree" minSdkVersion 14 targetSdkVersion 26 versionCode 8 versionName '1.8' testInstrumentationRunner "android.support.test.runner.AndroidJUnitRunner" } buildTypes { release { minifyEnabled false proguardFiles getDefaultProguardFile('proguard-android.txt'), 'proguard-rules.pro' } } productFlavors { } } dependencies { implementation fileTree(include: ['*.jar'], dir: 'libs') implementation 'com.android.support:appcompat-v7:26.1.0' implementation 'com.android.support.constraint:constraint-layout:1.0.2' testImplementation 'junit:junit:4.12' androidTestImplementation 'com.android.support.test:runner:0.5' androidTestImplementation 'com.android.support.test.espresso:espresso-core:2.2.2' compile 'com.anjlab.android.iab.v3:library:1.0.44' } Add two libraries to the file with Activity:
import com.anjlab.android.iab.v3.BillingProcessor; import com.anjlab.android.iab.v3.TransactionDetails; We supply our Activity with the BillingProcessor.IBillingHandler functionality:
public class NewYearTree extends AppCompatActivity implements BillingProcessor.IBillingHandler { ... } To work with purchases, create a BillingProcessor class object and add the required methods:
public class NewYearTree extends AppCompatActivity implements BillingProcessor.IBillingHandler { BillingProcessor bp; ........... @Override public void onBillingInitialized() { /* * , */ } @Override public void onProductPurchased(String productId, TransactionDetails details) { /* * */ } @Override public void onBillingError(int errorCode, Throwable error) { /* * - */ } @Override public void onPurchaseHistoryRestored() { /* * . * , , */ } @Override protected void onActivityResult(int requestCode, int resultCode, Intent data) { // , , if (!bp.handleActivityResult(requestCode, resultCode, data)) { super.onActivityResult(requestCode, resultCode, data); } } } In the onCreate method, we initialize the variable:
protected void onCreate(Bundle savedInstanceState) { super.onCreate(savedInstanceState); ........ if(!BillingProcessor.isIabServiceAvailable(this)) { Toast.makeText(this, "In-app billing service is unavailable.", Toast.LENGTH_LONG).show(); } bp = new BillingProcessor(this, " Google Play", this); // . bp.initialize(); } Fill in the code with the defined methods:
@Override public void onBillingInitialized() { Log.d("LOG", "On Billing Initialaized"); // } @Override public void onProductPurchased(String productId, TransactionDetails details) { Toast.makeText(this, "Thanks for Your donate. "+productId, Toast.LENGTH_LONG).show(); // bp.consumePurchase(productId); // , . } @Override public void onBillingError(int errorCode, Throwable error) { Log.d("LOG", "On Billing Error"+Integer.toString(errorCode)); // } @Override public void onPurchaseHistoryRestored() { // , . // , } @Override protected void onActivityResult(int requestCode, int resultCode, Intent data) { //Toast.makeText(this, "On Activity Result", Toast.LENGTH_LONG).show(); Log.d("LOG", "On Activity Result"); if (!bp.handleActivityResult(requestCode, resultCode, data)) { super.onActivityResult(requestCode, resultCode, data); } } // , public void donate(String ProductID) { bp.purchase(this, ProductID); // } The application did everything, now you need to perform a series of actions in the Google Play console.
First you need to get a "LICENSE KEY FROM Google Play". This key is unique for each application, so to get it, the application must be published, for example, as a beta version.
After the application is published, go to the application management section (just by clicking on it in the application list), then in the left menu open the “Development Tools” section and go to the “Services and API” subsection, there in the “Licensing and sale of content” "And there is a necessary key that has the form" MIIBIjANBgkqhkiG9w0BAQEFAAOCA ....................................... ............................................... »
This key is used when calling the method:
bp = new BillingProcessor(this, "MIIBIjANBgkqhkiG9w0BAQEFAAOCA......................................................................................", this); Now we need to create content that we will sell. To do this, in the left menu, go to the "Settings page of the application" and the subsection "Content for sale."
Next, we need to determine what type of content we need - a product or a subscription, having defined the type, go to the appropriate tab and create the required content, filling in the required fields. The application can be both products and subscriptions at the same time.
It is worth paying attention to the naming of the product identifier, it will be used in our application.
For example, we create a product with the identifier one_dollar_donate, and for the purchase in the application we will use the following function call:
bp.purchase(this, "one_dollar_donate"); Happy New Year! and let it be more interesting than the previous ones!
Source: https://habr.com/ru/post/344566/
All Articles