Tutorial on the Unreal Engine. Part 3: materials

As in the real world, there are many objects in games, each with its own appearance. In the Unreal Engine, this appearance depends on the materials. What color is the object? Is it transparent? Does it shine? All these properties are set by materials.
Materials are used for almost any visual element in the Unreal Engine. Materials can be applied to any objects, including meshes, particles, and UI elements.
In this part of the tutorial, you will learn the following:
')
- Control textures by changing their brightness and color.
- Use copies of materials to quickly create variations.
- Use dynamic copies of materials to change the color of an avatar when a player collects items
In this section we will use the material editors and Blueprint. If they are unfamiliar to you, then read the parts dedicated to familiarization with the engine and Blueprints .
Note: This article is one of the eight parts of the Unreal Engine tutorial:
- Part 1: Introduction to the engine
- Part 2: Blueprints
- Part 3: Materials
- Part 4: UI
- Part 5: How to create a simple game
- Part 6: Animation
- Part 7: Sound
- Part 8: Particle Systems
- Part 9: Artificial Intelligence
- Part 10: How to create a simple FPS
Getting Started
Download the project blank and unpack it. To open a project, go to the project folder and open BananaCollector.uproject .
Note: if a window opens indicating that the project was created in an earlier version of the Unreal editor, then everything is fine (the engine is often updated). You can either choose the option to create a copy, or the option to convert the project itself.
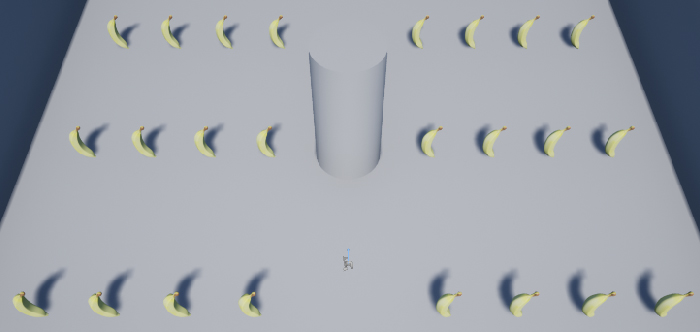
You will see a small area in which the bananas are located. Press Play to control the red cube using the W , A , S and D keys. You can collect bananas by touching them.
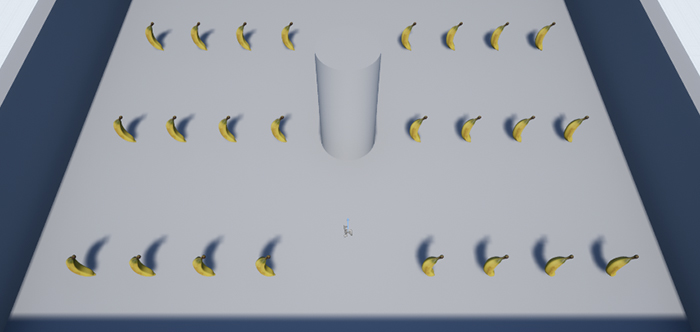
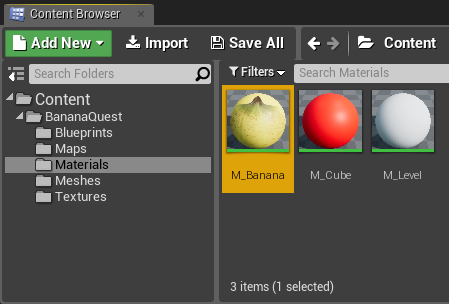
First, let's change the material of the banana to change its brightness. Navigate to the Materials folder and double-click M_Banana to open it in the material editor.
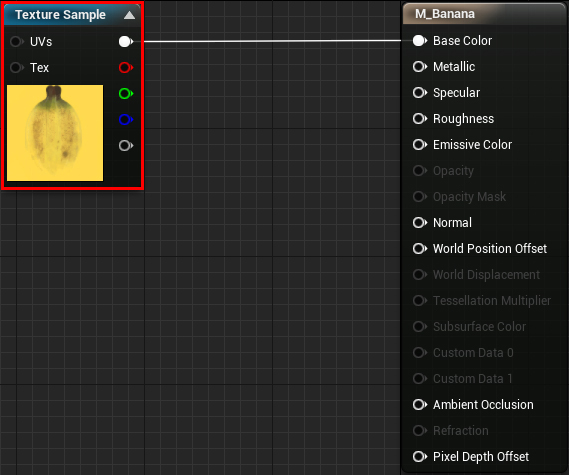
To adjust the brightness of a banana, we need to control its texture.
Texture Management
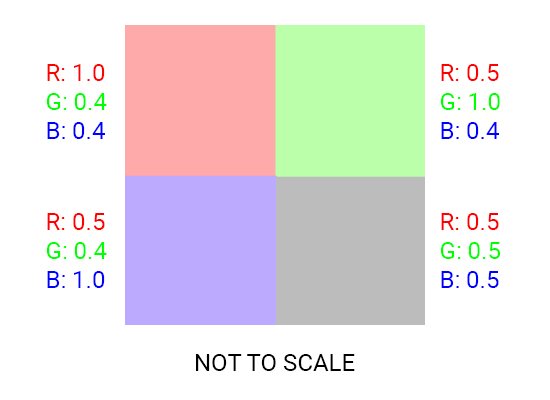
In essence, texture is an image, and an image is a collection of pixels. In a color image, the color of a pixel is determined by its red ® , green (G) and blue (B) channels.
Below is an example of a 2 × 2 image with RGB values for each pixel.
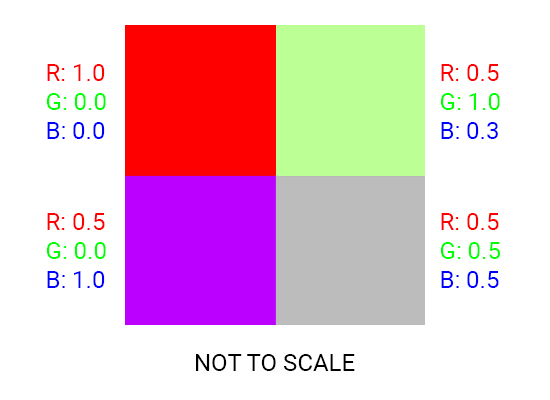
Note: in the Unreal Engine, RGB channels have a range of values from 0.0 to 1.0. However, in most other applications, the RGB channels have an interval from 0 to 255. These are just different ways of displaying the same information and they do not mean that the Unreal Engine color interval is smaller.
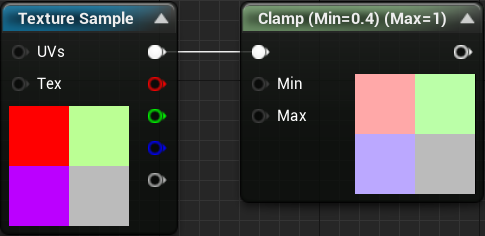
Texture management is performed by performing operations on each pixel of the texture. Operations can even be simple, for example, adding values to channels.
Below is an example of the limitation of each channel in the range from 0.4 to 1.0. This increases the minimum value of each channel, which makes each color brighter.
Here's how to do this in the material editor:
Now you can use the Multiply node to adjust the brightness of the texture.
Multiply nod
Multiply Nod does exactly what its name implies: it multiplies one input to another input.
Using multiplication, you can change the brightness of a pixel without affecting its hue or saturation. Below is an example of reducing the brightness by half by multiplying each channel by 0.5.
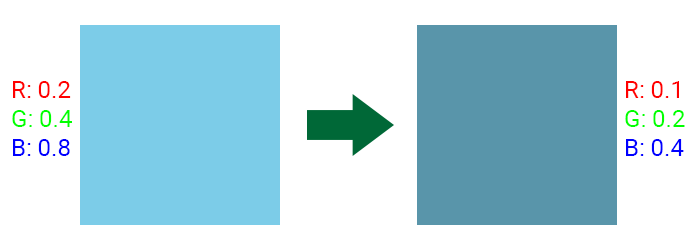
By performing this operation for each pixel, we can change the brightness of the entire texture.

We will not consider this in the tutorial, but you can use the Multiply node in combination with a texture mask. Using the mask, you can specify which areas of the base texture should be darker. Here is an example of applying a mask from a tile texture to a stone texture:
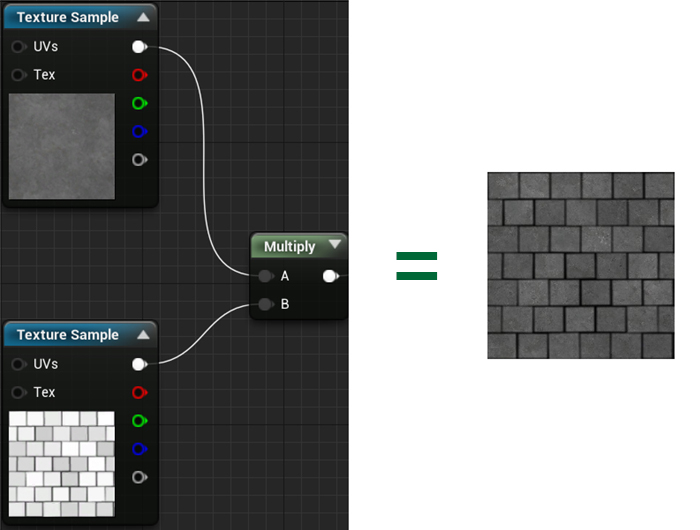
Mask mapping works because the grayscale is an interval from 0 (black) to 1 (white).
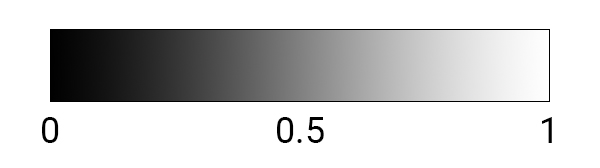
White areas have full brightness, because channels are multiplied by 1. Gray areas are darker, because channels are multiplied by values less than 1. Black areas do not have brightness, because channels are multiplied by 0.
Now it's time to use the Multiply node.
Texture Brightness Adjustment
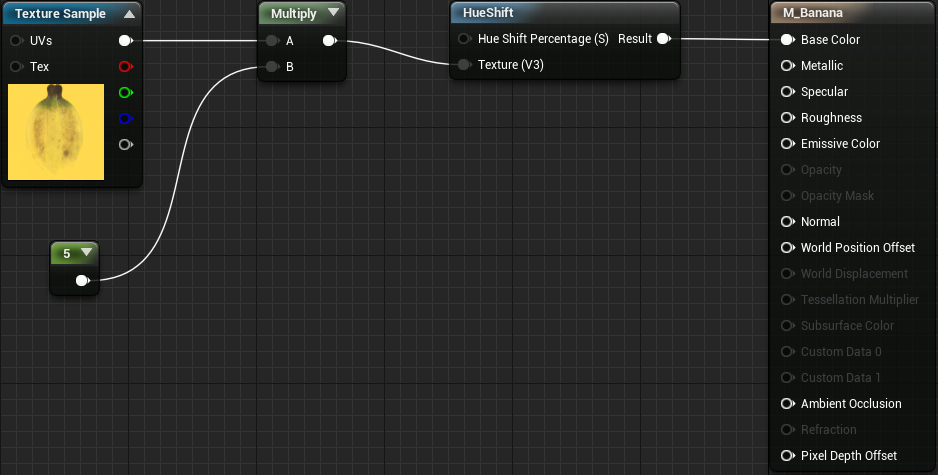
Break the connection between the Texture Sample node and the Base Color contact. This can be done by right clicking on any contact and selecting Break Link (s) . Alternatively, you can hold the Alt key and left-click on the connecting line.
Create a Multiply and Constant node. They can be created quickly by holding the M key (for the Multiply node) or the 1 key (for the Constant node) and left-clicking on the empty space in the graph. After that, the connection should look like this:
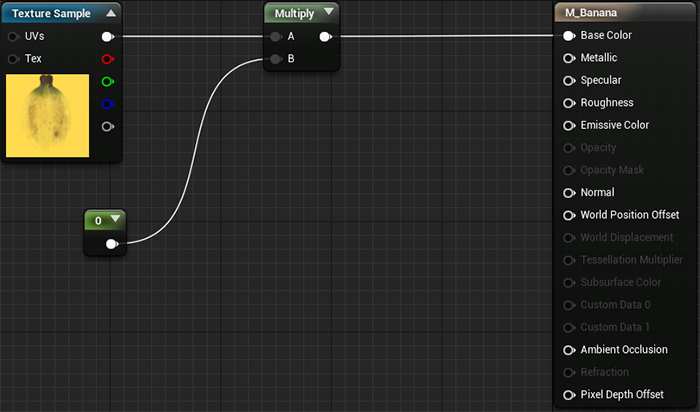
Such a scheme would iteratively bypass each pixel and multiply each channel by the value of the Constant node. Finally, the resulting texture will be displayed as Base Color .
While the resulting texture will be black, because the multiplier is zero. To change the multiplier value, select the Constant node and go to the Details panel. Enter 5 in the Value field.
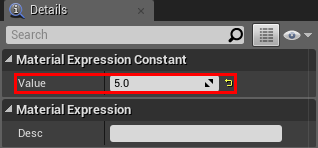
Click Apply and return to the main editor. You will see that bananas are now much brighter.
Let's diversify the scene by adding bananas of different colors. Of course, you can create a new material for each color, but it is easier to create a copy of the material .
About copies of materials
A copy of the material is a copy of the material. All changes made to the base material are also displayed on the copy of the material.
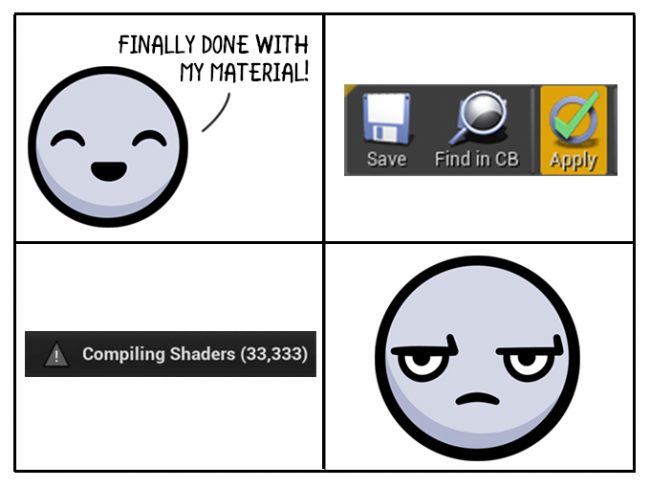
Copies of materials are very convenient, because they can be modified without recompilation. When you click Apply on the material, you may have noticed that a notification is shown that shaders are compiled.
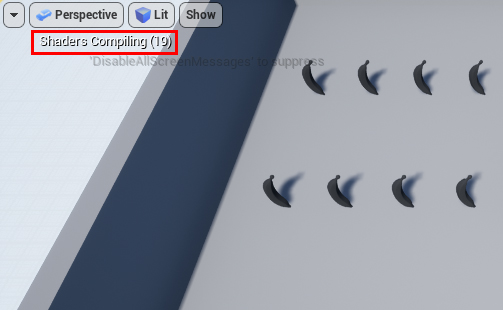
For simple materials, this process takes only a few seconds. However, for complex materials, the compile time may be significantly longer.
Copies of materials are useful in the following cases:
- In the presence of complex material, which you need to quickly make changes
- It is necessary to create variations of the base material. It can be anything - change in color, brightness, or even the texture itself.
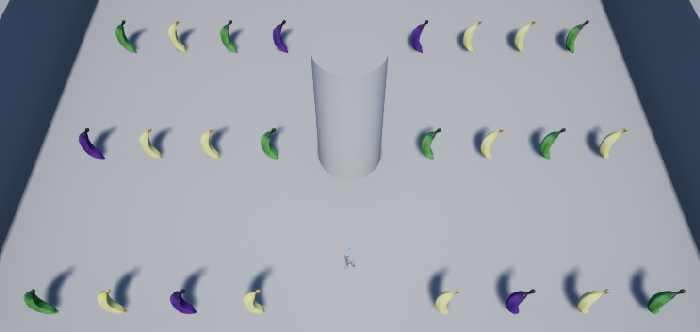
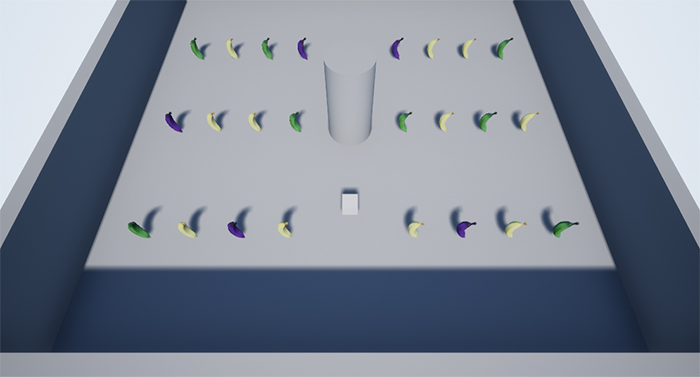
Below is an example of a scene that uses instances of materials to create color variations. All copies have the same base material.
Before creating an instance, we need to create parameters in the base material. They will be displayed in a copy of the material and allow you to customize the properties of the material.
Creating material parameters
Return to the material editor and select the M_Banana material.
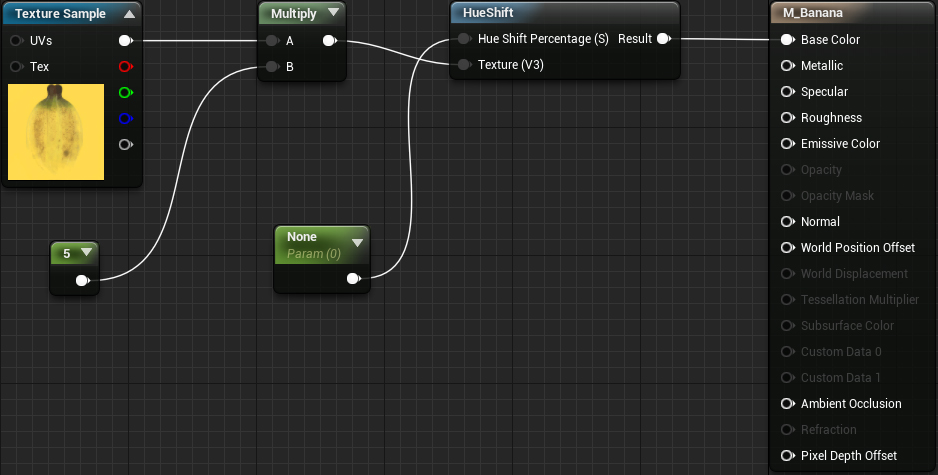
First, we need a node that changes the hue of the texture. To do this, you can use the node HueShift . Add it to the graph and connect as follows:
Forgot how to do it? Solution inside
- Break the connection between the Multiply node and the M_Banana node by holding down the Alt key and left-clicking on the connecting line.
- Right-click on the empty space in the blueprint, locate the HueShift node and select it.
- Connect the "wires" as shown in the diagram below.
Now we need to create the Scalar Parameter node. A single value is stored in this node and can be changed in the instance of the material. This node can be quickly created by holding the S key and clicking the left mouse button on the empty space in the graph. After creating the node, connect it to the Hue Shift Percentage (S) contact of the HueShift node.
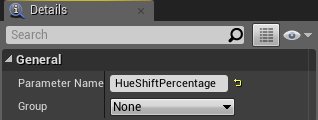
Not bad will also give the names of the parameters. Select the Scalar Parameter node and go to the Details panel. Change the Parameter Name to HueShiftPercentage .
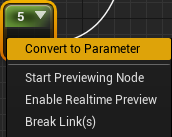
You can also convert Constant nodes to Scalar Parameter. Right-click on the previously added Constant node, and then select Convert to Parameter . Rename the parameter to Brightness .
Now we will create a copy of the material.
Instance creation
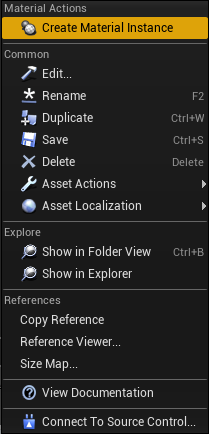
Go to the Content Browser and select the Materials folder. Right-click on M_Banana and select Create Material Instance . Rename the new asset to MI_Banana_Green .
Double tap on MI_Banana_Green to open it. At the same time it will open in the editor of copies of materials.
The editor of copies of materials consists of three panels:
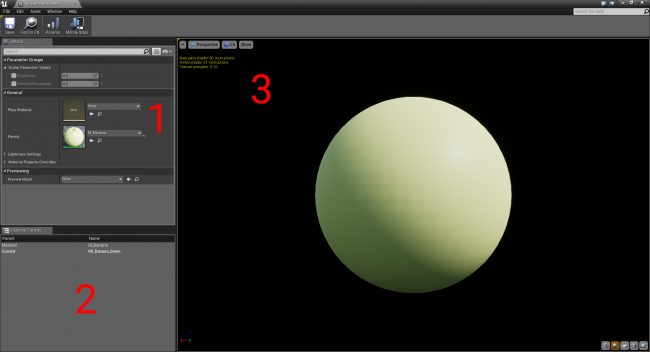
- Details: parameters and other general settings are displayed here.
- Instance Parents: Displays a list of parent materials for the current instance. In this case, the only parent material is M_Banana.
- Viewport: contains a preview mesh that shows a copy of the material. You can rotate the camera by holding the left mouse button and moving the mouse. Scaling is done by scrolling the mouse wheel .
To see the changes on the banana mesh, go to the Details panel and find the Previewing section. Left-click on the drop-down list next to the Preview Mesh and select SM_Banana . Now you will see a banana mesh instead of a sphere.

Now we change the parameters to change the color of the banana to green. To make the parameters editable, left-click on the checkbox next to each parameter.
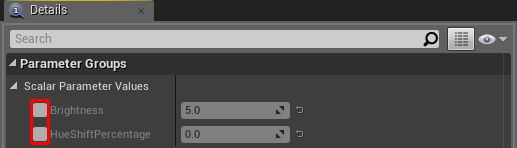
Set Brightness to 0.5 , and HueShiftPercentage to 0.2 . As a result, you get the following:
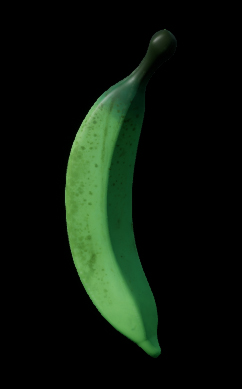
We created a copy of the material, now you can apply it to some of the bananas! Close the material instance and go to Viewport of the main editor.
Application copy of the material
The actors located in the scene can be edited individually. This means that if you change the material for one banana, it will not affect the others. You can use this to change the color of some bananas to green.
Select any banana and go to the Details panel. In the list of components, select the StaticMesh component.
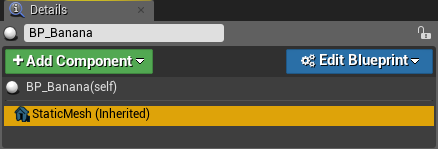
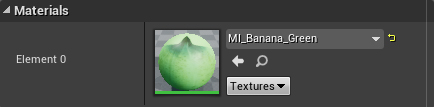
The Details panel displays the properties of the StaticMesh component. Change the material to MI_Banana_Green .
Repeat the process a few more times for a better distribution of yellow and green bananas. Try to create another copy of the material so that you have purple bananas!
Dynamically changeable materials
Materials do not have to be only cosmetic: you can use them to help in game design. Now we will understand how to dynamically change the color of the cube from white to red when the player collects bananas.
Before you create an instance of a material, you will need to set up a cube material.
Make sure you are in the Materials folder and double-click on M_Cube to open it.
First, we need a way to create flowers. The Base Color node is connected to the Constant3Vector node. These nodes are ideal for selecting colors, because they have red, green, and blue channels.
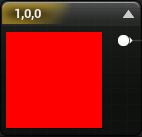
Since the red color has already been created, we will create a white color. Add another Constant3Vector node. This can be done quickly by holding down the 3 key and left-clicking on the empty space in the graph.
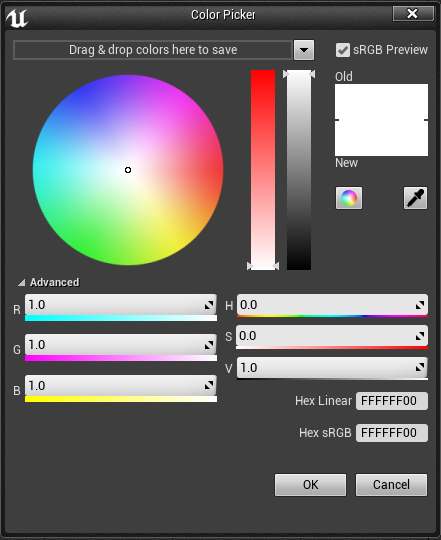
Open the color picker by double clicking on the Constant3Vector node.

Choose white, either by using the sliders, or by typing 1.0 for the R , G, and B channels. Then click OK .
To change the color from white to red, we need a way to create a smooth transition between them. There is a simple way to implement it - linear interpolation .
What is “linear interpolation”?
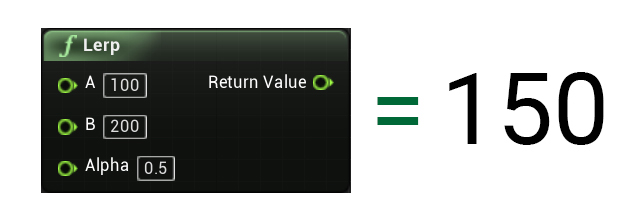
Linear interpolation is a way to find values between A and B. For example, you can use linear interpolation to find a value in the middle between 100 and 200.
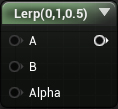
Linear interpolation becomes an even more powerful tool if alpha can be controlled. We can take alpha as a percentage between A and B. Alpha = 0 returns the value of A, and alpha = 1 returns the value of B.
For example, you can increment alpha gradually to smoothly move an object from point A to point B.
In this tutorial, we will manage alpha using the number of bananas harvested.
Using the LinearInterpolate node
First, add a LinearInterpolate node. This can be done quickly by holding down the L key and left-clicking on the empty space in the graph.
Then create the Scalar Parameter node and name it ColorAlpha . Connect the nodes as follows (note that white is now on top):
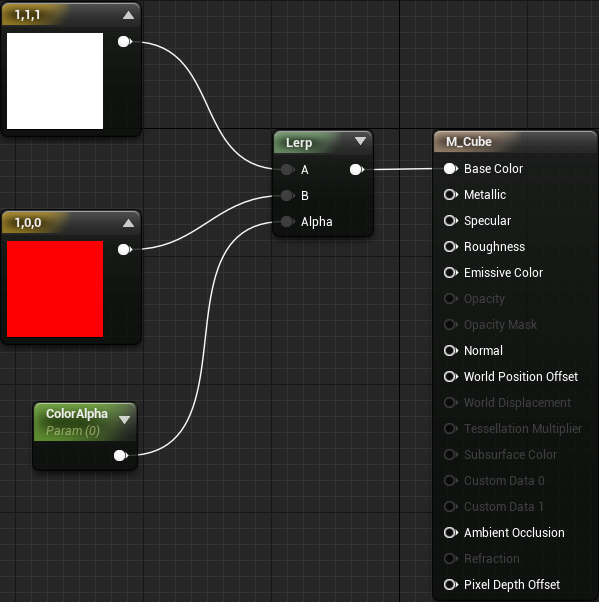
To summarize: the LinearInterpolate node will output the value of the input value A. This is because the initial value of alpha is 0 . As alpha approaches 1 , the output value will approach the input value B.
The material is ready. We still have a lot to do, but to see what we have done, click on Apply and close the material editor. If you click Play , then you will see that now the cube is not red, but white.
In order for the cube to change color, you must change the ColorAlpha parameter. However, there is one problem. During the execution of the game, we cannot change the parameters of the copy of the material. The solution will be the use of dynamic copies of materials .
About dynamic copies of materials
Unlike a regular instance, a dynamic copy of the material can be changed during gameplay. This can be done using Blueprints or C ++.
Dynamic materials can be used in various ways, for example, changing the transparency of an object to make it invisible. Or change the brilliance of the object when it becomes wet.
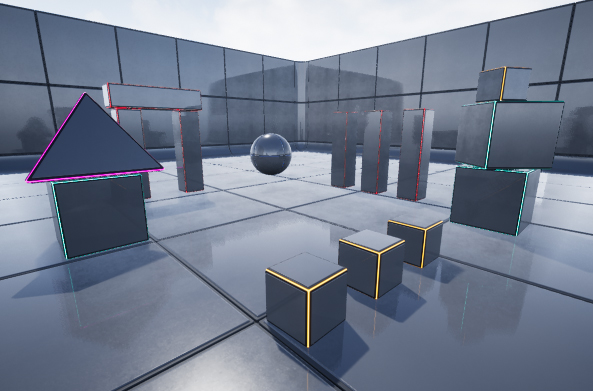
Another good aspect of dynamic content instances is that they can be individually modified.
Below is an example of updating individual instances to overlay a mask on an object's area.
Let's start by creating a dynamic copy of the material.
Creating a dynamic copy of the material
Dynamic copies of materials can be created only during the game process. To do this, you can use Blueprints (or C ++).
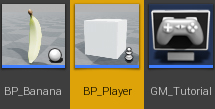
In the Content Browser, go to the Blueprints folder and double-click on the BP_Player to open it.
The first thing we will do is create a new dynamic instance of the material and then apply it to the cube mesh. It will be logical to do this when Unreal spunits an actor, and this task is performed by the Event BeginPlay node.
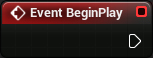
Go to the Event Graph and find the Event BeginPlay node.
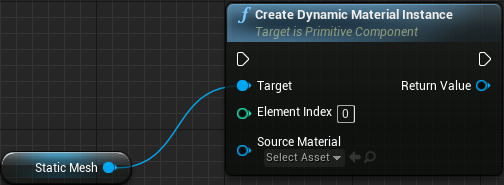
Now add the Create Dynamic Material Instance node (StaticMesh) . This node will simultaneously create and apply a new dynamic instance of the material to the cube mesh.
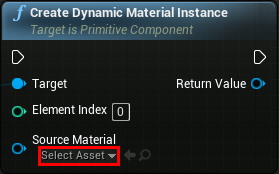
Now we need to specify which material the cube should use. Click on the drop-down list in the Source Material and select M_Cube .
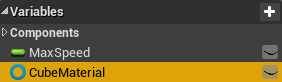
To more conveniently refer to the material, it is best to store it in a variable. The easiest way to do this is by right-clicking the contact Return Value of the Create Dynamic Material Instance node. Then select Promote to Variable .
If you look at the My Blueprint tab, you will notice that a new variable has appeared there. Rename it to CubeMaterial . This can be done quickly by pressing the F2 key.
Finally, connect the Event BeginPlay node to the Create Dynamic Material Instance node.
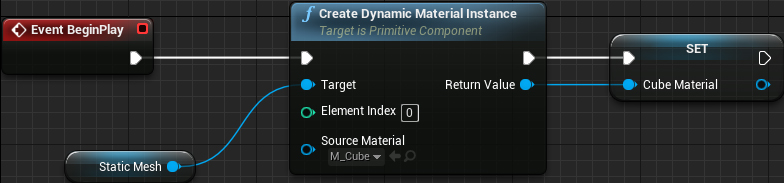
To summarize: when Unreal spawn BP_Player , it creates a new dynamic copy of the material and applies it to the StaticMesh component. It then saves the material into a variable called CubeMaterial .
The next step is to create a counter to track the number of bananas harvested.
Create a banana counter
If you move a little from the Event BeginPlay node, you can see the following diagram. Here we will update the banana counter and material.
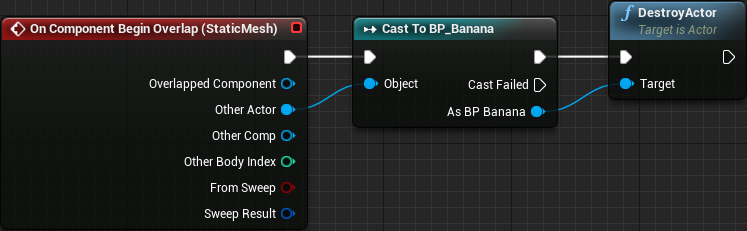
The On Component Begin Overlap node is executed when the cube overlaps another actor. Then the Cast to BP_Banana node checks if the actor being overlapped is a banana. If the actor is a banana, then the DestroyActor node destroys it and it disappears from the game.
The first thing to do is create a variable to store the number of bananas harvested. Later we will increase the value by one each time the cube touches the banana.
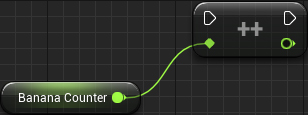
Create a new variable Float and name it BananaCounter . Drag the BananaCounter variable into the Event Graph and select Get .
Next, attach the DestroyActor node to the IncrementFloat node.
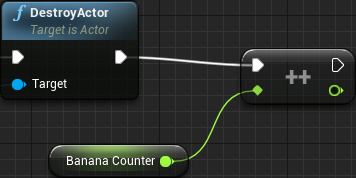
Now, when the player raises the banana, the BananaCounter variable will increase by one.
If we used BananaCounter as alpha right now, we would get unexpected results, because the LinearInterpolation node expects a value in the range from 0 to 1. You can use normalization to convert the counter to 0 to 1.
For normalization, we simply divide BananaCounter by the maximum value. This value is equal to the number of bananas that a cube must collect in order to completely turn red.
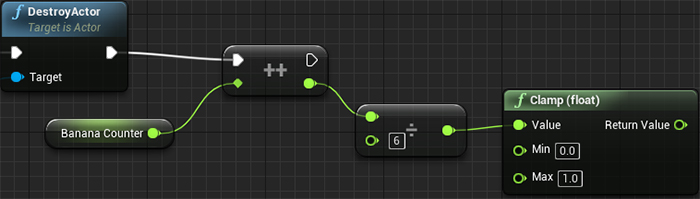
Add a float / float node and connect its top contact with the remaining contact of the IncrementFloat node.
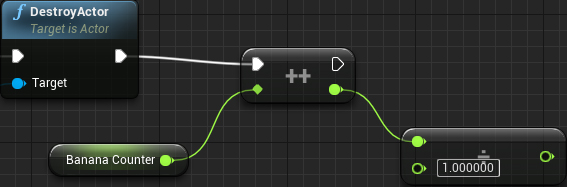
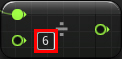
Set the float / float value to 6 as the lower input value of the node. This means that the cube will turn completely red when the player collects six bananas.
But there is a small problem. When a player collects more than six bananas, the alpha will be greater than one. To fix this, we use the Clamp (float) node to limit alpha to an interval from 0 to 1.
Add a Clamp (float) node and connect the Value contact to the right contact of the float / float node.
Now that we have alpha, it's time to transfer its meaning to the material.
Update material
Drag the CubeMaterial variable into the Event Graph and select Get .
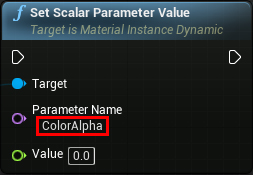
Then drag the contact of the CubeMaterial variable to the empty space and release the left mouse button . A list of nodes that can use a variable of this type will appear. Any selected node will be automatically connected to the variable. Add a Set Scalar Parameter Value node. This node will set the specified parameter to the value being passed.
Now you need to specify the parameter to be updated. Select the ColorAlpha value in the Parameter Name field . This is the parameter that we created in the cube material.
Connect the result of the Clamp (float) node to the Value contact of the Set Scalar Parameter Value node.
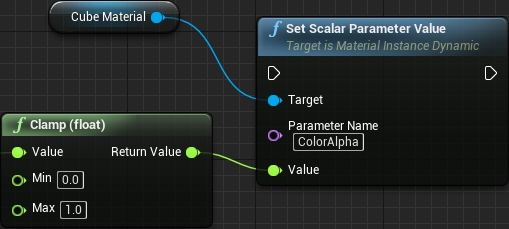
Finally, connect the IncrementFloat node to the Set Scalar Parameter Value node.

The order of execution will be as follows:
- On Component Begin Overlap (StaticMesh): performed when the mesh of the cube intersects with another actor
- Cast to BP_Banana: checks if the actor being intersected is a banana
- DestroyActor: If the intersected actor is a banana, then it destroys it.
- IncrementFloat: increases BananaCounter by one
- float / float: divides the counter by the given number to normalize it
- Clamp (float): limits the result of the division so that a value greater than 1 cannot be obtained
- Set Scalar Parameter Value: sets the cube material's ColorAlpha parameter the value to be transferred. In this case, the value is normalized and limited in the interval by the version of BananaCounter
It is time to check everything! Click on Compile and close the Blueprint editor.
Click on Play and start collecting bananas. The cube will first be white and will gradually turn red when picking bananas. When you collect six bananas, it will turn completely red.
Where to go next?
The finished project can be downloaded here .
I like the materials, because it is a very powerful tool with which you can do a lot. You can combine materials to create complex materials like stone and moss growing in cracks. You can also create interesting effects, for example, the disintegration effect shown in the tutorial.
If you want to learn more about materials, I recommend reading the Material Inputs page in the Unreal Engine documentation. Exploring the possibilities of inputs will allow you to create more complex materials.
I advise you to experiment with materials and test different nodes (there are a lot of them there). The best way to learn is to try everything yourself.
If you want to continue learning, read the next post in a series of tutorials in which I will talk about how to add UI elements to games, such as tags or buttons.
Source: https://habr.com/ru/post/344522/
All Articles