Creating an Ionic application using the API
I have an application written in the Ionic Framework. Based on it, I want to share with all my development experience and write how to create a cross-platform application step by step.
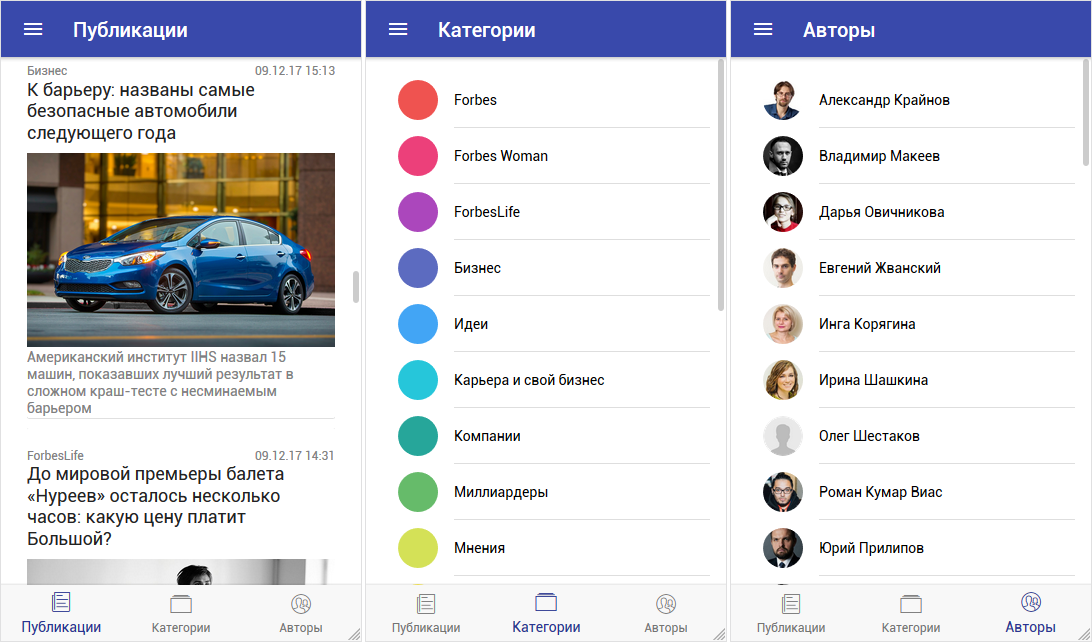
In this article we will develop an application from scratch that allows you to read articles (publications). The publication will have a title (title), a title photo, a summary, full content, category, author, date of publication. All data for the application will be taken from the server via Http requests.
')
The application will have several pages (screens):
- a list of all posts, sorted by date.
- a list of categories sorted alphabetically.
- list of authors, sorted by name.
- list of publications of the selected category, sorted by date.
- list of publications of the selected author, sorted by date.
- the content of the publication.
The result of the article will be an application that looks like the image above.
Plus a link to the source of the entire project.
Start
Create a new project and name it articles . To do this, run the command:
ionic start articles tabsThe result will see the created directory named articles :
Project structure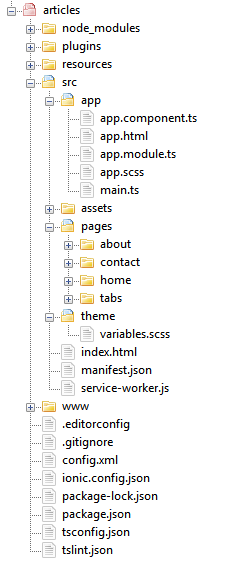
Create new pages that we need: postlist , categorylist , authorlist . To do this, execute the following commands in turn:
ionic generate page postlist
ionic generate page categorylist
ionic generate page authorlist
As a result, we will see the created directories in the \ articles \ src \ pages \ folder:
Created pages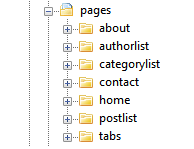
Open the files: postlist.ts , categorylist.ts , authorlist.ts and in each file we write a line to import the NavController class and the NavParams object
import { NavController, NavParams } from 'ionic-angular'; As a result, we get the following type of files: postlist.ts , categorylist.ts , authorlist.ts
import { Component } from '@angular/core'; import { NavController, NavParams } from 'ionic-angular'; @Component({ selector: 'page-postlist', templateUrl: 'postlist.html', }) export class Postlist { constructor(public navCtrl: NavController, public navParams: NavParams) { } ionViewDidLoad() { console.log('ionViewDidLoad Postlist'); } } import { Component } from '@angular/core'; import { NavController, NavParams } from 'ionic-angular'; @Component({ selector: 'page-categorylist', templateUrl: 'categorylist.html', }) export class Categorylist { constructor(public navCtrl: NavController, public navParams: NavParams) { } ionViewDidLoad() { console.log('ionViewDidLoad Categorylist'); } } import { Component } from '@angular/core'; import { NavController, NavParams } from 'ionic-angular'; @Component({ selector: 'page-authorlist', templateUrl: 'authorlist.html', }) export class Authorlist { constructor(public navCtrl: NavController, public navParams: NavParams) { } ionViewDidLoad() { console.log('ionViewDidLoad Authorlist'); } } Delete the extra folders in \ articles \ src \ pages \ : about , contact , home . They were created automatically when creating a project. We do not need them.
Open the \ src \ app \ app.module.ts file and make changes there. Let's prescribe the use of the newly created pages and remove any references to deleted pages.
The result of all the actions will be the contents of the app.module.ts file .
app.module.ts
import { NgModule, ErrorHandler } from '@angular/core'; import { BrowserModule } from '@angular/platform-browser'; import { IonicApp, IonicModule, IonicErrorHandler } from 'ionic-angular'; import { MyApp } from './app.component'; import { Postlist } from '../pages/postlist/postlist'; import { Categorylist } from '../pages/categorylist/categorylist'; import { Authorlist } from '../pages/authorlist/authorlist'; import { TabsPage } from '../pages/tabs/tabs'; import { StatusBar } from '@ionic-native/status-bar'; import { SplashScreen } from '@ionic-native/splash-screen'; @NgModule({ declarations: [ MyApp, Postlist, Categorylist, Authorlist, TabsPage ], imports: [ BrowserModule, IonicModule.forRoot(MyApp) ], bootstrap: [IonicApp], entryComponents: [ MyApp, Postlist, Categorylist, Authorlist, TabsPage ], providers: [ StatusBar, SplashScreen, {provide: ErrorHandler, useClass: IonicErrorHandler} ] }) export class AppModule {} Open the \ src \ pages \ tabs \ tabs.ts file and change the content so that the tabs link to the postlist , categorylist , authorlist pages .
The modified file looks like this:
import { Component } from '@angular/core'; import { Postlist } from '../postlist/postlist'; import { Categorylist } from '../categorylist/categorylist'; import { Authorlist } from '../authorlist/authorlist'; @Component({ templateUrl: 'tabs.html' }) export class TabsPage { tab1Root = Postlist; tab2Root = Categorylist; tab3Root = Authorlist; constructor() { } } Open the file \ src \ pages \ tabs \ tabs.html and make the following changes: change the names of tabs in tabTitle and icons in tabIcon (all necessary icons are listed in the ionicons documentation):
<ion-tabs> <ion-tab [root]="tab1Root" tabTitle="" tabIcon="ios-paper-outline"></ion-tab> <ion-tab [root]="tab2Root" tabTitle="" tabIcon="ios-albums-outline"></ion-tab> <ion-tab [root]="tab3Root" tabTitle="" tabIcon="ios-contacts-outline"></ion-tab> </ion-tabs> Run the
ionic serve command to view the result:First result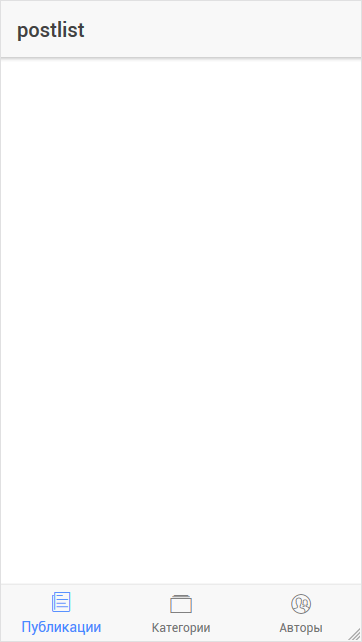
Change the main color of the application to the one we want. To do this, open the \ src \ theme \ variables.scss file and add the desired color
clmain:#3949ab in the $colors array: $colors: ( primary: #488aff, secondary: #32db64, danger: #f53d3d, light: #f4f4f4, dark: #222, clmain: #3949ab, ); And then apply this color in the upper part (for
<ion-navbar> ) to each of the postlist.html , categorylist.html , authorlist.html pages : <ion-navbar color="clmain"> ... </ion-navbar> Redefine the color for tabs (tabs). Let's write these lines in the \ src \ theme \ variables.scss file:
$tabs-md-tab-color-active: #283593; $tabs-ios-tab-color-active: #283593; $tabs-wp-tab-color-active: #283593; As a result, the appearance of the application will be as follows:
Primary color of the application
Menu
Now we will make the menu, which is pushed to the left when you press the button-gamberger.
Create an array, which will list the pages with names, indexes and icons. Open the file app.component.ts and first declare an array of
pages in the class MyApp : pages: Array<{title: string, component: any, index: string, icon_name: string}>; and then in the class constructor, fill this array:
this.pages = [ { title: '', component: TabsPage, index: '0', icon_name: 'ios-paper-outline' }, { title: '', component: TabsPage, index: '1', icon_name: 'ios-albums-outline' }, { title: '', component: TabsPage, index: '2', icon_name: 'ios-contacts-outline' } ]; Also at the very beginning we import used tabs:
import { TabsPage } from '../pages/tabs/tabs'; Use the filled
pages array to display the menu items. Open the app.html file and bring it to the following form: <ion-menu [content]="content"> <ion-header> </ion-header> <ion-content> <ion-list no-lines> <button menuClose ion-item *ngFor="let p of pages" (click)="openPage(p)" color="clmain"> <ion-icon item-left [name]="p.icon_name" item-left color="light"></ion-icon> {{p.title}} </button> </ion-list> </ion-content> </ion-menu> <ion-nav [root]="rootPage" #content></ion-nav> The
openPage(p) method works when you click on a menu item. The parameter is the array element of the menu item that was clicked.We describe the operation of this method in the app.component.ts file
openPage(page) { this.navCtrl.setRoot(page.component, {index: page.index}); } When calling
navCtrl.setRoot we pass the page.component page, as well as the page.index parameter, which is the index of the selected item. We will need this parameter to know which of the three tabs is opened.navCtrl - is declared as follows (all in the same app.component.ts file): import { ViewChild } from '@angular/core'; import { Nav } from 'ionic-angular'; and in the class
MyApp at the very beginning we write the announcement: @ViewChild(Nav) navCtrl: Nav; As a result, we get the following contents of the app.component.ts file:
app.component.ts
import { Component, ViewChild } from '@angular/core'; import { Nav, Platform } from 'ionic-angular'; import { StatusBar } from '@ionic-native/status-bar'; import { SplashScreen } from '@ionic-native/splash-screen'; import { TabsPage } from '../pages/tabs/tabs'; @Component({ templateUrl: 'app.html' }) export class MyApp { @ViewChild(Nav) navCtrl: Nav; rootPage:any = TabsPage; pages: Array<{title: string, component: any, index: string, icon_name: string}>; constructor(platform: Platform, statusBar: StatusBar, splashScreen: SplashScreen) { platform.ready().then(() => { // Okay, so the platform is ready and our plugins are available. // Here you can do any higher level native things you might need. statusBar.styleDefault(); splashScreen.hide(); }); this.pages = [ { title: '', component: TabsPage, index: '0', icon_name: 'ios-paper-outline' }, { title: '', component: TabsPage, index: '1', icon_name: 'ios-albums-outline' }, { title: '', component: TabsPage, index: '2', icon_name: 'ios-contacts-outline' } ]; } openPage(page) { this.navCtrl.setRoot(page.component, {index: page.index}); } } Now let's make a selection of exactly the tab that should be opened when clicking a certain menu item: “Publications” , “Categories” , “Authors” . To do this, open the tabs.ts file and write the receipt of the
Index parameter (which is passed in the openPage(page) method).Importing
NavParams : import { NavParams } from 'ionic-angular'; Let's declare a new
index variable in the TabsPage class: index: string; In the parameters of the constructor we enter:
public navParams: NavParams and in the body of the constructor we write the retrieval of the index value
this.index = navParams.get('index'); Fully tabs.ts file will look like this:
import { Component } from '@angular/core'; import { NavParams } from 'ionic-angular'; import { Postlist } from '../postlist/postlist'; import { Categorylist } from '../categorylist/categorylist'; import { Authorlist } from '../authorlist/authorlist'; @Component({ templateUrl: 'tabs.html' }) export class TabsPage { index: string; tab1Root = Postlist; tab2Root = Categorylist; tab3Root = Authorlist; constructor(public navParams: NavParams) { this.index = navParams.get('index'); } } And add the selection of the desired tab on the resulting index. To do this, in the tabs.html file for
<ion-tabs> we write the following: <ion-tabs selectedIndex={{index}}> Let's make the background for all the menus the same as our main color. To do this, open the \ src \ app \ app.scss file and add the style to it:
.myBg{ background-color: #3949ab; } Open the app.html file and apply this style to the
<ion-content> element: <ion-content class="myBg"> Left menu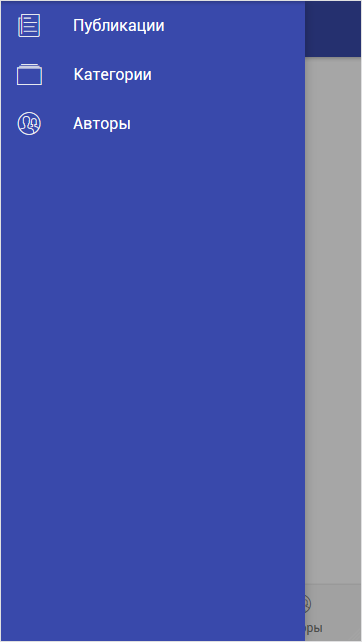
Add the following lines (inside the
<ion-navbar> ) to the postlist.html , categorylist.html , authorlist.html files to see the menu icon (hamburger) on the left side of the top line of the application. <button ion-button menuToggle> <ion-icon name="menu"></ion-icon> </button> Let's see the result and see this view:
Menu icon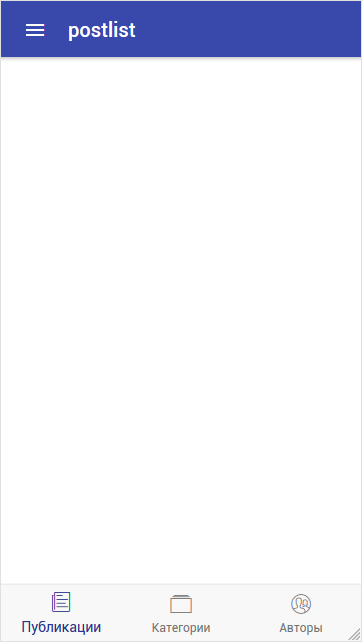
Well, as an experiment, add a picture before displaying all the menu items. To do this, take a picture of any size and place it in the
\src\assets\imgs\ menu.png named menu.png . Then we will use it in the app.html file: <ion-content class="myBg"> <img src="assets/imgs/menu.png" /> <ion-list no-lines> <button menuClose ion-item *ngFor="let p of pages" (click)="openPage(p)" color="clmain"> <ion-icon item-left [name]="p.icon_name" item-left color="light"></ion-icon> {{p.title}} </button> </ion-list> </ion-content> Let's see the result and see the following:
Menu with a picture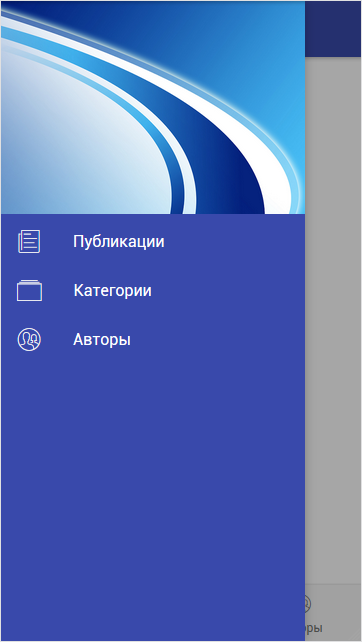
As a result of the work done, we received an application that contains:
- three pages: "Publications", "Categories", "Authors".
- the menu that pops up on the left.
- tabs to switch pages.
- menu items to switch tabs.
Data acquisition
Then we will fill each of the pages ( postlist , categorylist , authorlist ) with data that we will receive in JSON format via HTTP requests.
Here is a list of items that will be implemented for each page:
- loading data when opening the page.
- podgruzka following data when scrolling to the last element of the list.
- refreshing the page when dragging the list down when the list shows the very beginning.
- display of the download spinner (at the time of the query when receiving data).
- error handling when executing a query.
A few words about the execution of requests in Ionic . When working with queries you need to remember about the CORS technology.
In my example, I use my server to retrieve data, so when retrieving data from the server in the headers, I easily specify the desired header:
header('Content-Type: application/json;charset=utf-8'); header('Access-Control-Allow-Origin: *'); For example, the full text of the script for a list of categories looks like this:
The script for a list of categories
header('Content-Type: application/json;charset=utf-8'); header('Access-Control-Allow-Origin: *'); $dblocation = "localhost"; $dbname = "database"; $dbuser = "username"; $dbpasswd = "password"; $mysqli = new mysqli($dblocation, $dbuser, $dbpasswd, $dbname); $query = " select `tb_categories`.* from `tb_categories` order by `tb_categories`.`category`"; $data = array(); if ($res = $mysqli->query($query)) { $data['count'] = strval($res->num_rows); while($row = $res->fetch_assoc()){ $data['data'][] = array( 'id' => $row['id'], 'category' => $row['category'], 'url' => $row['url'] ); } } echo json_encode($data); When executing this script, we will receive the data in JSON format as a response:
JSON data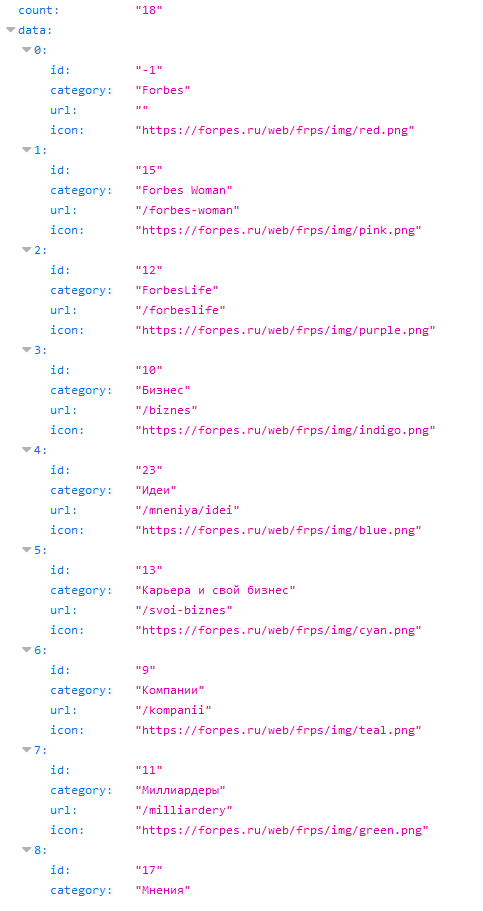
We return to the Ionic-application. Let's start with connecting the Http service. First, in the app.module.ts file, we import the HttpModule with the following line:
import { HttpModule } from '@angular/http'; and also write it in the import section:
imports: [ BrowserModule, HttpModule, IonicModule.forRoot(MyApp) ], Next, go to the postlist.ts file and describe the import of the following objects:
import { Http } from '@angular/http'; import 'rxjs/add/operator/map'; import 'rxjs/add/operator/timeout'; import { LoadingController } from 'ionic-angular'; LoadingController is used to display the loading indicator.
We announce the
Http service and LoadingController in the constructor of the Postlist class: constructor(public navCtrl: NavController, public http: Http, public loadingCtrl: LoadingController, public navParams: NavParams) Then I will give the full contents of the postlist.ts file with comments:
postlist.ts
import { Component } from '@angular/core'; import { NavController, NavParams } from 'ionic-angular'; import { Http } from '@angular/http'; import 'rxjs/add/operator/map'; import 'rxjs/add/operator/timeout'; import { LoadingController } from 'ionic-angular'; @Component({ selector: 'page-postlist', templateUrl: 'postlist.html', }) export class Postlist { postlists: any; // , postlists_new: any; // , countElement: number = 10; // - , beginElement: number = 0; // , post_error: string; // 0-, 1- constructor(public navCtrl: NavController, public http: Http, public loadingCtrl: LoadingController, public navParams: NavParams) { // // 0 - // 1 - this.loadData(0); } loadData(isNew) { if (isNew==0){ // this.beginElement = 0; this.countElement = 10; // let loadingPopup = this.loadingCtrl.create({ content: '' }); // loadingPopup.present(); // , URL- this.http.get('https://mysite.ru/postlist.php?begin='+this.beginElement+'&limit='+this.countElement) .timeout(20000) // 20 . .map(res => res.json()) .subscribe( data => { setTimeout(() => { this.postlists = data.data; // , this.countElement = data.count; // - this.post_error = "0"; // - loadingPopup.dismiss(); // }, 1000); }, err => { loadingPopup.dismiss(); // this.post_error = "1"; // - } ); }else{ // this.beginElement = Number(this.beginElement) + Number(this.countElement); } } // doInfinite(infiniteScroll) { // // 0 , // if (this.countElement != 0){ this.loadData(1); // Get the data this.http.get('https://mysite.ru/postlist.php?begin='+this.beginElement+'&limit='+this.countElement) .timeout(20000) .map(res => res.json()) .subscribe( data => { setTimeout(() => { this.postlists_new = data.data; // this.countElement = data.count; this.post_error = "0"; for (let i = 0; i < this.countElement; i++) { this.postlists.push( this.postlists_new[i] ); // } infiniteScroll.complete(); }, 1000); }, err => console.error(err) ); }else{ infiniteScroll.complete(); } } // , doRefresh(refresher) { this.loadData(0); setTimeout(() => { refresher.complete(); }, 2000); } ionViewDidLoad() { console.log('ionViewDidLoad Postlist'); } } Open the postlist.html file and display the received data in the form of a list:
... <ion-content padding> <ion-refresher (ionRefresh)="doRefresh($event)"> <ion-refresher-content pullingIcon="arrow-dropdown" pullingText=" " refreshingSpinner="circles" refreshingText="..."> </ion-refresher-content> </ion-refresher> <div *ngIf="post_error == '0'"> <ion-card *ngFor="let postlist of postlists" (click)="openPostPage(postlist)" text-wrap class="list-selected"> <ion-card-title class="postlist-title"></ion-card-title> <div> <div class="postlist-category">{{postlist.category}}</div> <div class="postlist-dat">{{postlist.dat3}}</div> </div> <ion-card-title class="postlist-title"> {{postlist.title}} </ion-card-title> <img [src]="postlist.img" /> <h5 class="postlist-intro-text">{{postlist.intro_text}}</h5> </ion-card> </div> <div *ngIf="post_error == '1'" style="text-align: center"> <ion-label> </ion-label> <button ion-button (click)="loadData(0)" color="clmain" icon-left> <ion-icon name="refresh"></ion-icon> </button> </div> <ion-infinite-scroll (ionInfinite)="doInfinite($event)"> <ion-infinite-scroll-content loadingSpinner="bubbles" loadingText=" ..."> </ion-infinite-scroll-content> </ion-infinite-scroll> </ion-content> Now a few words about this code. In the upper part in the <ion-refresher> block , actions are described when dragging the list down when the list displays the very beginning. The bottom part of the <ion-infinite-scroll> block describes actions when scrolling to the last item in the list.
In the central part are two
div . One is displayed provided that there is no error when retrieving data ( post_error == '0' ). The second is displayed if there was an error ( post_error == '1' ).The result is: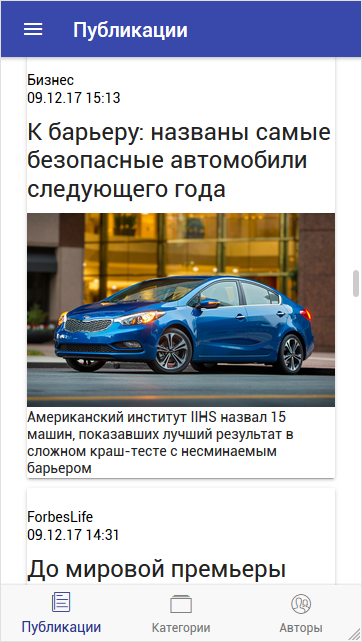
Now let's embellish the display. To do this, we describe the necessary styles (
postlist-title, postlist-intro-text, postlist-dat, postlist-category ) in the file postlist.scss : page-postlist { .postlist-title { font-size: 18px !important; white-space: inherit; } .postlist-intro-text { font-size: 14px !important; color: gray; white-space: inherit; } .postlist-dat { font-size: 12px !important; color: gray; white-space: inherit; float: right; text-align: right; width: 50%; } .postlist-category { font-size: 12px !important; color: gray; white-space: inherit; float: left; width: 50%; } } The result is:
Data loading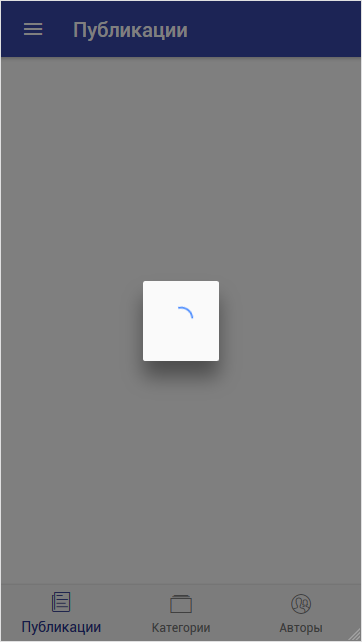
Error retrieving data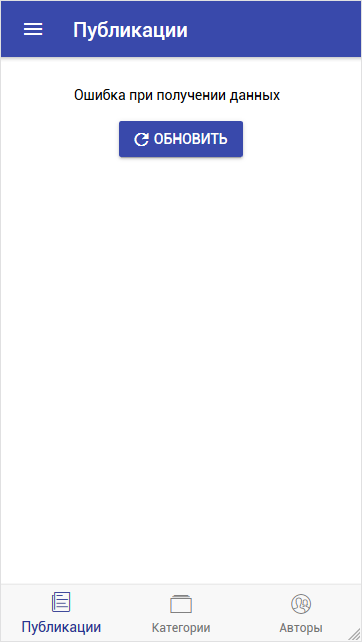
Data update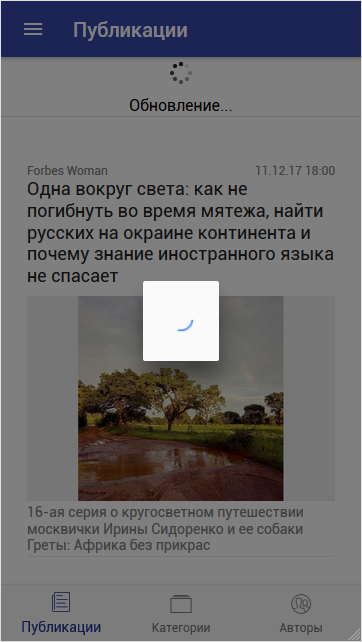
Loading the following data
Clicking on the list item ( <ion-card> ) triggers a
click event. And we have written a call to the openPostPage(postlist) method. This method will open the contents of the publication. We will return to it later and describe it.We carry out similar actions for the remaining two pages.
In categorylist will display a list of all categories of publications.
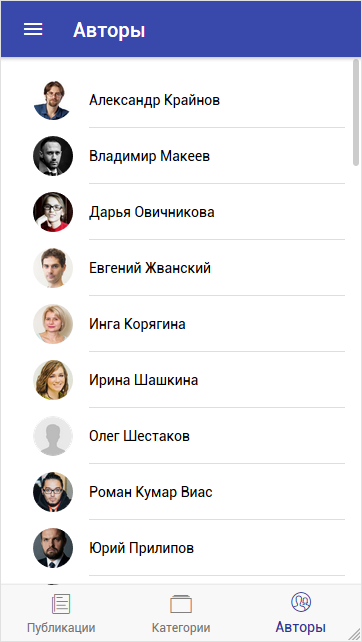
In the authorlist we will display a list of all users of publications.
Below, I will cite the finished files of each page immediately, because the method of obtaining and displaying data in them is the same as for the postlist page.
The only exception concerns categories. Since There will be a small number of categories in principle, for this page it is not necessary to load the following data when reaching the end of the list. Immediately get all the categories and display them entirely.
Additionally, we will do one more functionality: when you click on a list item (either on a category or on an author), open the list of publications for the selected item. To do this, the
click event will write a call to the openPostCategoryPage and openPostAuthorPage respectively, on each page, and also describe the work of the methods (in both files categorylist.ts and authorlist.ts ): openPostCategoryPage(item) { this.navCtrl.push(Postlist, { item: item, type: '1' }); } openPostAuthorPage(item) { this.navCtrl.push(Postlist, { item: item, type: '2' }); } In the quality parameter, we will transfer the selected page (
item ) and the page number ( type ) in order to distinguish the categories page from the authors page later.Here are the full contents of the categorylist.ts, categorylist.html and authorlist.ts, authorlist.html files .
categorylist.ts
import { Component } from '@angular/core'; import { NavController, NavParams } from 'ionic-angular'; import { Http } from '@angular/http'; import 'rxjs/add/operator/map'; import 'rxjs/add/operator/timeout'; import { LoadingController } from 'ionic-angular'; import { Postlist } from '../postlist/postlist'; @Component({ selector: 'page-categorylist', templateUrl: 'categorylist.html', }) export class Categorylist { categorylists: any; post_error: string; constructor(public navCtrl: NavController, public navParams: NavParams, public http: Http, public loadingCtrl: LoadingController) { this.loadData(); } openPostCategoryPage(item) { this.navCtrl.push(Postlist, { item: item, type: '1' }); } loadData() { // let loadingPopup = this.loadingCtrl.create({ content: '' }); // loadingPopup.present(); // , URL- this.http.get('https://mysite.ru//categorylist.php') .timeout(20000) .map(res => res.json()) .subscribe( data => { setTimeout(() => { this.categorylists = data.data; this.post_error = "0"; loadingPopup.dismiss(); }, 1000); }, err => { loadingPopup.dismiss(); this.post_error = "1"; } ); } // , doRefresh(refresher) { this.loadData(); setTimeout(() => { refresher.complete(); }, 2000); } ionViewDidLoad() { console.log('ionViewDidLoad Categorylist'); } } categorylist.html
<ion-header> <ion-navbar color="clmain"> <button ion-button menuToggle> <ion-icon name="menu"></ion-icon> </button> <ion-title></ion-title> </ion-navbar> </ion-header> <ion-content padding> <ion-refresher (ionRefresh)="doRefresh($event)"> <ion-refresher-content pullingIcon="arrow-dropdown" pullingText=" " refreshingSpinner="circles" refreshingText="..."> </ion-refresher-content> </ion-refresher> <div *ngIf="post_error == '0'"> <ion-list> <button ion-item *ngFor="let categorylist of categorylists" (click)="openPostCategoryPage(categorylist)" text-wrap class="list-selected"> <ion-avatar item-left> <img [src]="categorylist.icon" /> </ion-avatar> <ion-label class="categorylist-title">{{categorylist.category}}</ion-label> </button> </ion-list> </div> <div *ngIf="post_error == '1'" style="text-align: center"> <ion-label> </ion-label> <button ion-button (click)="loadData(0)" color="clmain" icon-left> <ion-icon name="refresh"></ion-icon> </button> </div> </ion-content> authorlist.ts
import { Component } from '@angular/core'; import { NavController, NavParams } from 'ionic-angular'; import { Http } from '@angular/http'; import 'rxjs/add/operator/map'; import 'rxjs/add/operator/timeout'; import { LoadingController } from 'ionic-angular'; import { Postlist } from '../postlist/postlist'; @Component({ selector: 'page-authorlist', templateUrl: 'authorlist.html', }) export class Authorlist { authorlists: any; authorlists_new: any; countElement: number = 40; beginElement: number = 0; post_error: string; constructor(public navCtrl: NavController, public navParams: NavParams, public http: Http, public loadingCtrl: LoadingController) { this.loadData(0); } openPostAuthorPage(item) { this.navCtrl.push(Postlist, { item: item, type: '2' }); } loadData(isNew) { if (isNew==0){ // this.beginElement = 0; this.countElement = 40; // let loadingPopup = this.loadingCtrl.create({ content: '' }); // loadingPopup.present(); // , URL- this.http.get('https://mysite.ru/authorlist.php?begin='+this.beginElement+'&limit='+this.countElement) .timeout(20000) .map(res => res.json()) .subscribe( data => { setTimeout(() => { this.authorlists = data.data; this.countElement = data.count; this.post_error = "0"; loadingPopup.dismiss(); }, 1000); }, err => { loadingPopup.dismiss(); this.post_error = "1"; } ); }else{ // this.beginElement = Number(this.beginElement) + Number(this.countElement); } } // doInfinite(infiniteScroll) { // // 0 , // if (this.countElement != 0){ this.loadData(1); // , URL- this.http.get('https://mysite.ru/authorlist.php?begin='+this.beginElement+'&limit='+this.countElement+'&t='+this.searchtext) .timeout(20000) .map(res => res.json()) .subscribe( data => { setTimeout(() => { this.authorlists_new = data.data; this.countElement = data.count; this.post_error = "0"; for (let i = 0; i < this.countElement; i++) { this.authorlists.push( this.authorlists_new[i] ); } infiniteScroll.complete(); }, 1000); }, err => console.error(err) ); }else{ infiniteScroll.complete(); } } // , doRefresh(refresher) { this.loadData(0); setTimeout(() => { refresher.complete(); }, 2000); } ionViewDidLoad() { console.log('ionViewDidLoad Authorlist'); } } authorlist.html
<ion-header> <ion-navbar color="clmain"> <button ion-button menuToggle> <ion-icon name="menu"></ion-icon> </button> <ion-title></ion-title> </ion-navbar> </ion-header> <ion-content padding class="android-scroll-bar"> <ion-refresher (ionRefresh)="doRefresh($event)"> <ion-refresher-content pullingIcon="arrow-dropdown" pullingText=" " refreshingSpinner="circles" refreshingText="..."> </ion-refresher-content> </ion-refresher> <div *ngIf="post_error == '0'"> <ion-list> <button ion-item *ngFor="let authorlist of authorlists" (click)="openPostAuthorPage(authorlist)" text-wrap class="list-selected"> <ion-avatar item-left> <img [src]="authorlist.img" /> </ion-avatar> <ion-label class="authorlist-title">{{authorlist.author}}</ion-label> </button> </ion-list> </div> <div *ngIf="post_error == '1'" style="text-align: center"> <ion-label> </ion-label> <button ion-button (click)="loadData(0)" color="clmain" icon-left> <ion-icon name="refresh"></ion-icon> </button> </div> <ion-infinite-scroll (ionInfinite)="doInfinite($event)"> <ion-infinite-scroll-content loadingSpinner="bubbles" loadingText=" ..."> </ion-infinite-scroll-content> </ion-infinite-scroll> </ion-content> Result of displaying categories and authors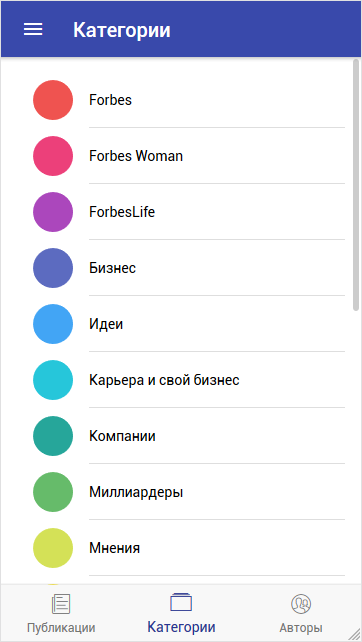
To display the list of publications of the selected category and the selected author, we will use the already existing postlist page .
To do this, in Http requests, we will enter the parameter C to transfer the value of the selected category and the parameter A to transfer the selected author. If this parameter is not filled, we will return all publications.
After making changes to the postlist.ts and postlist.html files, we get the following:
postlist.ts
import { Component } from '@angular/core'; import { NavController, NavParams } from 'ionic-angular'; import { Http } from '@angular/http'; import 'rxjs/add/operator/map'; import 'rxjs/add/operator/timeout'; import { LoadingController } from 'ionic-angular'; @Component({ selector: 'page-postlist', templateUrl: 'postlist.html', }) export class Postlist { title: string; categoryId: any; authorId: any; selectedItem: any; selectedType: string; postlists: any; // , postlists_new: any; // , countElement: number = 10; // - , beginElement: number = 0; // , post_error: string; // 0-, 1- constructor(public navCtrl: NavController, public http: Http, public loadingCtrl: LoadingController, public navParams: NavParams) { this.selectedItem = navParams.get('item'); this.selectedType = navParams.get('type'); this.categoryId = ''; this.authorId = ''; this.title = ''; if (this.selectedType == '1'){ this.title = this.selectedItem.category; this.categoryId = this.selectedItem.id; } if (this.selectedType == '2'){ this.title = this.selectedItem.author; this.authorId = this.selectedItem.id; } // // 0 - // 1 - this.loadData(0); } loadData(isNew) { if (isNew==0){ // this.beginElement = 0; this.countElement = 10; // let loadingPopup = this.loadingCtrl.create({ content: '' }); // loadingPopup.present(); // , URL- this.http.get('https://mysite.ru/postlist.php?begin='+this.beginElement+'&limit='+this.countElement+'&c='+this.categoryId+'&a='+this.authorId) .timeout(20000) // 20 . .map(res => res.json()) .subscribe( data => { setTimeout(() => { this.postlists = data.data; // , this.countElement = data.count; // - this.post_error = "0"; // - loadingPopup.dismiss(); // }, 1000); }, err => { loadingPopup.dismiss(); // this.post_error = "1"; // - } ); }else{ // this.beginElement = Number(this.beginElement) + Number(this.countElement); } } // doInfinite(infiniteScroll) { // // 0 , // if (this.countElement != 0){ this.loadData(1); // , URL- this.http.get('https://mysite.ru/postlist.php?begin='+this.beginElement+'&limit='+this.countElement+'&c='+this.categoryId+'&a='+this.authorId) .timeout(20000) .map(res => res.json()) .subscribe( data => { setTimeout(() => { this.postlists_new = data.data; // this.countElement = data.count; this.post_error = "0"; for (let i = 0; i < this.countElement; i++) { this.postlists.push( this.postlists_new[i] ); // } infiniteScroll.complete(); }, 1000); }, err => console.error(err) ); }else{ infiniteScroll.complete(); } } // , doRefresh(refresher) { this.loadData(0); setTimeout(() => { refresher.complete(); }, 2000); } ionViewDidLoad() { console.log('ionViewDidLoad Postlist'); } } In the postlist.html file , the changes will affect only part of the header display:
<ion-header> <ion-navbar color="clmain"> <button ion-button menuToggle> <ion-icon name="menu"></ion-icon> </button> <ion-title>{{title}}</ion-title> </ion-navbar> </ion-header> As a result of all changes, you can now view the publications of the selected category and the selected author:
Publications of the selected category and selected author

It remains to make the last page to display the contents of the publication. Namely: title, date, category, author, photo, summary, full content.
To do this, create a new page with the command:
ionic generate page postMake changes to the app.module.ts file . Add a line to import:
import { Post } from '../pages/post/post'; and also we will write the created page in sections
declarationsand entryComponents. ... declarations: [ MyApp, Postlist, Categorylist, Authorlist, TabsPage, Post ], ... entryComponents: [ MyApp, Postlist, Categorylist, Authorlist, TabsPage, Post ], ... In the file post.ts we will write a line for importing a class
NavControllerand an object.NavParams import { NavController, NavParams } from 'ionic-angular'; Further, the technique is similar: we obtain these publications by means of a query and display them in the desired form. The result of the finished modified files:
post.ts
import { Component } from '@angular/core';
import { NavController, NavParams } from 'ionic-angular';
import { Http } from '@angular/http';
import 'rxjs/add/operator/map';
import 'rxjs/add/operator/timeout';
import { LoadingController } from 'ionic-angular';
Component ({
selector: 'page-post',
templateUrl: 'post.html',
})
export class Post {
selectedItem: any;
postphotos: any;
post_category: any;
post_author: any;
post_author_id: any;
post_author_img: any;
post_title: any;
post_dat3: any;
post_intro_text: any;
post_full_text: any;
post_img: any;
post_is_photo: any;
post_error: string;
constructor(public navCtrl: NavController, public http: Http, public loadingCtrl: LoadingController, public navParams: NavParams) {
this.selectedItem = navParams.get('item');
this.loadData();
}
loadData() {
//
let loadingPopup = this.loadingCtrl.create({
content: ''
});
//
loadingPopup.present();
// , URL-
this.http.get('https://mysite.ru/post.php?p='+this.selectedItem.id)
.timeout(20000)
.map(res => res.json())
.subscribe(
data => {
setTimeout(() => {
this.postphotos = data.data;
this.post_category = data.category;
this.post_author = data.author
this.post_author_id = data.author_id;
this.post_author_img = data.author_img;
this.post_title = data.title;
this.post_dat3 = data.dat3;
this.post_intro_text = data.intro_text;
this.post_full_text = data.full_text;
this.post_img = data.img;
this.post_is_photo = data.is_photo;
this.post_error = «0»;
loadingPopup.dismiss();
}, 1000);
},
err => {
loadingPopup.dismiss();
this.post_error = «1»;
}
);
}
// ,
doRefresh(refresher) {
this.loadData();
setTimeout(() => {
refresher.complete();
}, 2000);
}
ionViewDidLoad() {
console.log('ionViewDidLoad Post');
}
}
post.html
<ion-header> <ion-navbar color="clmain"> <button ion-button menuToggle> <ion-icon name="menu"></ion-icon> </button> <ion-title></ion-title> </ion-navbar> </ion-header> <ion-content padding> <ion-refresher (ionRefresh)="doRefresh($event)"> <ion-refresher-content pullingIcon="arrow-dropdown" pullingText=" " refreshingSpinner="circles" refreshingText="..."> </ion-refresher-content> </ion-refresher> <div *ngIf="post_error == '0'"> <h3></h3> <div> <div class="post-category">{{post_category}}</div> <div class="post-dat">{{post_dat3}}</div> </div> <h3 class="post-title">{{post_title}}</h3> <img *ngIf="post_is_photo != '1'" src="{{post_img}}" /> <h5 class="post-intro-text">{{post_intro_text}}</h5> <div class="post-text" [innerHTML] = "post_full_text"></div> <button ion-item> <ion-avatar item-left> <img [src]="post_author_img" /> </ion-avatar> <ion-label class="author-title">{{post_author}}</ion-label> </button> </div> <div *ngIf="post_error == '1'" style="text-align: center"> <ion-label> </ion-label> <button ion-button (click)="loadData(0)" color="clmain" icon-left> <ion-icon name="refresh"></ion-icon> </button> </div> </ion-content> post.scss
page-post { .post-title { font-size: 19px !important; white-space: inherit; } .post-intro-text { font-size: 15px !important; color: gray; white-space: inherit; } .post-dat { font-size: 14px !important; color: gray; white-space: inherit; float: right; text-align: right; width: 50%; } .post-category { font-size: 14px !important; color: gray; white-space: inherit; float: left; width: 50%; } .post-text { font-size: 16px !important; } } Now let's recall the method
openPostPage()that is called in the postlist.html of the event click.This method will open the page with the contents of the publication. We describe the method in postlist.ts :
openPostPage(item) { this.navCtrl.push(Post, { item: item }); } and also import the page
Post: import { Post } from '../post/post'; Check the result of all the changes and see the page that opens when you click on the publication in the list.
Page content
That's probably the whole main functionality that will allow you to scroll through the publications and read their contents, the data for which are taken from the site via Http requests.
The sources of this example project can be viewed on GitHub
Source: https://habr.com/ru/post/344474/
All Articles