Optimization of Android-applications for work with the Samsung DeX docking station
A year ago, the Samsung Galaxy S8 / S8 + smartphone appeared, and with it the DeX docking station, which allows the user to turn the phone into a full-fledged computer. To do this, simply put the phone on the station, and on the screen of the connected monitor will display a desktop similar to Windows 8+, and other peripheral devices (mouse, keyboard, printer) will also be available. The innovative architecture of the application MyOffice Documents allows you to adapt and maintain technological innovations (such as DeX) without significant costs. It is especially pleasant that the cost of implementing such a solution is small, and the number of users who can use applications on the big screen is quite high. In this article we will share with you the experience of how to implement support for the DeX docking station in your Android application.

Features of optimizing the functionality of applications for working with Samsung DeX
Before we delve into the technical features, it is worth noting that much of what is described below can be used not only in conjunction with the Samsung DeX, you just have to plug in any Bluetooth keyboard and / or Bluetooth mouse. Obviously, for ease of use of your application with the connected peripherals, you will need to perform a number of manipulations with the application itself. And although not every application needs support for the desktop mode, flexibility in use is never superfluous.
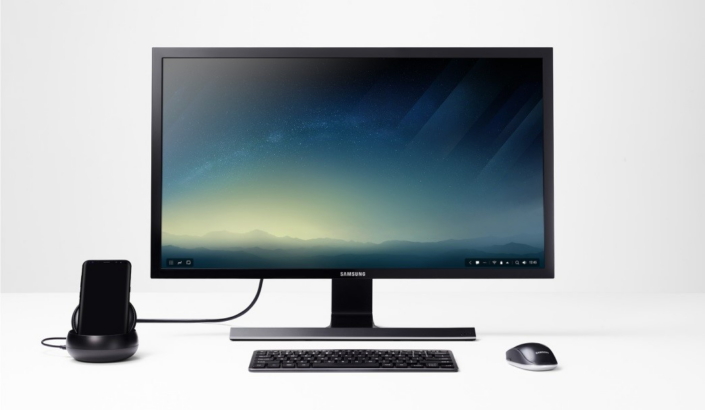
Source: Samsung
So let's go! First of all, you should briefly consider what needs to be changed in the application so that it looks good on the Samsung DeX and it is comfortable for the user to work with it.
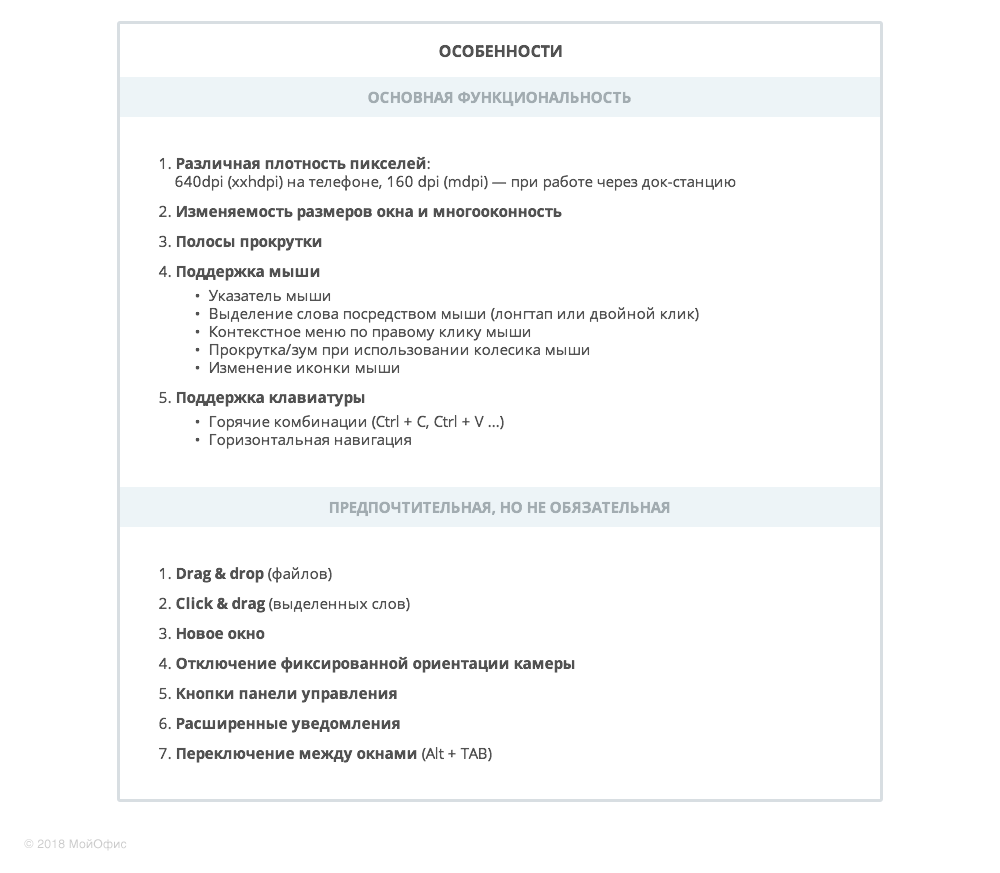
Let's start with the fact that Samsung DeX is essentially a refinement of the multi-window mode that appeared in Android 7 (Nougat). That is, if your application is already adapted to work in this mode, then there will be no problems starting up on the docking station. However, to fully mimic the desktop, it is necessary to take into account a number of features and add additional functionality presented in the table below and conditionally divided into the main and preferred ones:
Applications running on Samsung DeX can be divided into three groups, depending on the type of window:
- Resizable window. That is, the application fully supports all standards of multi-window mode in Android N.
- Window with a fixed size. That is, not all the “tricks” of Android N are taken into account when developing.
- No support for multiple windows. Well, that means no. At Samsung DeX, such applications will obviously not work.
In fact, everything will look like this:

MyOffice Documents
Now dive into the details.
Support for different screen pixel density
As noted above, your applications running directly on a mobile phone (we are talking about Samsung Galaxy S8 / S8 +) and broadcast via the docking station will have different dpi values: 640 dpi (xxhdpi) and 160 dpi (mdpi), respectively. So if you are not using vector graphics yet, then it is worth preparing appropriate resources for images. You also need to consider that the layout can float - you should prepare alternative layouts as one of the solutions to the problem. More details about working with screens with different pixel densities can be found in the official documentation for Android developers.
Support for window resilience and multiple windows
If you want the window of your application to be resized, it is enough to add the following check box for each activity in the application manifest, the dimensions of which should be changed:
android: resizableActivity = "true" Multi-window support - the “trick” is not new, for sure with the release of Android Nougat, many managed to fasten it or at least look in its direction. Everything is well painted in the official documentation . Implementing this functionality is quite simple: put a checkmark in the manifest, and it’s ready:
<application android:resizeableActivity="true"> </application> Here it is worth considering that when switching to multi-window mode and vice versa, the activity will re-create each time, since in this case the system must select the necessary resources. In the conditions of our application MyOffice Activity documents cannot be recreated, therefore we use the following set of flags in the manifest in the “non-replaring” activity:
android:configChanges="orientation|keyboardHidden|screenSize|uiMode|screenLayout|smallestScreenSize" In this case, all necessary replacements of the layouts should be handled with handles, for example, in the onConfigurationChanged(Configuration newConfig) activity method.
Application life when exiting the desktop mode
We may need to find out if we are now in the desktop-mode through the DeX station (as a rule, to change the UI of the application). This is done as follows:
public boolean isDexMode(@NonNull Context context) { Configuration config = context.getResources().getConfiguration(); try { Class configClass = config.getClass(); return configClass.getField("SEM_DESKTOP_MODE_ENABLED").getInt(configClass) == configClass.getField("semDesktopModeEnabled").getInt(config); } catch (NoSuchFieldException | IllegalAccessException | IllegalArgumentException e) { // } return false; } And the following flag in the manifest is required to set the behavior of the application when exiting the desktop mode:
<meta-data android:name="com.samsung.android.keepalive.density" android:value="true"/> The table below shows how the application will behave with the flag set or without it:

Scrolling
Scrolling content in the desktop mode is carried out with the mouse wheel, and the scrolling principle works automatically when using ListView , RecyclerView , GridView or ScrollView / HorizontalScrollView components. Additionally, it is recommended to implement support for scroll bars so that the user can scroll by pulling the corresponding component. You can also add scrolling through the mouse wheel if you implement your component, as it is done in our case, but this will be written a little lower (and adding scroll bars is quite simple ).
Working with the mouse and keyboard
Mouse support can be useful for a variety of applications (maps and navigation; games; in our case, documents, etc.) that run on the DeX docking station.
The MotionEvent object has a getSource() method with which you can determine the source of this event. In code, it looks like this:
@Override public boolean onTouchEvent(MotionEvent event) { boolean isMouse = InputDevice.SOURCE_MOUSE == event.getSource(); ... } You can understand that an element has a touch with the right mouse button using the getButtonState() method of the getButtonState() object:
boolean isRightClick = isMouse && buttonState == MotionEvent.BUTTON_SECONDARY; Now by clicking the right mouse button, you can open the context menu.
However, a number of phone models (not the Sumsung Galaxy S8 / S8 +) have a different processing logic for clicking the right mouse button. Therefore, on these devices, the implementation of these functions will be unavailable.
Working with the mouse would not be complete, if with the help of its wheel it was impossible to scroll and zoom. The following code snippet demonstrates how to work with the mouse wheel:
@Override public boolean onGenericMotionEvent(MotionEvent event) { boolean isMouse = event.getSource() == InputDevice.SOURCE_MOUSE; if (isMouse) { switch (event.getAction()) { case MotionEvent.ACTION_SCROLL: float axisValue = event.getAxisValue(MotionEvent.AXIS_VSCROLL); if (event.isCtrlPressed()) { // Ctrl zoomByMouse(axisValue); } else if (event.isShiftPressed()) { // X scrollX(axisValue); } else { // Y scrollY(axisValue); } break; } return true; } return false; } Behavioral scenarios may vary, but I think the general pattern is understandable.
Cursor change
When we hover the mouse over the clickable element, it is customary for the cursor to change. To implement this feature, you need to set the following flag on the clickable view:
android:state_hovered="true" Next, you need to directly set the PointerIcon custom for the PointerIcon using the setPointerIcon() method (see also view.onResolvePointerIcon(...) ).
Support for a hardware keyboard is simpler: just connect it to the device. The only thing worth paying attention to is the hotkey processing:
@Override public boolean onKeyDown(int keyCode, KeyEvent event) { if (event.isCtrlPressed()) { switch (event.getKeyCode()) { case KeyEvent.KEYCODE_C: // return true; case KeyEvent.KEYCODE_V: // return true; } } return super.onKeyDown(keyCode, event); } Additionally
Practically everything that is described in the article can be found in one form or another in the official documentation . Samsung suggests developers to make a number of additional improvements:
- Drag & Drop of files allows transferring files between views.
- Click & Drag selected text is like a continuation of the previous paragraph: you can select the text in one application and drag it into our application. This is very convenient, since you do not even need to press the shortcuts Ctrl-C / Ctrl-V. In the application MyOffice Documents you can thus drag text from one document to another.
The following is an example implementation of OnDragListener :
// ( Android N ) view.setOnDragListener(new OnDragListener(this)) public class OnDragListener implements View.OnDragListener { @NonNull private AppCompatActivity activity; public OnDragListener(@NonNull AppCompatActivity activity) { this.activity = activity; } @Override @TargetApi(Build.VERSION_CODES.N) public boolean onDrag(View view, DragEvent dragEvent) { switch (dragEvent.getAction()) { case DragEvent.ACTION_DRAG_ENTERED: return false; case DragEvent.ACTION_DRAG_EXITED: return true; case DragEvent.ACTION_DRAG_STARTED: return true; case DragEvent.ACTION_DROP: { DragAndDropPermissions dragAndDropPermissions = activity.requestDragAndDropPermissions(dragEvent); if (dragAndDropPermissions != null) { ClipboardUtils clipboardUtils = ClipboardUtils.getInstance(activity); String droppedPlainText = clipboardUtils.getClipboardPlainText(dragEvent.getClipData()); if (clipboardUtils.isRichTextInClipboard(droppedPlainText)) { // insert rich text } else { // insert plain text } } break; } default: } return true; } } - Disable the presentation class in Samsung DeX mode if you have it turned on in principle.
- Disable the fixed orientation of the camera .
Testing
How to test all this? The easiest way is to purchase a Samsung DeX docking station, connect all the peripherals to it and mess around. If for some reason the docking station is not available, then, as noted above, you can simply connect to a smartphone, and even better a tablet, preferably with Android 7 and above, a Bluetooth keyboard and mouse. You can also use the method proposed directly by Samsung, if you prefer to work with an emulator.
Conclusion
Specifically, as a piece of hardware, the Samsung DeX is a device that is interesting and will definitely be in demand among those users who consider mobility and the need to replace several working devices with a smartphone. In accordance with our experience, almost any application can be easily adapted to work in desktop mode on this docking station or when connecting hardware controllers. We hope that this article will be useful to you.
')
Source: https://habr.com/ru/post/344438/
All Articles