Tutorial on the Unreal Engine. Part 1: familiarity with the engine
Unreal Engine 4 is a set of tools for game development that has ample opportunities: from creating 2D mobile games to AAA projects for consoles. This engine was used in the development of games such as ARK: Survival Evolved , Tekken 7 and Kingdom Hearts III .
Development in Unreal Engine 4 is very easy for beginners. With Blueprints Visual Scripting, a visual scripting system, you can create ready-made games without writing a single line of code! In combination with a user-friendly interface, this allows you to quickly produce working prototypes.
In this part of the tutorial on Unreal Engine 4, we will look at the main features of the program. Here are the main topics that will be considered in it:
')
- Install engine
- Import Assets
- Creating materials
- Use Blueprints to create objects with simple functions.
We will study all these possibilities on the example of a turntable on which a banana lies.
Note: the tutorial will consist of eight parts:
- Part 1: Introduction to the engine
- Part 2: Blueprints
- Part 3: Materials
- Part 4: UI
- Part 5: How to create a simple game
- Part 6: Animation
- Part 7: Sound
- Part 8: Particle Systems
- Part 9: Artificial Intelligence
- Part 10: How to create a simple FPS
Installing Unreal Engine 4
To install Unreal Engine 4, Epic Games Launcher is used . Go to the Unreal Engine website and click on the Get Unreal button in the upper right corner.

Before downloading the startup program, you will need to create an account. After its creation, download the startup program that matches your operating system.

After downloading and installing the launcher, open it. The following window will appear:
Enter the email address and password used to download the download program and click on Sign In . After logging in, the following window will open:

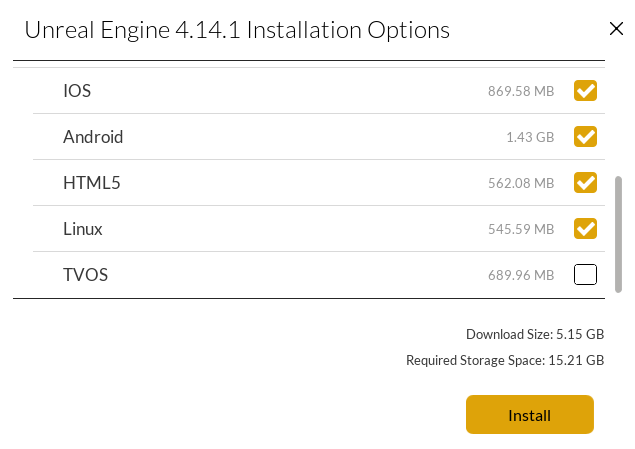
Click on Install Engine in the upper left corner. The launcher will go to a screen where you can select which components to install.

Note: Epic Games is constantly updating the Unreal Engine, so your version of the engine may differ slightly from that shown in the screenshots. For example, after writing the first draft of this tutorial, the version has already been updated to 4.14.3! Tutorial will suit you if you have a version not lower than 4.14.
Starter Content , Templates and Feature Packs and Engine Source are selected by default. It’s better to leave it at that. They will be useful for the following reasons:
- Starter Content: this is a collection of assets (resources) that can be used for free in your own projects. Including this model and materials. They can be used as temporary resources or in a ready-made game.
- Templates and Feature Packs: Templates (Templates) set the basic capabilities of the selected game genre. For example, selecting the Side Scroller pattern will create a project with a character, simple movements, and a camera on a fixed plane.
- Engine Source: Unreal is an open source engine, that is, anyone can make changes to it. If you need to add additional buttons to the editor, this can be done by changing the source code.
Under the list there is a list of possible platforms. If you do not plan to develop a game for a specific platform, you can safely remove all the checkboxes.
Having selected the necessary components, click on Install . After the installation is completed, the engine will appear in the library. Now it's time to create a project.

Project creation
Click on one of the Launch buttons to open the Project Browser. After opening it, click on the New Project tab.

Click on the Blueprint tab. Here you can choose one of the templates. However, since we are starting from scratch, we will select the Blank template.
Below are the additional options listed.

That's what each option is responsible for:
- Target Hardware: when you select Mobile / Tablet, some post-processing effects will be disabled. You can also use the mouse for touch input. Select the Desktop / Console option here.
- Graphical Target: When Scalable 3D or 2D is selected, some post-processing effects will be disabled. Select Maximum Quality here.
- Starter Content: You can enable this option to add Starter Content. To make it easier for us, choose No Starter Content .
In addition, there is a section for choosing the location of the project folder and the name of the project.

You can change the project storage folder by clicking on the ellipsis at the end of the Folder field.
The project name is not the name of the game, so do not worry if you want a name later. Select the text in the Name field and enter BananaTurntable .
Finally click on the Create Project .
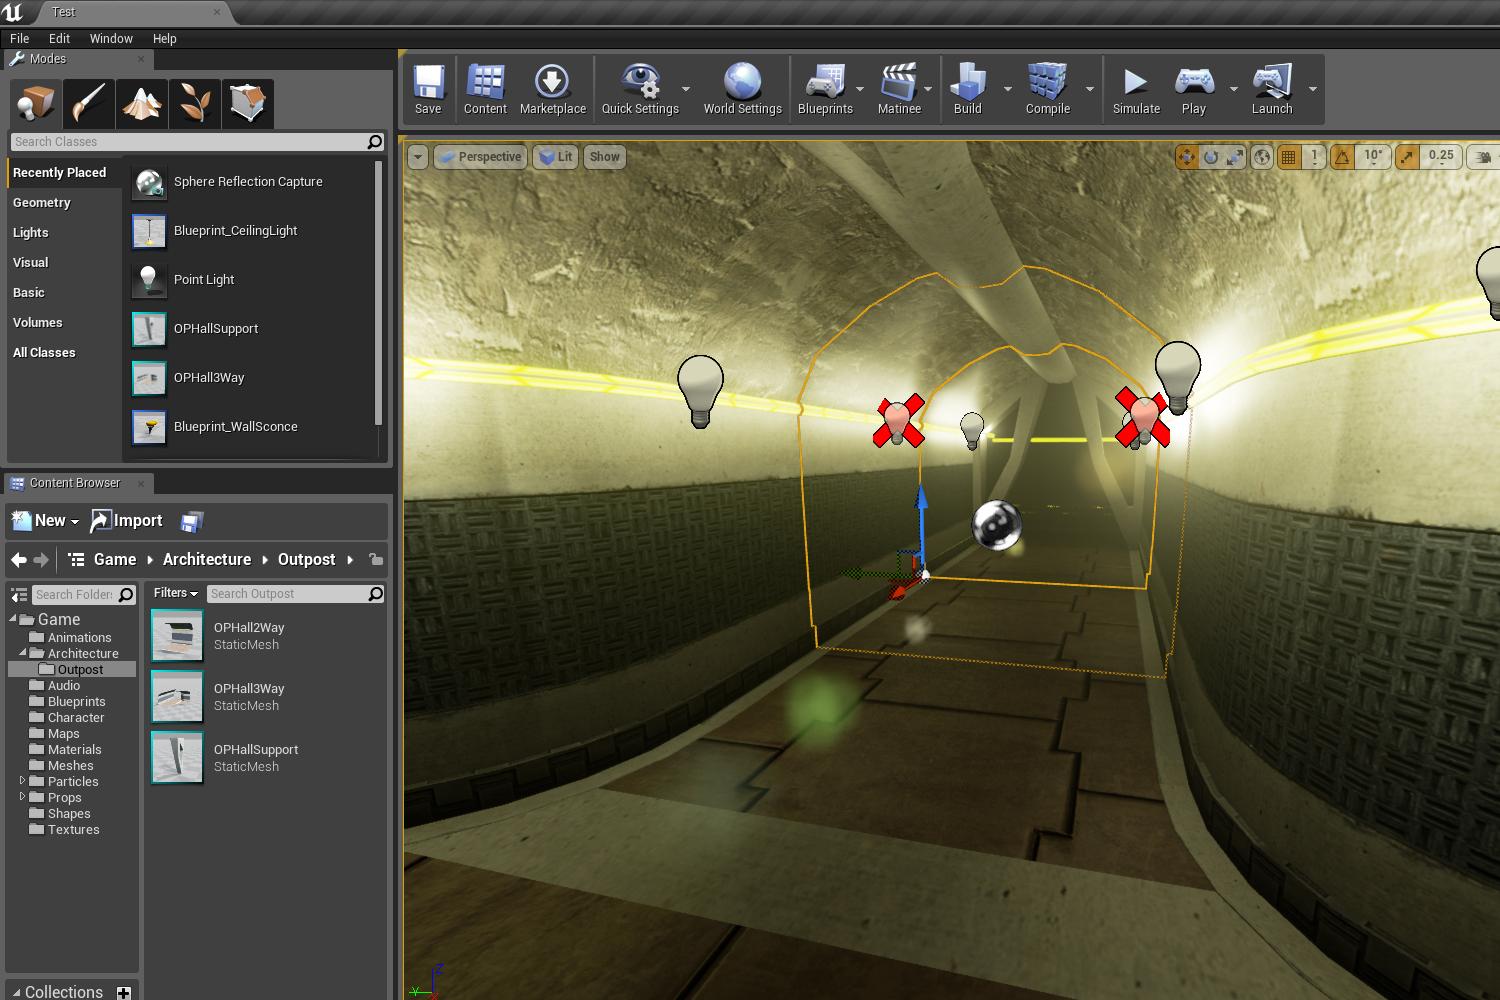
Interface Navigation
After creating the project, an editor will open. It is divided into several panels:

- Content Browser: in this panel all project files are displayed. It can be used to create folders and organize files. Here you can also search for files using the search string or filters.
- Modes: In this panel, you can switch between tools, such as the Landscape Tool and the Foliage Tool . The default tool is the Place Tool . It allows you to have at the level of various types of objects, such as light sources and cameras.
- World Outliner: displays all objects at the current level. You can organize the list by distributing related objects into folders, as well as search and filter them by type.
- Details: all properties of the selected object are displayed here. This panel is used to change object parameters. Changes made will affect only the selected instance of the object. For example, if there are two spheres in a scene, then if you change the size of a single change, they will only touch it.
- Toolbar: contains many different functions. Most often we will use Play .
- Viewport: This is a level overview. You can look around by holding the right mouse button and moving it . To move through the level you need to hold down the right-click and use the WASD keys.
Import Assets
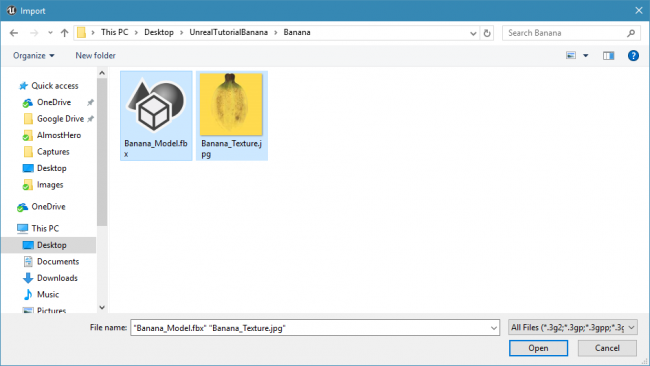
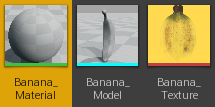
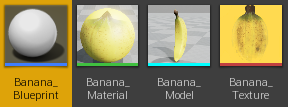
What is the point in the turntable, if there is nothing to show on it? Download this banana model . Inside there are two files: Banana_Model.fbx and Banana_Texture.jpg . You can also use your own model, but why, if there is such a stunning banana?
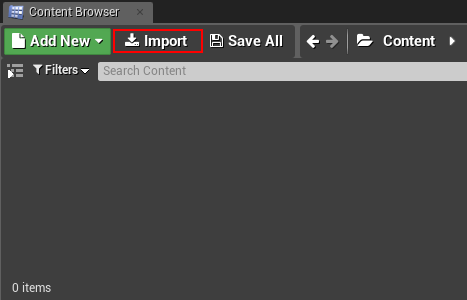
For Unreal to use files, they need to be imported. Go to the Content Browser and click on Import .
Using the file manager, find the folder where Banana_Model.fbx and Banana_Texture.jpg are located. Select both files and click Open .
Unreal will offer several options for importing the .fbx file. Uncheck the Import Materials box, because we will create your own material. The remaining parameters can not be changed.

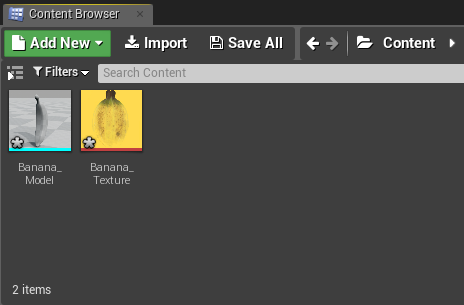
Click on Import . Two files will appear in the Content Browser.
When you import a file, in fact, it is not saved in the project, unless you explicitly indicate this. You can save files by right- clicking on the file and selecting Save . You can also save all files at once by selecting File \ Save All . Try to persist more often!
Note that in Unreal, models are called meshes . Now we have a banana mesh, it's time to add it to the level.
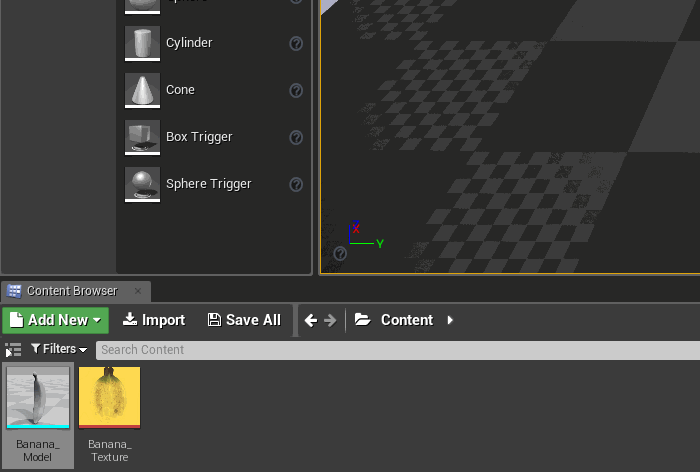
Add meshes to level
While the level looks pretty empty, let's make it more interesting.
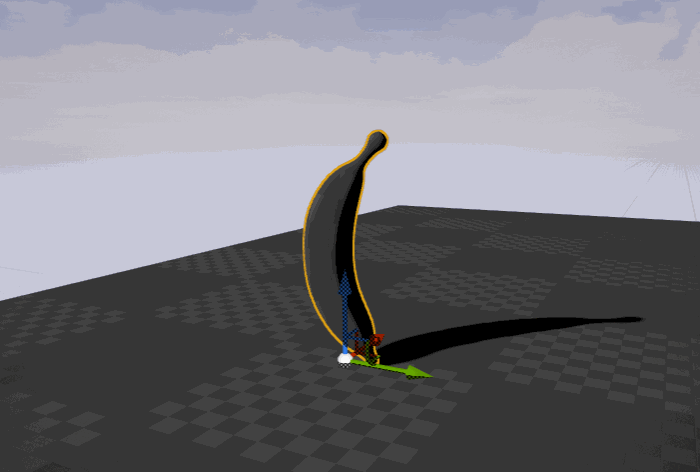
To add to the mesh level, right-click and drag Banana_Model from the Content Browser to the Viewport. Release the left mouse button and the mesh will be added to the level.
Objects in the level can be moved , rotated and scaled . Hotkeys for these actions are W , E and R. After clicking on them, you can use the manipulator:
About materials
If you look closely at the banana, you can see that it is not yellow! In fact. it looks almost completely gray.
To make the banana color and details, you need to create a material .
What is “material”?
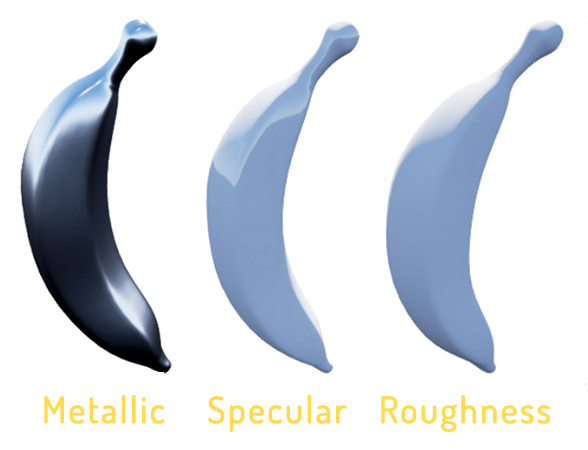
The material defines the appearance of the surface. At a basic level, the material defines four aspects:
- Base Color: the color or texture of the surface. Used to add detail and color variations.
- Metallic: how metallic the material looks. In general, a purely metallic object has a maximum Metallic value, and a fabric has a value of 0.
- Specular: controls the brilliance of non-metallic surfaces. For example, ceramics will have a high specular value, unlike clay.
- Roughness: A surface with maximum roughness will have no shine. Used for surfaces such as stone and wood.
Below is an example of three different materials. They have the same color, but different attributes. Each material has a high value of the corresponding attribute. The value of the other attributes is zero.
Creating material
To create a material, go to the Content Browser and click on the green Add New button. A menu appears with a list of assets you can create. Select Material .

Name the material Banana_Material and then double-click the file with the left mouse button to open it in the material editor.
Material Editor
The material editor consists of five main panels:
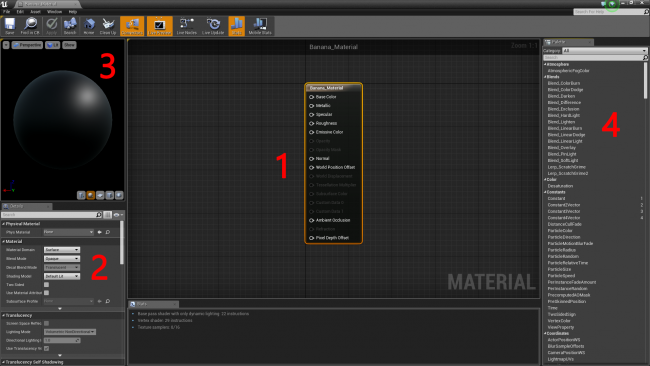
- Graph: this panel contains all nodes (nodes) and Result nodes. You can move around the panel by holding the right mouse button and moving the mouse. Scaling is done by scrolling the mouse wheel .
- Details: the properties of the selected node are displayed here. If no node is selected, the material properties are displayed here.
- Viewport: contains a preview mesh representing the material. You can rotate the camera by holding the left key and moving the mouse. Scaling is done by scrolling the mouse wheel .
- Palette: a list of all nodes available for your material.
What is a node (node)?
Before you start creating your material, you need to know about the objects that are used to create it: nodes .
Nodes make up most of the material. There are many types of nodes that have different functions.
Nodes have entrances and exits, represented by a circle with an arrow. The entrances are located on the left and the exits are on the right.
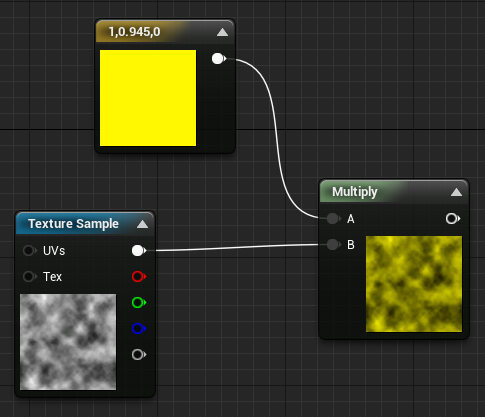
Here is an example using the Multiply and Constant3Vector nodes that add a yellow color to the texture:
The materials have a special node called Result , which in our case is already created as Banana_Material . Here all nodes finish with time. What is connected to this node determines the appearance of the final material.

Adding textures
To add a model of color and details we need a texture . Texture is just a two-dimensional image. Usually they are projected on three-dimensional models, giving them color and details.
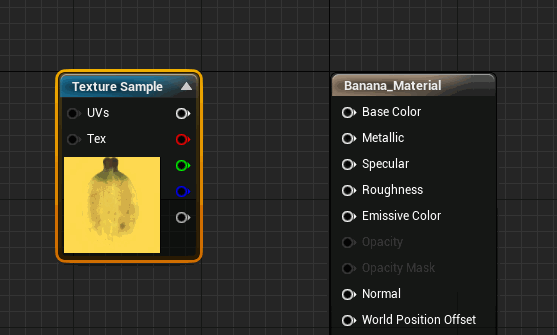
For texturing a banana we use Banana_Texture.jpg . Apply texture to the material allows the TextureSample node.
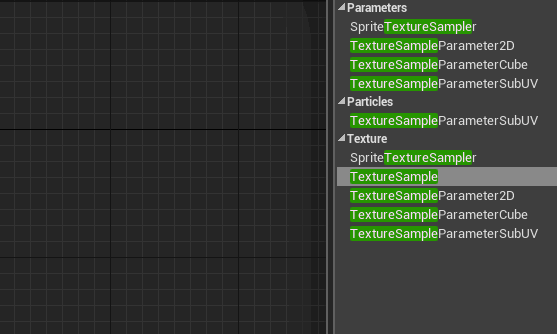
Go to the Palette panel and find TextureSample . Add a node by holding the left mouse button and dragging it onto the scheme.
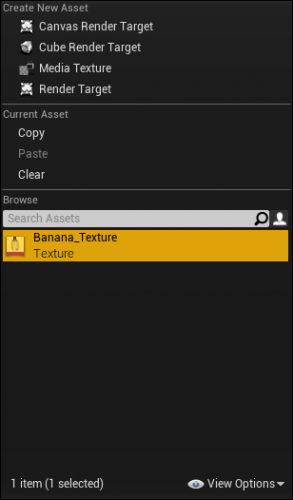
To select a texture, you must first select the TextureSample node. Go to the Details panel and click on the drop-down list located to the right of Texture .

A menu opens listing all the textures for the project. Select Banana_Texture .
To see the texture in the preview mesh, you need to connect it to the Result node. Hold the left mouse button on the white output contact of the TextureSample node. Drag it to the input contact Base Color Result node.
Return to Viewport to see the texture in the preview mesh. You can rotate it (by holding the left mouse button and moving the mouse) to view other details.

Click on Apply in the Toolbar to update the material, and close the material editor when done.
Use of materials
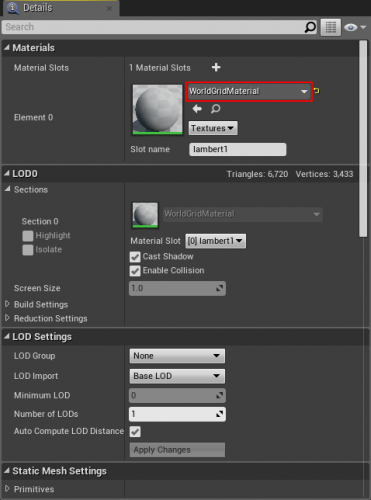
To apply material on a banana, you need to assign it. Go back to the Content Browser and double-click on Banana_Model to open it. The following editor window will appear:

Go to the Details panel and find the Materials section. Click on the drop-down menu to the right of Element 0 and select Banana_Material .
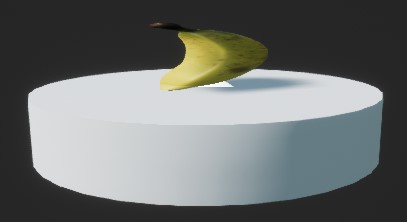
Close the mesh editor, go back to the main editor and look at the Viewport. You will see that now on the banana there is a texture. Congratulations, you now know everything you need to become a level designer!

Note: If the lighting is too dark, you can change it by going to World Outliner and clicking on Light Source . In the Details panel, find the Intensity parameter and increase its value.
About Blueprints
Even though the banana looks great, it will be even better if it starts to rotate on the turntable. The easiest way to create it is with Blueprints ' blueprints.
In the simplest case, Blueprint is a “thing”. Blueprints allow you to create your own behaviors for objects. An object can be something physical (such as a turntable) or something abstract, for example, a health system.
Want to create a moving car? Use Blueprint . What about a flying pig? Use Blueprints . And if you need a cat exploding when touched? Blueprints .
As in the materials, Blueprints uses a node-based system. This means that it is enough to create nodes and connect them - no code is required!
Note: if you prefer to write code, use C ++ instead.
Blueprints are easy to use, but not as fast as C ++ code. That is, if you need to create something “heavy” in terms of computation, for example, a complex algorithm, it is better to use C ++.
But even if you prefer C ++, there are times when it is best to use Blueprints. Here are some of the benefits of Blueprints:
- Typically, developing on Blueprints is faster than C ++.
- Easy ordering. It is possible to divide nodes into different areas, for example, into functions and columns.
- If you work with people who do not know programming, then changing the Blueprint is easier due to their clarity and intuitiveness.
Creating objects using Blueprints is a good approach. And when additional features are required, converting them to C ++.
Blueprint creation
Go to the Content Browser and click on Add New . Select Blueprint Class from the list.

A window will open asking you to select a parent class. Your Blueprint will inherit all the variables, functions, and components from the selected parent class. Take time to explore the possibilities of each class.
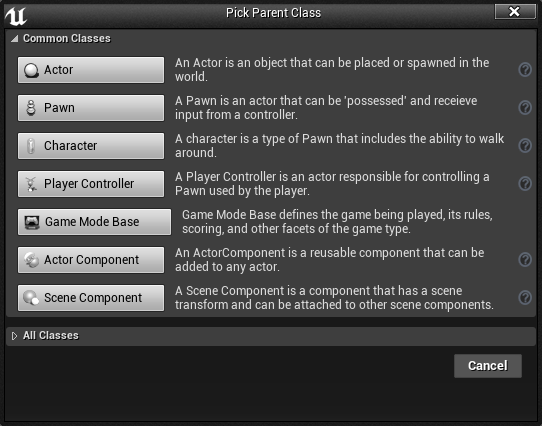
Note: since we can arrange the Pawn and Character classes, they are also actors ( Actors ).
The turntable will be in place, so the Actor class will be the most appropriate. Select Actor and name the new file Banana_Blueprint .
Double-click on Banana_Blueprint to open it. Click on the Open Full Blueprint Editor if a similar window appears:
Blueprint editor
First, select the Event Graph tab in the Blueprint editor.
Blueprint editor consists of four main panels:

- Components: contains a list of current components.
- My Blueprint: This section is typically used to manage graphs, functions, and variables.
- Details: the properties of the currently selected item are displayed here.
- Graph: this is where the magic happens. All nodes and logic are here. You can move around the panel by holding the right mouse button and moving the mouse. Scaling is done by scrolling the mouse wheel .
- Viewport: All components with visual elements are displayed here. Relocation and review are performed in the same way as in Viewport of the main editor.
Creating a turntable
To create the table, we need two things - the base and the stand. They can be created using components .
What are “components”?
If Blueprint is a car, then the components are the building elements of which it is composed. Examples of components include doors, wheels, and an engine.
However, components may not only be physical objects.
For example, to make the car move, you can add a motion component. You can even make the car fly if you add a flight component.
Add components
To see the components, you must switch to Viewport mode. Click on the Viewport tab to switch to it. Here's what it looks like:

Note: the DefaultSceneRoot component is not displayed when the application is started, it is visible only in the editor.
The turntable will use two components:
- Cylinder: simple white cylinder. This will be the base on which the banana lies.
- Static Mesh: - this component will display the banana mesh.
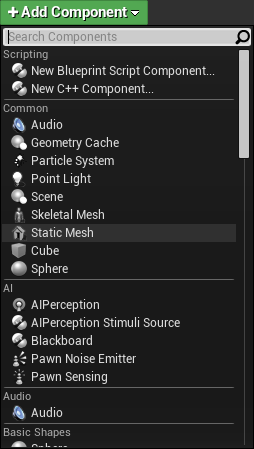
To add a base, go to the Components panel. Click on Add Component and select Cylinder .

It would be nice to make the base a little shorter. Activate the scaler by pressing R , and then zoom out (the exact size is not important, you can change it later).

Now it's time to add a mesh. Return to the Components panel and left-click on an empty area to deselect the Cylinder component. Due to this, the next added component will not be attached to the Cylinder component.

Note: if this is not done, the next component will be attached to the Cylinder component. This means that it will also inherit the scale of the Cylinder component. Since we have scaled the cylinder, the next component will also be scaled down.
Then click on Add Component and select Static Mesh from the list.
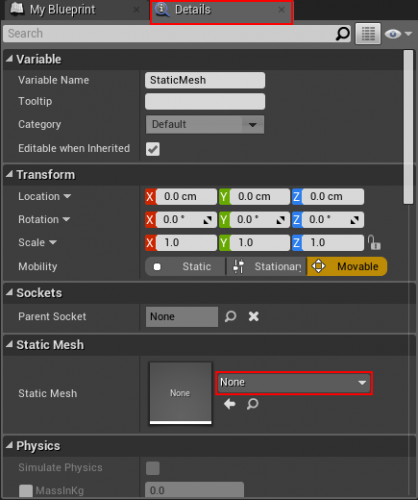
To display a banana, select the Static Mesh component, and then click on the Details tab. Click the drop-down lists on the right side of Static Mesh and select Banana_Model .
Move the banana if it is in the wrong position. To do this, activate the move handle by pressing W , and then move it up.

About Blueprint nodes
Now you need to make the turntable rotate. And here we need the Blueprint nodes .
Unlike their close relatives - the material nodes - the Blueprint nodes have special contacts, called Execution contacts. The contact on the left is the input, the contact on the right is the output. All nodes have at least one input and output.
If a node has an input contact, then it needs to be connected in order for it to work. If the node is not connected, all subsequent nodes will not be executed.
Here is an example:

Node A and Node B will be executed, because their input contacts have a connection. Node C and Node D are never executed, because the input contact Node C has no connection.
Rotating turntable
Before we get started, let's take a look at the Components panel. You can see that Cylinder and Static Mesh have indentation, while DefaultSceneRoot does not, because they are connected to DefaultSceneRoot .

If you move, rotate, or scale the root component, the same will happen with the components attached to it. Thanks to this behavior, you can rotate Cylinder and Static Mesh at the same time, rather than separately.
Creating a node
To start creating scripts, switch back to the Event Graph tab.
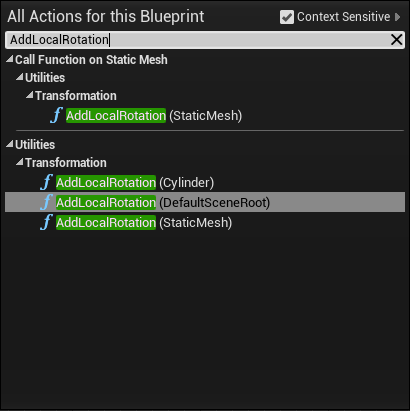
The implementation of object rotation is so simple that it requires only one node. Right-click on the empty space in the graph to open the menu of available nodes. Find AddLocalRotation . We need to rotate the base and the banana, so we will simply rotate the root component. Select AddLocalRotation (DefaultSceneRoot) .
Note: If the node is not in the list, uncheck the Context Sensitive box at the top right of the menu.
A new node AddLocalRotation will now appear in your graph. The Target input will automatically connect to the selected component.
To set the rotation value, go to the Delta Rotation input and change the Z value to 1.0 . Due to this, Blueprint will be able to perform rotation about the Z axis. The higher the values, the faster the table will rotate.

In order for the turntable to rotate constantly, you need to call AddLocalRotation in each frame. To perform the node in each frame, use the Event Tick node. He is already in the graph. If not, then create it in the same way as before.
Drag the output contact of the Event Tick node to the input contact of the AddLocalRotation node.

Note: in this implementation, the rotation speed depends on the frame rate. This means that the rotary table on slow computers will rotate at a lower speed, and vice versa. For the tutorial, this suits us perfectly, because I do not want to complicate anything, but in the future I will show how to fix it.
Finally, go to the Toolbar and click on Compile to update the Blueprint, and then close the Blueprint editor.

Adding Blueprints to Level
Before adding Blueprint, go back to Viewport in the main editor and delete the banana model. To do this, select the model, and then select Edit \ Delete or press the Delete key.
Adding Blueprint is the same process as adding a mesh. Hold the left mouse button on the file and drag it to Viewport.
Go to the Toolbar and click Play to see the results of your work!

Note: if you do not delete the original model of the banana, you can get a warning about the need for lighting adjustment. If you delete the model, the error will no longer manifest.
What to do next?
The finished project can be downloaded from here .
You've learned a lot in this part of the tutorial, but this is only a small part of Unreal. If you want to continue exploring, then wait for the next part of the tutorial in which we take a closer look at Blueprints.
Source: https://habr.com/ru/post/344394/
All Articles