Authentication and authorization in Ember, Part 1: ember library simple auth
Subsystems of registration, authentication and authorization of users need almost any web project. The creation of such subsystems can be approached from different sides. For example - use specialized libraries. Today we want to share with you a translation of an article by Alvin Crespo, a programmer from Echobind, who talks about the ember-simple-auth library.

According to him, this library, designed to organize authentication and authorization, occupies a worthy place in the arsenal of tools that the company uses to develop web-based systems based on Ember. In this article, Alvin talks about how to integrate the library into a project and create a subsystem for registering users of the site.
First, create a new Ember application:
')
After executing this command, you should see the following:
As you can see, I use NPM, everything works as it should, so please do not criticize me for this.
Go to the directory of the new application:
Install
After executing this command, the system should report the successful installation of the library
With the installation, we figured out, as you see, there are no difficulties. Now let's do the application setup.
First, create an application adapter:
Here we used the generator to create the default application level adapter. As a result, the following file will be created:
Here we need to make some changes, bringing this file to the following form:
Here we imported the
Here, firstly,
The authenticator authenticates the session. This can be used, for example, by sending a set of credentials to the server and getting an access token from it, or initiating authentication using an external provider like Facebook.
If in a nutshell, the authenticator is used to authenticate the session using the credentials passed to it. Here we will use OAuth2PasswordGrantAuthenticator , which makes it possible to perform authentication using an identifier (user name, email address, and so on) and a password.
To create an authenticator, use the following command:
In response, the system displays the following:
During the execution of the above command, the
Now we need to set the serverTokenEndpoint property. What role does it play?
This is the endpoint on the server to which authentication and update requests are sent.
Set up the endpoint in the same
Here we form the
The
Authorizers use session data received by the authenticator during session authentication to generate authorization data, which can then, for example, be embedded in subsequent network requests.
The point of all this is that after the authentication is completed, the authorizer uses the session data to generate the authorization data used in the requests. In our example, this will lead to the formation of such a header:
Fortunately, the
We just need to execute the following command:
After executing the command, we will see the following:
This will create a file located at
After the configuration of the authentication and authorization subsystems is completed, you can use all of this in the application.
First you need to create a route that provides registration in the system:
In response to this command, the following will be issued:
Let's open the created registration form template (
There is a simple form with
Above, we just added an
In the
The session service provides access to the current session, as well as methods for its authentication, invalidation, and so on. This is the main interface to the Ember Simple Auth functionality that applications can use.
Given this, then we call the authenticate method. We pass to this method the authenticator that we want to use, in our case, the
Please note that if you did not use the
Now we just have to define the
source This is unlikely to please anyone, so let's do a model.
We will create a fairly simple
Having executed this command, we will see the following:
The
Now everything is ready for testing.
In order to look at what we have just done, in action, you need to run the application. But before you do this, remove the standard welcome page. Open the
Now start the server:
After that, go to
Here is an example of working with the newly created client part of the authentication system:
In this material, we have integrated into the Ember application the client part of the system of registration, authentication and authorization of users. Now it remains only to connect all this to the API. Alternatively, you can simulate the end point in ember-cli-mirage . However, we are going to go on a really working web application, so the next time we’ll continue to work on the project using Elixir / Phoenix and Guardian .
Dear readers! How do you create authentication subsystems for web applications?
According to him, this library, designed to organize authentication and authorization, occupies a worthy place in the arsenal of tools that the company uses to develop web-based systems based on Ember. In this article, Alvin talks about how to integrate the library into a project and create a subsystem for registering users of the site.
Install ember-simple-auth
First, create a new Ember application:
')
ember new auth-example-frontend After executing this command, you should see the following:
➜ ember new auth-example-frontend installing app create .editorconfig create .ember-cli create .eslintrc.js create .travis.yml create .watchmanconfig create README.md create app/app.js create app/components/.gitkeep create app/controllers/.gitkeep create app/helpers/.gitkeep create app/index.html create app/models/.gitkeep create app/resolver.js create app/router.js create app/routes/.gitkeep create app/styles/app.css create app/templates/application.hbs create app/templates/components/.gitkeep create config/environment.js create config/targets.js create ember-cli-build.js create .gitignore create package.json create public/crossdomain.xml create public/robots.txt create testem.js create tests/.eslintrc.js create tests/helpers/destroy-app.js create tests/helpers/module-for-acceptance.js create tests/helpers/resolver.js create tests/helpers/start-app.js create tests/index.html create tests/integration/.gitkeep create tests/test-helper.js create tests/unit/.gitkeep create vendor/.gitkeep NPM: Installed dependencies As you can see, I use NPM, everything works as it should, so please do not criticize me for this.
Go to the directory of the new application:
cd auth-example-frontend Install
ember-simple-auth : ember install ember-simple-auth After executing this command, the system should report the successful installation of the library
➜ ember install ember-simple-auth NPM: Installed ember-simple-auth Installed addon package. With the installation, we figured out, as you see, there are no difficulties. Now let's do the application setup.
Adapter setup
First, create an application adapter:
➜ ember g adapter application installing adapter create app/adapters/application.js installing adapter-test create tests/unit/adapters/application-test.js Here we used the generator to create the default application level adapter. As a result, the following file will be created:
// auth-example-frontend/app/adapters/application.js import DS from 'ember-data'; export default DS.JSONAPIAdapter.extend({ }); Here we need to make some changes, bringing this file to the following form:
// auth-example-frontend/app/adapters/application.js import JSONAPIAdapter from 'ember-data/adapters/json-api'; import DataAdapterMixin from 'ember-simple-auth/mixins/data-adapter-mixin'; import config from 'my-app/config/environment'; export default JSONAPIAdapter.extend(DataAdapterMixin, { host: config.apiUrl, namespace: config.apiNamespace, authorizer: 'authorizer:application' }); Here we imported the
JSONAPIAdapter adapter, extended it using DataAdapterMixin and added several properties. In particular, the values that are written to the host and namespace are stored in the config/environment.js file, which we also import. It has the following code responsible for the values of interest: let ENV = { ... apiNamespace: 'api', apiUrl: null }; Here, firstly,
apiNamespace is the string api , which affects the formation of the paths http://localhost:4000/api/users . In this apiURL we will set apiURL using the proxy option in ember-cli , for example, like this: ember s --proxy http://localhost:4000 Configuring Authenticator
The authenticator authenticates the session. This can be used, for example, by sending a set of credentials to the server and getting an access token from it, or initiating authentication using an external provider like Facebook.
If in a nutshell, the authenticator is used to authenticate the session using the credentials passed to it. Here we will use OAuth2PasswordGrantAuthenticator , which makes it possible to perform authentication using an identifier (user name, email address, and so on) and a password.
To create an authenticator, use the following command:
ember g authenticator oauth2 --base-class=oauth2 In response, the system displays the following:
➜ ember g authenticator oauth2 --base-class=oauth2 installing authenticator create app/authenticators/oauth2.js During the execution of the above command, the
oauth2.js file will be created: // auth-example-frontend/app/authenticators/oauth2.js import OAuth2PasswordGrant from 'ember-simple-auth/authenticators/oauth2-password-grant'; export default OAuth2PasswordGrant.extend({ }); Now we need to set the serverTokenEndpoint property. What role does it play?
This is the endpoint on the server to which authentication and update requests are sent.
Set up the endpoint in the same
oauth2.js file: // auth-example-frontend/app/authenticators/oauth2.js import OAuth2PasswordGrant from 'ember-simple-auth/authenticators/oauth2-password-grant'; import config from 'my-app/config/environment'; const host = config.apiUrl || ''; const namespace = config.apiNamespace; const serverTokenEndpoint = [ host, namespace, 'token' ]; export default OAuth2PasswordGrant.extend({ serverTokenEndpoint: serverTokenEndpoint.join('/') }); Here we form the
serverTokenEndpoint property we need by combining the host and namespace string constants with the string token . As a result, for example, if we have the following: host = 'http://localhost:4000' namespace = 'api' token = 'token' The
serverTokenEndpoint will have the following string: http://localhost:4000/api/token Configure the authorizer
Authorizers use session data received by the authenticator during session authentication to generate authorization data, which can then, for example, be embedded in subsequent network requests.
The point of all this is that after the authentication is completed, the authorizer uses the session data to generate the authorization data used in the requests. In our example, this will lead to the formation of such a header:
Authorization: Bearer s0m3tok3n1 Fortunately, the
ember-simple-auth library makes it easy to set it up. We will use the OAuth2BearerAuthorizer class, since it, with little effort on our part, allows us to form the above header.We just need to execute the following command:
ember g authorizer application --base-class=oauth2 After executing the command, we will see the following:
➜ ember g authorizer application --base-class=oauth2 installing authorizer create app/authorizers/application.js This will create a file located at
app/authorizers/application.js : // auth-example-frontend/app/authorizers/application.js import OAuth2Bearer from 'ember-simple-auth/authorizers/oauth2-bearer'; export default OAuth2Bearer.extend({ }); Connecting ember simple auth to the application
After the configuration of the authentication and authorization subsystems is completed, you can use all of this in the application.
▍ Create a route for registration in the system
First you need to create a route that provides registration in the system:
ember g route sign-up In response to this command, the following will be issued:
➜ ember g route sign-up installing route create app/routes/sign-up.js create app/templates/sign-up.hbs updating router add route sign-up installing route-test create tests/unit/routes/sign-up-test.js Let's open the created registration form template (
sign-up.hbs ) and bring it to this form: <form {{action "onSignUp" email password on="submit"}}> <div> <label>Email</label> {{input type="email" value=email}} </div> <div> <label>Password</label> {{input type="password" value=password}} </div> <button type="submit">Sign Up</button> </form> There is a simple form with
email and password fields. When a user clicks the Sign Up — button Sign Up — we onSignUp action, passing him the entered email address and password. We define this action: // auth-example-frontend/routes/sign-up.js import Route from '@ember/routing/route'; import { inject as service } from '@ember/service'; const AUTHENTICATOR = 'authenticator:oauth2'; export default Route.extend({ session: service(), actions: { async onSignUp(email, password) { let attrs = { email, password }; let user = this.store.createRecord('user', attrs); await user.save(); let session = this.get('session'); await session.authenticate(AUTHENTICATOR, email, password); } } }); Above, we just added an
onSignUp action to the route. If you are not familiar with how events work in Ember, then keep in mind that the onSignUp action triggered in the template will involve the controller and then the route. Since we do not define an action in the controller, the route will process it.In the
onSignUp action onSignUp we get email and password , so we use this data to create a user account. Then save this account and get the session service. The session service is part of ember-simple-auth , here is its description:The session service provides access to the current session, as well as methods for its authentication, invalidation, and so on. This is the main interface to the Ember Simple Auth functionality that applications can use.
Given this, then we call the authenticate method. We pass to this method the authenticator that we want to use, in our case, the
authenticator:oauth2 , as well as, as separate arguments, the password and email address.Please note that if you did not use the
async/await construct in your project, then it is quite possible to work without it. You can easily remove async/await from the above code and use the then/catch/finally to resolve promises. If you are interested in learning more about using async/await in your projects, take a look at this material .Now we just have to define the
user model. If this is not done, we will encounter the following unpleasant error:source This is unlikely to please anyone, so let's do a model.
▍ Definition of the user model
We will create a fairly simple
user model. It will contain only an email address and password. Create it by running the following generator: ember g model user email:string password:string Having executed this command, we will see the following:
➜ ember g model user email:string password:string installing model create app/models/user.js installing model-test create tests/unit/models/user-test.js The
user.js model file created by this command should be user.js to the following form: // auth-example-frontend/models/user.js import DS from 'ember-data'; export default DS.Model.extend({ email: DS.attr('string'), password: DS.attr('string') }); Now everything is ready for testing.
Authentication Testing
In order to look at what we have just done, in action, you need to run the application. But before you do this, remove the standard welcome page. Open the
package.json file and remove the following from it: "ember-welcome-page": "^3.0.0", Now start the server:
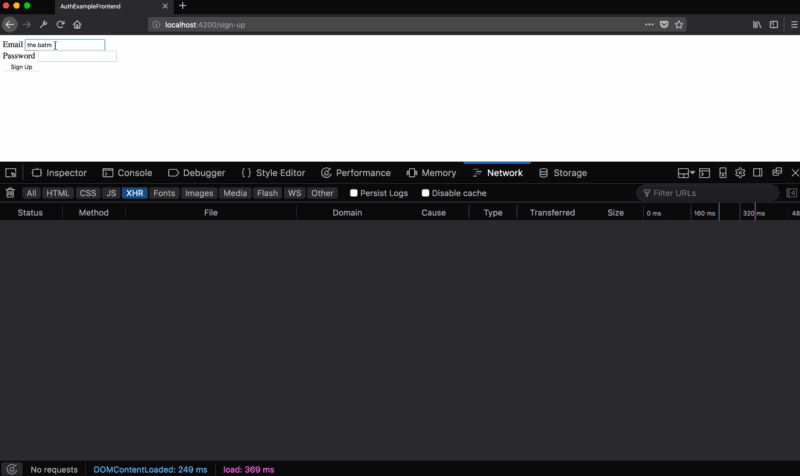
ember s After that, go to
http://localhost:4200/sign-up .Here is an example of working with the newly created client part of the authentication system:
Results
In this material, we have integrated into the Ember application the client part of the system of registration, authentication and authorization of users. Now it remains only to connect all this to the API. Alternatively, you can simulate the end point in ember-cli-mirage . However, we are going to go on a really working web application, so the next time we’ll continue to work on the project using Elixir / Phoenix and Guardian .
Dear readers! How do you create authentication subsystems for web applications?
Source: https://habr.com/ru/post/344384/
All Articles