The battlefield is augmented reality. Part II: how to recognize the object and show the 3D model
In the previous article we learned the basics of the process. Now you can begin to consider the case. If you missed the beginning - it does not matter, click on the link and catch up.
Case is taken from real life, so it is important to say about the conditions that the customer has set before us. Individually, these conditions do not seem so impossible, but together they complicate the task.
Let's analyze the first part, namely, learn to recognize the image and display in its place a 3D object.
')
While working on the case, I went into the ARKit beta and we managed to dig a little in it. This is quite a powerful tool, but even such a cool SDK like ARKit does not have an object recognition system. It contains the so-called "plane detection" - it recognizes the floor or another horizontal plane.
If you prefer, you can use ARKit as the basis for solving the task, but we need to add OpenCV here for object recognition, and most likely Unity, for loading GUI components. The funny thing is that go and find a multiplatform solution that can recognize the floor, because even ARKit is not doing so well with it.
It became clear to us that the native solution is not suitable due to the complexity and diversity of the case. The solution would be to break the project into two parts and do everything for each platform.
There was still a whole breakthrough ahead of us and I wanted to reduce the amount of our work so that the framework for working with add. made all the dirty work for us.
Knowing how much work the project ultimately resulted in, I’ll say that I don’t regret it one iota about the chosen solution.
There are a lot of technologies for AR, we stopped at the Wikitude SDK and SLAM.
Why? Everything is very simple:
SLAM (simultaneous localization & mapping), in contrast to the marker-based, allows you not to bind the displayed 3D object to a specific image. These two distinct approaches influence the position of the object’s coordinates relative to the world. Also, before starting work, I recommend to get acquainted with the Wikitude SDK framework on the official website .
Table comparing frameworks for working with AR:

Even the simplest explanations always take a lot of time, so further only the code and strictly on implementation.
First of all, I highly recommend reading the documentation .
We have a multiplatform solution, so we use JS. You can take as a basis a finished application with examples, the whole basis for calling modules with JS code has been prepared there.
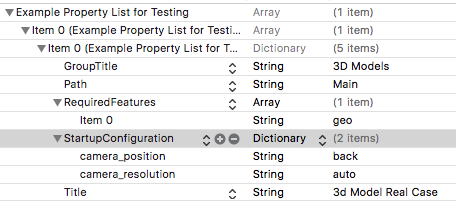
The example has already added the Examples.plist file. Let's take a look inside, edit for our needs and find out what it is for:
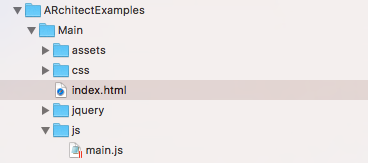
Accordingly, we will get a folder with a module under JS with the same path:
In addition to start you should get a key and use it in the code. Without a key will work, but on the whole screen there will be an inscription "trial".
Example Wikitude is organized as a table with cells. Each cell is represented by a model of type WTAugumentedRealityExperience. Do you remember a bit earlier we looked at the contents of the Examples.plist file? So each element of this sheet is the representation of the WTAugumentedRealityExperience object.
Please take a look at the picture. On it you will see the designer of this model. Files from the aforementioned .plist are transferred to it. Small world!

Let's start by downloading the pattern for recognition. To do this, we go to the site of a special tool wikitude target manager .
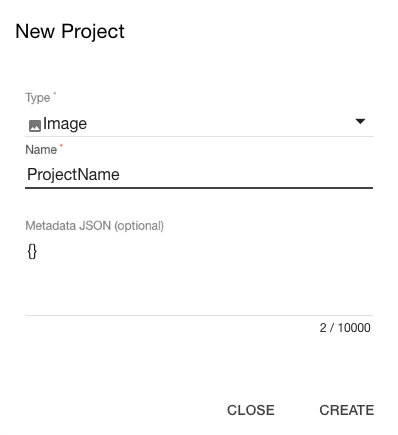
After registration create a new project.
Interestingly, when adding a 3D object, we will need to upload a video in which this object was shot. This is especially useful for creating a very accurate pattern of an object for recognition. On their website, they show the fire engine, in which you can turn on the siren when you click on the recognized car.
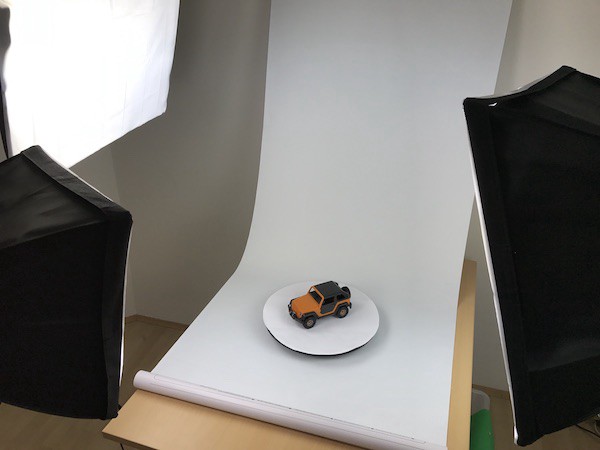
An example of shooting a video. The machine is on a spinning tray, shooting comes from all angles.
After creating the project, we add to it all the objectives for recognition. One project may contain several goals. This is also because right there you can add animation or objects accompanying the recognition.
By adding pictures for recognition, they are rated by the system on a scale from 0 to 3. From "not at all suitable" to "very suitable."
General tips:
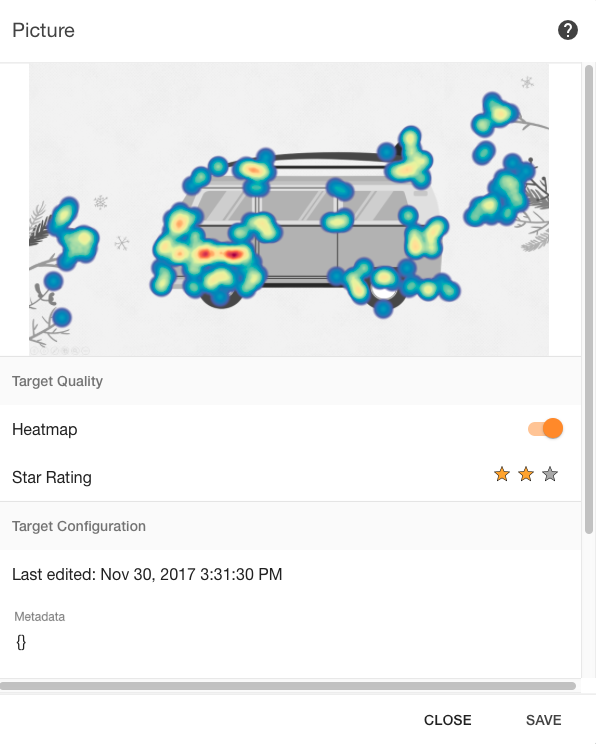
The image above is the picture we uploaded. Heat map and rating included.
What the editor looks like from the inside:
It is important that Augmentations objects can or may not be used. We will talk about this a little later, when the conversation turns to the display of 3D objects and animation.
In the upper left corner there are two icons: the first for cloud recognition, the second for offline recognition. We download the file in the second version and get the output * .wtc format. (Wikitude target collection).
Add a file to our project and go write code.

And that's all about recognition. Now when you hover on the image machine appears.
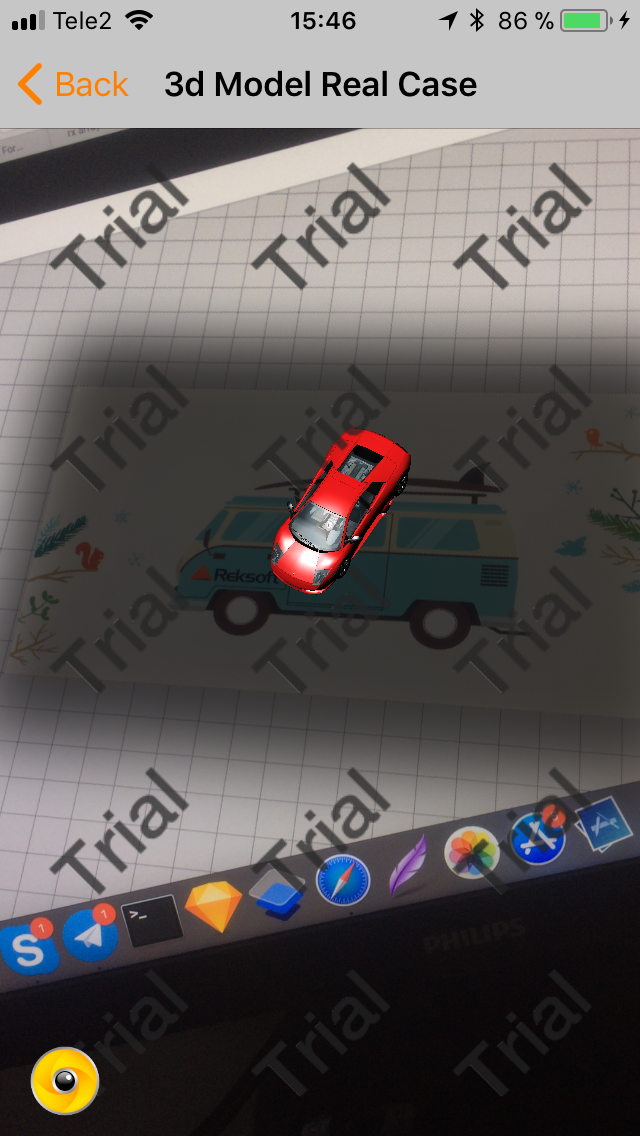
In this case, we cheated a little bit and used the 3D model already loaded into the project.
And that's all for today. Next time we will examine in more detail the loading of 3D models and animations for them, and also consider how to bind an object to a point of interest and show the model using the SLAM technology.
See you again!

Case is taken from real life, so it is important to say about the conditions that the customer has set before us. Individually, these conditions do not seem so impossible, but together they complicate the task.
- Tasks must be performed within a single multiplatform solution. (iOS / Android).
- Images and objects for recognition can be changed with one click.
- 3D models and animation should be loaded simply without dancing with vertices and polygons.
- 3D models must respond to a click.
We divided the work process into the following steps:
- Recognize an image or object. After recognition on this place to display the model with a 3D object.
- Display a 3D object on the screen, similar to “pokemon go”, without being tied to a specific place. When clicked, the animation is played.
- Show a 3D object at the given coordinates as a POI (point of interest).
Let's analyze the first part, namely, learn to recognize the image and display in its place a 3D object.
')
Platform Selection
While working on the case, I went into the ARKit beta and we managed to dig a little in it. This is quite a powerful tool, but even such a cool SDK like ARKit does not have an object recognition system. It contains the so-called "plane detection" - it recognizes the floor or another horizontal plane.
If you prefer, you can use ARKit as the basis for solving the task, but we need to add OpenCV here for object recognition, and most likely Unity, for loading GUI components. The funny thing is that go and find a multiplatform solution that can recognize the floor, because even ARKit is not doing so well with it.
It became clear to us that the native solution is not suitable due to the complexity and diversity of the case. The solution would be to break the project into two parts and do everything for each platform.
There was still a whole breakthrough ahead of us and I wanted to reduce the amount of our work so that the framework for working with add. made all the dirty work for us.
Knowing how much work the project ultimately resulted in, I’ll say that I don’t regret it one iota about the chosen solution.
What we worked with
There are a lot of technologies for AR, we stopped at the Wikitude SDK and SLAM.
Why? Everything is very simple:
SLAM (simultaneous localization & mapping), in contrast to the marker-based, allows you not to bind the displayed 3D object to a specific image. These two distinct approaches influence the position of the object’s coordinates relative to the world. Also, before starting work, I recommend to get acquainted with the Wikitude SDK framework on the official website .
Table comparing frameworks for working with AR:
Implementation
Even the simplest explanations always take a lot of time, so further only the code and strictly on implementation.
First of all, I highly recommend reading the documentation .
We have a multiplatform solution, so we use JS. You can take as a basis a finished application with examples, the whole basis for calling modules with JS code has been prepared there.
The example has already added the Examples.plist file. Let's take a look inside, edit for our needs and find out what it is for:
Accordingly, we will get a folder with a module under JS with the same path:
We get the key
In addition to start you should get a key and use it in the code. Without a key will work, but on the whole screen there will be an inscription "trial".
Example Wikitude is organized as a table with cells. Each cell is represented by a model of type WTAugumentedRealityExperience. Do you remember a bit earlier we looked at the contents of the Examples.plist file? So each element of this sheet is the representation of the WTAugumentedRealityExperience object.
Please take a look at the picture. On it you will see the designer of this model. Files from the aforementioned .plist are transferred to it. Small world!
Load the picture
Let's start by downloading the pattern for recognition. To do this, we go to the site of a special tool wikitude target manager .
After registration create a new project.
Interestingly, when adding a 3D object, we will need to upload a video in which this object was shot. This is especially useful for creating a very accurate pattern of an object for recognition. On their website, they show the fire engine, in which you can turn on the siren when you click on the recognized car.
An example of shooting a video. The machine is on a spinning tray, shooting comes from all angles.
After creating the project, we add to it all the objectives for recognition. One project may contain several goals. This is also because right there you can add animation or objects accompanying the recognition.
By adding pictures for recognition, they are rated by the system on a scale from 0 to 3. From "not at all suitable" to "very suitable."
General tips:
- More contrast in the picture.
- In addition to the text should be graphic material.
- jpg size from 500 to 1000 pixels.
- Remove empty spaces.
- Just the logo is not enough, add additional graphic material.
The image above is the picture we uploaded. Heat map and rating included.
What the editor looks like from the inside:
It is important that Augmentations objects can or may not be used. We will talk about this a little later, when the conversation turns to the display of 3D objects and animation.
In the upper left corner there are two icons: the first for cloud recognition, the second for offline recognition. We download the file in the second version and get the output * .wtc format. (Wikitude target collection).
Add a file to our project and go write code.
And that's all about recognition. Now when you hover on the image machine appears.
In this case, we cheated a little bit and used the 3D model already loaded into the project.
And that's all for today. Next time we will examine in more detail the loading of 3D models and animations for them, and also consider how to bind an object to a point of interest and show the model using the SLAM technology.
See you again!
Source: https://habr.com/ru/post/343648/
All Articles