Hik or Hack? (NOT) IoT security with the example of Hikvision IP camera
 In the modern world, we are surrounded by "smart" devices, which in one form or another are a small computer. From the point of view of integration with modern equipment, be it consumer electronics and smart homes, medical and banking equipment, entertainment systems and industrial equipment - all of these are embedded systems ( embedded devices ).
"Smart" gadgets are very tightly incorporated into our lives, and their number is growing from year to year due to their low cost, convenience and ease of use, including through the Internet . However, behind a number of pluses there are cons, invisible at first glance to the ordinary user.
In one of the reports of the “Face-to-face rate” NeoQUEST-2017, an extensive class of embedded devices — IP cameras — was considered, and general approaches to the analysis of embedded software were discussed. In this article we will focus on the Hikvision DS-2CD2432F-IW camera, its firmware, and the mechanisms for protection against embedding and modification used by the manufacturer.
Acquaintance
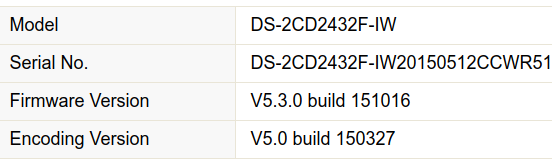
We go to the web-interface and study the functionality: find out the software version, activate network services (SSH, SNTP, FTP, ...). We got the camera with a rather old firmware 5.3.0. Naturally, from version to version, the vendor patches not only the functionality of the device, but also security problems. At the time of writing, the latest firmware for this camera is version 5.4.5.
')
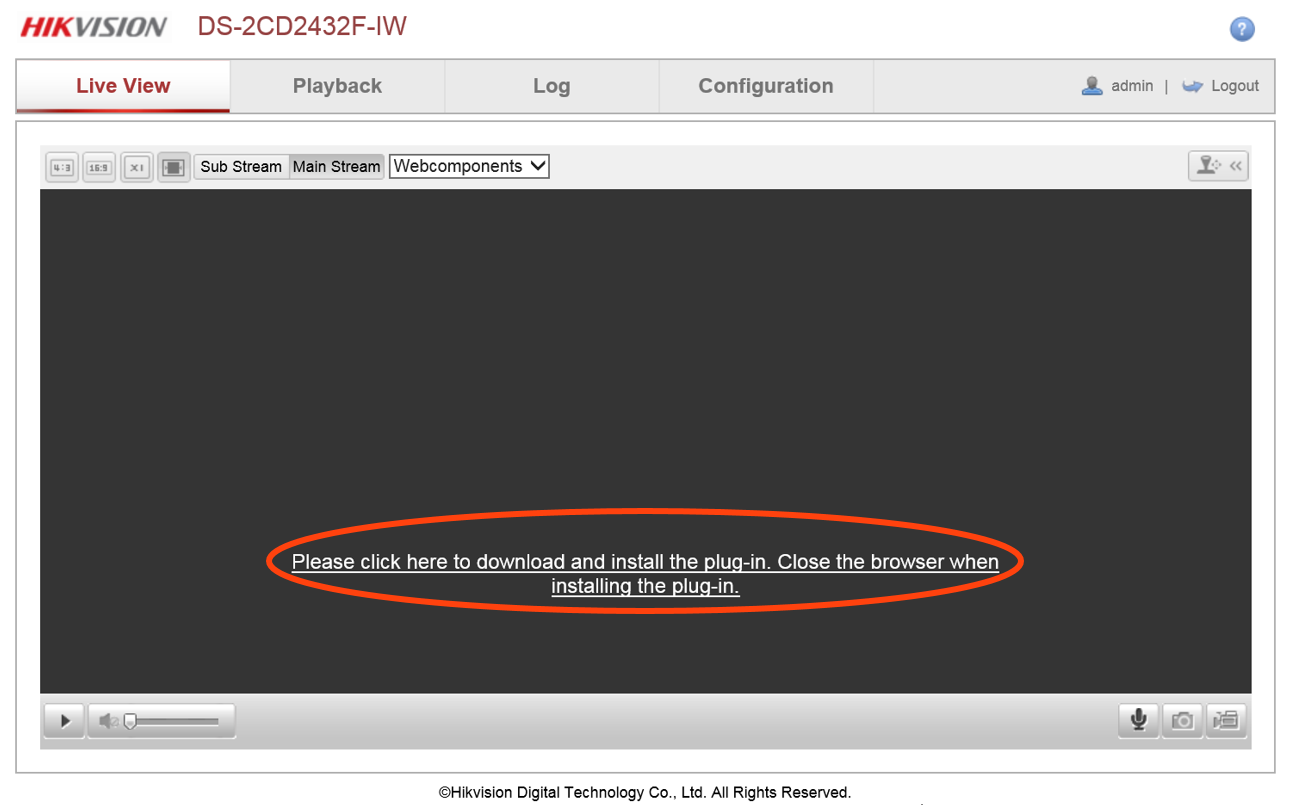
To view live video from the camera, you need a browser plugin. One of the plug-ins is stored on the camera itself - we will download it, perhaps it will still come in handy for us.
We connect via SSH to the device and see the CLI with a certain set of commands with which you can find out the current camera settings, set your own and learn much more information about the device than through the web interface.
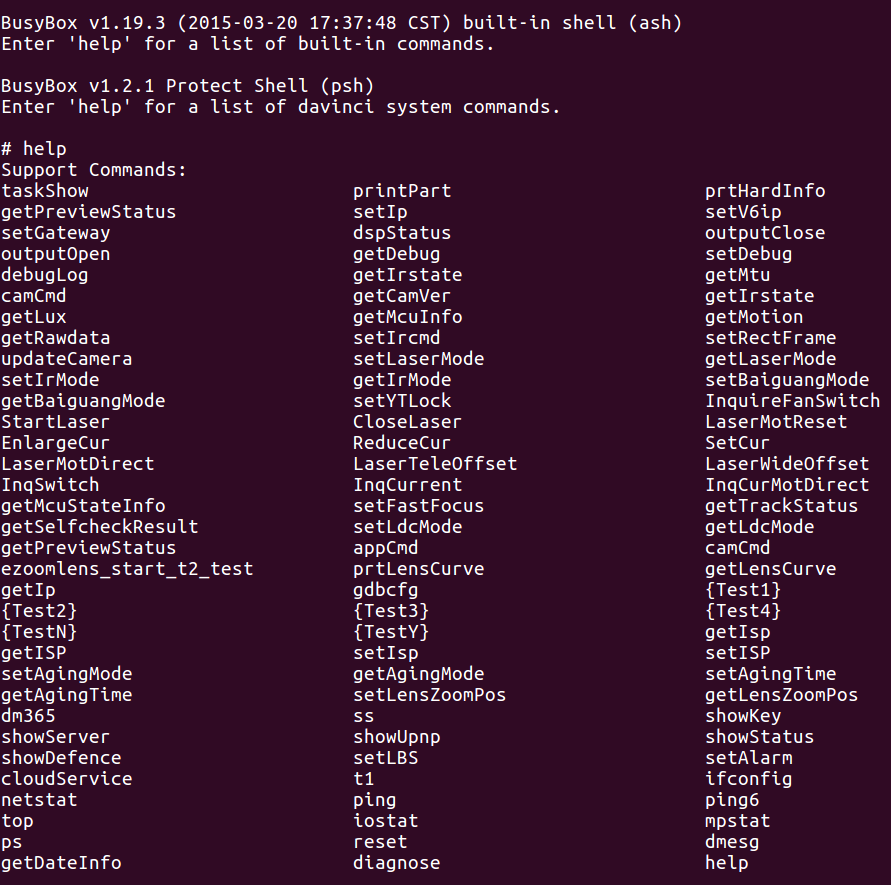
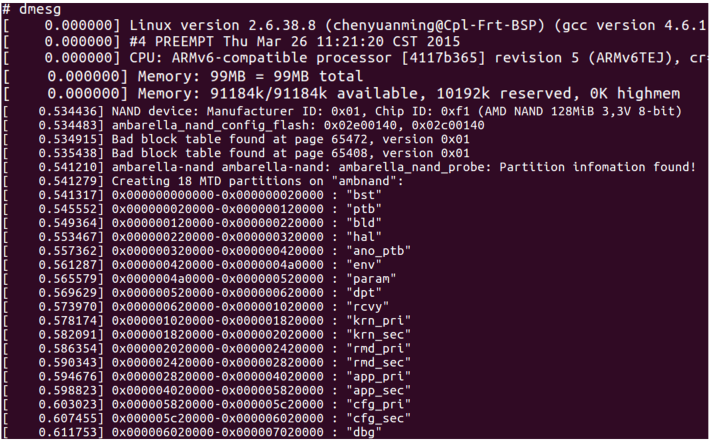
We check the commands and with the help of one of them we learn information about the OS, OS kernel, processor architecture, file system, RAM sizes, physical memory partitions, etc.
Search for information
An important skill for a researcher is the ability to search for information - after all, most likely, someone has already done this before you. Answers to many questions can be found on the thematic forums or simply in search engines. For example, let's go to a forum dedicated to various cameras, recorders, etc.
A little surfing and find how to “fall through” even deeper, namely in the root-shell, where the commands “cut” in the CLI are available, and the file system!
Accessing the root-shell itself will allow us to get lists of open ports and processes, extract executable files from the file system for study and run our own files. You can import / export those and others using an SD card.

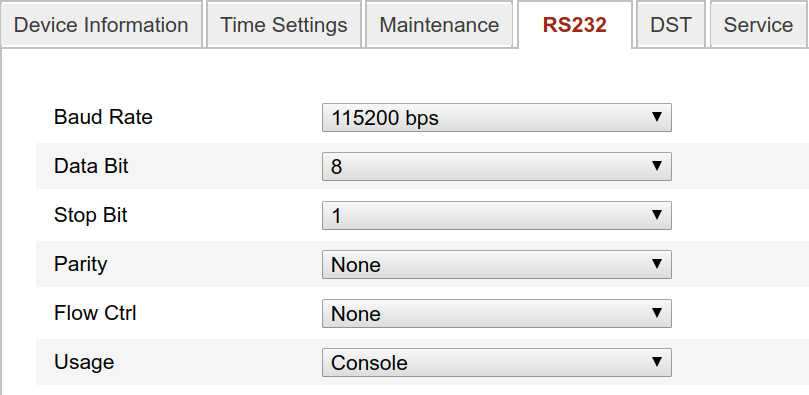
Even at the stage of familiarization with the camera in the web-interface was seen the RS232 tab. The forum immediately showed a thread about how this interface can be used.
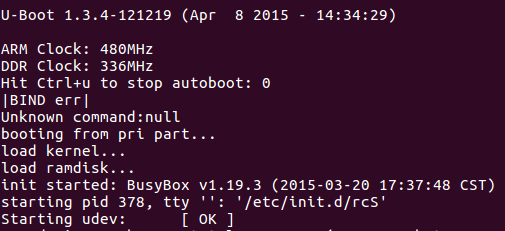
By connecting the UART to the camera and setting the necessary parameters for minicom , we are able to read the entire log of the camera download, stop the device loading and “fall through” in the bootloader! We see that the log is quite large, and it displays the processes launched, the checks passed (so far unknown to us), errors and other system information.
No less interesting is the boot itself and its commands, which allow you to read and write data to the physical memory of the device, update the camera via the tftp server (if you suddenly turned it into a “brick”), get even more detailed information about the camera’s internal parts.

Firmware structure
Header
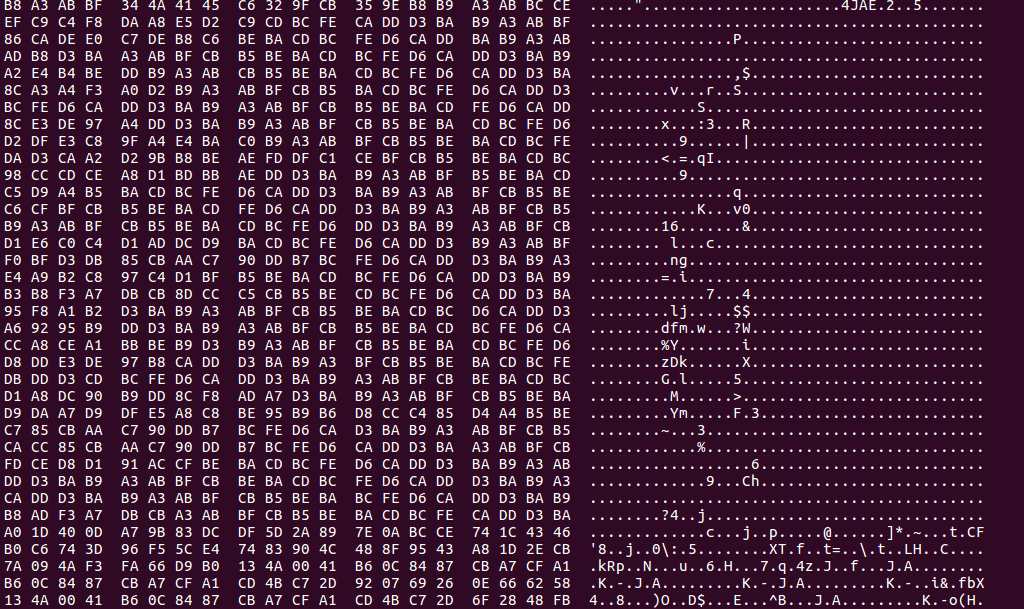
Having a little studied the camera itself, we proceed to the study of the image of the firmware. Download the image, we note that the firmware is an unknown file with the extension ".dav". We try to see something in the hex editor.
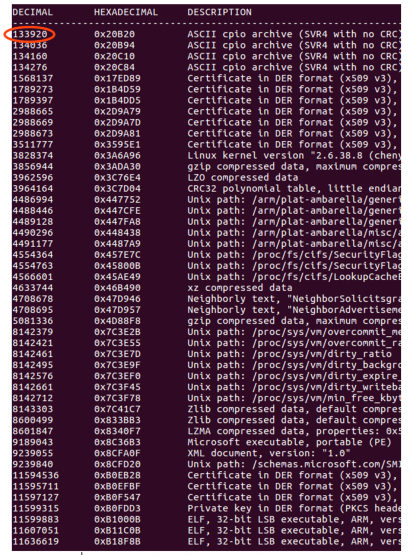
As a rule, any firmware image most likely begins with a header, which contains metadata about the image itself and about the supported device. From the previous figure we see something similar to the title. Let's try to feed the binwalk firmware file . In the first ~ 130 thousand bytes nothing was found, and this suggests that, most likely, this block is encrypted.
Go to "smoke" already mentioned forum and stumble upon it . It turns out that the header of the firmware file is really encrypted byte-by-byte. Block encryption is implemented based on XOR operation. Operation key = "BA CD BC FE D6 CA DD D3 BA B9 A3 AB BF CB B5 BE". Before each successive xor, the key is shifted cyclically to the left by byte. We write a small script to decrypt the header. So far, the result is supposedly the names of some files and a set of unknown bytes.
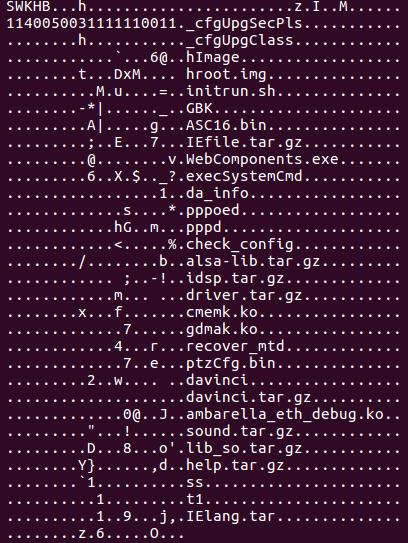
Let's try to match the available information (image size and version, binwalk `a log, etc.) with unknown data in the header. For example, you can see the size of the image or the offset of the .gz archive, which is also determined by binwalk. In order of bytes, we can conclude that this is little-endian.
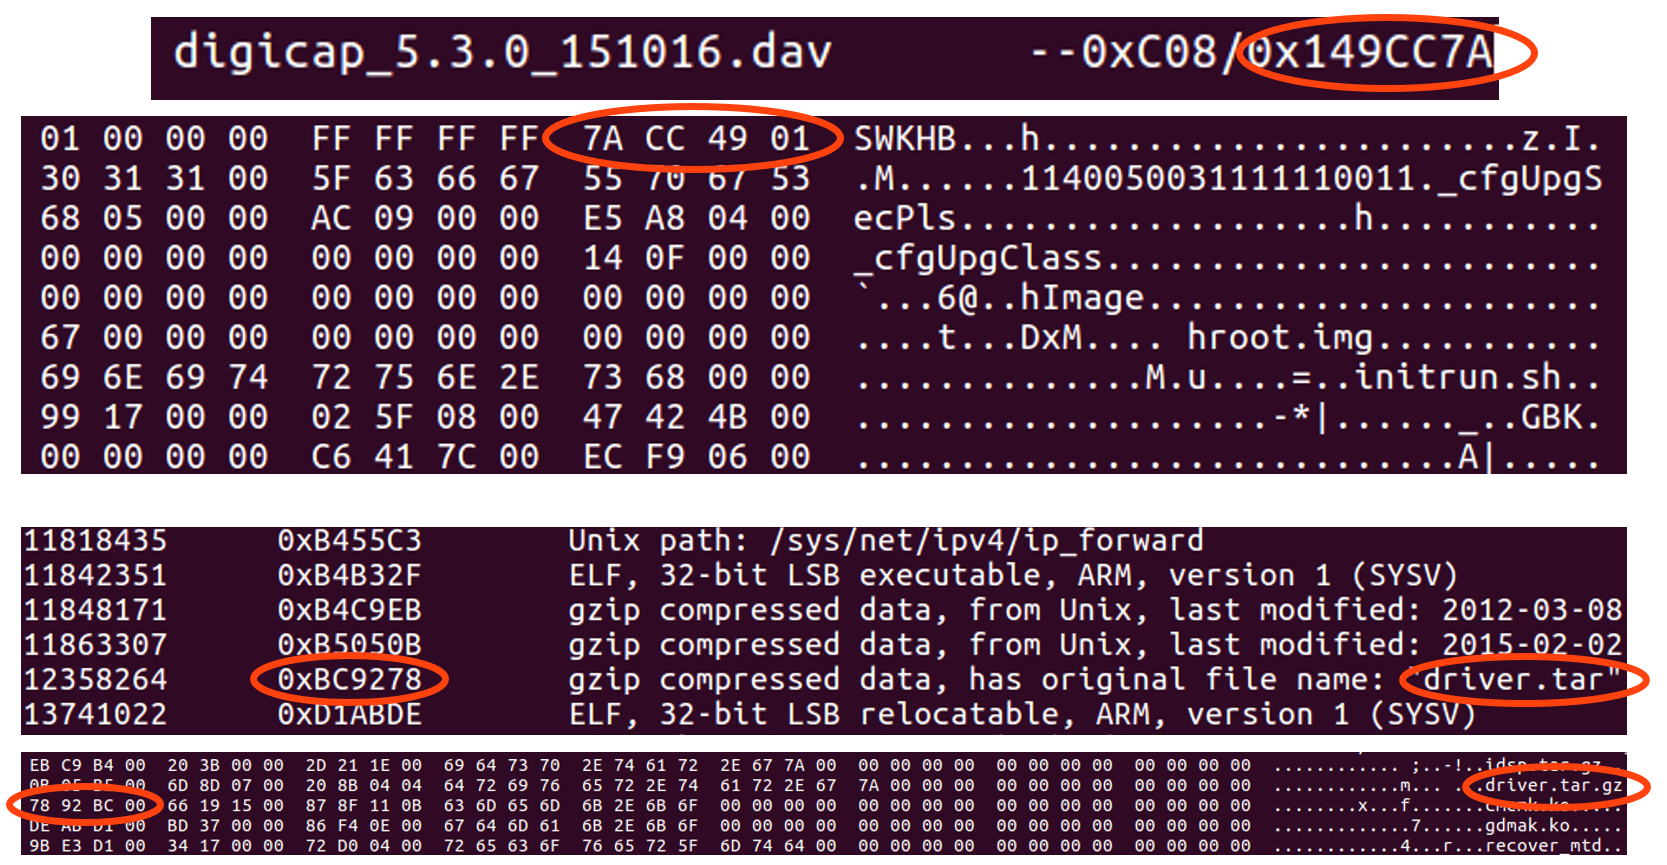
Recall the browser plugin that we downloaded at the dating stage. Its name appears in the title. Immediately after its displacement in the composition of the image we see its size.

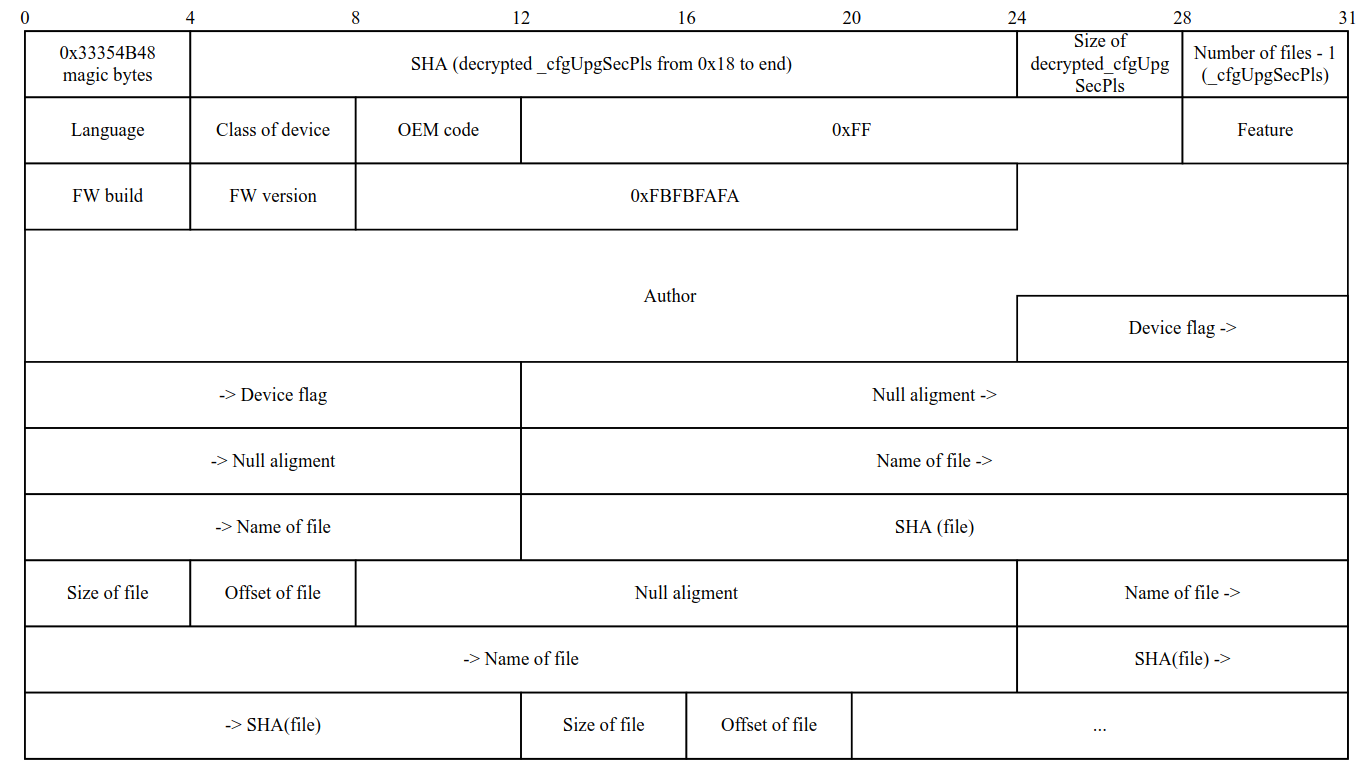
It is already known that the structure associated with the files contains the file name (32 bytes), its offset (4 bytes) and size (4 bytes). 4 bytes of information are still unknown to the next structure. Most likely, this is a checksum. It remains to find out by what algorithm it is calculated. Since the length is only 4 bytes, we can safely say that this is not the result of some popular hash function (MD5 (), SHA * ()). It can be assumed that CRC32 () is used. We try - by, the amounts do not converge.
After several assumptions, a curious dependency was noticed: the larger the file size, the larger its checksum. This prompted the idea of adding successive bytes in one of the files. Indeed, the algorithm for calculating the checksum is quite simple and is a sequential addition of bytes. The header checksum is calculated in the same way - it is right at the beginning, next to its size.
The decrypted header contains information:
- about the image itself: about its version, build, size;
- about the device;
- About the files in the firmware: name, offset, size and checksum.
The detailed structure of the header is presented below:

Now that the header structure is completely known, it is easy to write a script that parses the header and unpacks the image into separate files (links to the sources of programs implementing unpacking the original firmware image and assembling a new image - at the end of the article!). And we will study them carefully!
hroot.img
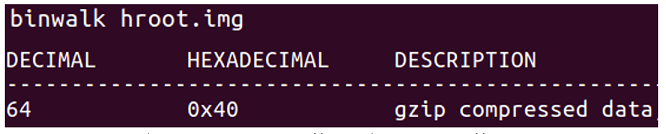
Examine the files that are part of the image. It becomes clear from the name of the appointment of some, but for the purpose of the others it remains only to guess ... A file with the extension ".img" immediately catches the eye, most likely, this is an image of the file system. Mount it immediately fails. “Feed” binwalk and see the “.gz” archive, but only from 64 bytes, which means that the image has its own header.
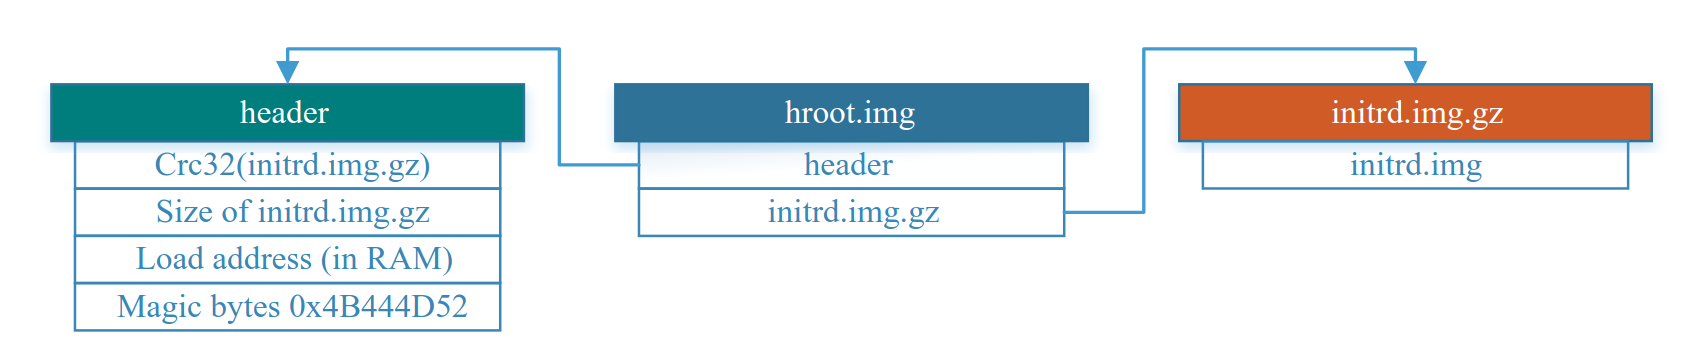
As a rule, the header of the file system image contains the checksum of the image, its size and the address of loading into the device’s RAM. In our case, the checksum is CRC32 (). Also added are “magic bytes” KDMR (RMDK, ramdisk magic). The remaining bytes of the header are filled with zeros.
initrun.sh
Already by the name it can be assumed that the script runs when the device is turned on. After examining it, we understand that it creates the necessary directories, unpacks the archives, copies the files, launches the binary files, deletes the unnecessary ones, loads the kernel modules, mounts the necessary sections, creates symbolic links - all this happens in the RAM.
davinci.tar.gz
It would seem that lib_so.tar.gz - the archive with dynamic libraries is not remarkable, but inside the archive, among the libraries, the executable binary file daemon_fsp_app was lost. It is strange that it was placed in this archive, although the rest of the binaries were simply concatenated with the rest of the files in the image. Well, you have to fix it!
It turned out that this binary file decrypts, launches and deletes, leaving hanging in the processes, one of the files in the firmware, namely davinci.tar.gz. This is the most interesting file - davinci encrypted executable file that implements the main logic of the device. It "manages" the web server and checks the imported image of the new firmware.
Checksums of files, their offsets and sizes, the number of files in the firmware, the size of the image and its version, the class of the compatible device, the checksum and the size of the header, the header of the image of the file system and, of course, “magic bytes” are checked. Bypassing these checks is not so difficult if you disassemble the structure of each file. This will modify the image or build your own.
The manufacturer disguised davinci as a tar.gz compressed archive, but in fact there is a completely different matryoshka (see the figure below)! The binary file is packed into a tar archive, compressed using the lzma algorithm and encrypted using the AES symmetric block encryption algorithm: the block size is 128 bits, the key size is 256 bits, the mode encryption is ECB, and the header with “magic bytes” is added, and is checked when decrypting.
The encryption key is generated using the key generation function EVP_BytesToKey () , where MD5 () is used in two passes, the password phrase "R0sslV53cryptor0" and the salt "HangZhou". For different classes and series of devices, this key will be different; the series of the camera we are examining is R0.

_cfgUpgSecPls
The file is encrypted in the same way as the davinci binary file, but it differs only in the encryption key and in that davinci itself is engaged in decoding. The key is different due to the fact that another password phrase is used to form it - “h @ k8807H $ Z5998”. It can be found “inside” of the davinci binary file, in the same place as the “HangZhou” salt.
According to the structure of the decrypted file shown in the figure below, we can say that this is the second header of the image — it also contains the metadata, the file name, its offset, size, and checksum. The main difference is the algorithm for calculating the checksum - here is the usual SHA () (not to be confused with SHA1 () and other SHA () algorithms), and the file encryption algorithm. This file, like the header, is checked by davinci.
The remaining files in the image are not as interesting as the ones mentioned above. Their brief description is presented in the table below.
Description of the files in the image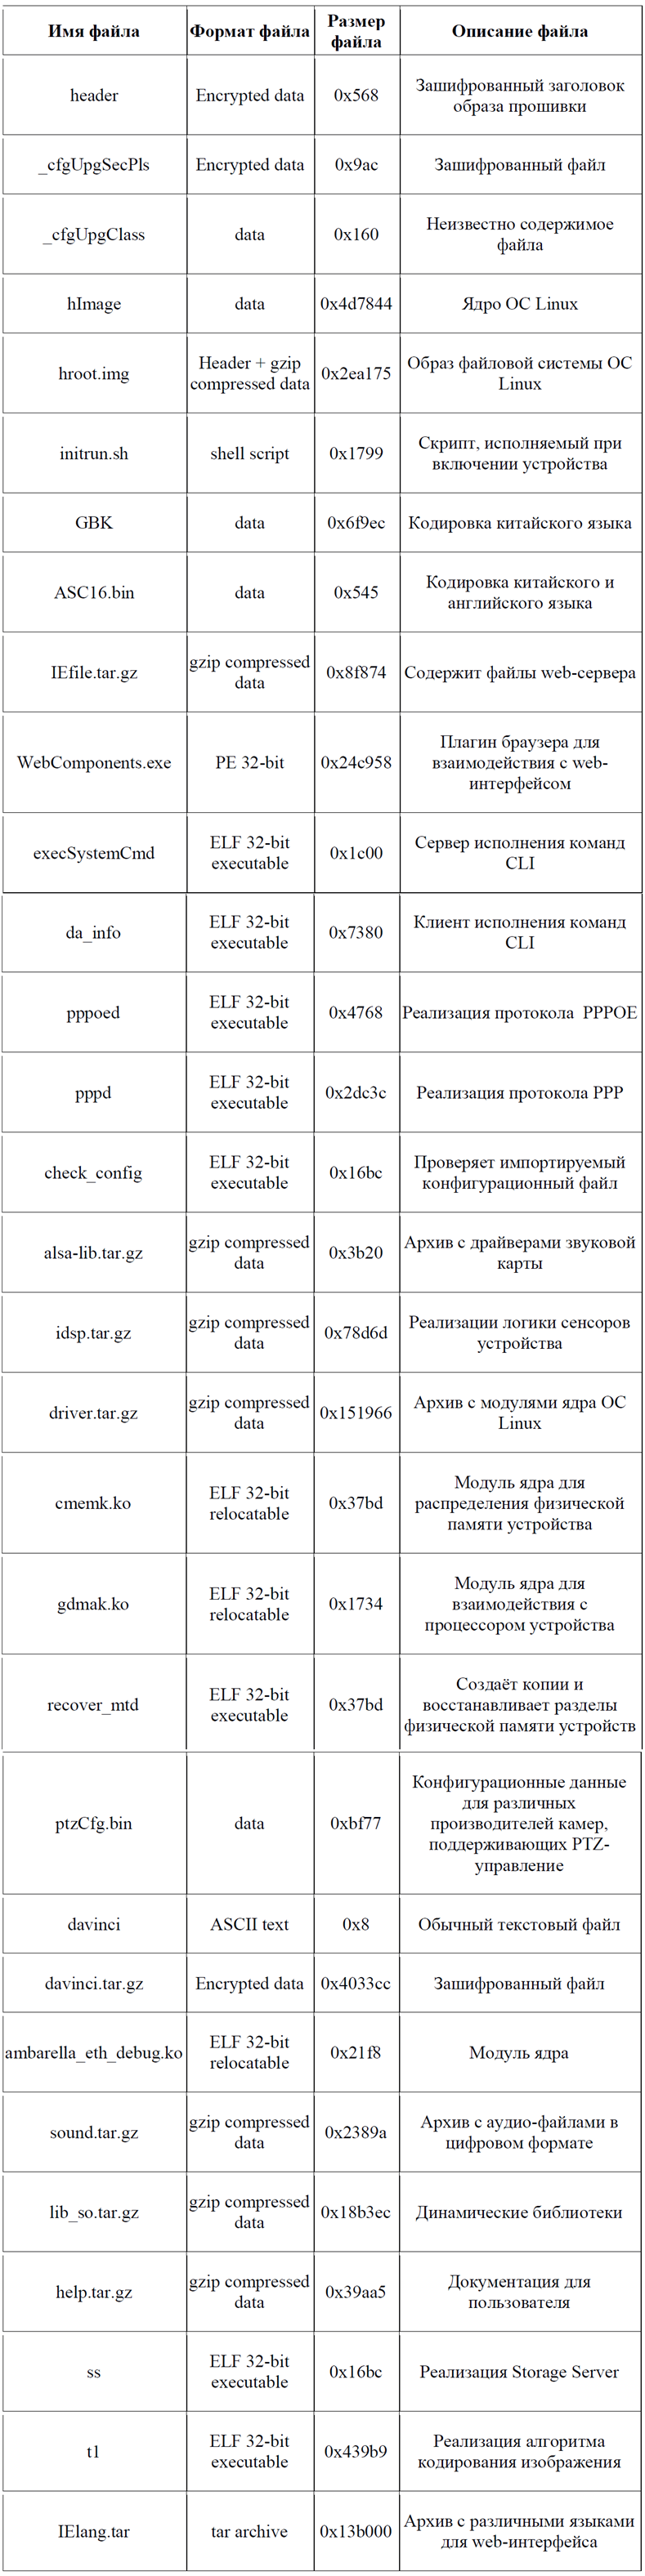
Let's sum up the sad results ...
What can you say? Most embedded devices are made in China, and manufacturers are trying to save on the work of programmers and on hardware, so that this hardware has extremely limited computing resources. As a result, poorly implemented security mechanisms to prevent modification of the original software (or, in general, their complete absence).
Moreover, the manufacturer can independently lay backdoors . And if hacking a smart teapot is unlikely to cause significant damage (although this can be argued, relying on the assertion that a potentially smart teapot can even "put" the Pentagon site ), then an attack on more significant embedded-systems can lead to serious effects.
The lack of automatic updating of most devices completely undermines their security - an ordinary person does not follow the news in the field of information security until it affects him personally or until everyone talks about it. It is unlikely that a housewife will climb to download a new firmware for her camera from a Chinese site.
Devices may not be updated over the years. As a result, attackers exploit an accessible loophole for their own personal interests, ranging from the banal surveillance of the "victim" and ending with the creation of botnets .
One can only hope that in the future manufacturers will be more responsible in regard to the safety of their products, which are increasingly pouring into our lives, introducing into them modern and reliable protection mechanisms against software modification and replacement, for example, EDS .
PS
In the process of research, programs for unpacking the original firmware image and assembling a new image in Python were written. Unpacker divides the image into separate files included in its composition. The assembly takes into account the fields that are checked when downloading to the device, which allows you to modify any of the files in the image (without adding a new file to the image) and build a new firmware file. For assembly requires an already unpacked image.
Source: https://habr.com/ru/post/343144/
All Articles