How to create graphics for VR - Google recommendations
Creating graphic resources: recommendations
As a VR and AR artist, I noticed two trends. First, there are constantly new tools and practices that allow us to improve the quality of our work. But at the same time, the techniques and skills of the late 90s and early 2000s are returning. They are fully applicable to virtual reality, because computing resources in VR are limited. And if you are just starting your way, then you should consider a variety of approaches. So, if you are an artist and have recently taken up VR, here are some of my favorite tips for creating high-quality graphic resources.
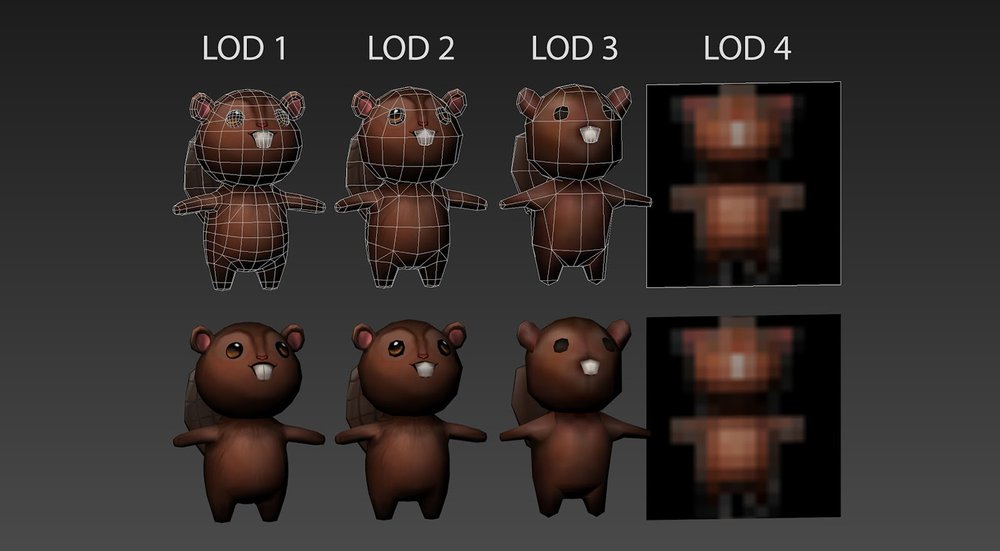
- You can not lose a frame. You need to keep the frame rate as high as possible, because the lower it becomes, the higher the likelihood of discomfort and motion sickness due to the conflict between the inner ear and the player’s visual perception. One way to maintain a high frame rate is to create levels of detail (LOD). A character from 10,000 polygons should be in such high resolution only when it is very close. At a distance, the model can be replaced with a version with 5,000 polygons, and the farther the polygonal model is, the less polygons there should be, up to a single polygon (LOD 4 in the figure below). This will help maintain high performance, and especially works well for large groups of background characters that are always visible from a distance.
- Be careful with the textures used . Overloaded with details, noisy and contrasting textures can cause nausea in VR, because it usually seems that they are shaking. However, plain textures without details can also cause problems, because without a texture it is difficult to estimate movement and depth. Extremes can work fine in environments without VR, but in virtual reality they should be avoided.
')
- The main thing is how the graphics look in VR. When creating resources in 2D, constantly check and see how they will look in VR. Permanent switching can be tedious, but it will change your view of things: in VR, volume and size are very clear. Perhaps the distance to a tree set on a hill looks great when created in 2D, but when comparing distances in VR it may look completely different.
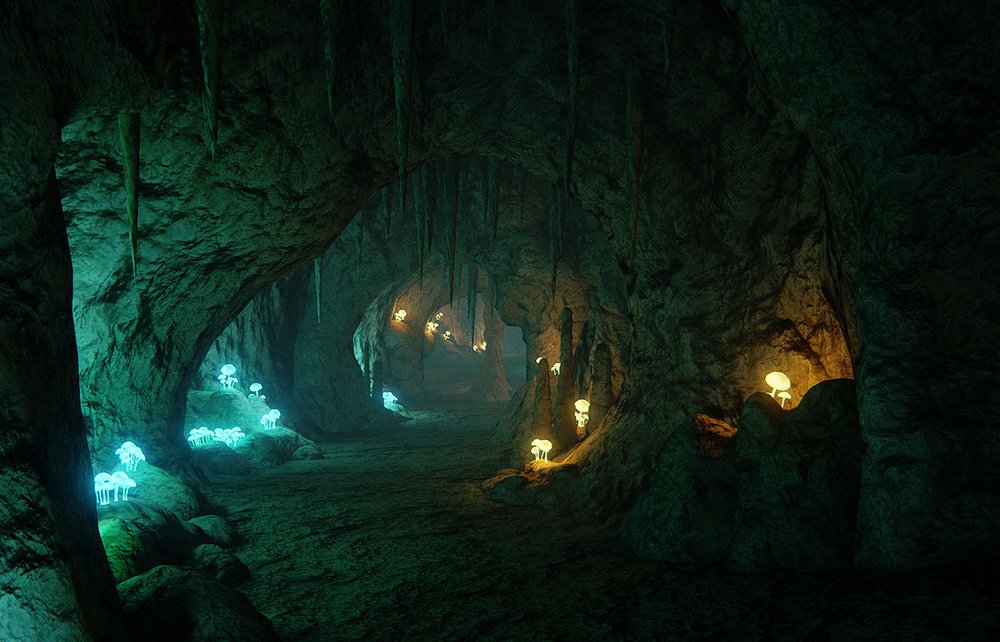
- Make the study interesting, not complicated. Exploring the world should be fun and accessible, but in VR you need to clearly tell the player where to go. Create a visual language, for example, orange torches near the desired exit from the dungeon or street lights in the case of a zombie apocalypse. These are small but important indicators, because in VR it is very easy to get lost.
Optimization of graphic resources for VR
We also chose for VR artists how to optimize polygons and UV spaces .
Tile textures: instead of creating a single giant texture covering most of the space, create a smaller tile texture that can be used on multiple spaces. The example below uses UV-space with a tile texture, which is repeated eight times, creating a high resolution of the stairs. Thanks to mirroring and rotation, the player most likely will not notice that the UV spaces are used several times, but in general it will seem that the object has a higher resolution.

Use more polygons: although it is important to keep as few polygons as possible, the more valuable resources are texture and pixel resolutions. Plan in advance the creation of a graphic resource and consider that you may need more polygons or model a resource with less optimization of polygons if the resolution increases and as a result you get a more detailed and generally more optimized resource. On the left, the figure shows a model of 13,000 polygons, which in VR should have a height of 6 inches. When the user approaches the model, it becomes pixelated and does not look very good. Instead of using large UV-space textures, the model on the right is created with a more careful location of polygons. It contains 9,000 polygons with higher resolution textures, and on closer look, VR looks great.
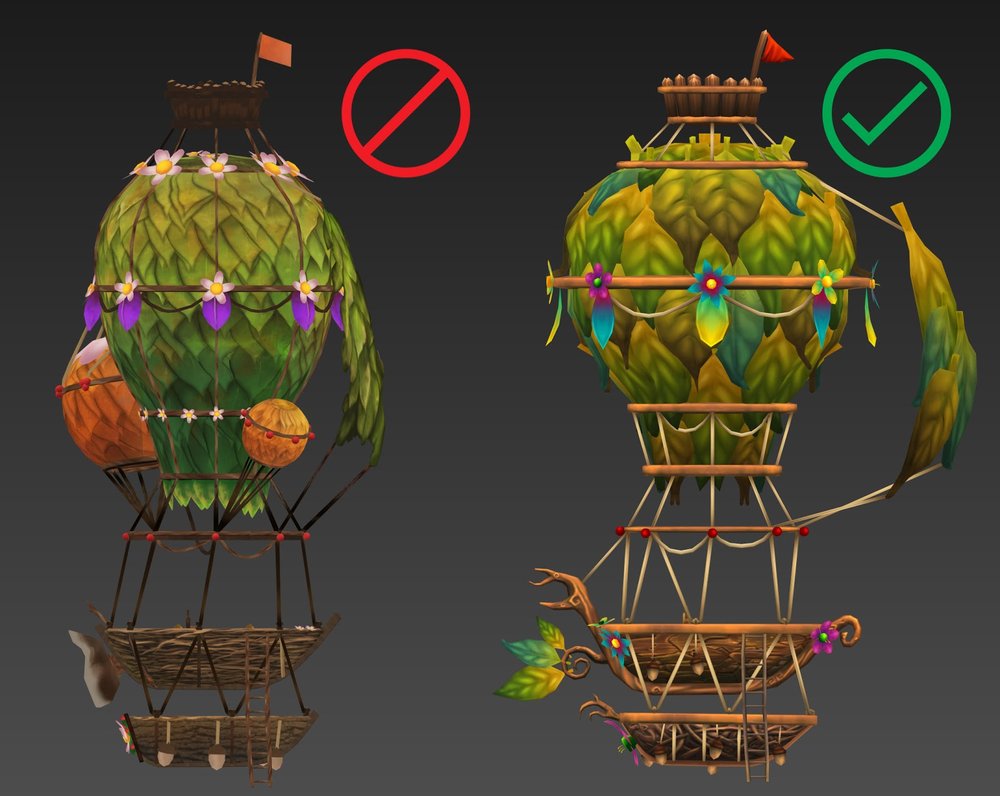
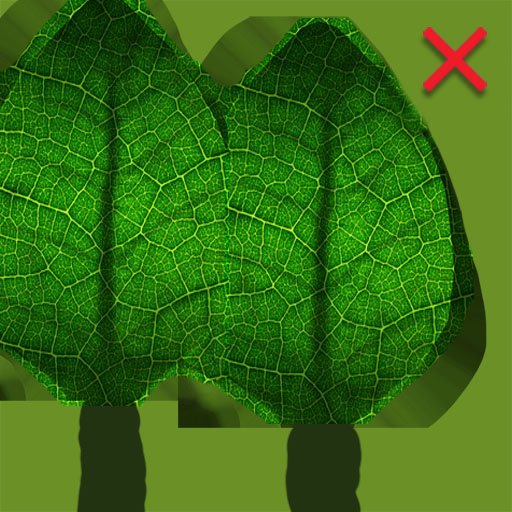
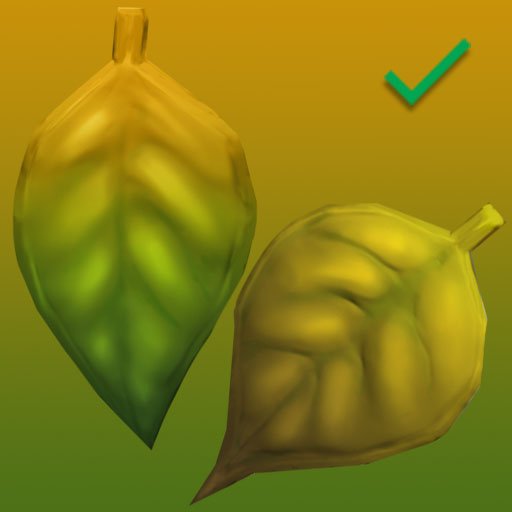
Maximize UV space: aim for higher resolution, creating more voluminous UV space to achieve high resolution. Since almost every graphic resource has a unique UV space, the image on the left uses a large area of green leaf for the entire balloon, so it looks pixelated at close distances in VR. Thanks to the creation of large UV-spaces with high resolution and duplication of geometry instead of using unique UV-regions, the finished resource on the right looks closer when viewed more clearly.
Use geometry to create something unique, not texture: the disadvantage of reusing UV space is that objects may look repetitive. To make areas of the object more unique, use geometry to add new color or add multiple edge loops to give the duplicated resource different outlines with the help of bends and scaling.

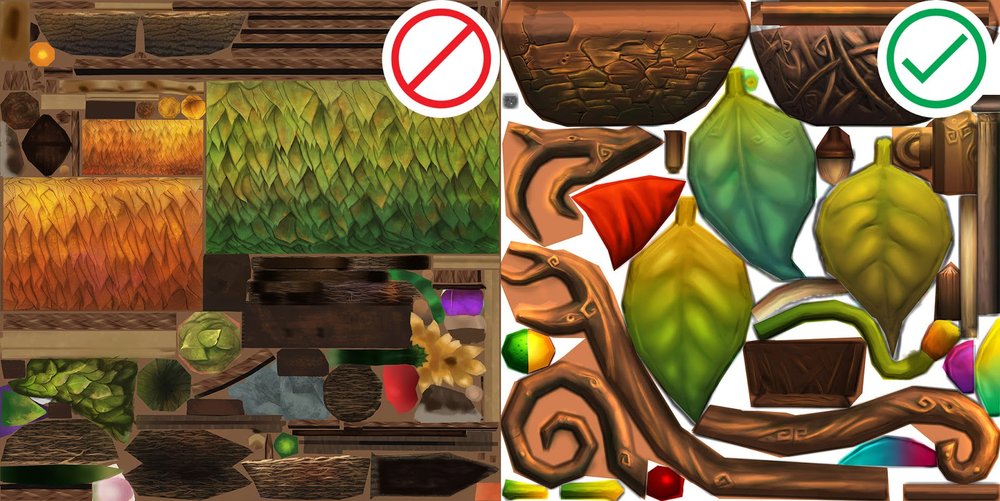
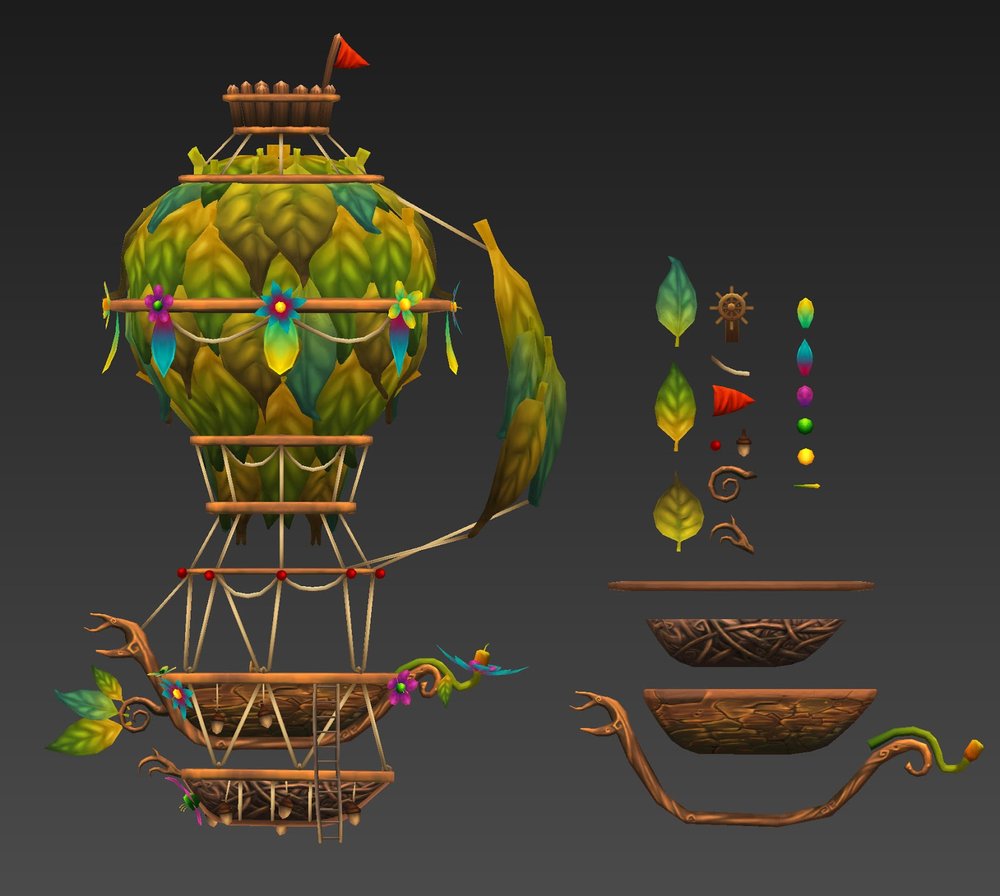
When creating graphic resources, plan ahead so that they can be reused and combined with other resources: a good practice in the face of close VR constraints is the creation of separate parts of the finished resource and their subsequent assembly. It is always worth considering whether another unique part is worth it if its price is the total smaller UV scan, and therefore a lower resolution of the resource. The entire finished resource on the left is assembled from the parts shown on the right.
I hope these tips will be useful in the process of creating and optimizing graphics for VR.
Source: https://habr.com/ru/post/342426/
All Articles