Convenient solution for the gaming database based on EditorWindow
Unity offers great tools for making small games with few variables. When the project grows, it becomes extremely inconvenient to change the data in the standard Inspector, especially if all data is stored in one place (which is extremely convenient when editing).
How to make a convenient for editing and understandable for game designers database?
About this below.
To begin with, let's create a DataBase class that will be responsible for communicating with the database or storing data for small projects.
It is worth talking to the gemdesigner and it will determine which list of data types is required. For example, this will be 4 data types.
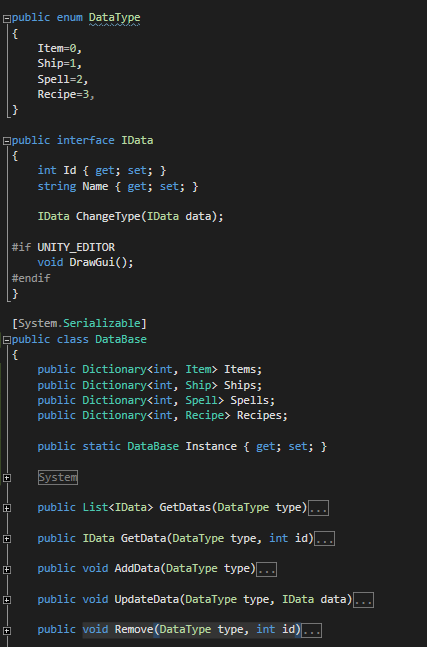
We write them in enum (then it will be clear why)
public enum DataType { Item=0, Ship=1, Spell=2, Recipe=3, } Here we also create an interface for communicating with our data types. It must have Id, Name and one DrawGui () function that will be responsible for drawing our interface.
public interface IData { int Id { get; set; } string Name { get; set; } #if UNITY_EDITOR void DrawGui(); #endif } We do not need the DrawGui () function in the compiled project, so I strongly recommend that you include it with the compilation directive.
In the DataBase class itself, we add functions for accessing data:
List GetDatas (DataType type) - to get the entire list of data of the specified type
IData GetData (DataType type, int id) - to get data by id
void AddData (DataType type) - add a new value
void UpdateData (DataType type, IData data) - update the specified value
void Remove (DataType type, int id) - deletes the specified value
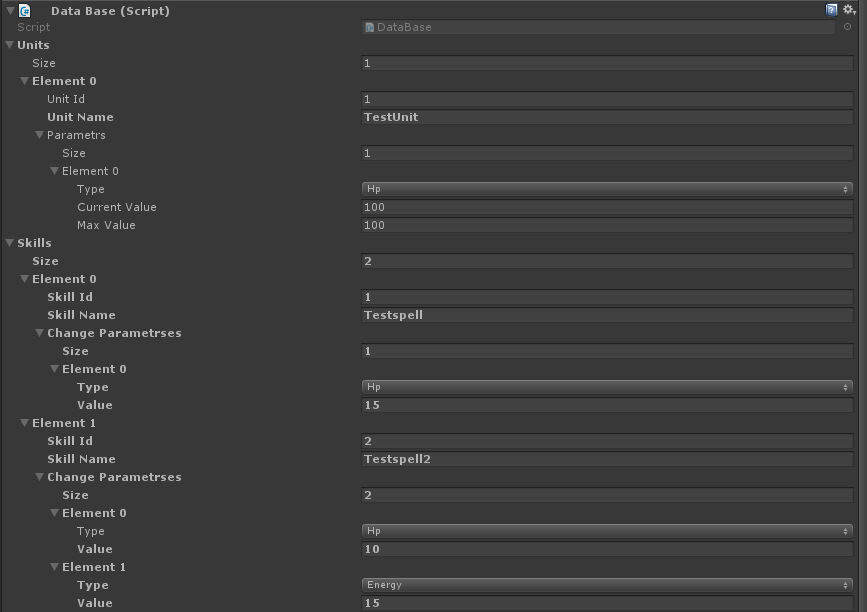
These functions will describe the interaction with the database, for example with PostgreSQL.
It turned out like this
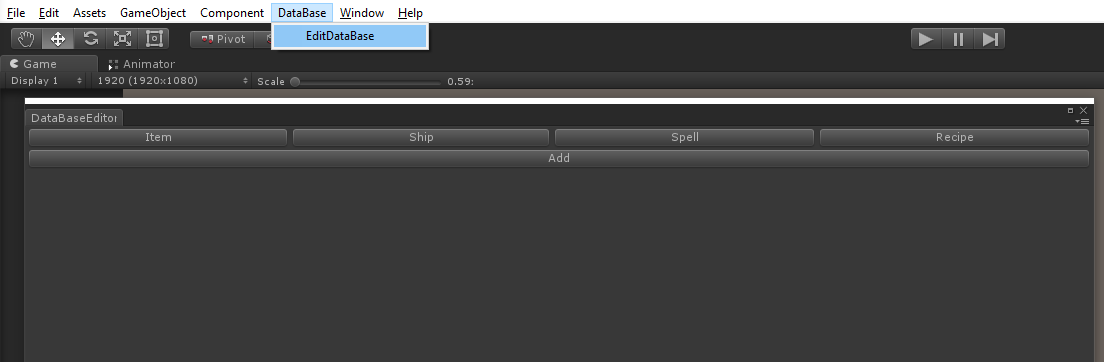
Now you need to create a class to draw the window in the Unity editor. Create the Editor folder and the DataBaseEditor script in it. We inherit it from EditorWindow.
It is necessary to implement switching between previously created data types.
Let's declare a static variable DataType CurrentDataType and make a choice of the data type in the standard OnGUI () function
There are 2 options:
- use the standard EditorGUILayout.EnumPopup ()
- for each enum elements create your own button
Personally, I prefer the second option so it turns out more convenient. This code is quite enough
var types = Enum.GetValues(typeof (DataType)); GUILayout.BeginHorizontal(); foreach (var type in types) { if (GUILayout.Button(type.ToString())) { CurrentDataType = (DataType) type; } } GUILayout.EndHorizontal(); You can play a little and make a selection of the selected type of color.
Now add one button to add data to our database.
if (GUILayout.Button("Add")) { DataBase.AddData(CurrentDataType); } And it remains to call our window from the Unity menu for this:
- create a new menu item
[MenuItem("DataBase/EditDataBase")] - By clicking on the menu item create our window
static void Init() { var window = (DataBaseEditor)GetWindow(typeof(DataBaseEditor)); window.Show(); } The result should be something like that.
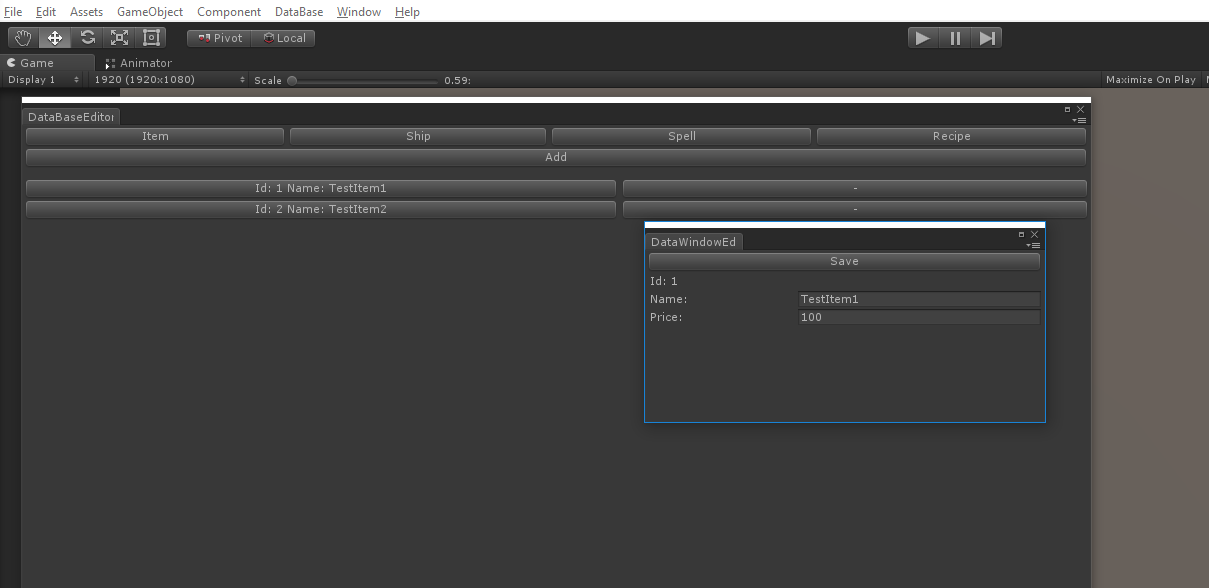
Now we need a window in which the form for changing the data will be displayed.
Create a new class DataWindowEditor and, as before, inherit it from EditorWindow.
In this class, we need to track 2 events (opening and closing the window).
When opening, we will transfer data for display to this window and save previously opened data so that the game designer does not accidentally lose his job.
When closing, save changes to our database.
public void OnOpen(IData data,DataType type) { if (_data != null) { DataBaseEditor.DataBase.UpdateData(_dataType, _data); } _data = data; _dataType = type; } void OnDestroy() { DataBaseEditor.DataBase.UpdateData(_dataType, _data); } And it remains to draw the form itself in OnGUI
public void OnGUI() { if (_data==null) { Close(); return; } _data.DrawGui(); } Now we need to get a list of our data. Use the previously created function GetDatas.
And we draw our data using GUILayout, when clicking on an element, open its view.
var datas = DataBase.GetDatas(CurrentDataType); foreach (var data in datas) { GUILayout.BeginHorizontal(); if (GUILayout.Button("Id: " + data.Id + " Name: " + data.Name)) { var window = (DataWindowEditor)GetWindow(typeof(DataWindowEditor)); window.OnOpen(data,CurrentDataType); window.Show(); } if (GUILayout.Button("-")) { DataBase.Remove(CurrentDataType,data.Id); } GUILayout.EndHorizontal(); } The second button is responsible for removing the specified item.
Now let's go directly to our data.
Create a new class Item.
We add the fields that game designers need.
In my case, for now this will be the price of the item.
We inherit the class from the previously created IData interface.
The DrawGui () function, as well as in the interface, should be marked with a conditional compilation directive and in the function body describe the element mapping itself:
#if UNITY_EDITOR public void DrawGui() { GUILayout.Label("Id: "+Id); Name = EditorGUILayout.TextField("Name: " , Name); Price = EditorGUILayout.IntField("Price: " , Price); } #endif That's all. Go to the editor and get this picture:
For other data types, we also create separate classes and do the same for the Item class.
')
Source: https://habr.com/ru/post/342190/
All Articles