Overview of the new version of Infobox hosting
The Infobox engineering team has launched a new high-performance hosting site :
In this article:
')
Over the long years of hosting more than 300,000 clients, we have tried several different architectures:
Both schemes add overhead when processing HTTP requests to sites. Network latency is particularly affecting performance, leading to slower client sites.
In the new hosting client sites and the database are located on the same physical server without adding network overhead. Scaling is done by adding physical hosts, but at the same time each hosted client site is guaranteed to be located on a single server completely, which ensures the highest possible speed.
On the host servers, we use enterprise-level SSDs with a bandwidth of 12Gb / s, which allows us to process requests to client sites even faster than on conventional 6Gb / s SSDs. Especially this acceleration is felt when working with databases.
According to our tests, random recording on these disks is up to 2x faster than 6Gb / s SSD and hundreds of times faster than regular HDDs.
The processor will no longer be a narrow neck for your site - the high frequency of cores significantly speeds up the execution of scripts and database queries.
We rewrote the phpredis module and now we provide all customers with the ability to work safely with sessions without blocking, redis is available on all tariffs at no extra charge.
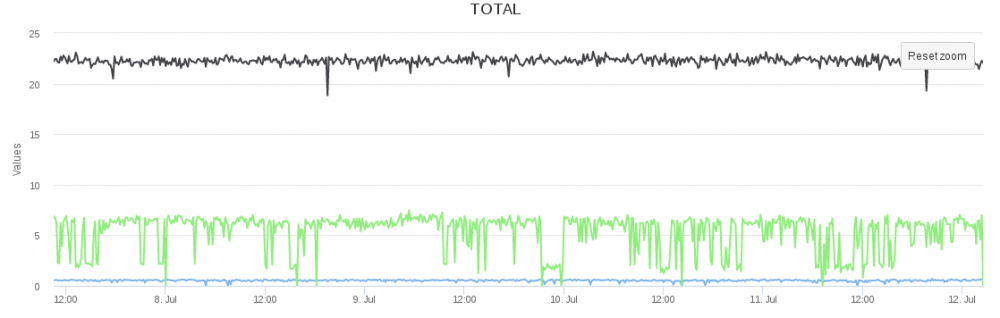
Inside the company, a system for monitoring site performance on competitor platforms has been written and deployed. Monitoring takes CPU / FS / MYSQL performance and average site loading speed. We monitor the main competitors and provide truly “Fastest” php hosting.
Web servers use the latest version of CloudLinux, limiting client resources by using LVE technology. The very essence of the restrictions is not to force a client to switch to VPS, but to protect customers from a significant increase in resource consumption of neighboring sites. Now, all sites have a limit of 2GB of RAM (actual memory consumption) and 500% CPU (five physical server cores).
To increase uptime, we have created a host reservation system. When a host serving hosting is unavailable, requests to sites are transferred to backup hardware, the files and the database on which are synchronized with the combat server. Thus, losing customer sites in the event of iron failures is almost impossible. The time of inaccessibility in case of iron damage to the battle server is at worst 20 minutes in the worst case. Switching does not happen automatically to exclude the possibility of losing files between synchronizations, the decision on switching is made by the service administrator.
All client site data is backed up daily to backup servers. Convenient tools for restoring sites and databases from the created copies are available in the control panel. Also, without leaving the control panel, you can set up backup to any remote FTP server.
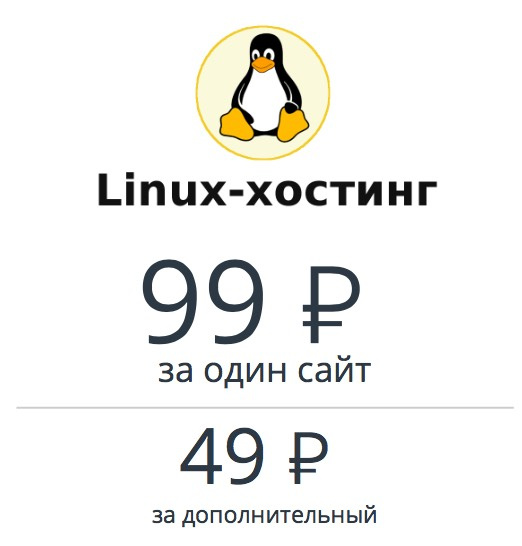
In the updated Linux – hosting only one tariff - 99 rubles per month for the first site and 49 rubles per month for each additional. We have already included the maximum possible discount for the equipment used in the monthly fee.
The customer can purchase exactly as many sites as needed, without overpaying for the excess.
The tariff includes:
Additional sites, disk space and IP addresses can be added at any time without problems from the control panel.
Key features:
Available payment methods:
For the test, a real Joomla site with content was used. Tested resistance to 200 requests per second at a time. You can see the distribution of response time below ( Yandex.Tank ):

The response time of the site steadily holds between 20 ms and 30 ms, the site does not become inaccessible.
We hope that hosting a new generation of Infobox will allow your website to work faster and you will earn more.
If you are engaged in the development of websites - welcome to our affiliate program - earn 40% of each payment for hosting your customers. At the same time, customers pay at the same market prices with no extra charges or overpayments.
We are waiting for your feedback at partners@infobox.ru .
Successes!
- redesigned and simplified hosting architecture, reducing delays in the work of sites
- used the latest servers with high-frequency processors up to 3.7 GHz and the fastest SAS SSDs 12Gbit / s
- has deployed a completely new hosting control panel based on Plesk technology
- introduced a process of continuous monitoring of competing solutions to provide services of constantly better quality.
In this article:
')
- We’ll take a deeper look at what has changed (almost everything): architecture, hardware, software optimizations, fault tolerance, a new panel, a new single rate for 99 rubles.
- Let us show by example how to deploy the site (hidden in the spoiler for those who are interested)
- we will shoot Yandex.Tank on a real site on a hosting as load testing.
New hosting architecture
Over the long years of hosting more than 300,000 clients, we have tried several different architectures:
- Web servers with shared databases (1 database server for multiple web servers)
- Cluster solution (network storages, web nodes processing requests and balancers before them)
Both schemes add overhead when processing HTTP requests to sites. Network latency is particularly affecting performance, leading to slower client sites.
In the new hosting client sites and the database are located on the same physical server without adding network overhead. Scaling is done by adding physical hosts, but at the same time each hosted client site is guaranteed to be located on a single server completely, which ensures the highest possible speed.
Performance
12GB / s SSD
On the host servers, we use enterprise-level SSDs with a bandwidth of 12Gb / s, which allows us to process requests to client sites even faster than on conventional 6Gb / s SSDs. Especially this acceleration is felt when working with databases.
According to our tests, random recording on these disks is up to 2x faster than 6Gb / s SSD and hundreds of times faster than regular HDDs.
3.4 GHz high frequency processors (Turbo Boost up to 3.7 GHz)
The processor will no longer be a narrow neck for your site - the high frequency of cores significantly speeds up the execution of scripts and database queries.
Work with php redis sessions without blocking
We rewrote the phpredis module and now we provide all customers with the ability to work safely with sessions without blocking, redis is available on all tariffs at no extra charge.
Continuous performance comparison with competitors
Inside the company, a system for monitoring site performance on competitor platforms has been written and deployed. Monitoring takes CPU / FS / MYSQL performance and average site loading speed. We monitor the main competitors and provide truly “Fastest” php hosting.
Isolation from other users
Web servers use the latest version of CloudLinux, limiting client resources by using LVE technology. The very essence of the restrictions is not to force a client to switch to VPS, but to protect customers from a significant increase in resource consumption of neighboring sites. Now, all sites have a limit of 2GB of RAM (actual memory consumption) and 500% CPU (five physical server cores).
Reliability
Disaster recovery
To increase uptime, we have created a host reservation system. When a host serving hosting is unavailable, requests to sites are transferred to backup hardware, the files and the database on which are synchronized with the combat server. Thus, losing customer sites in the event of iron failures is almost impossible. The time of inaccessibility in case of iron damage to the battle server is at worst 20 minutes in the worst case. Switching does not happen automatically to exclude the possibility of losing files between synchronizations, the decision on switching is made by the service administrator.
Backup
All client site data is backed up daily to backup servers. Convenient tools for restoring sites and databases from the created copies are available in the control panel. Also, without leaving the control panel, you can set up backup to any remote FTP server.
Opportunities
In the updated Linux – hosting only one tariff - 99 rubles per month for the first site and 49 rubles per month for each additional. We have already included the maximum possible discount for the equipment used in the monthly fee.
The customer can purchase exactly as many sites as needed, without overpaying for the excess.
The tariff includes:
- 1 site / 1 DB / FTP access
- 5 GB of disk space on SSD 12GB / s
- Auto installer 200+ CMS
- Free SSL certificate (Lets Encrypt of course)
- Backup at no extra charge.
- 24-hour support 24x7x365
Additional sites, disk space and IP addresses can be added at any time without problems from the control panel.
Key features:
- New modern service control panel CCPv2, rewritten in javascript, which allows you to work with the service without reading the documentation. In the future, other Infobox services will be added to this panel.

- Full Plesk inside without additional royalties with the usual control panel

- Ability to select server operation mode: apache + fastcgi, nginx + php-fpm, apache + fpm, the ability to return statics via nginx

- Latest stable versions of php, perl and python
- Php accelerator
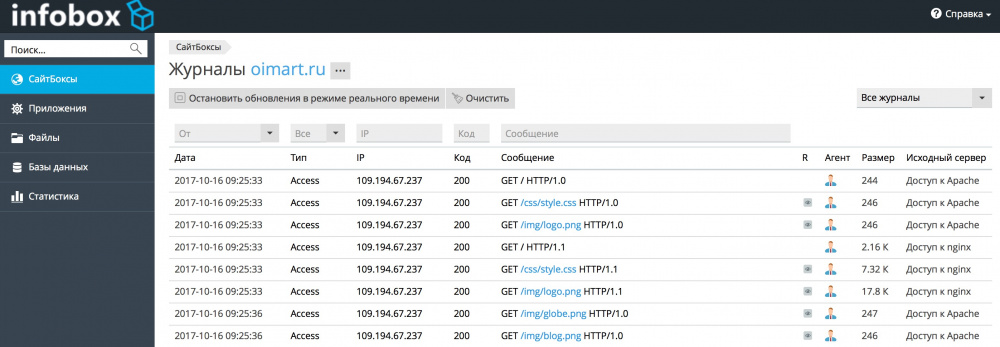
- The ability to view logs in real time
- SSH and FTP access to your files
- File manager with visual code editor
- Installation of CMS in one click (all popular and not very engines)
- Free certificate for any domain (Let`s-Encrypt)

- HTTP / 2.0 support
- Store innodb database tables in Barracuda format
- IPv6 support
- Ability to deploy from Git

Available payment methods:
- on bank account
- card
- Yandex money
- Webmoney
- QIWI Wallet
Overview of the order process and payment
By clicking on the "Order" button , the user enters a new order form, which we have tried to make as simple as possible for quick registration:
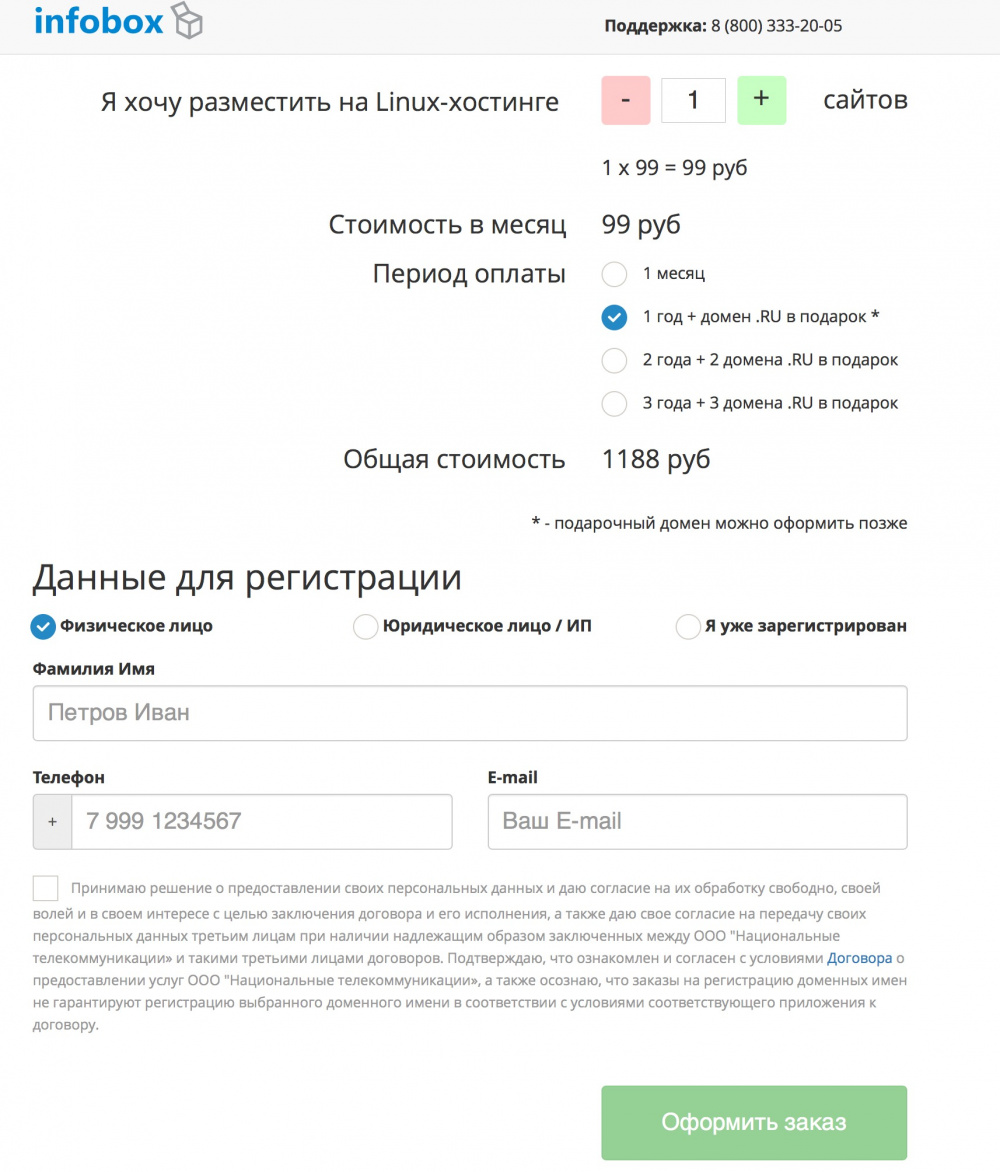
Specify the required number of sites, the discount is applied automatically.

When choosing a payment for the year, we give the domain in the zone RU. You pay for more years - you get more domains for free.
When you enter a surname and name, the form prompts popular, which allows you to speed up the input.
After filling in the data and setting a tick of consent with the processing of PD and the contract, click "Checkout".

You will receive an email with access to the control panel and an invoice for payment.
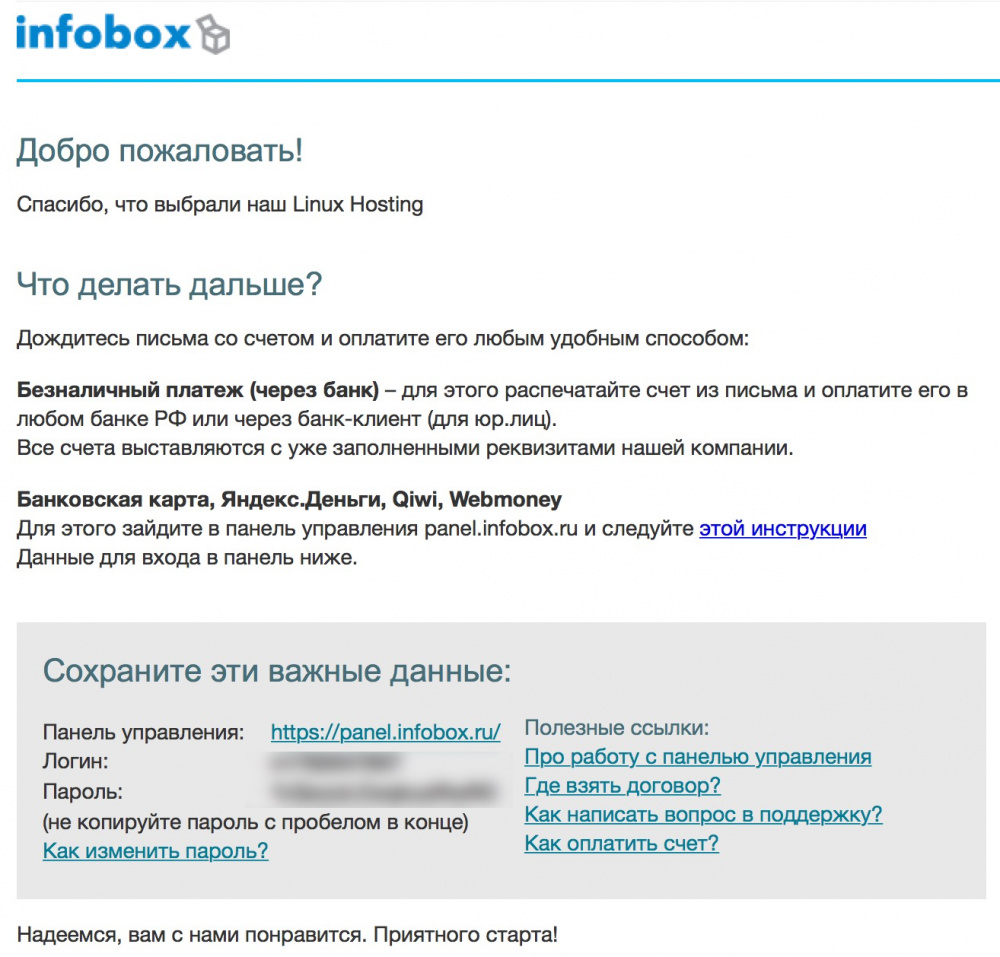
Log into the control panel https://panel.infobox.ru with the access data received in the letter.
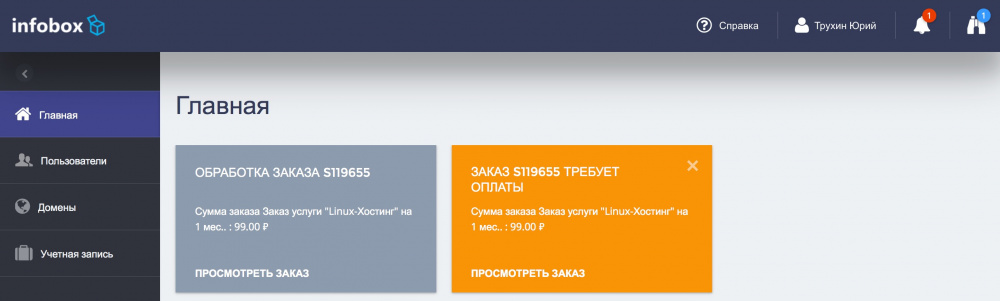
A large orange rectangle “Order requires payment” reminds us that an order made would be good to pay. Click on it.

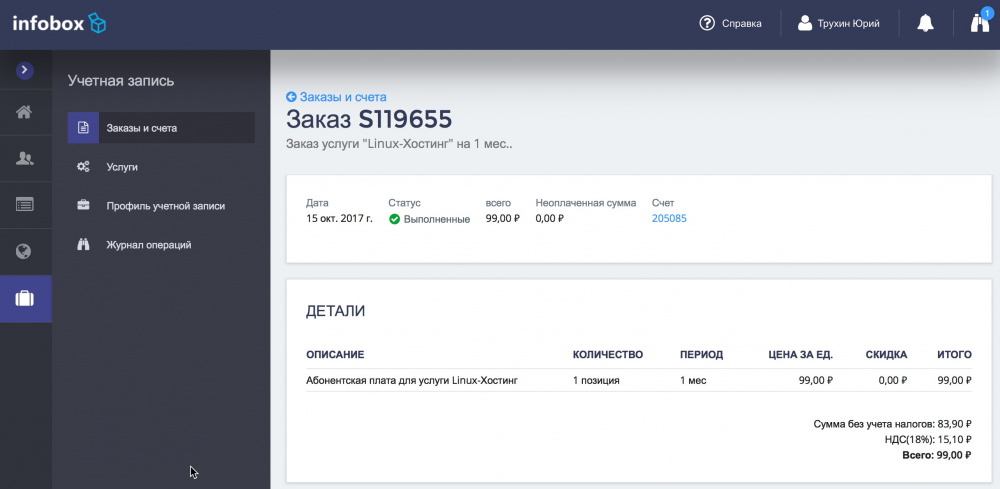
Now click "Pay Order".

Choose the appropriate method and click "Pay".
After entering the card data and confirmation of payment is made and the service becomes active.
You can go to the main page by clicking on the "house" in the upper left corner of the control panel.
Order process
By clicking on the "Order" button , the user enters a new order form, which we have tried to make as simple as possible for quick registration:
Specify the required number of sites, the discount is applied automatically.
When choosing a payment for the year, we give the domain in the zone RU. You pay for more years - you get more domains for free.
When you enter a surname and name, the form prompts popular, which allows you to speed up the input.
After filling in the data and setting a tick of consent with the processing of PD and the contract, click "Checkout".
You will receive an email with access to the control panel and an invoice for payment.
Hosting Payment
Log into the control panel https://panel.infobox.ru with the access data received in the letter.
A large orange rectangle “Order requires payment” reminds us that an order made would be good to pay. Click on it.
Now click "Pay Order".
Choose the appropriate method and click "Pay".
After entering the card data and confirmation of payment is made and the service becomes active.
You can go to the main page by clicking on the "house" in the upper left corner of the control panel.
How to deploy a website
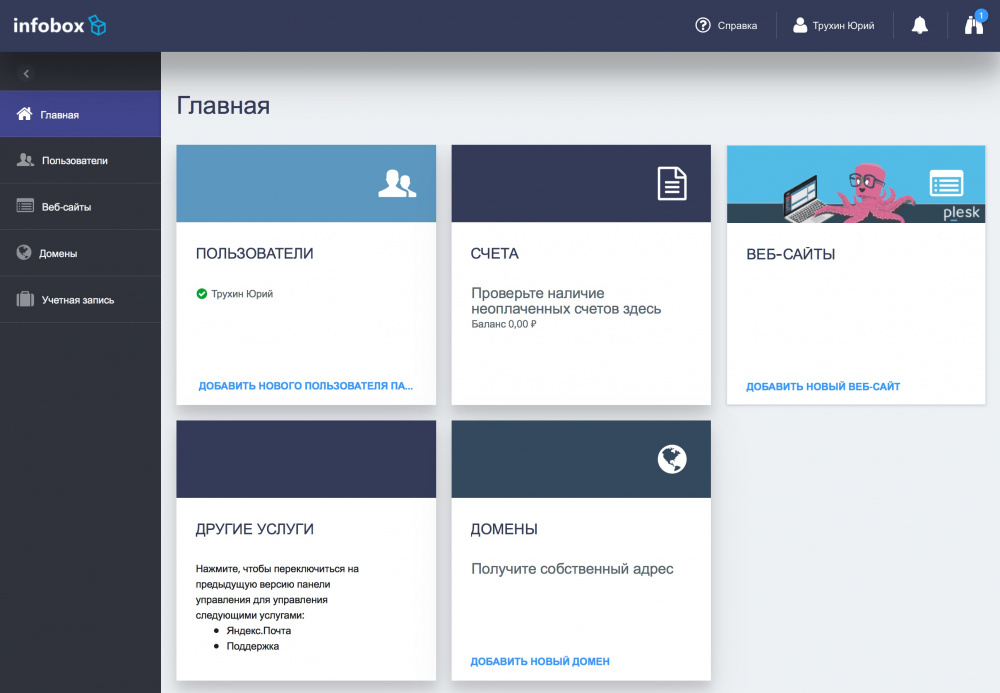
Log into the control panel with the data received by mail after registration. Each connected service is displayed in a separate tile + separate tiles are rendered for the most important operations: user management, payment. It is also possible to switch to the classic Infobox control panel using the “Other Services” tile (which allows you to make the transition to a new panel gradually). Using a new control panel usually does not require prior training. Want to add a user - click on the appropriate tile and add. If you want to replenish the balance, click on "Accounts" and "Deposit".
The “Websites” section is our new hosting of a new generation. Click “Add New Website” to host the website.
If you need to add resources to the service, you can do this by clicking "Add more resources".

Then click "OK" and "Next."

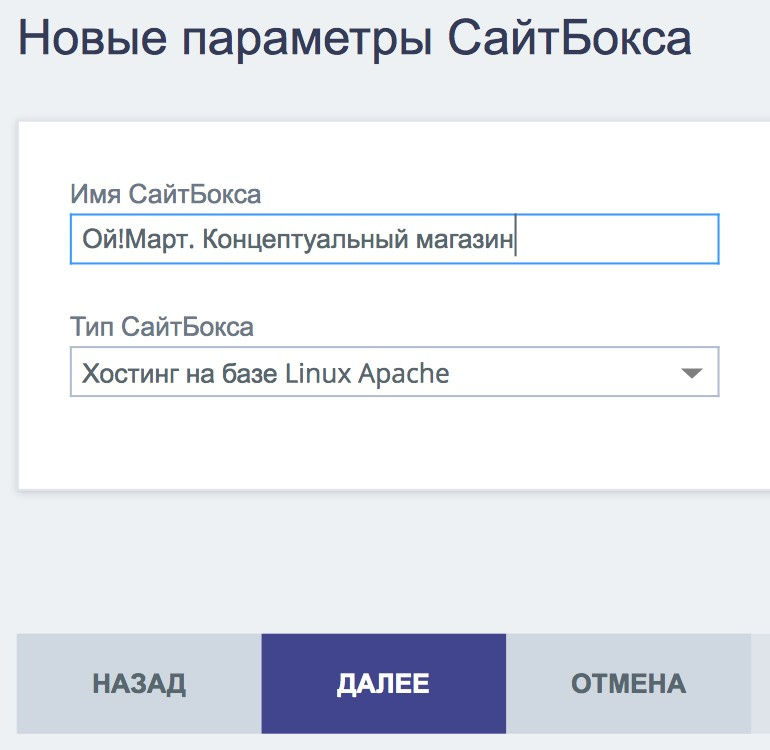
Enter the site name and click "Next".
At this step, you can transfer or register a new domain. In our example, we simply delegate the existing domain to the Infobox NS – servers.

The site has been successfully added.
To view the NS servers that you need to specify in the domain settings at the registrar, click "Domains". Then click on the added domain.
As we see, you need to register the following NS with the registrar:
In case you ordered a domain from Infobox - NS are registered automatically.
After updating NS – servers (it may take several hours), the site will open with a domain name with a default page.

If there are any questions in the process or you need help, on the main page of the control panel, click “Other Services” -> “Support” -> “Requests”.
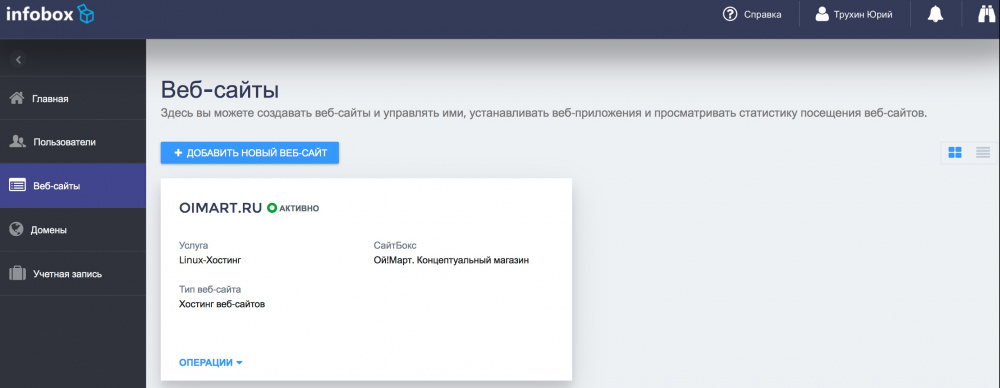
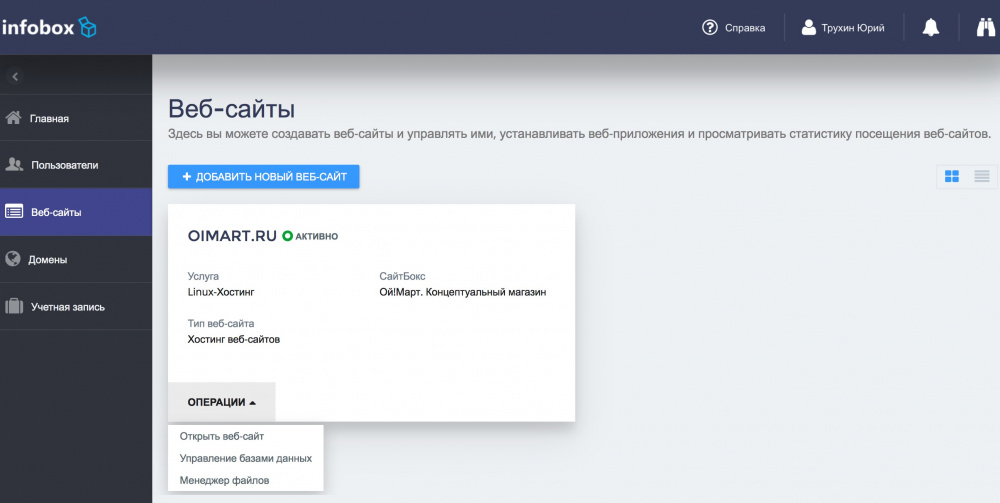
After adding a site and delegating / registering / transferring a domain, it appears in the “Websites” section. When you click on the site tile itself, a simplified hosting management interface is available to you. The “Operations” section on the tile is something that can be done quickly right from the tile.
Our hosting has 2 interfaces: simplified for quick operations:


Simplified interface - in fact, links to the most frequently used operations in Plesk.
A full Plesk management interface is also available in the “Other Tools” section.
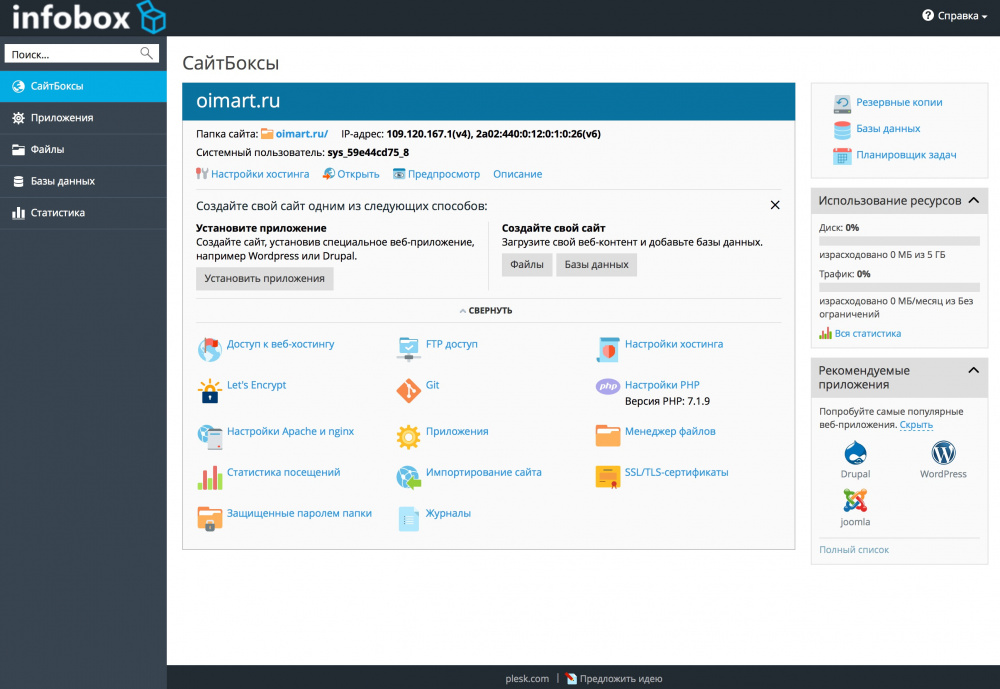
Thus, if you have ever used Plesk - you already know how to work with our new hosting.
Let's add a database for our site. To do this, click "Databases" -> "Add Database".
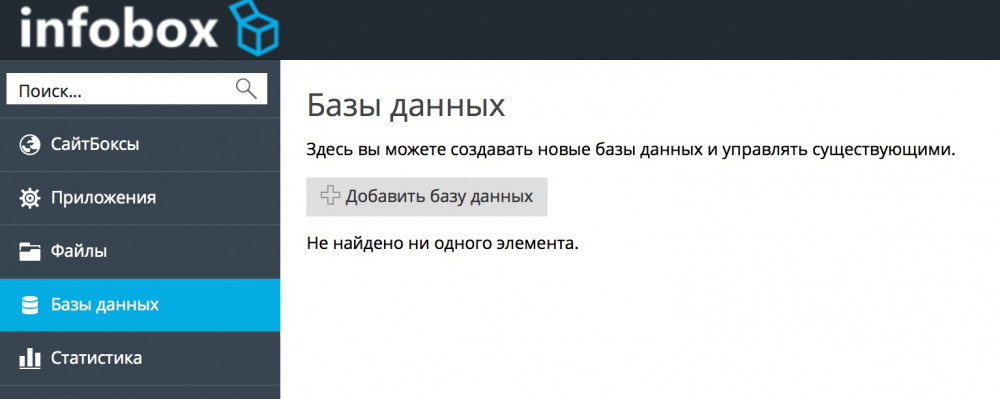
Specify the parameters of the database and click "OK".

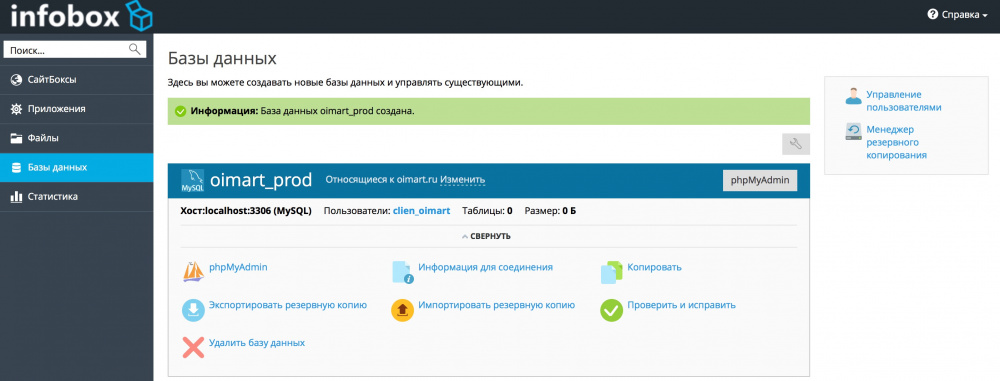
Database successfully created.
The service includes free site migration. If you do not want to transfer the site yourself - our specialists will do it. Just write to us in the section “Other services” -> “Support” -> “Requests” and we will transfer your website at a convenient time for you.
In fact, the transfer consists of 3 steps: transferring the site files, transferring the database and setting the configuration for the site. After that you can switch DNS.
The site files are transferred from the “Site Import” section on the main page of the control panel.

The database is loaded using the backup import or in the familiar PHPMyAdmin interface.

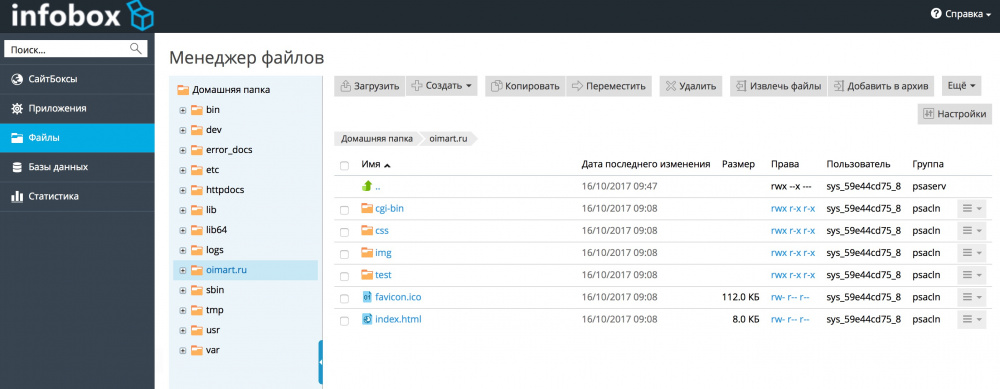
It is convenient to change the site configuration from the file manager editor:

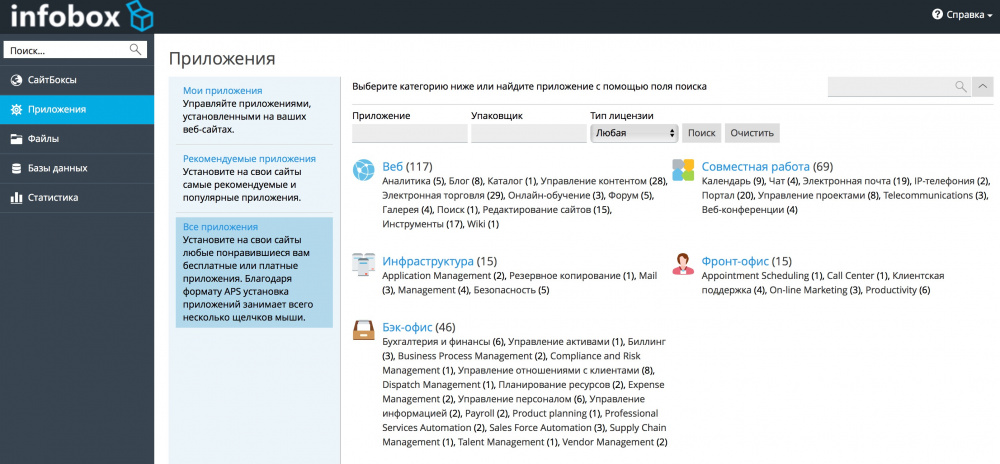
Go to the "Applications", select the desired and click "Install". If necessary, you can select a specific version of the product to install.

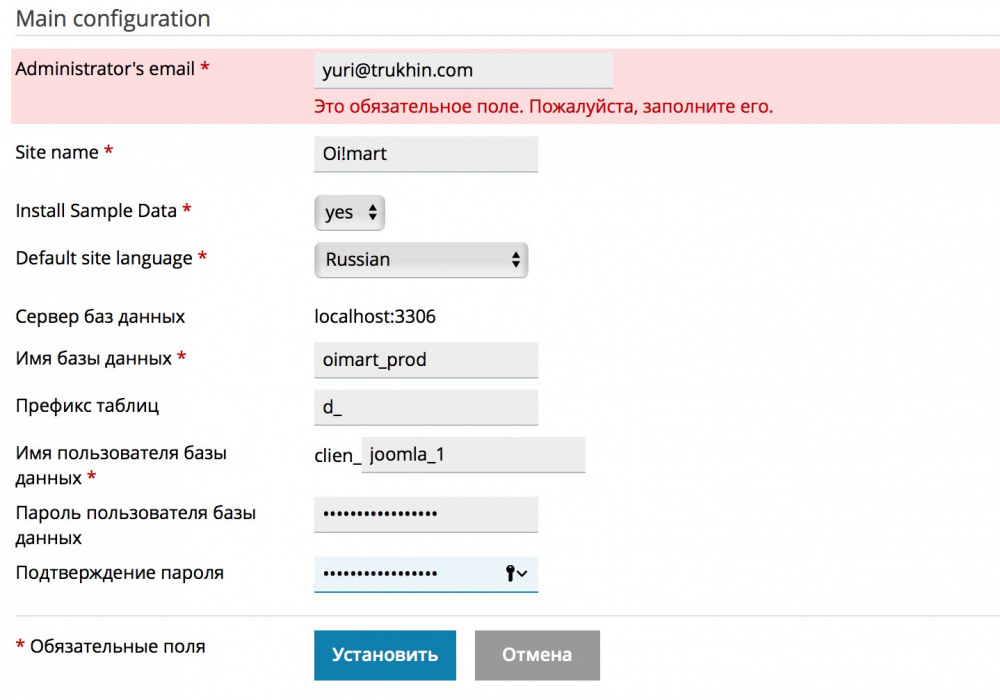
Specify the parameters of the CMS installation and click "Install".
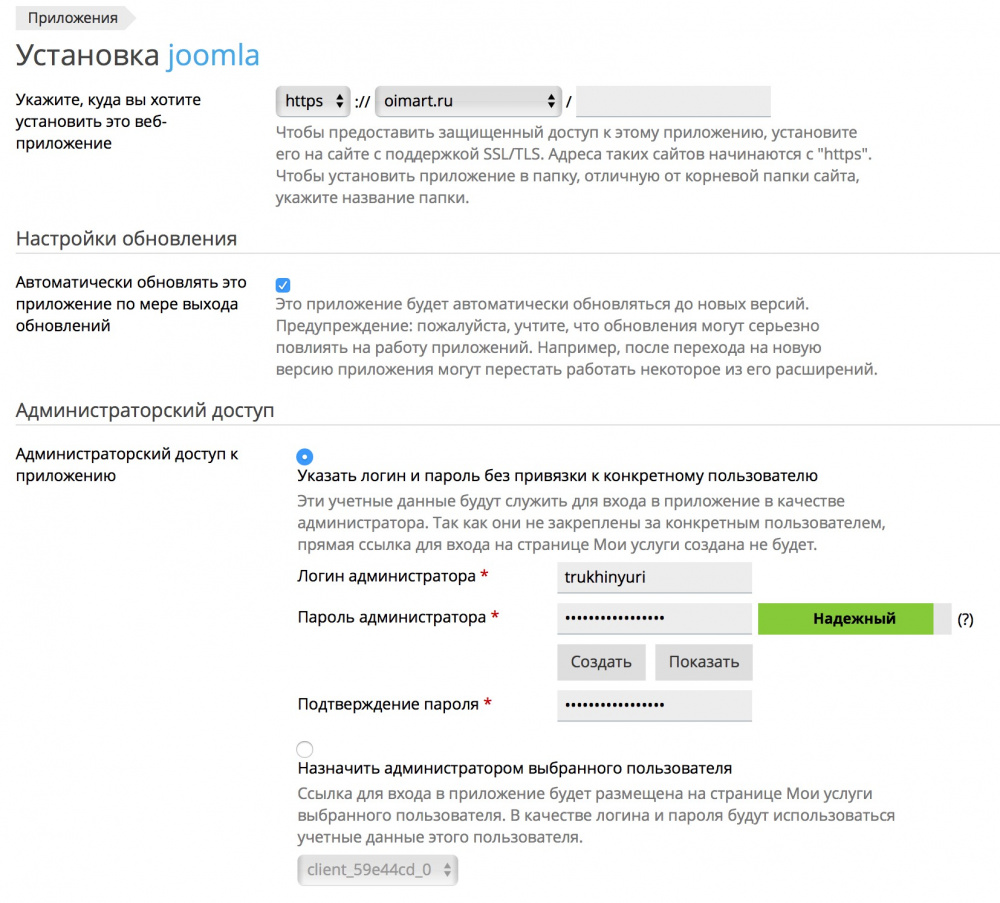
CMS successfully installed.


How to deploy a website
Log into the control panel with the data received by mail after registration. Each connected service is displayed in a separate tile + separate tiles are rendered for the most important operations: user management, payment. It is also possible to switch to the classic Infobox control panel using the “Other Services” tile (which allows you to make the transition to a new panel gradually). Using a new control panel usually does not require prior training. Want to add a user - click on the appropriate tile and add. If you want to replenish the balance, click on "Accounts" and "Deposit".
The “Websites” section is our new hosting of a new generation. Click “Add New Website” to host the website.
If you need to add resources to the service, you can do this by clicking "Add more resources".
Then click "OK" and "Next."
Enter the site name and click "Next".
At this step, you can transfer or register a new domain. In our example, we simply delegate the existing domain to the Infobox NS – servers.
The site has been successfully added.
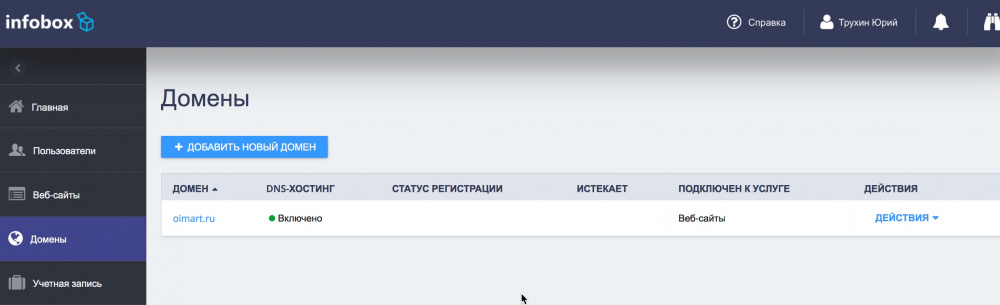
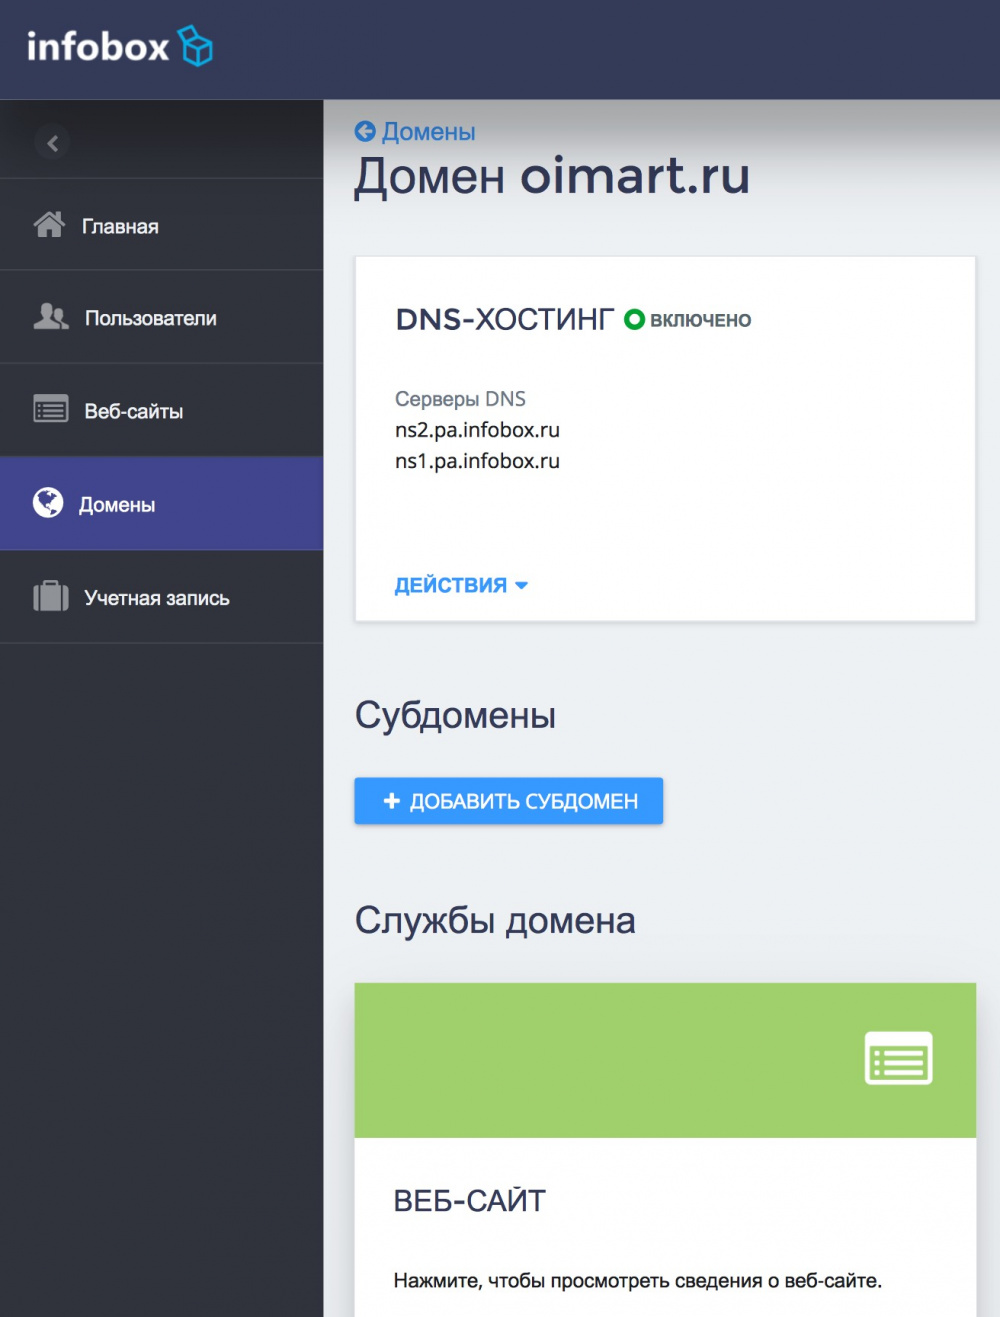
To view the NS servers that you need to specify in the domain settings at the registrar, click "Domains". Then click on the added domain.
As we see, you need to register the following NS with the registrar:
- ns2.pa.infobox.ru
- ns1.pa.infobox.ru
In case you ordered a domain from Infobox - NS are registered automatically.
After updating NS – servers (it may take several hours), the site will open with a domain name with a default page.
If there are any questions in the process or you need help, on the main page of the control panel, click “Other Services” -> “Support” -> “Requests”.
After adding a site and delegating / registering / transferring a domain, it appears in the “Websites” section. When you click on the site tile itself, a simplified hosting management interface is available to you. The “Operations” section on the tile is something that can be done quickly right from the tile.
Hosting Management: Simplified Interface and Plesk
Our hosting has 2 interfaces: simplified for quick operations:
Simplified interface - in fact, links to the most frequently used operations in Plesk.
A full Plesk management interface is also available in the “Other Tools” section.
Thus, if you have ever used Plesk - you already know how to work with our new hosting.
Let's add a database for our site. To do this, click "Databases" -> "Add Database".
Specify the parameters of the database and click "OK".
Database successfully created.
Transfer existing site
The service includes free site migration. If you do not want to transfer the site yourself - our specialists will do it. Just write to us in the section “Other services” -> “Support” -> “Requests” and we will transfer your website at a convenient time for you.
In fact, the transfer consists of 3 steps: transferring the site files, transferring the database and setting the configuration for the site. After that you can switch DNS.
The site files are transferred from the “Site Import” section on the main page of the control panel.
The database is loaded using the backup import or in the familiar PHPMyAdmin interface.
It is convenient to change the site configuration from the file manager editor:
Deploy new site
Go to the "Applications", select the desired and click "Install". If necessary, you can select a specific version of the product to install.
Specify the parameters of the CMS installation and click "Install".
CMS successfully installed.
Stress Testing
For the test, a real Joomla site with content was used. Tested resistance to 200 requests per second at a time. You can see the distribution of response time below ( Yandex.Tank ):
The response time of the site steadily holds between 20 ms and 30 ms, the site does not become inaccessible.
Conclusion
We hope that hosting a new generation of Infobox will allow your website to work faster and you will earn more.
If you are engaged in the development of websites - welcome to our affiliate program - earn 40% of each payment for hosting your customers. At the same time, customers pay at the same market prices with no extra charges or overpayments.
We are waiting for your feedback at partners@infobox.ru .
Successes!
Source: https://habr.com/ru/post/342024/
All Articles