Create your own blockchain on Ethereum
How to create private blockchain Ethereum from scratch?
Ethereum is a decentralized platform on which smart contracts operate: applications that run in a strictly programmed manner, without the possibility of downtime, censorship, fraud, or the intervention of third parties. In this article, I will guide you through all the steps necessary to create a fully functional private Ethereum blockchain within your local network.
The instruction includes the following:
- Creating a private Ethereum blockchain with geth .
- Creating a MetaMask wallet to work with a private blockchain.
- Transfer funds between multiple accounts.
- Creating, deploying and calling a smart contract in a private blockchain using remix .
- Creating a browser of Ethereum blocks on top of a private blockchain.
Install geth
Go Ethereum (or geth ) is one of the three original implementations of the Ethereum protocol (along with C ++ and Python). It is written in Go, fully open and licensed under the GNU LGPL v3. Go Ethereum can be downloaded either as a separate client that works in almost any operating system, or as a library for embedding into Go, Android or iOS projects.
')
To install geth on Mac OS X, we used homebrew . Homebrew installs everything that Apple doesn’t take care of. This article assumes that you already have homebrew installed. If not, follow this instruction . After installing homebrew, the following commands install geth .
brew tap ethereum/ethereum
brew install ethereum
Installing geth on Ubuntu is pretty easy; just run the following apt-get commands.
sudo apt-get install software-properties-common
sudo add-apt-repository -y ppa:ethereum/ethereum
sudo apt-get update
sudo apt-get install ethereum
For Windows, the appropriate installer is here . In case of any difficulties, refer to the instructions .
Creating a miner account
First you need to create an account for mining Ethereum. So we will generate a pair of private and public keys with a password for protection. Do not lose your password, otherwise you will never be able to recover the keys. By default, keys are stored inside: <datadir> / keystore . Everything geth stores is stored inside the datadir (except for the PoW Ethash DAG). The location of the default directory depends on the OS. It is always better to change the default settings and set your own path for a private blockchain.
- Mac: ~ / Library / Ethereum
- Linux: ~ / .ethereum
- Windows:% APPDATA% \ Ethereum
Ethash DAG is stored in ~ / .ethash (Mac / Linux) or% APPDATA% \ Ethash (Windows), so all clients can use it.
The following command shows how to create an arbitrary account for the data directory. This command will give you your Ethereum address.
geth account new --datadir <path-to-data-directory>Example:
geth account new --datadir /path/to/data/dirCreating a primary block (genesis block)
Ethereum blockchains are distinguished from each other by primary blocks. Every blockchain starts with such a block, and everything else is built on top of it, where every next block refers to the previous one. In the Ethereum public blockchain, the primary block was created on July 20, 2015. For our own chain you need to create your own primary block. Initialization of the private blockchain with the specified primary block is performed by the following command:
geth -datadir <path-to-data-directory> init <path-to-genesis-block>Example:
geth -datadir /path/to/data/dir init /path/to/genesis.json- datadir : directory for databases and keystore.
- init : initial loading and initialization of a new primary block — with the corresponding json file.
Below is shown our primary block, which is used in a private blockchain - you need to save it under the name genesis.json and specify it in the above command.
{ "config": { "chainId": 15, "homesteadBlock": 0, "eip155Block": 0, "eip158Block": 0 }, "difficulty": "0x400", "gasLimit": "0x2100000", "alloc": { "7a69b359e86893efa3d9732e4c65ced51567edd0": { "balance": "0x1337000000000000000000" } } } - chainid : provides a way to make transactions in Ethereum without using ETC (Ethereum Classic) or the Morden test network. EIP 155 provides the following chainid values for different networks: the main network is Ethereum (1), the main network is Morden / Expanse (2), Ropsten (3), Rinkeby (4), the main network Rootstock (30), the test network Rootstock (31), Kovan (42), the main network is Ethereum Classic (61), the test network is Ethereum Classic (62), private chains geth (1337 by default). In our example, we specified an identifier of 15, which is not used by any of the existing circuits.
- homesteadBlock : a value of 0 indicates use of the Ethereum Homestead release. This is the second of the major releases of Ethereum - and recently, on October 16, 2017, Ethereum is stuck on the release of Byzantium .
- eip155Block : A value of 0 indicates that this block supports EIP (Ethereum improvement proposal, Ethereum improvement proposal) number 155. EIP offers describe the standards for the Ethereum platform, including key protocol specifications, client APIs and contract standards.
- eip158Block : a value of 0 indicates that this block supports EIP 158.
- difficulty : the value corresponds to the level of difficulty that is used to find a random nonce value for this block. This article explains in detail how the Ethereum complexity level is calculated.
- gasLimit : gas is an internal payment unit for conducting a transaction or contract in Ethereum. Each instruction that is sent to the Ethereum Virtual Machine (EVM) virtual machine costs a certain amount of gas to process a transaction or smart contract. If the transaction does not receive the required amount of gas, then it will not pass. When you make each transaction in Ethereum, you specify the gas limit - the maximum amount that all related operations for this transaction can use. The gasLimit parameter in the block determines the total limit of all transactions in the block.
- alloc : parameter to pre-allocate Ether from the primary unit to one or more accounts. In the above example of the primary unit, all the Ether is received on the account created from the very beginning.
Start mining
All is ready! Now you can start mining with geth using the following command. Here the networkid parameter distinguishes this network from Ethereum among others. All miners wishing to connect to this network must use the same networkid with the same primary block.
geth --mine --rpc --networkid <networkd-id> --datadir <path-to-data-directory>Example:
geth --mine --rpc --networkid 1999 --datadir /path/to/data/dir- networkid : the network identifier of this network is ethereum. Choose any value. For example, Olympic (0), Frontier (1), Morden (2), Ropsten (3).
- mine : includes mining.
- rpc : includes an HTTP-RPC server. Wallet applications can be connected via http to this mining site.
- rpcaddr : specifies the interface to listen on the HTTP-RPC server (default: “localhost”)
- rpcport : specifies the port to listen on the HTTP-RPC server (default: 8545)
- rpcapi : specifies the APIs available on the HTTP-RPC interface (default: “eth, net, web3”)
- rpccorsdomain : activates CORS, indicating a comma-separated list of third-party domains from which to accept requests (cross-origin). A useful option when using for the placement of smart contracts browser editors Solidity (Remix) or browser wallets. For example, such a parameter will allow receiving CORS from any domain.
--rpccorsdomain "*" - nodiscover : disables the peer search engine. Your site will not be able to find any other nodes on the network. If you intend to use the blockchain on the local network together with others, do not use this parameter.
- console : with this command we can launch a mining site with an interactive JavaScript environment. In the next section we will take a closer look at this topic.
geth --mine --rpc --networkid 1999 --datadir /path/to/data/dir console
We connect the console Geth
You can either start mining as a console , or launch console separately - and connect it to the mining node with the attach command. I’ll show you how to do this and check that you entered the parameters in the same order.
geth --datadir <path-to-data-directory> attach ipc:<path-to-data-directory>/geth.ipcExample:
geth --datadir /path/to/data/dir attach ipc:/path/to/data/dir /geth.ipcThe console connects to the host IPC . IPC (interprocess communication) runs on the local computer. In this case, geth creates the Geth pipeline (which is represented by the <path-to-data-directory> /geth.ipc file) in the file system of the local computer — and the console connects to this node via IPC.
View all accounts
Once you are connected to the geth console, you can try running the following command to display all available accounts.
> eth.accounts
["0x7a69b359e86893efa3d9732e4c65ced51567edd0"]
View account balance
The following command allows you to view the balance of the specified account from the geth console.
> eth.getBalance("0x7a69b359e86893efa3d9732e4c65ced51567edd0")
1.295e+21
Connecting a MetaMask Ethereum wallet
MetaMask is an Ethereum wallet that works as a Chrome extension. He injects Ethereum Web3 API into every JavaScript context on the site, so all these applications are able to get information from the blockchain. MetaMask also allows you to create and manage your own identities, so that when an application wants to complete a transaction and write data to the blockchain, the user has a secure interface to view the transaction before approving or rejecting it.
To connect MetaMask to the Ethereum private blockchain, you need to select the correct host name and port. The Web3 API is the JavaScript programming interfaces for Ethereum implemented in web3.js. In order for the JavaScript application to communicate with the Ethereum node, MetaMask uses the web3.js library with a convenient interface for rpc methods. It exchanges rpc calls with the local host . The web3.js library works with any Ethereum node that has an rpc layer. You may have noticed above that when you start a mining node, you can pass the rpcapi parameter and specify which interfaces we want to use on this node. By default, if you do not specify anything, the interfaces eth, net, web3 will be used.

Transfer of the Ether
MetaMask will create an Ethereum account - the secret key and Ethereum address. Next, we will understand how to transfer the broadcast from the first account created at the very beginning to the MetaMask account from the geth console. To transfer account funds, you must use the secret key of this account to sign. To use it, you must first unlock it, as shown below.
> personal.unlockAccount( "0x7a69b359e86893efa3d9732e4c65ced51567edd0","password")personal is the control program interfaces in geth . In addition to personal , geth also provides the following control APIs: admin , debug , miner and txpool . As soon as we unblock the account, we can define three variables in the console: for sender , receiver and amount , that is, the recipient, the sender and the amount of funds transferred. The sender value is the Ethereum address that we created at the beginning of this article, and the receiver value is the Ethereum address created in MetaMask.
> var sender = "0x7a69b359e86893efa3d9732e4c65ced51567edd0";
> var receiver = "0xA9f28458eE1170F285440990c196c1592D3a73f5"
> var amount = web3.toWei(1, "ether")
The next command will transfer the funds - it refers to the variables that we defined above.
> eth.sendTransaction({from:sender, to:receiver, value: amount})View account balance in MetaMask
When we have completed the transfer of funds, following the steps above, you can view your account balance in two ways. The first way is directly from the MetaMask plugin, as shown below.

Another way is through the geth console using the following command.
< eth.getBalance("0xA9f28458eE1170F285440990c196c1592D3a73f5")
1000000000000000000
Remix editor for Solidity
Solidity is the most popular programming language for writing Ethereum smart contracts. Remix is an IDE for Solidity with a built-in debugger and testing environment. The online remix editor can be found here . Remix connects to any Ethereum network. To connect to our local blockchain, make sure that you start the mining site with the following command, as shown below. We have already spoken about the
--rpccorsdomain "*" parameter. Instead of an asterisk (maximum openness), you can specify “https://remix.ethereum.org” as the value of this parameter.geth --mine --rpc --rpccorsdomain "*" --networkid <networkd-id> --datadir <path-to-data-directory>To connect remix to our closed network, you need to change the Environment on the Web3 Provider , this is done on the Run tab. With this change, remix will ask for Web3 Provider Endpoint - set the value to
http://localhost:8545 . Until you explicitly change the port, the default mining node starts on port 8545.
Creating a smart contract
Now everything is ready for writing the very first smart contract that we will launch on the Ethereum network. Copy the following code and paste it into the online remix editor. This is a very simple smart contract - I don’t even want to explain it line by line. In the next article we will look at the Solidity programming language in detail.
pragma solidity ^0.4.11; contract Hello { // a string variable string public greeting; // the function with the same name as the class is a constructor function Hello(string _greeting) { greeting = _greeting; } // change the greeting message function setGreeting(string _greeting) { greeting = _greeting; } // get the greeting message function greet() constant returns (string _greeting) { _greeting = greeting; } } If you did not change the default settings in remix , they are set to automatic compilation. If not, you need to compile the code.
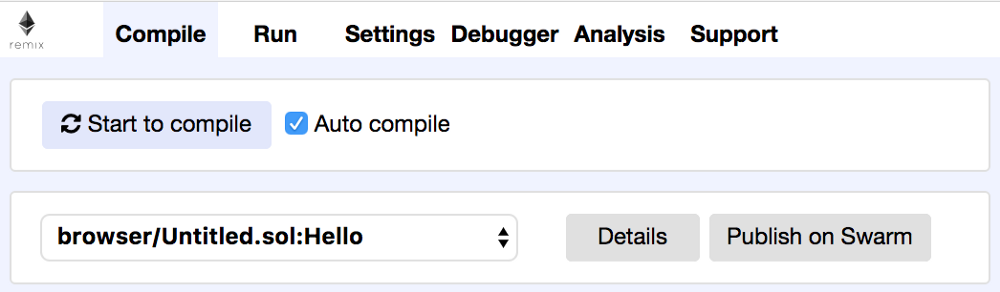
After compiling, when you click the Details button, you will see the calculated amount of gas needed to create this smart contract.
Introducing smart contract
Now we can inject a smart contract into our private blockchain. On the Run tab, make sure that you have the correct Ethereum account and the correct gas limit selected. Values of gas price and value can be specified as zero.
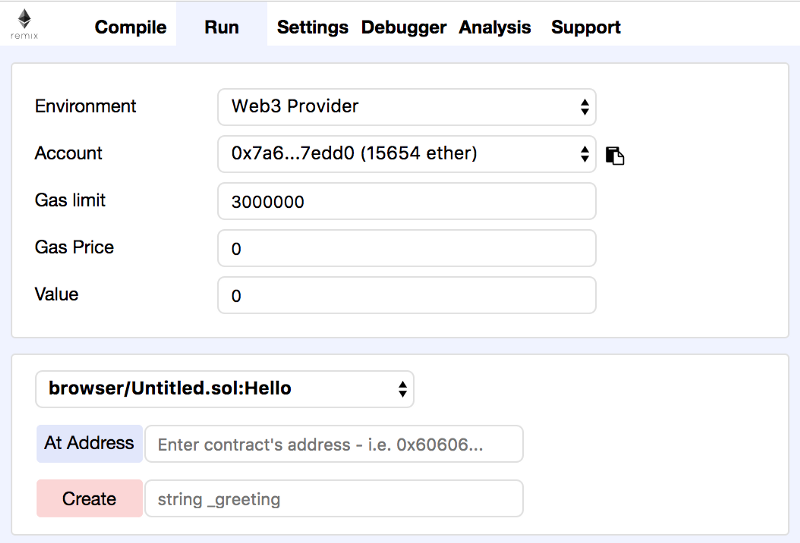
Here is the Ethereum transaction, signed with the account selected above to create a smart contract in the blockchain. To sign, you first need to unlock the account via the geth console.
> personal.unlockAccount( "0x7a69b359e86893efa3d9732e4c65ced51567edd0","password")Now you can click the Create button to create a smart contract. We have a constructor in it that accepts a string parameter, which is why remix shows the input field along with the Create button. You can enter some value here (in quotes, for example, “Hi”) - or simply leave it blank. The following message appears in the geth console when you create a smart contract. Also note that if the correct gas limit is not set, then such a command will result in an error.
INFO [10-19|07:31:08] Submitted contract creation fullhash=0xf5511bb9d088672ac0d3896b8590b9a3e25484300f02deecdd739c3a549ed33a contract=0x42b7E903Fb42e191a7D623cbb4b7b4330D329d78Calling a smart contract
After creating a smart contract, the remix interface will change a little - as shown below, on the Run tab.
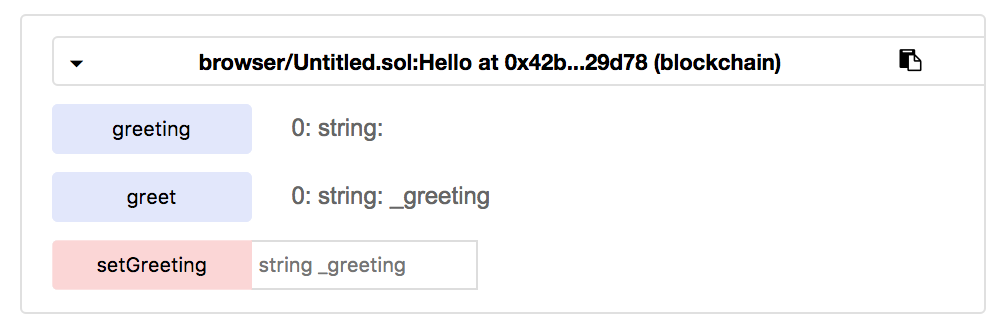
Here you can set a certain value for the setGreeting method - and click on it to call a smart contract. Again, you should make sure that the account is unblocked, because when you call a smart contract, we use Ethereum transactions and require the signature of the initiator. Having done the operation with setGreeting , you can call other methods.

Ethereum Block Explorer
You may be familiar with the etherscan service for scanning the Ethereum public blockchain. But it can not be sent to our local blockchain. Although Ethereum Block Explorer doesn’t even come close to the functionality of etherscan , it is quite suitable for studying what is happening in our local blockchain.
To install the program, first take the source from the next repository.
git clone https://github.com/carsenk/explorerThen run the installation command from the Ethereum Block Explorer directory.
npm installAfter the installation is complete, launch Ethereum Block Explorer with the following command - and access the web console via
http://localhost:8000 .npm start
Before connecting Ethereum Block Explorer to the local blockchain, be sure to start the mining site with the following command with the parameter
--rpccorsdomain "*" - we discussed its value earlier.geth --mine --rpc --rpccorsdomain "*" --networkid <networkd-id> --datadir <path-to-data-directory>Update : For a discussion of this article on Hacker News, see here . Feel free to join.
Summary
In this article, we discussed how to create a private Ethereum blockchain using geth . Then they set up a MetaMask wallet to work with this blockchain and transferred funds to an Ethereum account created in MetaMask. An online IDE remix was used to create, implement, and invoke a smart contract. Finally, we installed Ethereum Block Explorer to explore the private blockchain.
Source: https://habr.com/ru/post/341466/
All Articles