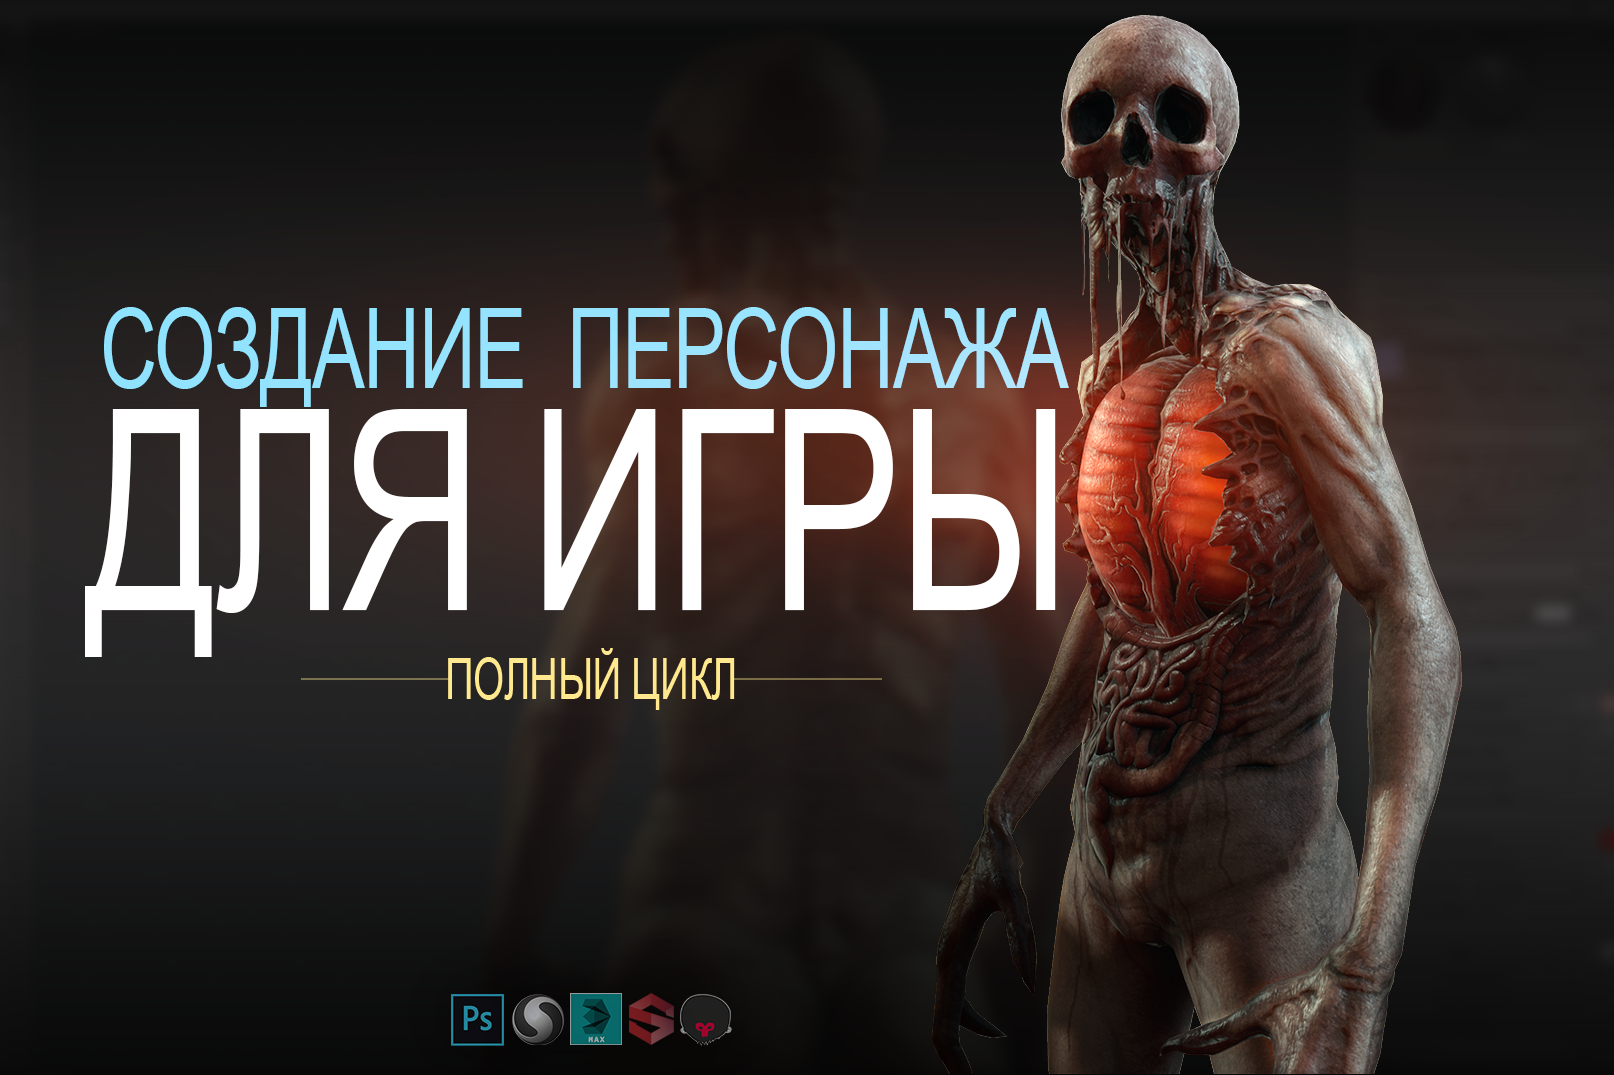
Full cycle of creating a character model for the game
The process of creating in-game character models from sketch to release.
Good day. My name is Ivan. Today I will share with you the details of game development, namely, I will tell you about the full cycle of character creation. So let's go!
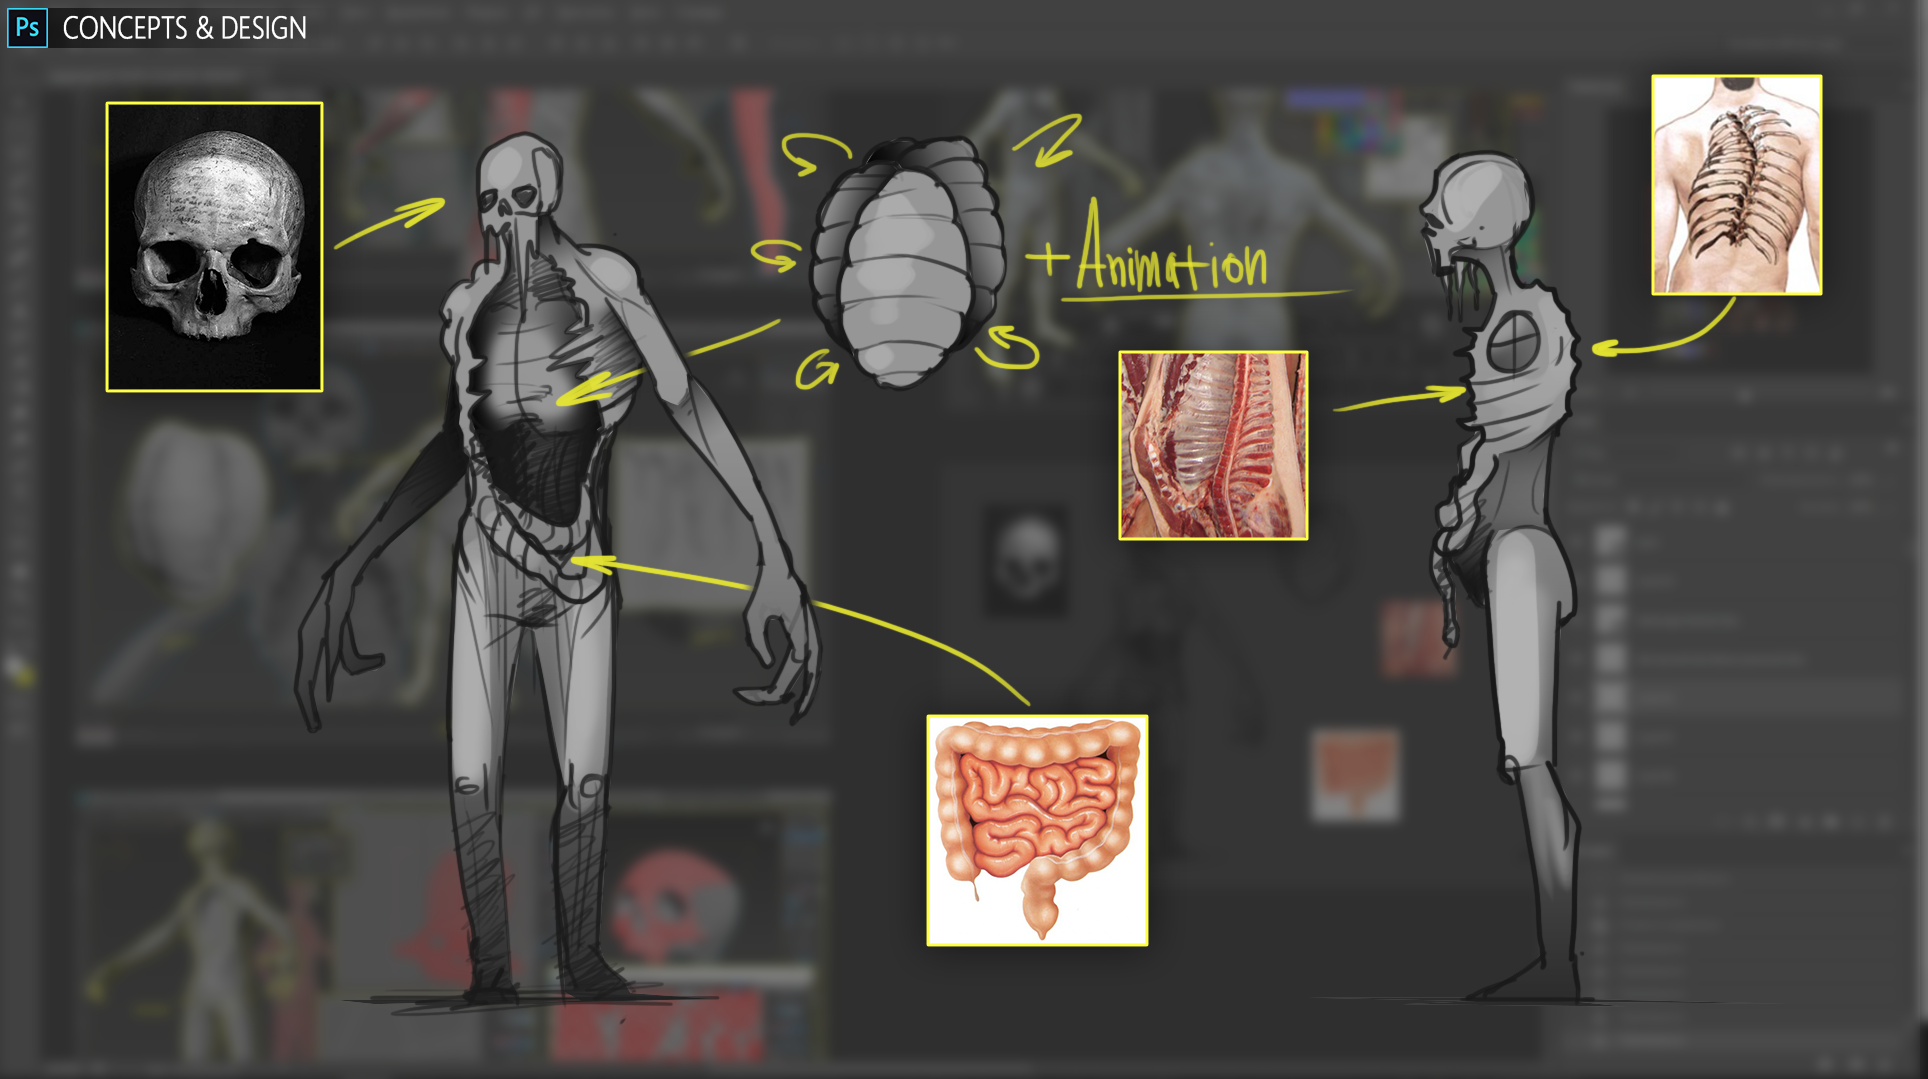
As in any other business, you should start with an idea that we need to express in concepts. This is an important stage, which will be the foundation for all further work. In fact, it is not so important what quality the sketches will be (yes, I mean myself) the main thing is to have them. Because a sketch is a plan, following which you will save a lot of time and nerves. Having a sketch, you will clearly represent the final result and the steps that are necessary for its implementation. As the saying goes, "A ship that does not know where to sail, no wind will be fair."
')
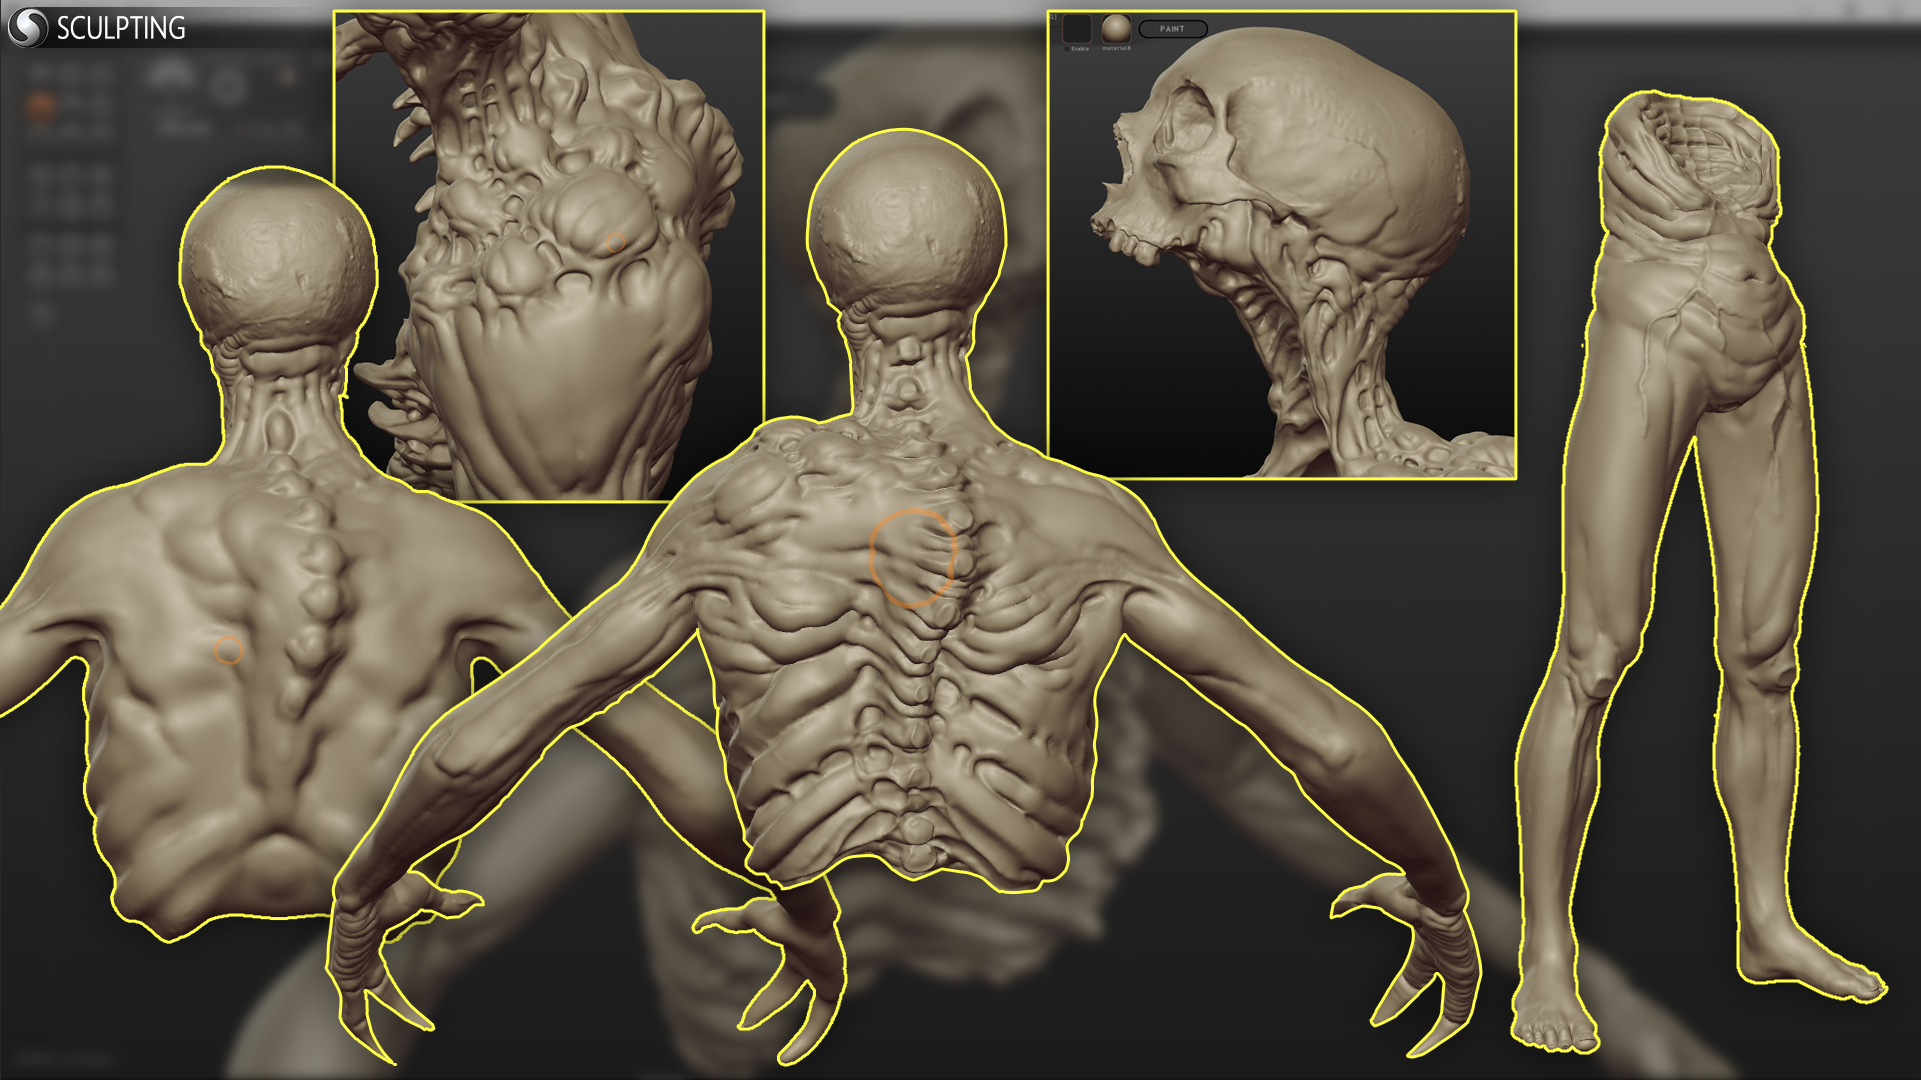
You will need to use all the available knowledge and skills to fashion your character, not sparing polygons. The main task is to create the most detailed model. Because, at the next stages, it will be problematic to introduce any detail. ZBrush or Sculptris is perfect for this task. If the model is not very complex, I prefer to use Sculptris, since it has a very ascetic interface and there is the possibility of creating a dynamic topology.
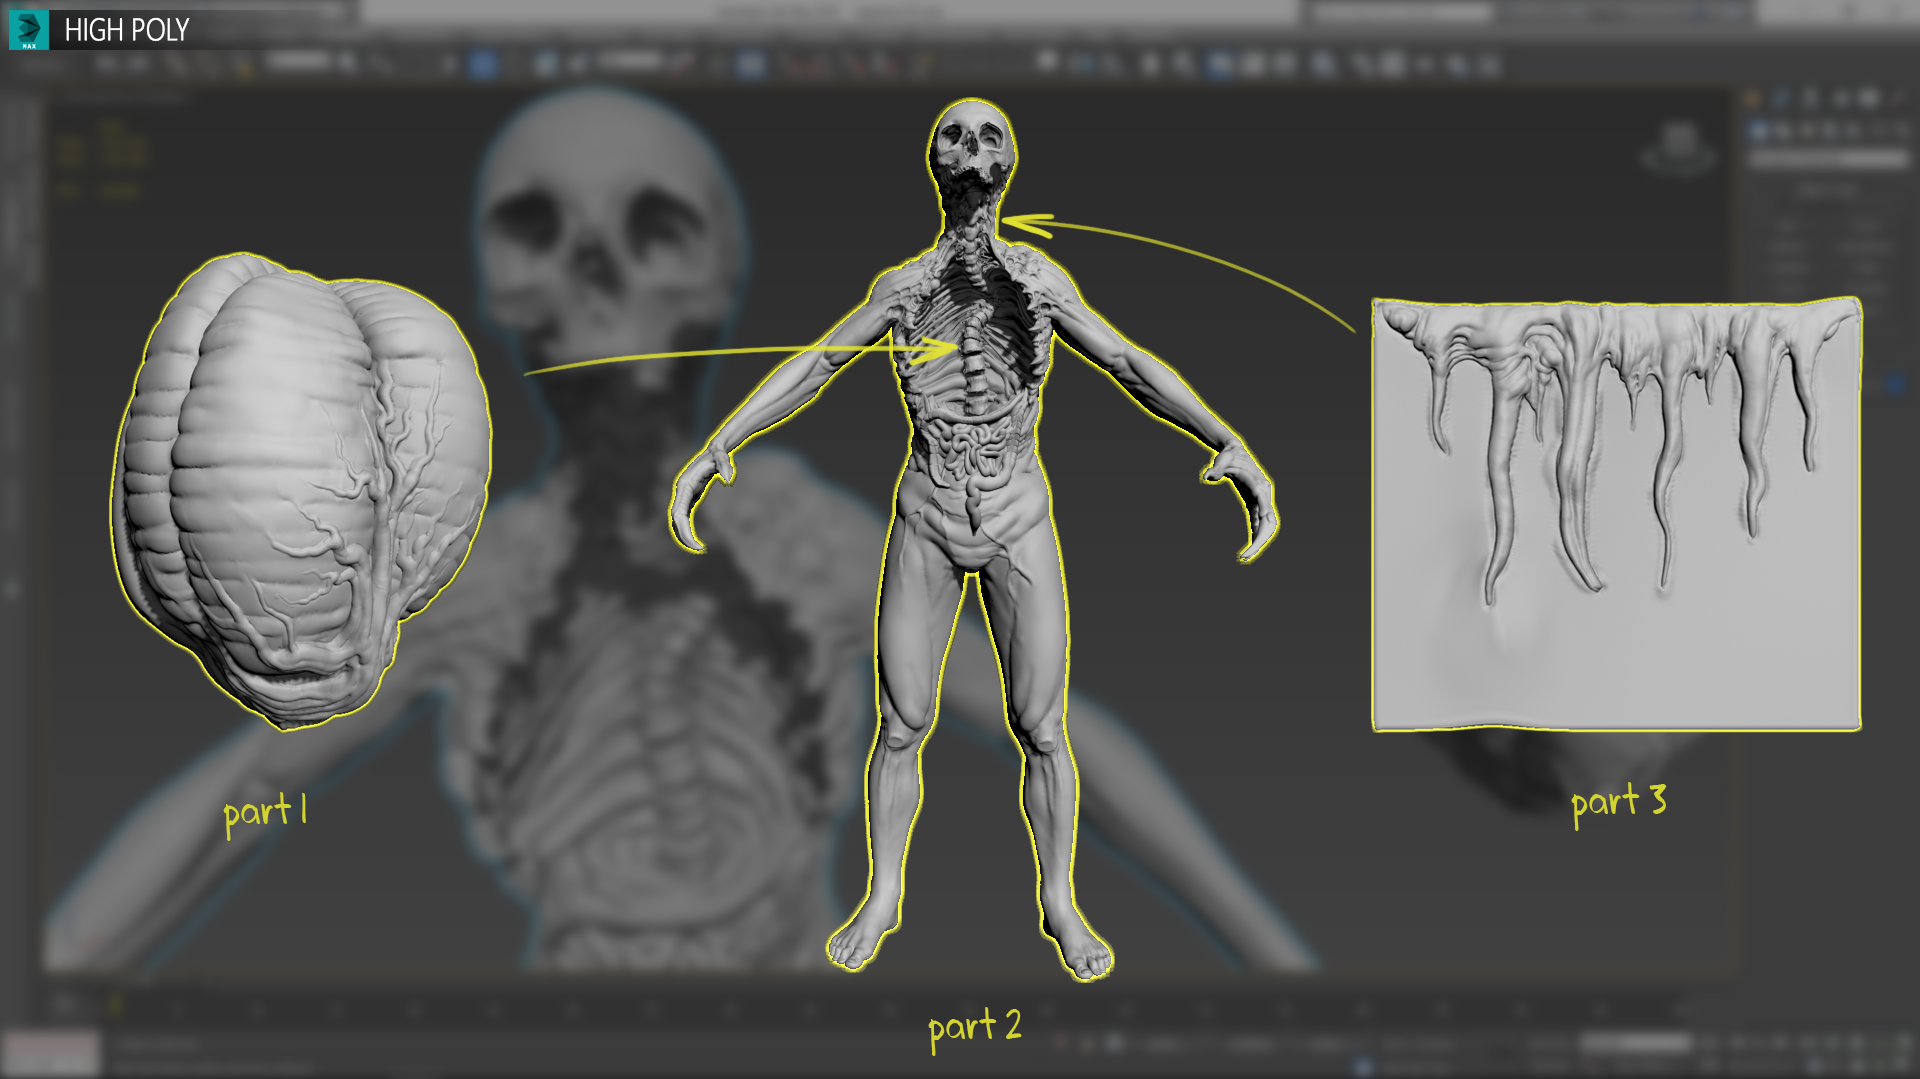
Having completed the work on the high poly model, you can safely proceed to its optimization, because in the form in which the model is located now, the use of the game is extremely unreasonable. There is hardly a daredevil who would dare to throw a model of 20 million polygons and with an absolutely chaotic grid. Therefore, we proceed to the process of retopology, the main essence of which is to reduce the number of polygons to the optimal and build the correct grid suitable for animation. The rotopology can be done both in third-party software and in 3D Max using the PolyDraw tool. Actually to this, and proceed. We try to build topology using “loops” (loop, from English - loop, round) in places of bends, this will facilitate further skinning and provide animations with a more natural look.


Next, we proceed to scan. We need to expand all the parts of the mesh so that the texture correctly fits on the model. If any part of the model needs more detail, then it can be allocated more space on the scan. When creating a sweep, you should try to hide the seams in less visible places, such as the inside of the arm, armpit, etc. To create a sweep use the standard set of tools 3D Max'a.

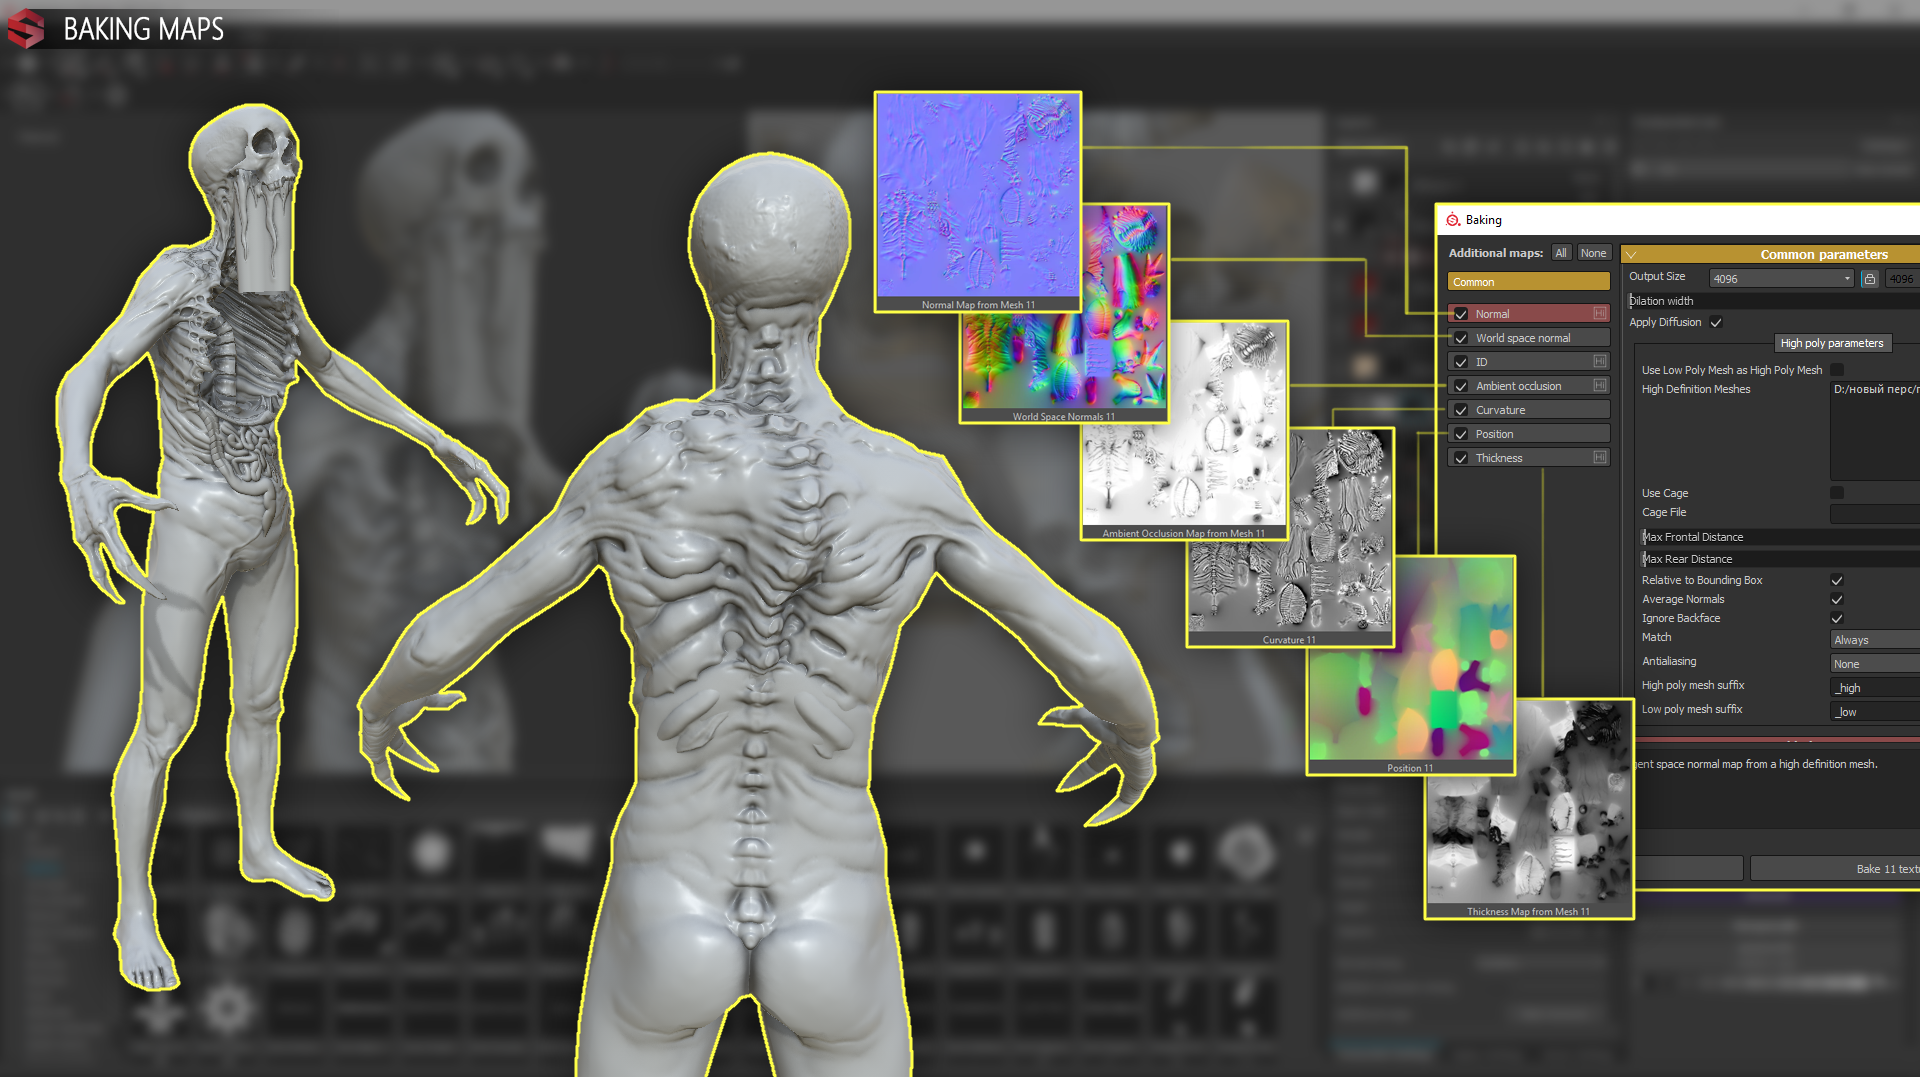
To transfer detail from high poly models to low poly models, texture maps are used, such as Normal Map, Ambient Occlusion and others. Fortunately, their creation is completely automatic. Substance Painter is perfect for baking cards. We export separately high poly and low poly models and import all of this into SP. Baking is done with a couple of mouse clicks; you don’t need to do anything manually. The maximum that may be required is to trim small stitches on maps in Photoshop, but most often this is not required.
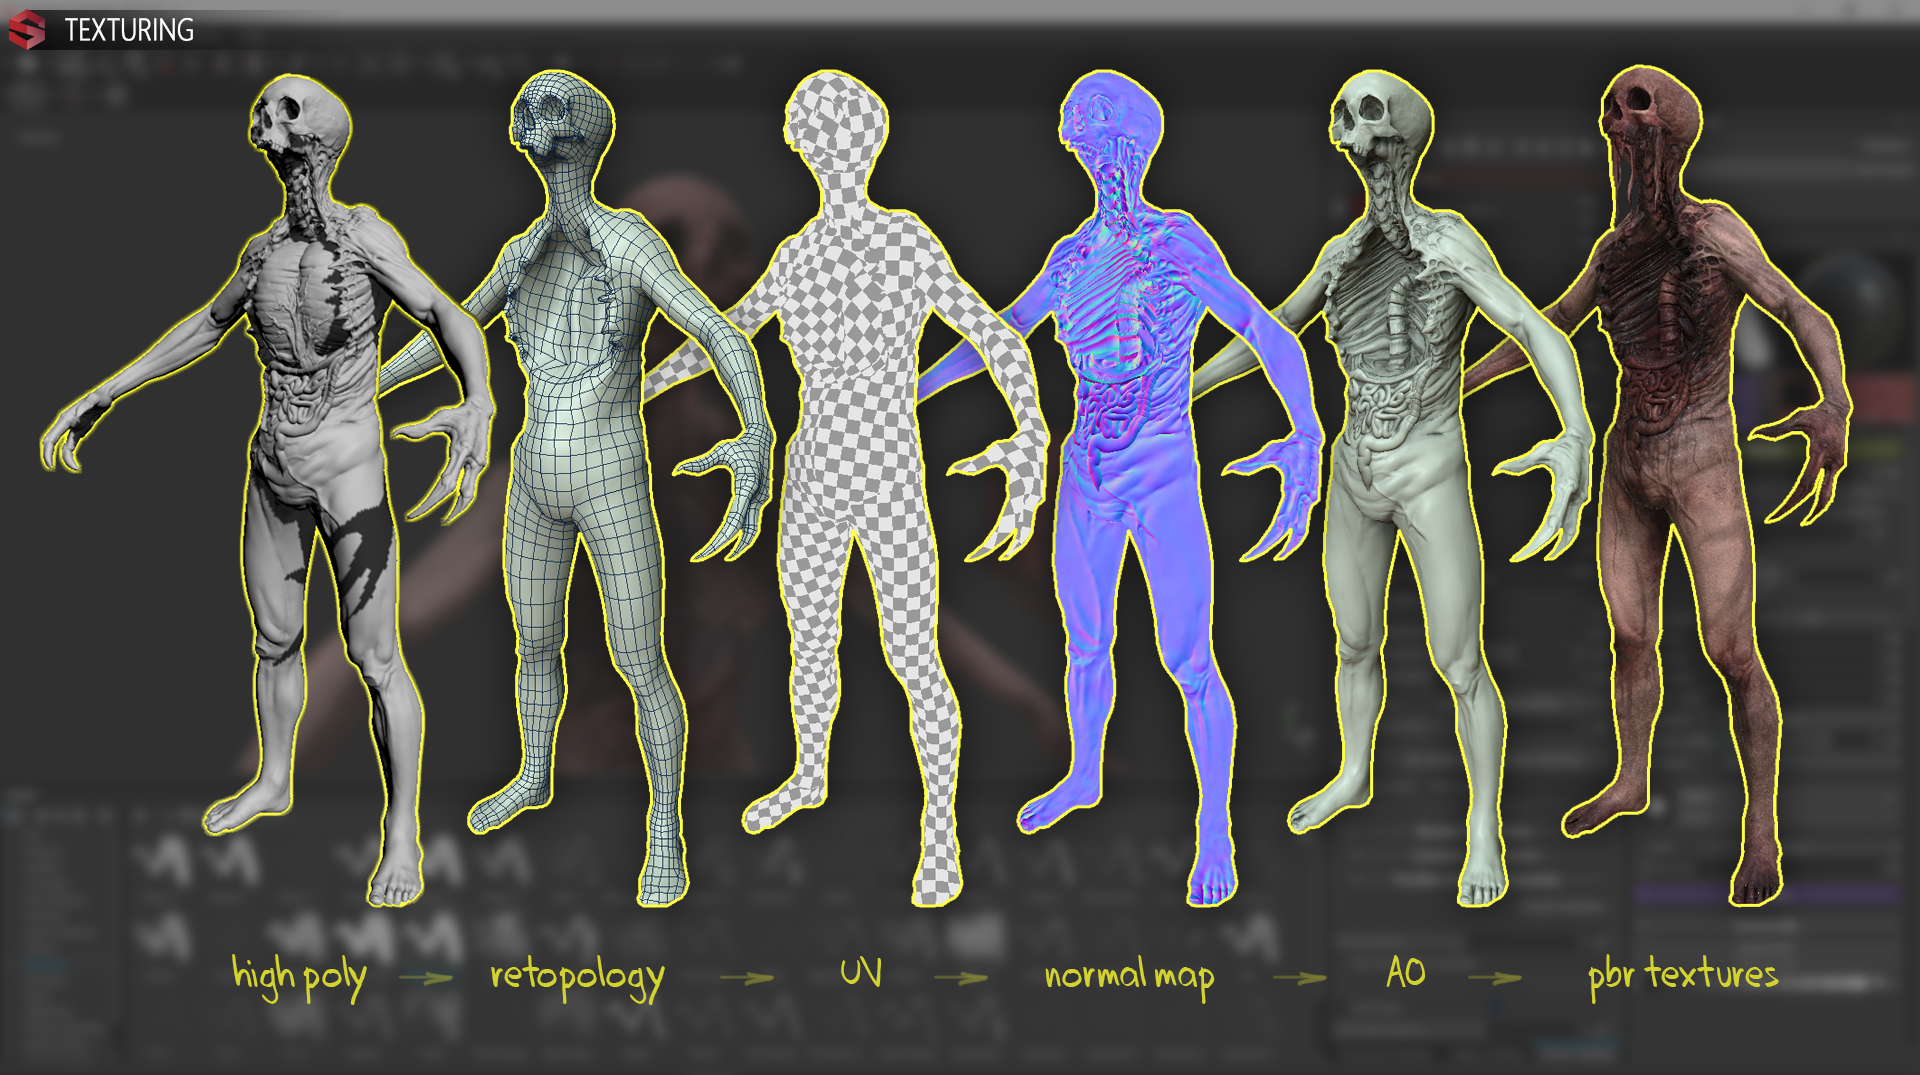
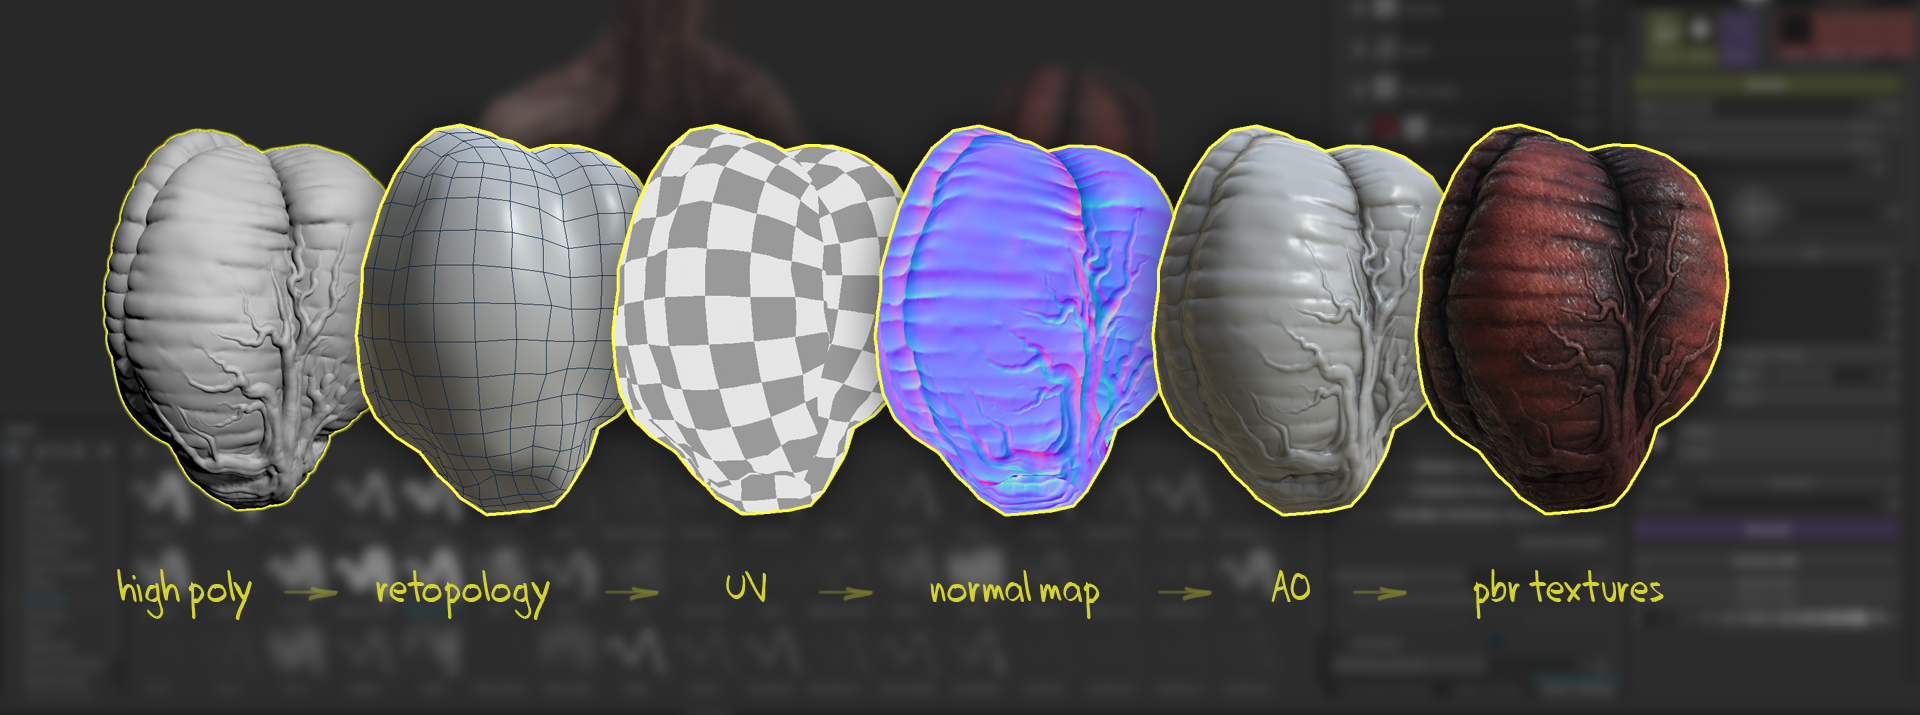
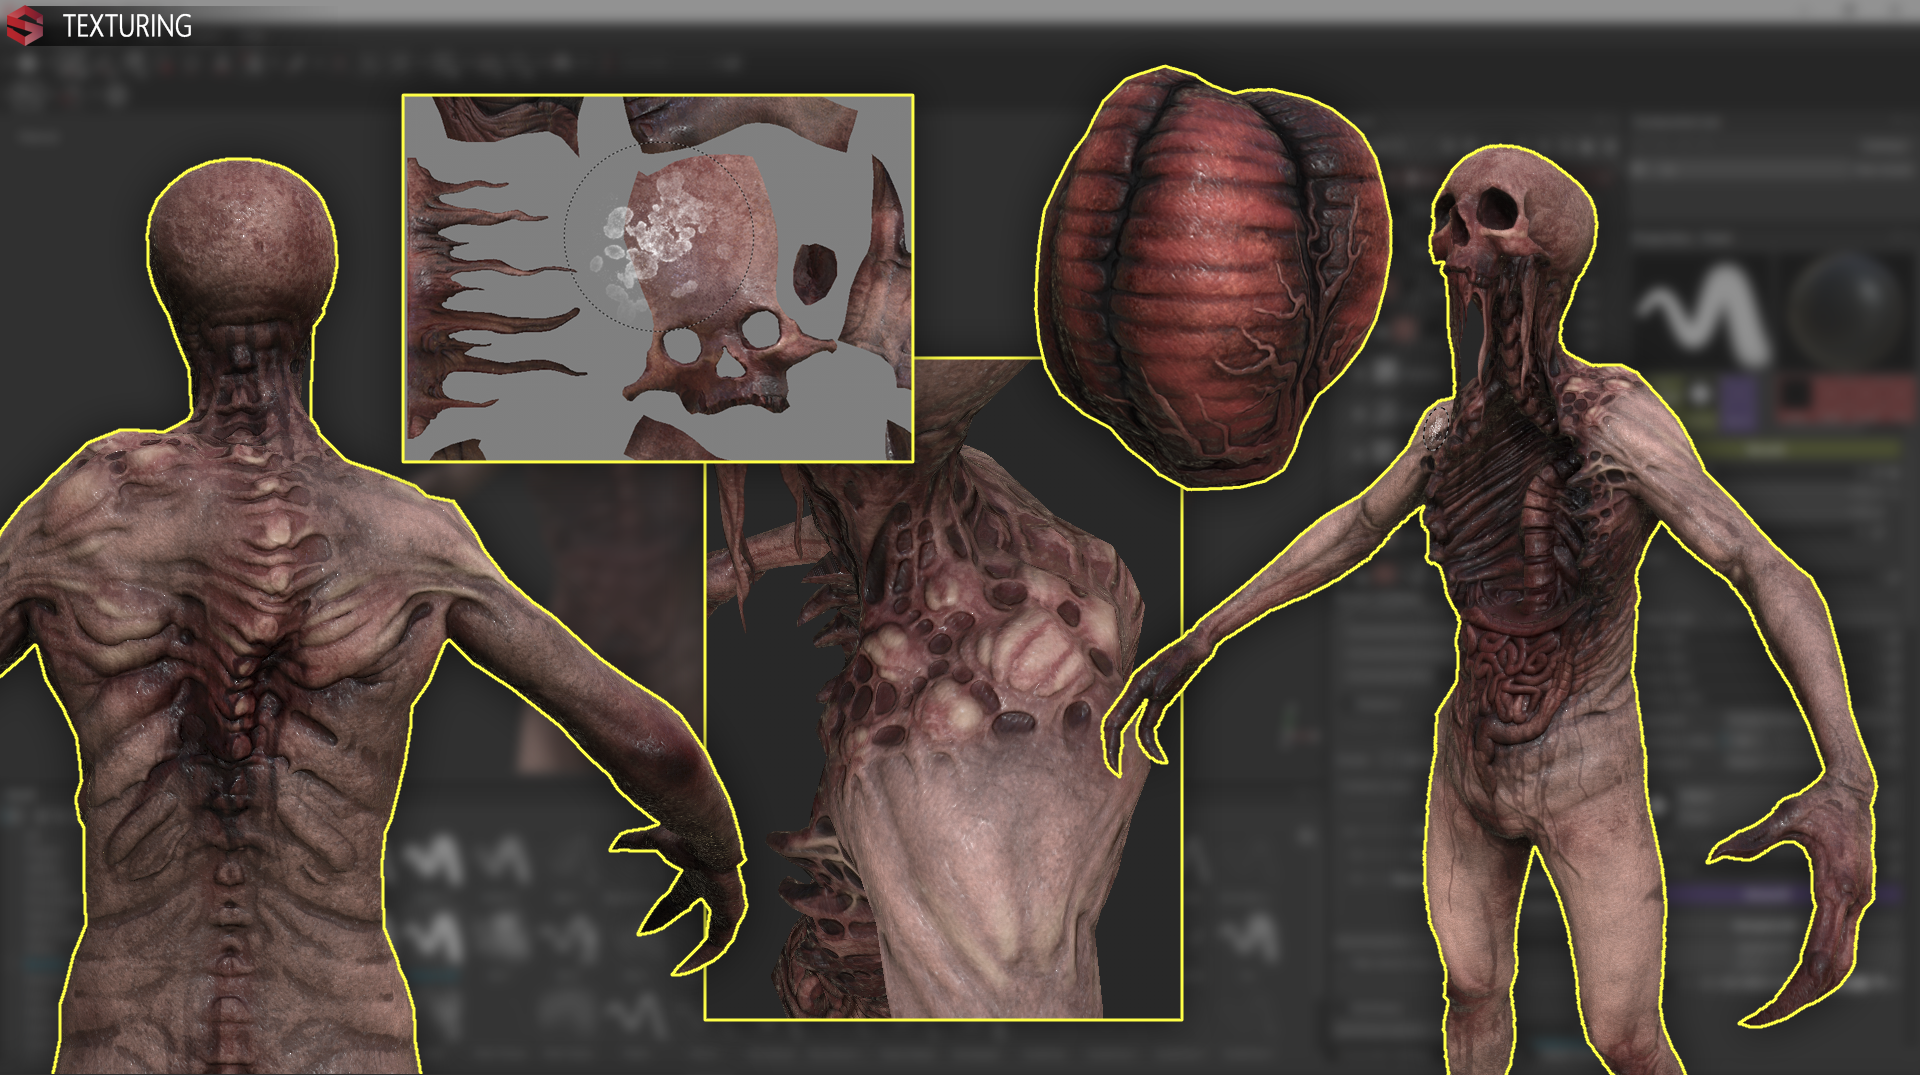
We start texturing our model in Substance Painter. SP provides a unique opportunity to paint directly on the model. For texturing, you can use either ready-made materials or manually created materials for any non-standard needs, but more often, a standard set of SP materials will suffice. Once again, we will need to mobilize all our skills and knowledge. From this will depend on the quality of the result.
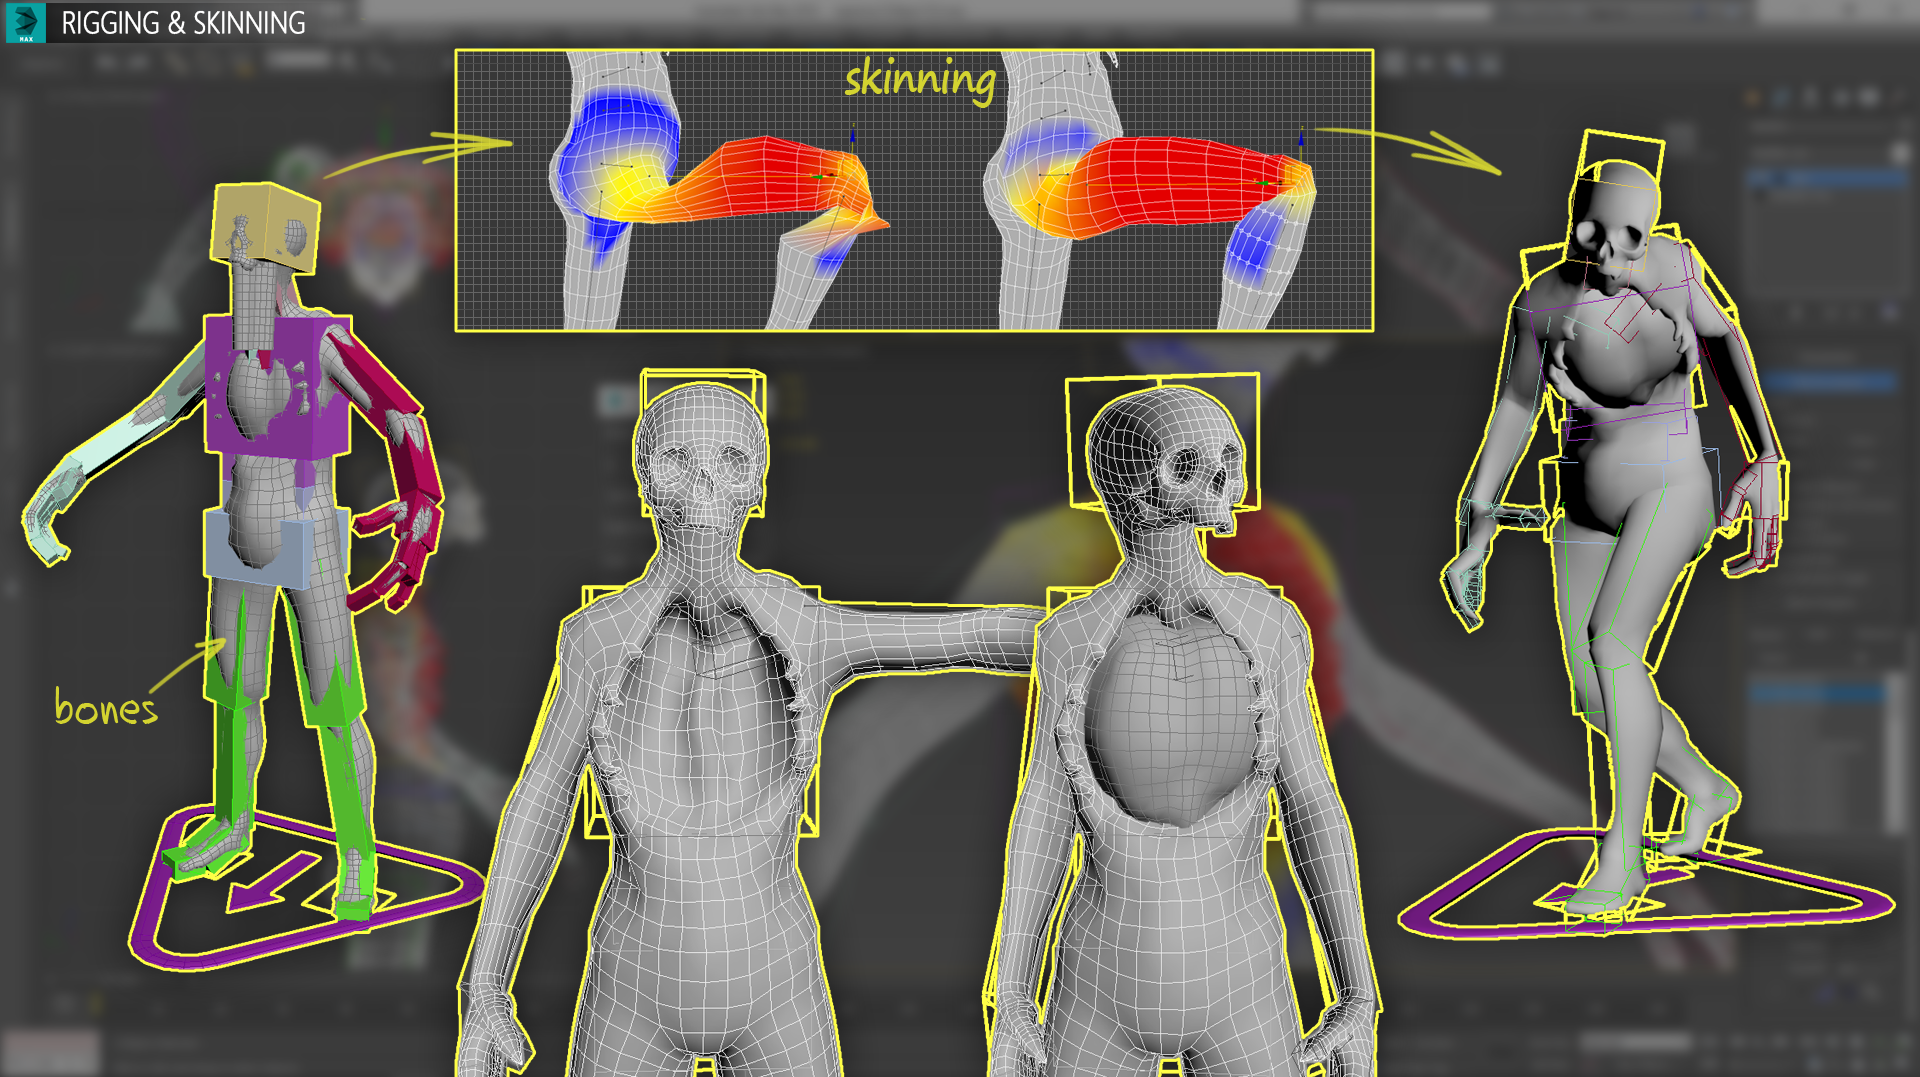
So we got to the final stage. To breathe life into our character, we need to create bones for him and to model him. Skinning - (from the English word skin - skin, skinning - the process of creating skin, there is also writing skinning) - this is one of the stages of the 3D character's setup, when the finished skeleton is tied (skins) to the 3D model of the character itself. In our case, this is a humanoid, so we use the standard skeleton CATRig. Customize all the bones under the proportions of our character and proceed to skinning. We are patient, this is quite a laborious process, since we need to correctly assign a weight (English weight) for each model tip. The greater the weight, the more a specific bone affects the specific vertex of the 3D model. Remember, the better the topology of your model, the easier and faster skinning will be.
Only after going through all these stages, the model becomes suitable for creating animation and importing into the engine, but this is the topic for the next post. Thanks for attention.

Good day. My name is Ivan. Today I will share with you the details of game development, namely, I will tell you about the full cycle of character creation. So let's go!
Stage 1 - Concepts and Design
As in any other business, you should start with an idea that we need to express in concepts. This is an important stage, which will be the foundation for all further work. In fact, it is not so important what quality the sketches will be (yes, I mean myself) the main thing is to have them. Because a sketch is a plan, following which you will save a lot of time and nerves. Having a sketch, you will clearly represent the final result and the steps that are necessary for its implementation. As the saying goes, "A ship that does not know where to sail, no wind will be fair."
')
Stage 2 - Sculpting high poly models
You will need to use all the available knowledge and skills to fashion your character, not sparing polygons. The main task is to create the most detailed model. Because, at the next stages, it will be problematic to introduce any detail. ZBrush or Sculptris is perfect for this task. If the model is not very complex, I prefer to use Sculptris, since it has a very ascetic interface and there is the possibility of creating a dynamic topology.
Stage 3 - Rotopology
Having completed the work on the high poly model, you can safely proceed to its optimization, because in the form in which the model is located now, the use of the game is extremely unreasonable. There is hardly a daredevil who would dare to throw a model of 20 million polygons and with an absolutely chaotic grid. Therefore, we proceed to the process of retopology, the main essence of which is to reduce the number of polygons to the optimal and build the correct grid suitable for animation. The rotopology can be done both in third-party software and in 3D Max using the PolyDraw tool. Actually to this, and proceed. We try to build topology using “loops” (loop, from English - loop, round) in places of bends, this will facilitate further skinning and provide animations with a more natural look.
Stage 4 - Sweep
Next, we proceed to scan. We need to expand all the parts of the mesh so that the texture correctly fits on the model. If any part of the model needs more detail, then it can be allocated more space on the scan. When creating a sweep, you should try to hide the seams in less visible places, such as the inside of the arm, armpit, etc. To create a sweep use the standard set of tools 3D Max'a.
Stage 5 - Baking Cards
To transfer detail from high poly models to low poly models, texture maps are used, such as Normal Map, Ambient Occlusion and others. Fortunately, their creation is completely automatic. Substance Painter is perfect for baking cards. We export separately high poly and low poly models and import all of this into SP. Baking is done with a couple of mouse clicks; you don’t need to do anything manually. The maximum that may be required is to trim small stitches on maps in Photoshop, but most often this is not required.
Stage 6 - Texturing
We start texturing our model in Substance Painter. SP provides a unique opportunity to paint directly on the model. For texturing, you can use either ready-made materials or manually created materials for any non-standard needs, but more often, a standard set of SP materials will suffice. Once again, we will need to mobilize all our skills and knowledge. From this will depend on the quality of the result.
Stage 7 - Rigging and Skinning
So we got to the final stage. To breathe life into our character, we need to create bones for him and to model him. Skinning - (from the English word skin - skin, skinning - the process of creating skin, there is also writing skinning) - this is one of the stages of the 3D character's setup, when the finished skeleton is tied (skins) to the 3D model of the character itself. In our case, this is a humanoid, so we use the standard skeleton CATRig. Customize all the bones under the proportions of our character and proceed to skinning. We are patient, this is quite a laborious process, since we need to correctly assign a weight (English weight) for each model tip. The greater the weight, the more a specific bone affects the specific vertex of the 3D model. Remember, the better the topology of your model, the easier and faster skinning will be.
Conclusion
Only after going through all these stages, the model becomes suitable for creating animation and importing into the engine, but this is the topic for the next post. Thanks for attention.
Source: https://habr.com/ru/post/341050/
All Articles