IoTmanager is a mobile MQTT client with an unusual concept
He removed the post from the vote, because the moderator moved it to "I am promoting".In a recent article on GeekTimes about the completion of an intercom with the MQTT protocol, I conducted a survey on what article to write next, and about 50% of readers voted for an article about working with the IoTmanager MQTT client mobile app.
This application is slightly different in concept from all presented mobile MQTT clients: the appearance of the widgets is set directly in the topics. Thus, all settings are stored in one place - the final physical device, and IoTmanager simply serves to display and control widgets. Such an approach may be useful for a certain range of tasks.
On Habré and GeekTimes IoTmanager practically does not mention that I consider it undeserved and I want to tell a little about the peculiarities of working with the application using the example of a bundle with ESP8266. I invite in the comments to the discussion of analogues.
Disclaimer: I have no relation to the author or the application, it is completely free, does not require registration and does not have built-in advertising, I am writing an article with the aim of learning the basics of the Internet of things.
Description
IoTmanager is built on the Ionic framework (HTML5 + AngularJS) and is available for Android and iOS operating systems. Each widget has its own html markup, which can be found from the documentation on the official website of the application, and the parameters of which are set in the JSON-format topics. MQTT is implemented on top of WebSockets on Paho.js and MQTT.js libraries (can be selected in the settings).
')
HTML example of Toggle switch widget markup:
<div class="class1" style="style1"> <div class="item-toggle descrClass" style="descrStyle"> <i class="iconClass" style="iconStyle">descr</i> <label class="toggle"> <input type="checkbox" /> <div class="track" style="trackStyle"> <div class="handle" style="handleStyle"></div> </div> </label> </div> </div> All classes, styles and icons can be set in MQTT topics. Yes, there is an opinion that this implementation contradicts the very idea of MQTT - the lightness of the protocol with a minimum of transmitted data, but I found this approach interesting: all settings are stored on a physical device and you do not need to configure each client separately, and, if necessary, you can change the appearance managing widgets right on the fly. This approach is the place to be.
For example, I found it convenient to work with an intercom, the link to the article about which I gave at the very beginning of the article. I installed the application to several people, selected “End User Mode” in the settings (hides all settings, logs, statistics), and they all have access to my intercom without thinking about how the application works, and I can change the functionality of the device as of necessity.
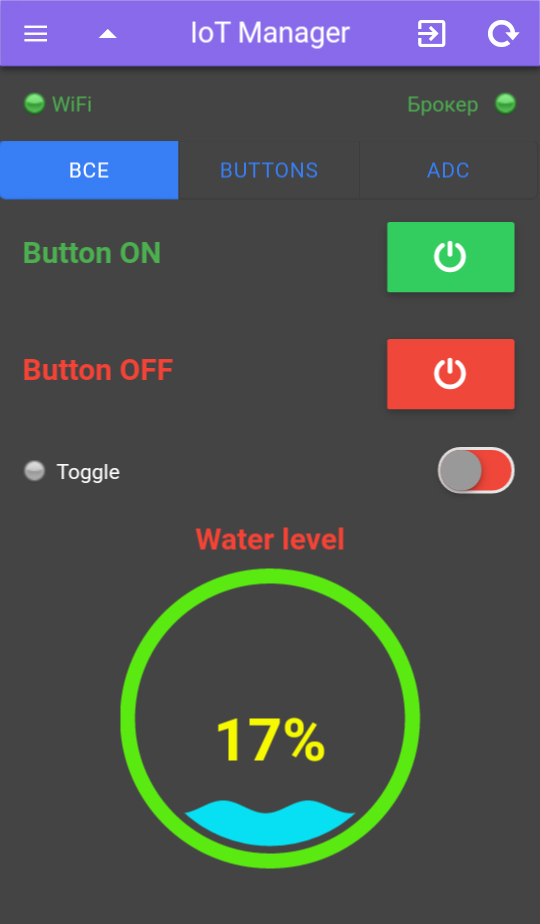
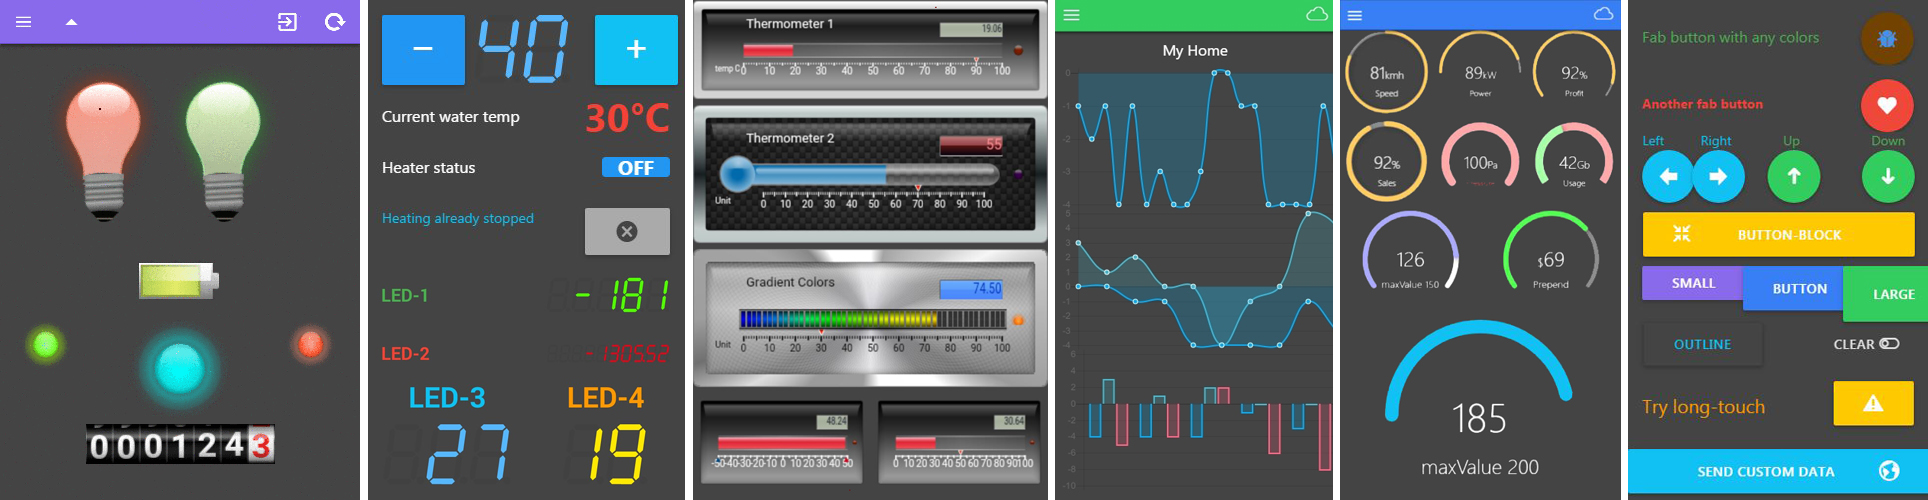
The application has a wide variety of widgets and more than 500 different icons for use. Here are examples (clickable):
Broker setup
For example, I'll start a broker at cloudmqtt.com , but, of course, it could be your local broker. I created a broker on the free Cute Cat tariff plan, as a result I received the server address + ports:

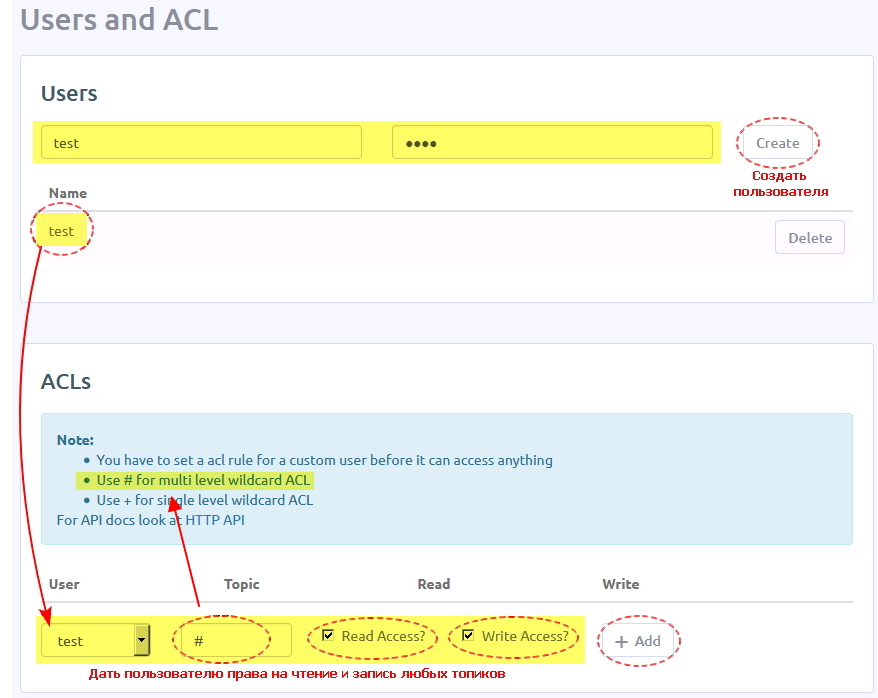
I immediately add the test user with a password and give this user the right to read and write all the topics (set simply #):
At this, the broker setting ends, enough for our needs.
Application setup
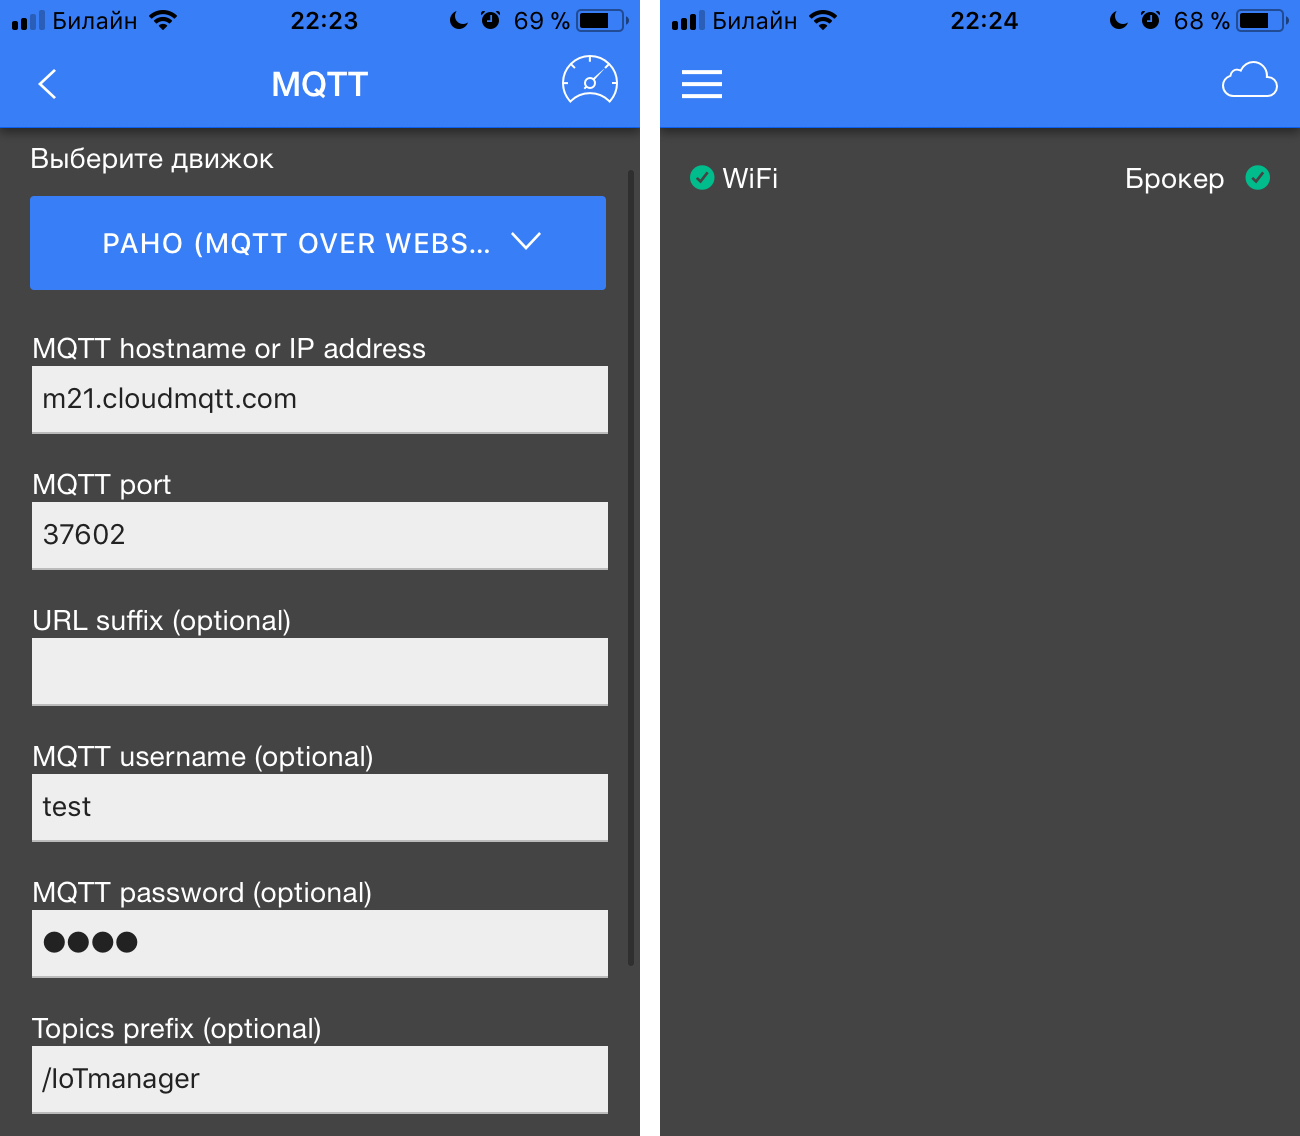 In the application settings, enter the broker data: server, port (the one that WebSockets TLS only), the user with the password, turn on the toggle switch to use SSL / TLS , leave the standard / IoTmanager as a prefix for the names of the topics. We click on the connect (speedometer icon in the upper right corner) and see the green Broker icon, which means a successful connection.
In the broker, we should see the application's welcome topics with service information:

That's it, now we have a fully functional mobile application for managing anything over the Internet. Do not worry that the workspace is completely empty, all further setting up the appearance of the application will be done on a physical device, nothing is configured on the phone itself.
Procurement firmware for ESP8266
Let's try to blink the LED on NodeMCU using our application on the phone. Classic, is not it? As an IDE, I will use the Atom editor with the PlatformIO extension and Arduin libraries.
Further, I give all the explanations regarding the Toggle switch widget, since I already gave the html-code above. All widgets are described in detail on the official website of the application with all sorts of buns and specific examples.
When writing firmware for NodeMCU, I used the ESP8266WiFi libraries to connect to WiFi, the PubQubClient MQTT client (by Imroy) and ArduinoJson for conveniently generating JSON strings. Link to the firmware repository is at the end of the article. I will explain a little the principle of work.
JsonObject& root = jsonBuffer.createObject(); root["id"] = "0"; root["widget"] = "toggle"; root["topic"] = "IoTmanager/" + deviceID + "/led1"; root["descr"] = " 1"; root["style1"] = "padding-top:10px;"; root["descrStyle"] = "font-size:20px;"; root.printTo(thing_config[0]); This creates a JSON string containing the necessary parameters for configuring the widget, and which will later be sent to the topic / IoTmanager / deviceID / config to display the widget in IoTmanager.
To set the status of the widget (on / off position), you need to send a JSON string of the form {"status": "1"} to the topic / IoTmanager / deviceID / led1 / status .
In turn, the application, when the switch is pressed, sends a 0 or 1 message to the topic / IoTmanager / deviceID / led1 / control (for the convenience of parsing on microcontrollers). Accordingly, on ESP this can be caught in the function of a callback like this:
if (sub.topic() == "IoTmanager/" + deviceID + "/led1/control") { if (sub.payload_string() == "0") ledStatus(ESP_LED, false); else ledStatus(ESP_LED, true); } Now in the firmware it is made so that when getting to the main topic / IoTmanager (the same prefix) of the HELLO message (as the program does), ESP returns all configs for the widgets. Thus, they immediately appear in the application and this automatically means that the device is connected:

if (sub.topic() == prefix) { if (sub.payload_string() == "HELLO") { pubConfig(); } } But you can use the flag retained for config messages. Then the broker, when the application is connected to it, will give all the topics with this flag. Ie, regardless of whether the device is connected or not, widgets will be displayed in the application. I use this approach in the intercom. And in order to know whether the device is connected or not, when the HELLO message is received, the intercom gives the widget's configuration with the text There is a contact (slightly noticeable at the bottom of the screenshot).
Video work
useful links
1. The repository of the resulting firmware
2. Application site with all documentation
3. Manual for quick application setup
4. Description and useful links from the author
5. My example of using the application
Thank you all for your attention, I hope the review will be useful.
I invite in comments - write what programs you used and in what their advantages.
Source: https://habr.com/ru/post/339970/
All Articles