How to accept payments in a mobile application: tokenization, NFC, optical scanning and other buns in one SDK
I have already told earlier on the example of the Android SDK, how not to limit myself to the frame and WebView, to embed the native form of accepting payments by bank card in a mobile application, and not to get under the PCI DSS audit. Since then, our SDK has expanded quite significantly, and such functionality has been added to the usual card input form in Android and iOS:
- React Native Library for Android and iOS
- customization of layout layout forms with the details of the map
- optical card scanning function
- receiving contactless payments in Android using NFC technology
In this publication, I will tell you what you can do with payments in mobile applications, such as life hacks and pitfalls, and finally give you an example code for a demo application and tell you how to write off card debt from a friend using your smartphone’s NFC reader.
Here it is important to understand that if your backend is not PCI DSS certified, then you cannot store the card number and its validity in its database. Therefore, before you bind the ID of the card to the client's account, you must first tokenize the card. To do this, you need to make a first payment with a client via a mobile application, and preferably with 3D-Secure, blocking a small amount on the card, for example, 1 currency unit. 3D-secure in this case is necessary first of all to protect yourself, as a retail outlet, from financial claims (chargebacks) for future recurring debits, and secondly - to improve conversion, as for example, using Sberbank cards in Russia and Privatbank Ukraine in most cases, a transaction without 3D-Secure will not work.
So, to get a token card, you must pass the parameters requiredRecToken and verification (for more details on how to create a mobile application, see the article, the link to which I indicated at the beginning, as well as in the code of the demo application on github):
The requiredRecToken parameter requires returning the card token when the card is successfully authorized, and verification - that it is not necessary to charge funds from the card, but it is enough to block them and then return them (the payment gateway returns them automatically).
In response, the payment gateway will return the recToken parameters — the card token, recTokenLifeTime — the token's validity period (in fact, the card's validity period) and maskedCard — the masked card number that must be attached to the token in the backend for further display to the client when choosing a payment method.
Now that you have a token card, you can, at any time, at the request of the client or at the due date, call the token-write method via the server-to-server API and write off the required amount.
Underwater rocks:
According to our statistics, it’s not possible to pay a fairly significant part of cardholders via 3DSecure on a mobile device for several reasons, which are independent of it and the gateway:
- SMS may not come, or the user switching between the SMS application and yours, lost the form by entering the 3D-Secure password, as it opens in WebView or the system browser
- 3D-Secure page layout of the bank on a smartphone or tablet has reached (banks rarely adapt such pages)
- the web server of the bank has disabled support for the insecure TSL 1.0 protocol, which makes 3D-Secure unavailable for Android version <4.1
Life hacking:
We at the payment gateway know how to enable / disable 3D-Secure on the fly, and if the client still fails to pay, we adjust to it, and try to make the payment without a 3D-Secure password.
It is also worth remembering that if you save the tokens of one payment provider in your system, you will not be able to use them on another provider, unless providers do not agree on the migration of tokens to each other, which in principle has already happened several times in our practice.
Often there is a need to place the fields for entering the card number, expiration date, and cvv2 in a different sequence than the standard layout in the SDK provides. But due to the requirements of PCI DSS, you can’t just take and replace the card number input field with the standard EditText component. For this purpose, we have developed a flexible layout. Flexible layout inherits the styles of your mobile application and allows you to place the elements of the form in any sequence and in any design and at the same time prevents the random transfer of card data to the side of your backend.
To organize the input card in the SDK there are two mechanisms:
CardInputView - ready view for use;
CardInputLayout is just a layout wrapper for customizing the view in its own markup style.
')
In fact, CardInputView = CardInputLayout + CardNumberEdit + CardExpMmEdit + CardExpYyEdit + CardCvvEdit.
The simplified structure of the CardInputView in XML can be written up like this:
Therefore, you can absolutely freely customize and position the input elements for as long as you have enough imagination. There is only one rule to follow - each input element (CardNumberEdit, CardExpMmEdit, CardExpYyEdit, CardCvvEdit) must be in CardInputLayout once, and the nesting level View does not matter.
Here is what it might look like:

Underwater rocks:
Customizing input fields is worth remembering:
- cvv2 can be either 3 or 4 characters long
- card number can be from 14 to 19 characters
- You can achieve the most accurate customization to your design by forking the SDK and making changes to the layout already in your implementation (this is not forbidden if you don’t start to skip the card details through your backend). But having made a fork, you lose support for the SDK updates from the gateway and the integration of new features.
Life hacking:
You can often find on the input form for card details inputa for entering the name and surname of the cardholder and its ZIP code. For payments on the CIS, there is no practical need to do this in 99% of cases - only some banks in the USA, Canada and the UK support this technology, which is called the Address Verification System , while for the verification to work, it must be supported by both the acquiring bank and the bank issuer

The optical card scanning function is implemented for Android in the android-sdk-optical library, for iOS in the CloudipsOptical library using the card.io SDK .
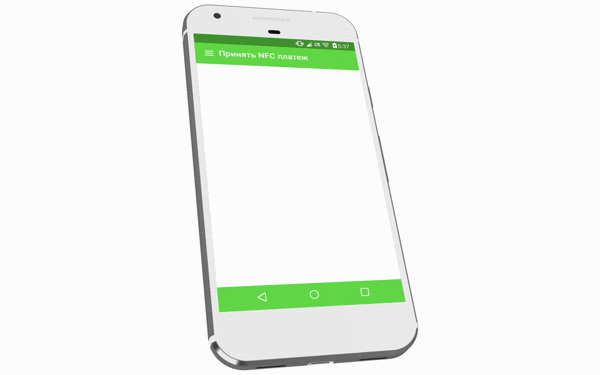
NFC scanning is implemented using the android-sdk-nfc and react-native-cloudipsp-nfc libraries and is available only for Android. Although Apple has opened third-party developers the ability to read RFID tags since iOS 11+ , EMV tags still cannot be read from bank cards.
It differs from the usual implementation of the presence of NfcCardBridge and hanging Intent on it to wait for the event that the card is read (readCard)
Underwater rocks:
Although the card is read by means of NFC, the usual card not present is still the protocol for financial authorization of the card. Those. for the full operation of this functionality, the card must be open for payments on the Internet.
Life hacking:
By writing a simple application, you can use it to transfer funds from someone else’s card to your own, by bringing someone else’s card to the phone. For example, it may be convenient if you need to write off a small amount from a friend in the card debt account. On the one hand, it will be practical and convenient, on the other - quite impressively. In order to use the card-to-card transfer service, you must first register on the website of the Fondy payment platform and link the bank card for which funds will be received to your financial settings. In order to ensure security, the amount that can be written off via NFC without 3D-Secure support can be no more than the equivalent of $ 4.
- React Native Library for Android and iOS
- customization of layout layout forms with the details of the map
- optical card scanning function
- receiving contactless payments in Android using NFC technology
In this publication, I will tell you what you can do with payments in mobile applications, such as life hacks and pitfalls, and finally give you an example code for a demo application and tell you how to write off card debt from a friend using your smartphone’s NFC reader.
Case 1. We bind a client card to the backend for regular debits or payments in 1 click.
Here it is important to understand that if your backend is not PCI DSS certified, then you cannot store the card number and its validity in its database. Therefore, before you bind the ID of the card to the client's account, you must first tokenize the card. To do this, you need to make a first payment with a client via a mobile application, and preferably with 3D-Secure, blocking a small amount on the card, for example, 1 currency unit. 3D-secure in this case is necessary first of all to protect yourself, as a retail outlet, from financial claims (chargebacks) for future recurring debits, and secondly - to improve conversion, as for example, using Sberbank cards in Russia and Privatbank Ukraine in most cases, a transaction without 3D-Secure will not work.
So, to get a token card, you must pass the parameters requiredRecToken and verification (for more details on how to create a mobile application, see the article, the link to which I indicated at the beginning, as well as in the code of the demo application on github):
order.setRequiredRecToken(true) order.setVerification(true) The requiredRecToken parameter requires returning the card token when the card is successfully authorized, and verification - that it is not necessary to charge funds from the card, but it is enough to block them and then return them (the payment gateway returns them automatically).
In response, the payment gateway will return the recToken parameters — the card token, recTokenLifeTime — the token's validity period (in fact, the card's validity period) and maskedCard — the masked card number that must be attached to the token in the backend for further display to the client when choosing a payment method.
Now that you have a token card, you can, at any time, at the request of the client or at the due date, call the token-write method via the server-to-server API and write off the required amount.
Underwater rocks:
According to our statistics, it’s not possible to pay a fairly significant part of cardholders via 3DSecure on a mobile device for several reasons, which are independent of it and the gateway:
- SMS may not come, or the user switching between the SMS application and yours, lost the form by entering the 3D-Secure password, as it opens in WebView or the system browser
- 3D-Secure page layout of the bank on a smartphone or tablet has reached (banks rarely adapt such pages)
- the web server of the bank has disabled support for the insecure TSL 1.0 protocol, which makes 3D-Secure unavailable for Android version <4.1
Life hacking:
We at the payment gateway know how to enable / disable 3D-Secure on the fly, and if the client still fails to pay, we adjust to it, and try to make the payment without a 3D-Secure password.
It is also worth remembering that if you save the tokens of one payment provider in your system, you will not be able to use them on another provider, unless providers do not agree on the migration of tokens to each other, which in principle has already happened several times in our practice.
Case 2. Customize the layout of the form for entering the card number.
Often there is a need to place the fields for entering the card number, expiration date, and cvv2 in a different sequence than the standard layout in the SDK provides. But due to the requirements of PCI DSS, you can’t just take and replace the card number input field with the standard EditText component. For this purpose, we have developed a flexible layout. Flexible layout inherits the styles of your mobile application and allows you to place the elements of the form in any sequence and in any design and at the same time prevents the random transfer of card data to the side of your backend.
To organize the input card in the SDK there are two mechanisms:
CardInputView - ready view for use;
CardInputLayout is just a layout wrapper for customizing the view in its own markup style.
')
In fact, CardInputView = CardInputLayout + CardNumberEdit + CardExpMmEdit + CardExpYyEdit + CardCvvEdit.
The simplified structure of the CardInputView in XML can be written up like this:
<com.cloudipsp.android.CardInputLayout> <com.cloudipsp.android.CardNumberEdit/> <LinearLayout android:orientation="horizontal"> <com.cloudipsp.android.CardExpMmEdit /> <com.cloudipsp.android.CardExpYyEdit /> </LinearLayout> <com.cloudipsp.android.CardCvvEdit /> <com.cloudipsp.android.CardInputLayout> Therefore, you can absolutely freely customize and position the input elements for as long as you have enough imagination. There is only one rule to follow - each input element (CardNumberEdit, CardExpMmEdit, CardExpYyEdit, CardCvvEdit) must be in CardInputLayout once, and the nesting level View does not matter.
Here is what it might look like:
Underwater rocks:
Customizing input fields is worth remembering:
- cvv2 can be either 3 or 4 characters long
- card number can be from 14 to 19 characters
- You can achieve the most accurate customization to your design by forking the SDK and making changes to the layout already in your implementation (this is not forbidden if you don’t start to skip the card details through your backend). But having made a fork, you lose support for the SDK updates from the gateway and the integration of new features.
Life hacking:
You can often find on the input form for card details inputa for entering the name and surname of the cardholder and its ZIP code. For payments on the CIS, there is no practical need to do this in 99% of cases - only some banks in the USA, Canada and the UK support this technology, which is called the Address Verification System , while for the verification to work, it must be supported by both the acquiring bank and the bank issuer
Case 3. Connect the ability to scan the card through the camera and NFC
The optical card scanning function is implemented for Android in the android-sdk-optical library, for iOS in the CloudipsOptical library using the card.io SDK .
NFC scanning is implemented using the android-sdk-nfc and react-native-cloudipsp-nfc libraries and is available only for Android. Although Apple has opened third-party developers the ability to read RFID tags since iOS 11+ , EMV tags still cannot be read from bank cards.
Sample Demo Application for Using NFC
package com.cloudipsp.nfcexample; import android.app.Activity; import android.content.Intent; import android.os.Bundle; import android.text.TextUtils; import android.util.Patterns; import android.view.View; import android.widget.ArrayAdapter; import android.widget.EditText; import android.widget.Spinner; import android.widget.Toast; import com.cloudipsp.android.Card; import com.cloudipsp.android.CardInputView; import com.cloudipsp.android.Cloudipsp; import com.cloudipsp.android.CloudipspWebView; import com.cloudipsp.android.Currency; import com.cloudipsp.android.Order; import com.cloudipsp.android.Receipt; import com.cloudipsp.nfc.NfcCardBridge; public class MainActivity extends Activity implements View.OnClickListener { private static final int MERCHANT_ID = 1396424; private EditText editAmount; private Spinner spinnerCcy; private EditText editEmail; private EditText editDescription; private CardInputView cardInput; private CloudipspWebView webView; private Cloudipsp cloudipsp; private NfcCardBridge nfcCardBridge; @Override protected void onCreate(Bundle savedInstanceState) { super.onCreate(savedInstanceState); setContentView(R.layout.activity_main); nfcCardBridge = new NfcCardBridge(this); findViewById(R.id.btn_amount).setOnClickListener(this); editAmount = (EditText) findViewById(R.id.edit_amount); spinnerCcy = (Spinner) findViewById(R.id.spinner_ccy); editEmail = (EditText) findViewById(R.id.edit_email); editDescription = (EditText) findViewById(R.id.edit_description); cardInput = (CardInputView) findViewById(R.id.card_input); cardInput.setHelpedNeeded(true); findViewById(R.id.btn_pay).setOnClickListener(this); webView = (CloudipspWebView) findViewById(R.id.web_view); cloudipsp = new Cloudipsp(MERCHANT_ID, webView); spinnerCcy.setAdapter(new ArrayAdapter<Currency>(this, android.R.layout.simple_spinner_item, Currency.values())); if (savedInstanceState == null) { processIntent(getIntent()); } } @Override public void onClick(View v) { switch (v.getId()) { case R.id.btn_amount: fillTest(); break; case R.id.btn_pay: processPay(); break; } } private void fillTest() { editAmount.setText("1"); editEmail.setText("test@test.com"); editDescription.setText("test payment"); } private void processPay() { editAmount.setError(null); editEmail.setError(null); editDescription.setError(null); final int amount; try { amount = Integer.valueOf(editAmount.getText().toString()); } catch (Exception e) { editAmount.setError(getString(R.string.e_invalid_amount)); return; } final String email = editEmail.getText().toString(); final String description = editDescription.getText().toString(); if (TextUtils.isEmpty(email) || !Patterns.EMAIL_ADDRESS.matcher(email).matches()) { editEmail.setError(getString(R.string.e_invalid_email)); } else if (TextUtils.isEmpty(description)) { editDescription.setError(getString(R.string.e_invalid_description)); } else { final Currency currency = (Currency) spinnerCcy.getSelectedItem(); final Order order = new Order(amount, currency, "vb_" + System.currentTimeMillis(), description, email); order.setLang(Order.Lang.ru); final Card card; if (nfcCardBridge.hasCard()) { card = nfcCardBridge.getCard(order); cardInput.display(null); } else { card = cardInput.confirm(); } cloudipsp.pay(card, order, new Cloudipsp.PayCallback() { @Override public void onPaidProcessed(Receipt receipt) { Toast.makeText(MainActivity.this, "Paid " + receipt.status.name() + "\nPaymentId:" + receipt.paymentId, Toast.LENGTH_LONG).show(); } @Override public void onPaidFailure(Cloudipsp.Exception e) { if (e instanceof Cloudipsp.Exception.Failure) { Cloudipsp.Exception.Failure f = (Cloudipsp.Exception.Failure) e; Toast.makeText(MainActivity.this, "Failure\nErrorCode: " + f.errorCode + "\nMessage: " + f.getMessage() + "\nRequestId: " + f.requestId, Toast.LENGTH_LONG).show(); } else if (e instanceof Cloudipsp.Exception.NetworkSecurity) { Toast.makeText(MainActivity.this, "Network security error: " + e.getMessage(), Toast.LENGTH_LONG).show(); } else if (e instanceof Cloudipsp.Exception.ServerInternalError) { Toast.makeText(MainActivity.this, "Internal server error: " + e.getMessage(), Toast.LENGTH_LONG).show(); } else if (e instanceof Cloudipsp.Exception.NetworkAccess) { Toast.makeText(MainActivity.this, "Network error", Toast.LENGTH_LONG).show(); } else { Toast.makeText(MainActivity.this, "Payment Failed", Toast.LENGTH_LONG).show(); } e.printStackTrace(); } }); } } @Override public void onBackPressed() { if (webView.waitingForConfirm()) { webView.skipConfirm(); } else { super.onBackPressed(); } } @Override public void onNewIntent(Intent intent) { super.onNewIntent(intent); processIntent(intent); } private void processIntent(Intent intent) { if (nfcCardBridge.readCard(intent)) { Toast.makeText(this, "NFC Card read success", Toast.LENGTH_LONG).show(); nfcCardBridge.displayCard(cardInput); } } } It differs from the usual implementation of the presence of NfcCardBridge and hanging Intent on it to wait for the event that the card is read (readCard)
Underwater rocks:
Although the card is read by means of NFC, the usual card not present is still the protocol for financial authorization of the card. Those. for the full operation of this functionality, the card must be open for payments on the Internet.
Life hacking:
By writing a simple application, you can use it to transfer funds from someone else’s card to your own, by bringing someone else’s card to the phone. For example, it may be convenient if you need to write off a small amount from a friend in the card debt account. On the one hand, it will be practical and convenient, on the other - quite impressively. In order to use the card-to-card transfer service, you must first register on the website of the Fondy payment platform and link the bank card for which funds will be received to your financial settings. In order to ensure security, the amount that can be written off via NFC without 3D-Secure support can be no more than the equivalent of $ 4.
Source: https://habr.com/ru/post/339276/
All Articles