Reamp library: pain killer for your Android applications
One day, we at EastBanc Technologies were tired of fighting the architectural problems that arise in Android development and decided to fix it :). We wanted to find a solution that meets all our requirements.
And, as is often the case, there was no ready-made solution, and we had to make our own library, which already brings us happiness, and can help you.
What problems solved:
- Get away from the life cycle of screens, be it Activity, Fragment or View
- Avoid having to write code to save and restore state for each screen.
- Increase stability: protect against annoying kreshy and memory leaks
- Increase code reusability between phone UI and tablet UI
Lyrical digression. Why reamp?
Is it like that kind of pribluda for recording electric guitars?
Of course, in our case Reamp has nothing to do with sound recordings. Initially, we thought it would be an abbreviation, because there is M and P (model and presenter), A - we don’t remember why, RE - because it was written on a reagent. But we have already thrown out the reagent, and just a cool name remains.
In the process of implementation, we tried to follow the manifesto, which we ourselves invented:
- The library should be very easy to learn.
- The library should be very simple to implement: minimum dependencies, no manipulation of bytecode, and no code generation
- Library must be expandable
- The library should be easily integrated with other popular related solutions.
As a result, we have obtained the MVP / MVVM library, which we have been successfully using for over a year and are not going to change yet. We think now is the time to share it with the public!
What for?
Let's consider the solution of the most typical task of almost any mobile application - authorization.
We have login and password input fields, a login button, a ProgressBar to display the progress of the operation, and a TextView to show the result.
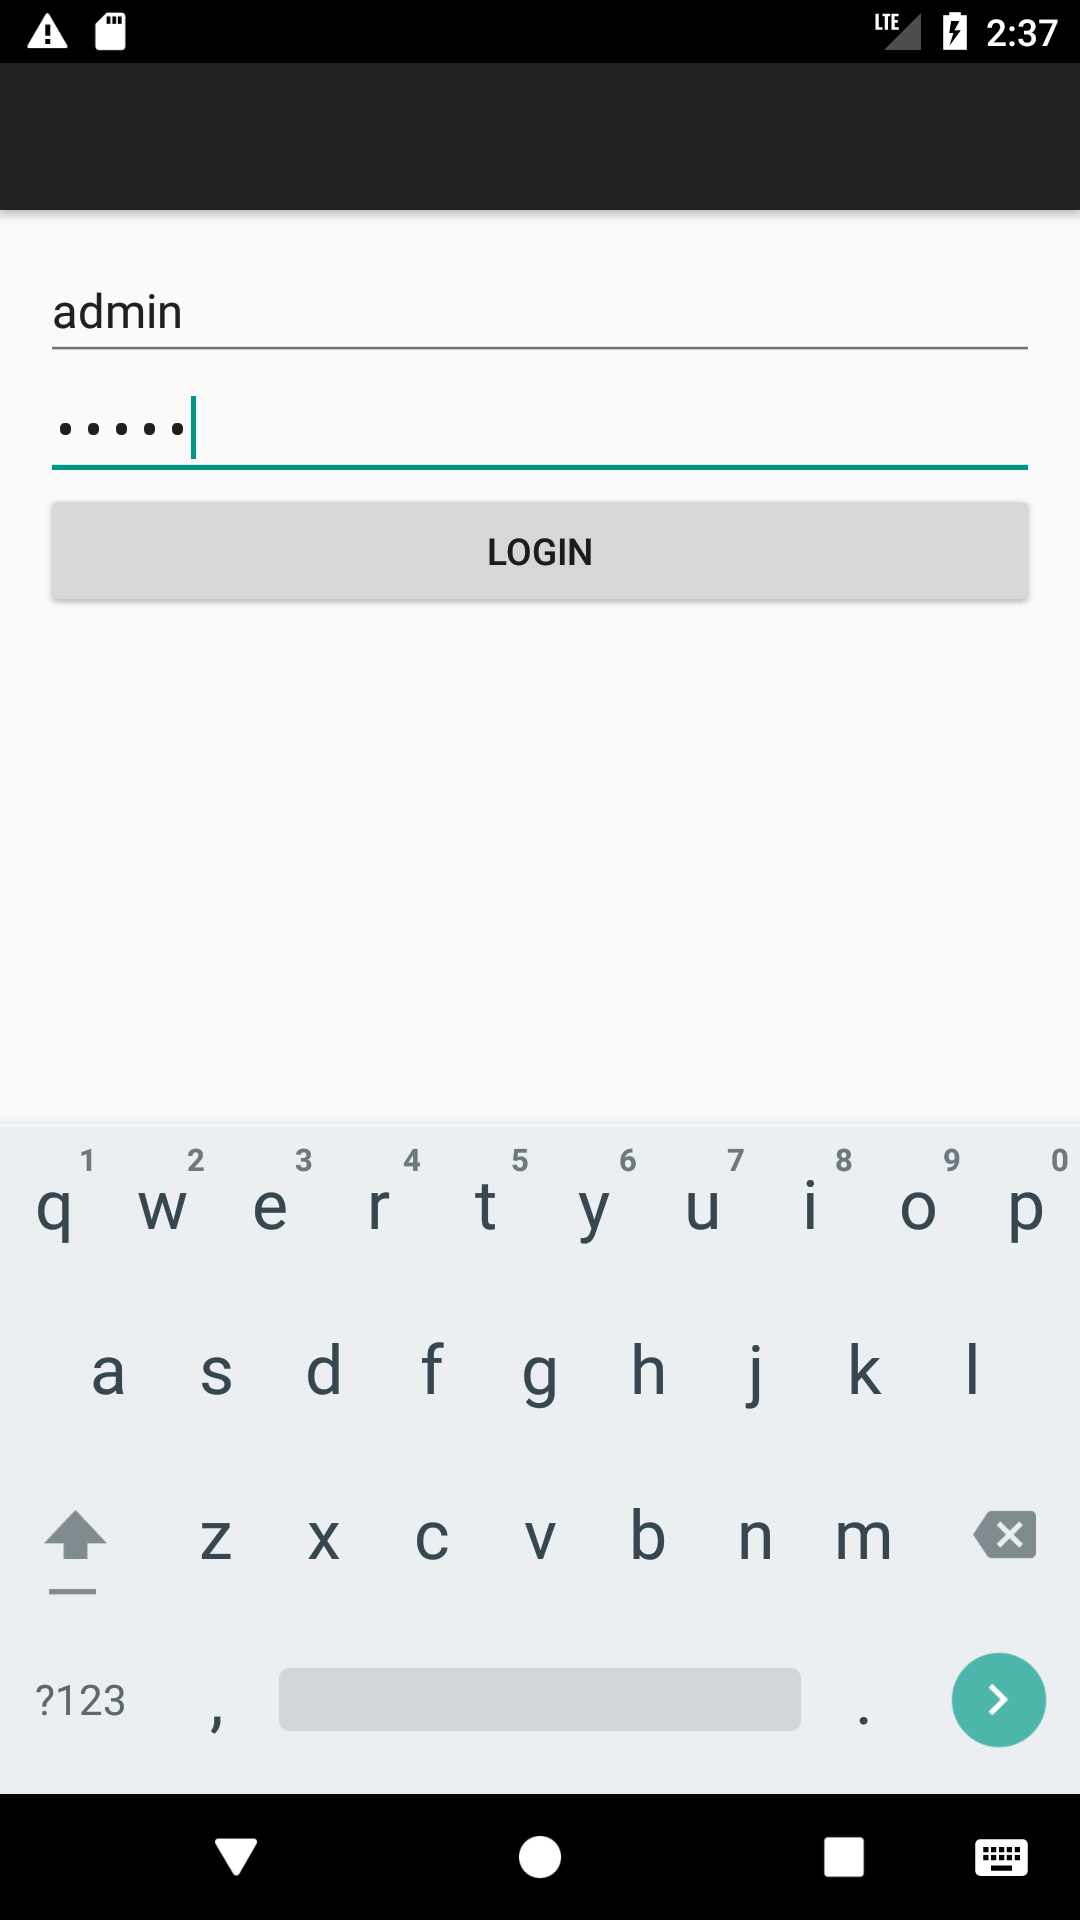
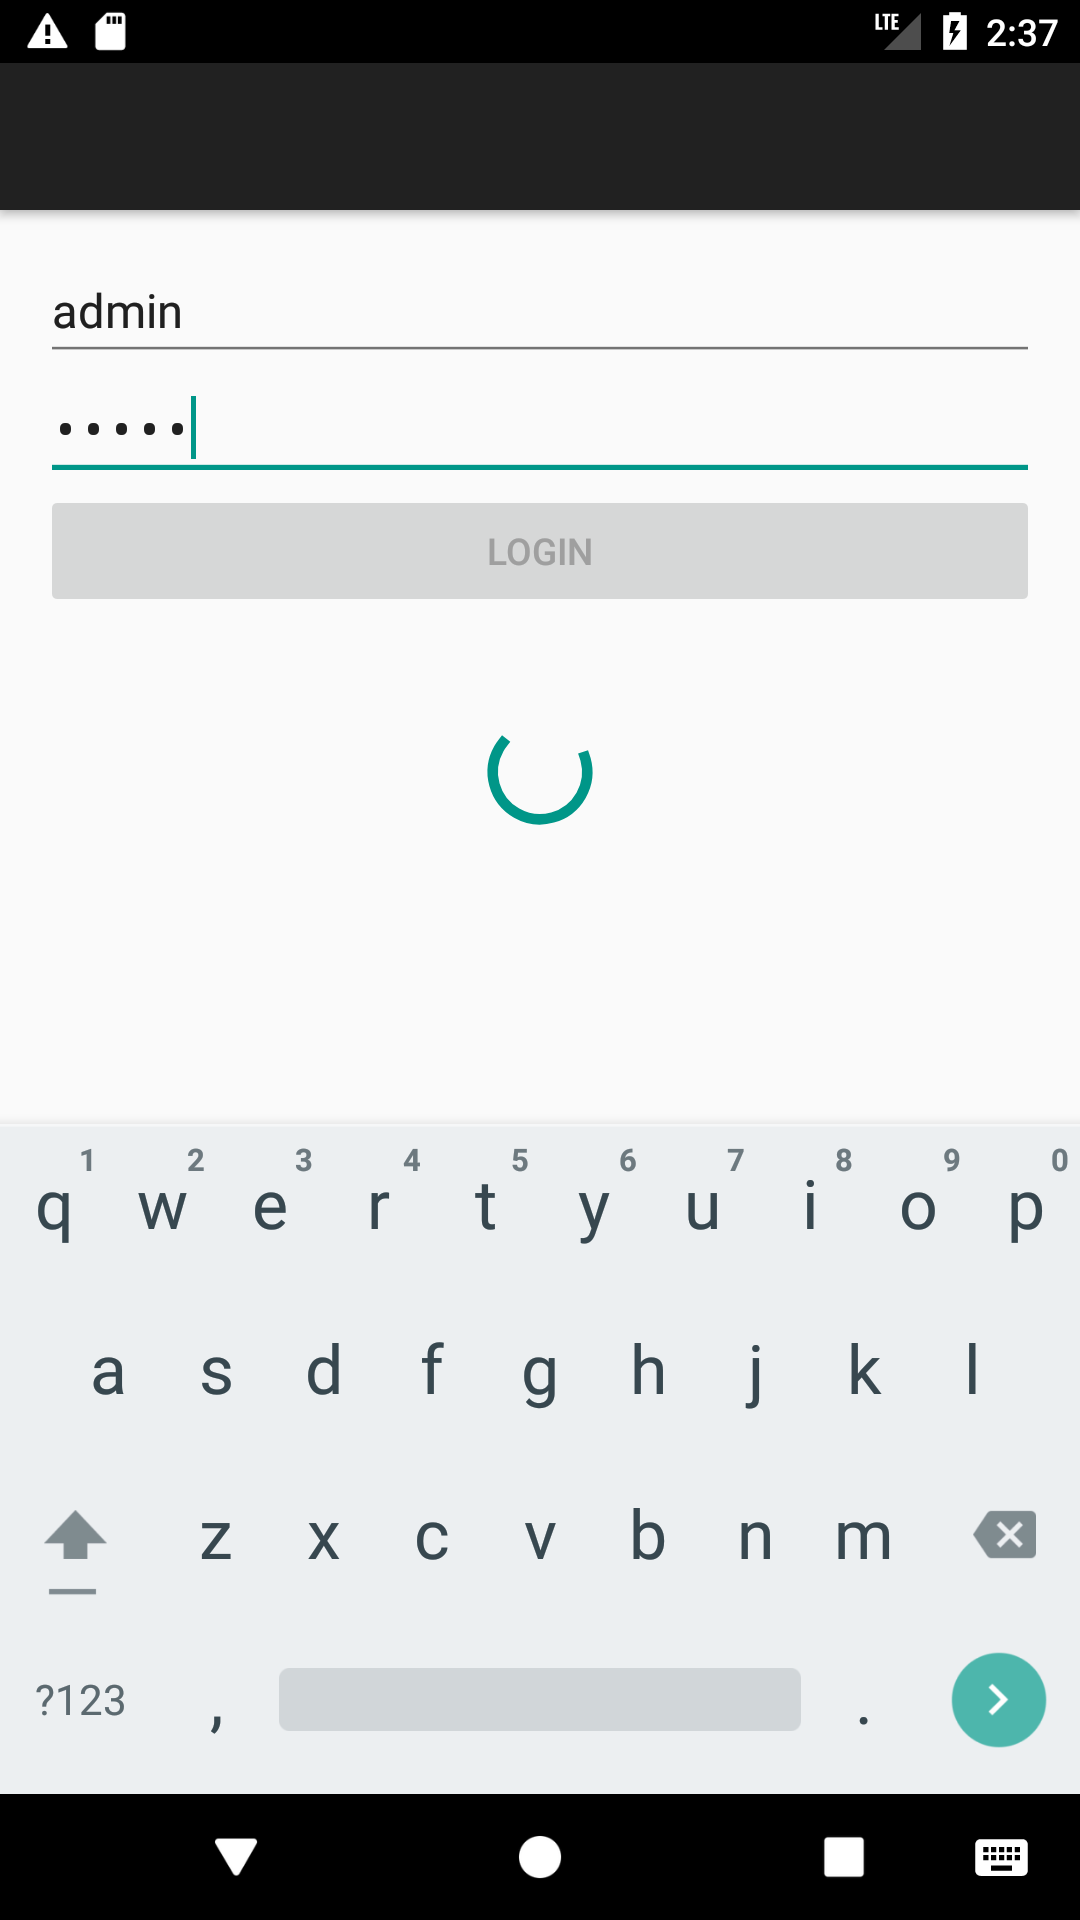
The requirements for the behavior of such a screen are quite typical:
- The login button must be locked until the input fields are empty.
- The login button must be locked while a server request is being made.
- When you rotate the screen, the user does not have to re-enter everything, and the login operation should not be reset.
Let's analyze what the developer should think about when solving such a task.
Validation
What's the big deal? On the loginEditText hang changeListener , which turns the button on or off when login empty or not empty!
loginEditText.addTextChangeListener = { text -> button.setEnabled(text.length() > 0) } Yes, but it will only work for one field. And we still have a password:
loginEditText.addTextChangeListener = { text -> validate() } passwordEditText.addTextChangeListener = { text -> validate() } private void validate() { boolean loginValid = loginEditText.getText().toString().lenght() > 0 boolean passwordValid = passwordEditText.getText().toString().lenght() > 0 button.setEnabled(loginValid && passwordValid) } Well, now that's for sure! No, there is also an asynchronous login operation, during which the button should be locked.
Ok, just turn off the button before executing the request and ... then it can be turned on by changing the text in loginEditText or passwordEditText .
It would be more correct to add a check for the presence of an active request inside the validate() method.
You probably already guessed what this item is for. You need to remember a bunch of things and their connections that can affect the UI.
It's easy to forget about them when you need to add and validate another input field or Switch.
Here, a new twist
To log in we need an asynchronous operation, be it AsyncTask or RxJava + Scheduler , it doesn't matter.
The important thing is that we cannot write it inside our Activity , because we do not want to stop it when the screen is rotated.
It is necessary to take the task beyond the scope of the Activity , when starting it, to invent and remember some identifier of it, in order to be able to check the status of this task later or get its result.
And you will need to write some kind of manager of such operations or take them from the finished ones, the benefit of those many.
condition
The state of the screen - this is what you have to deal with constantly.
Paradoxically, but a fact - many developers continue to ignore the state of the screen in their applications, justifying themselves by the fact that its program works only in one orientation.
While EditText able to independently store the text entered into it, the state of the login button will have to be restored in accordance with the entered text and the current network operation.
The more different data you need to store and recover in the Activity , the harder it is to keep track of them and the easier it is to miss something.
What solution does Reamp offer?
In Reamp, we use Presenter to implement screen behavior and StateModel to store the data that this screen needs.
It's pretty simple. Presenter almost independent of the life cycle of the screen.
By performing any operations that are required of it, the Presenter fills the StateModel object StateModel various necessary data.
Every time Presenter thinks that the latest data needs to be shown on the screen, he reports this to his View .
Show me the code!
In practice, it works as follows:
LoginState is a class containing information about what should be displayed on the screen:
whether you need to show the ProgressBar, what state the input button should have, what is written in the text input fields, etc.
LoginPresenter receives events from LoginActivity (entered text, pressed a button),
performs the necessary operations, fills the LoginState class LoginState necessary data, and sends LoginActivity to “ LoginActivity ” for “rendering”.
LoginActivity receives an event indicating that the data in the LoginState changed and adjusts its layout to match it.
//LoginState public class LoginState extends SerializableStateModel { public String login; public String password; public boolean showProgress; public Boolean loggedIn; public boolean isSuccessLogin() { return loggedIn != null && loggedIn; } } //LoginPresenter public class LoginPresenter extends MvpPresenter<LoginState> { @Override public void onPresenterCreated() { super.onPresenterCreated(); // getStateModel().setLogin(""); getStateModel().setPassword(""); getStateModel().setLoggedIn(null); getStateModel().setShowProgress(false); sendStateModel(); // LoginState "" } // View, public void login() { getStateModel().setShowProgress(true); // getStateModel().setLoggedIn(null); // sendStateModel(); // "" // new Handler() .postDelayed(new Runnable() { @Override public void run() { getStateModel().setLoggedIn(true); // getStateModel().setShowProgress(false); // sendStateModel(); // "" } }, 5000); } public void loginChanged(String login) { getStateModel().setLogin(login); // , } public void passwordChanged(String password) { getStateModel().setPassword(password); // , } } //LoginActivity public class LoginActivity extends MvpAppCompatActivity<LoginPresenter, LoginState> { /***/ @Override protected void onCreate(Bundle savedInstanceState) { super.onCreate(savedInstanceState); setContentView(R.layout.activity_login); /***/ loginActionView.setOnClickListener(new View.OnClickListener() { @Override public void onClick(View v) { getPresenter().login(); // } }); // , loginInput.addTextChangedListener(new SimpleTextWatcher() { @Override public void afterTextChanged(Editable s) { getPresenter().loginChanged(s.toString()); // } }); // , passwordInput.addTextChangedListener(new SimpleTextWatcher() { @Override public void afterTextChanged(Editable s) { getPresenter().passwordChanged(s.toString()); // } }); } // , LoginState @Override public LoginState onCreateStateModel() { return new LoginState(); } // , LoginPresenter @Override public MvpPresenter<LoginState> onCreatePresenter() { return new LoginPresenter(); } // , @Override public void onStateChanged(LoginState stateModel) { progressView.setVisibility(stateModel.showProgress ? View.VISIBLE : View.GONE); // loginActionView.setEnabled(!stateModel.showProgress); // , successView.setVisibility(stateModel.isSuccessLogin() ? View.VISIBLE : View.GONE); // "" } } At first glance, all we have done is to take the meaningful dynamic data into LoginState, transfer part of the code (such as a login request) from the Activity to the Presenter, and nothing more. At second glance, this is indeed true :) Because all the boring work is done for us by Reamp:
- If we rotate the screen, it will not affect the work of the presenter and the input request. When recreating the
LoginActivityit will immediately get the lastLoginStatestate. If the request is still running, theLoginStatewill indicate that the login button is inactive, and the download indicator is shown. If the login operation has time to complete just at the moment the screenLoginState, the presenter will populateLoginStateresult of the login and the future LoginActivity will immediately receive this result. - All data in the
LoginStateto theBundle savedStatewhen the system asks to save the screen state. Of course, Reamp can restoreLoginStatefrom theBundleif our program was unloaded from memory earlier. By default, the object's serialization mechanism is used to saveLoginState, but you can always write your own if necessary. - There is no need to check the
savedStateonnullwhen theLoginActivity, just as there is no chance to forget to show theProgressBarif the login request is already in progress. All code responsible for displaying the current state is concentrated in one place and always takes into account the data fromLoginStateentirely. This approach ensures the consistency of the data on the UI. - There is no need to check the availability of our
Activitybefore doing something with the UI, as is done in some other MVP libraries. In other words, there are no endlessif (view != null)checks. In the presenter, we work directly with the state that is available at any time.
We have listed how Reamp helps to get rid of the boilerplate code, but this is not all the profit from the use of the library. With Reamp, we increase the stability of the application: Reamp makes sure that the onStateChanged(...) method call onStateChanged(...) always occur in the main thread.
All exceptions that occur inside an onStateChanged(...) call do not drop the application process. Working properly with exceptions in Java is a high skill, but exceptions that occur at the topmost UI level (when setting up the layout) are more likely to be annoying misunderstandings than a deliberate event and the program crash is completely unnecessary.
With Reamp you can not be afraid of leaks Activity , t. To. You always work directly with presenter and state classes.
Last but not least, using Reamp we improve the quality of the code:
The code becomes more testable. In fact, we don't even need Instrumentation tests, because it is enough to test the presenter and make sure that after each operation our LoginState has the correct data set
The status class is an excellent candidate for storing UI logic. If our LoginState knows about login progress, entered login and password, then it already has all the initial data to decide whether to enable the login button
public class LoginState extends SerializableStateModel { /***/ public boolean isLoginActionEnabled() { return !showProgress && (loggedIn == null || !loggedIn) && !TextUtils.isEmpty(login) && !TextUtils.isEmpty(password); } } This approach agrees well with the principle of shared responsibility and greatly relieves the class code of our LoginActicity .
The code becomes reusable. LoginPresenter can be used in other projects where you need to implement a similar screen, simply by changing the UI component of this screen.
Comparison with similar solutions
Of course, Reamp is not the only MVP / MVVM library, thousands of them!
When we started doing Reamp, we deliberately wanted to write what we need.
And, of course, we studied the alternatives available at that time, in order to take the best and avoid what we did not like :)
I don’t want to make a holivar and, moreover, poke a finger at someone, just summarize what we like in Reamp, and what we are trying to avoid in it.
First, Reamp is very easy to use. We do not use code generation and try to introduce a minimum of new classes that are needed only for the work of the library itself.
In contrast, for example, from the new Android Architecture Components, we do not need a whole zoo of auxiliary technical classes and annotations to solve the same problems.
The second point is partly a consequence of the first. Having a non-overloaded architecture and minimal dependencies, you can easily integrate with many popular modern technologies.
For example, with DataBinding, because StateModel already has the quintessence of the data that DataBinding needs to work.
Another example, having no bytecode magic, we use Reamp programming on Kotlin without any problems.
Thirdly, there is no need to globally change an existing project; you can simply start using Reamp in an already existing project.
In one article it is difficult to tell about everything that you want, but we have a demo application that step by step will show all the possibilities of Reamp, from the simplest to complex solutions.

Links
Reamp on GitHub - https://github.com/eastbanctechru/Reamp
Demo application - https://github.com/eastbanctechru/Reamp/tree/master/sample
If you want to try Reamp in your project or want more information,
Take a look at the project's Wiki , and especially the FAQ section.
')
Source: https://habr.com/ru/post/338744/
All Articles