Creating the Google Maps API Maps Component with VueJs2
The Google Maps API is a geolocation service. With this service we can display a map and places on the map.
In the article I will describe the way to create a simple map component with the display of places (markers) that will be placed on vuejs.
To create a component based on an article, you need to independently prepare a “hello word” application on VueJs2 using es6 . So in order:
First you need to get the API key on the page . After receiving the key, we will add the google maps api connection script to the index.vue file of our application.
')
In the script, you need to replace "[YOUR API KEY]" with your Google Maps API key.
The script gives access to the global google object that will be used to create the map.
The file structure will consist of the components folder, the googleMap.vue file for the component implementation and the index.vue file - the main file “hello word” of the application.
Let's start by creating a template in googleMap.vue:
To be able to install several maps on the same page, we add the attribute id with the name parameter - the name of the map will be set in the component parameters.
The parameters of the component and the logic of the card are stored in the part of the file with the scripts. Prepare the basis for the component scripts in the googleMap.vue file:
In the code above: the name of the google-map component, the name property, the data method in which parameters are stored, the mounted method that is called when the component is created, and the methods object in which methods for working with the map are called.
Now add some styles for the map:
Bingo!
The basis of the component file is ready, then call the component in the index.vue file:
The component is called by the google-map tag, which is used for the name of the component. The component itself is loaded through the import method and attached to index.vue in the components object.
After creating the file structure and the main code, the component is connected, but the map is not displayed. To display, you need to create a new map using new google.maps.Map
Let's go back to the component file. The script that adds the map is called in the mounted method, this method is called after the template is loaded, and a prepared empty div is available. In the mounted method, create a new map using new google.maps.Map. The map will be a child of our div. Minimum for creating a map, we specify the zoom level and center coordinates:
After adding the code to the component, the map will look like this:
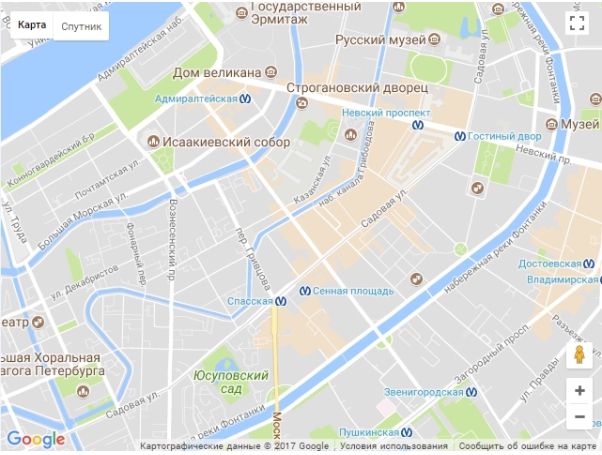
The map is visible, centered, but there are no objects on it yet!
To add objects, create an array of markers, which will contain coordinates. For simplicity, we will place the array in the component file, then we can put it into the props array:
In array 2, there are marker objects in which the coordinates of markers are stored in position. The coordinates are stored separately in position so that in the future it will be convenient to add other fields to the markers, for example, title.
After creating an array of markers, you need to add them to the map. To do this, we will bypass the array inside the function mount, and in the crawling process we will create a marker using new google.maps.Marker:
In the crawl process, we first created a position object - which is necessary to indicate the position of the marker, then we tied a map object and a position position to the marker, then created a marker using new google.maps.Marker (marker)
Done!
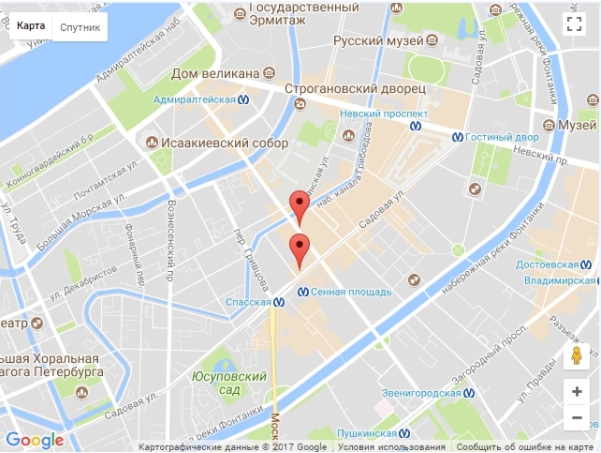
The map now looks like this:
The final component code:
If eslint is installed, it must be disabled with eslint-disable / eslint-enable commands for the section mounted so that it does not swear at google.maps.
The resulting index file code:
The article was created based on this article .
In the article I will describe the way to create a simple map component with the display of places (markers) that will be placed on vuejs.
To create a component based on an article, you need to independently prepare a “hello word” application on VueJs2 using es6 . So in order:
Installing API Access
First you need to get the API key on the page . After receiving the key, we will add the google maps api connection script to the index.vue file of our application.
')
<script src="https://maps.googleapis.com/maps/api/js?key=[YOUR API KEY]"></script> In the script, you need to replace "[YOUR API KEY]" with your Google Maps API key.
The script gives access to the global google object that will be used to create the map.
Creating the basic file structure
The file structure will consist of the components folder, the googleMap.vue file for the component implementation and the index.vue file - the main file “hello word” of the application.
Let's start by creating a template in googleMap.vue:
<template> <div class="google-map" :id="name"></div> </template> To be able to install several maps on the same page, we add the attribute id with the name parameter - the name of the map will be set in the component parameters.
The parameters of the component and the logic of the card are stored in the part of the file with the scripts. Prepare the basis for the component scripts in the googleMap.vue file:
<script> export default { name: 'google-map', props: ['name'], data: function () { return {} }, mounted: function () { }, methods: { } } </script> In the code above: the name of the google-map component, the name property, the data method in which parameters are stored, the mounted method that is called when the component is created, and the methods object in which methods for working with the map are called.
Now add some styles for the map:
<style scoped> .google-map { width: 640px; height: 480px; margin: 0 auto; background: gray; } </style> Bingo!
The basis of the component file is ready, then call the component in the index.vue file:
<template> <div class="container"> <google-map :name="name"></google-map> <script src="https://maps.googleapis.com/maps/api/js?key=AIzaSyCpg_bVTl4WhiOION5V-wYT8OGhYg6uHTM"></script> </div> </template> <script> import googleMap from '~/components/googleMap.vue' export default { data: function () { return { name: 'map', } }, mounted: function () { }, components: {googleMap} } </script> The component is called by the google-map tag, which is used for the name of the component. The component itself is loaded through the import method and attached to index.vue in the components object.
After creating the file structure and the main code, the component is connected, but the map is not displayed. To display, you need to create a new map using new google.maps.Map
Map display
Let's go back to the component file. The script that adds the map is called in the mounted method, this method is called after the template is loaded, and a prepared empty div is available. In the mounted method, create a new map using new google.maps.Map. The map will be a child of our div. Minimum for creating a map, we specify the zoom level and center coordinates:
export default { name: 'google-map', props: ['name'], data: function () { return { map: '' } }, computed: { mapMarkers: function () { return this.markers } }, mounted: function () { const element = document.getElementById(this.name) const options = { zoom: 14, center: new google.maps.LatLng(59.93, 30.32) } this.map = new google.maps.Map(element, options) }, methods: {} } After adding the code to the component, the map will look like this:
Adding markers
The map is visible, centered, but there are no objects on it yet!
To add objects, create an array of markers, which will contain coordinates. For simplicity, we will place the array in the component file, then we can put it into the props array:
data: function () { return { map: '', markers: [ { position: { latitude: 59.93, longitude: 30.32 } }, { position: { latitude: 59.928, longitude: 30.32 } } ] } } In array 2, there are marker objects in which the coordinates of markers are stored in position. The coordinates are stored separately in position so that in the future it will be convenient to add other fields to the markers, for example, title.
After creating an array of markers, you need to add them to the map. To do this, we will bypass the array inside the function mount, and in the crawling process we will create a marker using new google.maps.Marker:
mounted: function () { const element = document.getElementById(this.name) const options = { zoom: 14, center: new google.maps.LatLng(59.93, 30.32) } this.map = new google.maps.Map(element, options) this.markers.forEach((marker) => { const position = new google.maps.LatLng(marker.position.latitude, marker.position.longitude) marker.map = this.map marker.position = position new google.maps.Marker(marker) }) } In the crawl process, we first created a position object - which is necessary to indicate the position of the marker, then we tied a map object and a position position to the marker, then created a marker using new google.maps.Marker (marker)
Done!
The map now looks like this:
The final component code:
<template> <div class="container"> <div class="google-map" :id="name"></div> </div> </template> <script> export default { name: 'google-map', props: ['name'], data: function () { return { map: '', markers: [ { position: { latitude: 59.93, longitude: 30.32 } }, { position: { latitude: 59.928, longitude: 30.32 } } ] } }, computed: { mapMarkers: function () { return this.markers } }, mounted: function () { /*eslint-disable */ const element = document.getElementById(this.name) const options = { zoom: 14, center: new google.maps.LatLng(59.93, 30.32) } this.map = new google.maps.Map(element, options) this.markers.forEach((marker) => { const position = new google.maps.LatLng(marker.position.latitude, marker.position.longitude) marker.map = this.map marker.position = position new google.maps.Marker(marker) }) /*eslint-enable */ }, methods: { } } </script> <style scoped> .google-map { width: 640px; height: 480px; margin: 0 auto; background: gray; } </style> If eslint is installed, it must be disabled with eslint-disable / eslint-enable commands for the section mounted so that it does not swear at google.maps.
The resulting index file code:
<template> <div class="container"> <google-map :name="name"></google-map> <script src="https://maps.googleapis.com/maps/api/js?key=AIzaSyCpg_bVTl4WhiOION5V-wYT8OGhYg6uHTM"></script> </div> </template> <script> import googleMap from '~/components/googleMap.vue' export default { data: function () { return { name: 'map' } }, mounted: function () { }, components: {googleMap} } </script> The article was created based on this article .
Source: https://habr.com/ru/post/338568/
All Articles