Transition from ASP.NET to ASP.NET Core 2.0
This article is a translation of the Help guide for migrating applications from ASP.NET to ASP.NET Core 2.0. Link to the original
Content
- Requirements
- Framework Selection
- Differences in project structure
- Global.asax replacement
- Configuration storage
- Built-in mechanism Dependency Injection
- Work with static files
Requirements
• .NET Core 2.0.0 SDK or later.
Choosing a framework
To work with an ASP.NET Core 2.0 project, the developer has to make a choice - use .NET Core, .NET Framework, or use both options at once. As additional information, you can use the manual Choosing between the .NET Core and .NET Framework for server apps (briefly, the .NET core is a cross-platform library, unlike the .NET Framework) in order to understand which Framework will be the most preferable for you. .
After selecting the desired Framework in the project, you must provide links to the NuGet packages.
Using .NET Core allows you to eliminate numerous explicit references to packages, thanks to the combined package (meta package) of ASP.NET Core 2.0. This is how the installation of the Microsoft.AspNetCore.All meta package looks into the project:
<ItemGroup> <PackageReference Include="Microsoft.AspNetCore.All" Version="2.0.0" /> </ItemGroup> Differences in project structure
The structure of the .csproj project file has been simplified in ASP.NET Core. Here are some significant changes:
• Explicitly specifying files is optional for adding them to a project. Thus, the risk of conflicts in the process of merging XML is reduced if a large team works on a project.
• No more GUID links to other projects, which improves readability
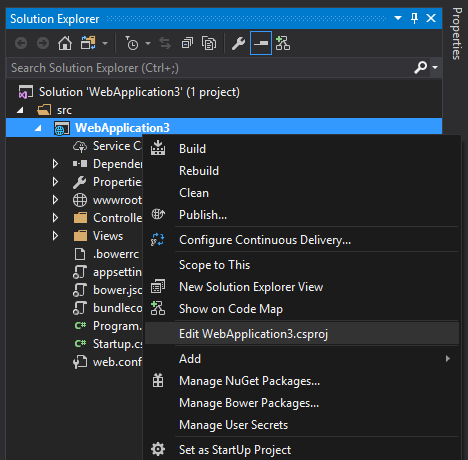
• The file can be edited without downloading it from Visual Studio:
Global.asax replacement
The entry point for an ASP.NET application is the Global.asax file. Tasks such as route configuration and filter and area registration are handled in the Global.asax file.
public class MvcApplication : System.Web.HttpApplication { protected void Application_Start() { AreaRegistration.RegisterAllAreas(); FilterConfig.RegisterGlobalFilters(GlobalFilters.Filters); RouteConfig.RegisterRoutes(RouteTable.Routes); BundleConfig.RegisterBundles(BundleTable.Bundles); } } This approach closely connects the application and the server on which the application is deployed. To reduce connectivity, OWIN was introduced as a tool that provides a more correct way to share several frameworks together.
OWIN allows you to add only necessary modules to the request pipeline. The runtime uses Startup to configure services and the query pipeline.
Startup registers a set of intermediate services (middleware) with the application. For each request, the application calls each of the set of intermediate services in turn, which have a pointer to the first element of the linked list of handlers.
Each middleware component can add one or more handlers to the query processing pipeline. This is done by returning the reference to the handler that is at the top of the list.
And the handler, having finished its work, calls the next handler from the queue.
In ASP.NET Core, the entry point in the application is the Startup class, with which we level the dependence on Global.asax.
If the .NET Framework was originally chosen, then using OWIN we can configure the query pipeline as in the following example:
using Owin; using System.Web.Http; namespace WebApi { // : OWIN. , appSetting owin: AutomaticAppStartup «false». // OWIN , global.asax MapOwinPath MapOwinRoute RouteTable.Routes public class Startup { // . public void Configuration(IAppBuilder builder) { HttpConfiguration config = new HttpConfiguration(); // , config.Routes.MapHttpRoute("Default", "{controller}/{customerID}", new { controller = "Customer", customerID = RouteParameter.Optional }); // xml json config.Formatters.XmlFormatter.UseXmlSerializer = true; config.Formatters.Remove(config.Formatters.JsonFormatter); // config.Formatters.JsonFormatter.UseDataContractJsonSerializer = true; builder.UseWebApi(config); } } } Also, if necessary, here we can add other intermediate services to this pipeline (service loading, configuration settings, static files, etc.).
As for the version of the .NET Core framework, a similar approach is used here, but not without using OWIN to determine the entry point. Alternatively, the Main method in Program.cs is used (by analogy with console applications), where Startup is loaded:
using Microsoft.AspNetCore; using Microsoft.AspNetCore.Hosting; namespace WebApplication2 { public class Program { public static void Main(string[] args) { BuildWebHost(args).Run(); } public static IWebHost BuildWebHost(string[] args) => WebHost.CreateDefaultBuilder(args) .UseStartup<Startup>() .Build(); } } Startup must include the Configure method. Configure defines which services will be used in the request pipeline. In the following example (taken from the standard website template), several extension methods are used to customize the pipeline with support:
• BrowserLink
• Error pages
• Static files
• ASP.NET Core MVC
• Identity
public void Configure(IApplicationBuilder app, IHostingEnvironment env, ILoggerFactory loggerFactory) { loggerFactory.AddConsole(Configuration.GetSection("Logging")); loggerFactory.AddDebug(); if (env.IsDevelopment()) { app.UseDeveloperExceptionPage(); app.UseDatabaseErrorPage(); app.UseBrowserLink(); } else { app.UseExceptionHandler("/Home/Error"); } app.UseStaticFiles(); app.UseIdentity(); app.UseMvc(routes => { routes.MapRoute( name: "default", template: "{controller=Home}/{action=Index}/{id?}"); }); } As a result, we have a separation of the runtime and the application, which gives us the opportunity to make the transition to another platform in the future.
Note: For a deeper understanding of ASP.NET Core Startup and Middleware, you can explore Startup in ASP.NET Core
Configuration storage
ASP.NET supports saving settings. For example, these are the settings that are used by the runtime where the application was deployed. The approach itself was that the <appSettings> section in the Web.config file was used to store user key-value pairs:
<appSettings> <add key="UserName" value="User" /> <add key="Password" value="Password" /> </appSettings> The application accessed these settings using the ConfigurationManager.AppSettings collection from the System.Configuration namespace:
string userName = System.Web.Configuration.ConfigurationManager.AppSettings["UserName"]; string password = System.Web.Configuration.ConfigurationManager.AppSettings["Password"]; In ASP.NET Core, we can store application configuration data in any file and load them using services at the initial stage of loading.
The default file in the new template project appsettings.json :
{ "Logging": { "IncludeScopes": false, "LogLevel": { "Default": "Debug", "System": "Information", "Microsoft": "Information" } }, // . JSON, : // , "AppConfiguration": { "UserName": "UserName", "Password": "Password" } } Loading this file into the IConfiguration instance for the application occurs in Startup.cs:
public Startup(IConfiguration configuration) { Configuration = configuration; } public IConfiguration Configuration { get; } This is how the application uses Configuration to get these settings:
string userName = Configuration.GetSection("AppConfiguration")["UserName"]; string password = Configuration.GetSection("AppConfiguration")["Password"]; There are other methods based on this approach that make the process more reliable, for example, Dependency Injection (DI).
The DI approach provides access to a strictly typed set of configuration objects.
// , AppConfiguration - , AppConfiguration services.Configure<AppConfiguration>(Configuration.GetSection("AppConfiguration")); Note: For a deeper understanding of ASP.NET Core configurations, you can get acquainted with Configuration in ASP.NET Core .
Built-in mechanism Dependency Injection
An important goal in creating large, scalable applications is to weaken the connection between components and services. Dependency Injection is a common technique for solving this problem and its implementation is a component built into ASP.NET Core.
In ASP.NET applications, developers used third-party libraries to implement Injection Dependency. An example of such a library is Unity .
An example of configuring Dependency Injection with Unity is a UnityContainer implementation wrapped in an IDependencyResolver :
using Microsoft.Practices.Unity; using System; using System.Collections.Generic; using System.Web.Http.Dependencies; public class UnityResolver : IDependencyResolver { protected IUnityContainer container; public UnityResolver(IUnityContainer container) { if (container == null) { throw new ArgumentNullException("container"); } this.container = container; } public object GetService(Type serviceType) { try { return container.Resolve(serviceType); } catch (ResolutionFailedException) { return null; } } public IEnumerable<object> GetServices(Type serviceType) { try { return container.ResolveAll(serviceType); } catch (ResolutionFailedException) { return new List<object>(); } } public IDependencyScope BeginScope() { var child = container.CreateChildContainer(); return new UnityResolver(child); } public void Dispose() { Dispose(true); } protected virtual void Dispose(bool disposing) { container.Dispose(); } } Create an instance of your UnityContainer , register your service, and set the dependency resolution for HttpConfiguration to a new instance of UnityResolver for our container:
public static void Register(HttpConfiguration config) { var container = new UnityContainer(); container.RegisterType<IProductRepository, ProductRepository>(new HierarchicalLifetimeManager()); config.DependencyResolver = new UnityResolver(container); // } Next, we inject IProductRepository where necessary:
public class ProductsController : ApiController { private IProductRepository _repository; public ProductsController(IProductRepository repository) { _repository = repository; } } Since Dependency Injection is part of the ASP.NET Core kernel, we can add our service to the ConfigureServices method inside Startup.cs:
public void ConfigureServices(IServiceCollection services) { // services.AddTransient<IProductRepository, ProductRepository>(); } And then the repository injection can be done anywhere, as is the case with Unity.
Note: Details can be found in Dependency Injection in ASP.NET Core
Work with static files
An important part of web development is the ability to maintain statics. The most common examples of static are HTML, CSS, JavaScript, and images.
These files must be saved in the application share folder (or, for example, in the CDN) so that they can be accessed later by reference. The approach for working with statics has been changed in ASP.NET Core.
In ASP.NET, static is stored in different directories.
And in ASP.NET Core, static files are stored by default in “web root” (/ wwwroot). And access to these files is carried out using the extension method UseStaticFiles from Startup.Configure:
public void Configure(IApplicationBuilder app) { app.UseStaticFiles(); } For example, images located in the wwwroot / images folder will be accessible from the browser at http://<app-address>/images/<imageFileName> .
Note: If the .NET Framework has been selected, then you will additionally need to install the NuGet Microsoft.AspNetCore.StaticFiles package.
Note: For a more detailed reference to serving static files in the ASP.NET core, see the Introduction to the ASP.NET Core .
translated poledustaren
')
Source: https://habr.com/ru/post/338298/
All Articles