Read user input (digits) in the 3CX Call Flow Designer application
Introduction
In this article, we will consider the creation of a voice application that reads a sequence of digits entered by the user through a dialer, and then confirms the correctness of the input by playing the entered digits to the subscriber. Agree, this is a fairly common task in self-service telephone portals.
Our application will perform this task using the 3CX Call Flow Designer . The application works as follows:
- 3CX CFD reports: Enter your user number
- User dials 1234
- 3CX CFD reports: The entered user number is 1234. To confirm, press 1, to re-enter, press 2.
Since the reproduction of numbers may be required in different parts of our application, we will move it into a separate user component. CFD allows you to create such custom components.
')
Recall that in previous articles we considered the creation of a CFD application for outgoing dialing (after a call is completed, you can send a report using the Email Sender component), CFD operation with databases (which can also be used to get a subscriber number), incoming call routing depending on time of day (which can be combined with outgoing dialing) and sending e-mail messages (for example, to notify the order by phone).
Please note - the 3CX CFD development environment is free. But voice applications will be run only on 3CX Pro and Enterprise editions . Download CFD from here .
The demo project of this voice application comes with the 3CX CFD distribution and is located in the Documents \ 3CX Call Flow Designer Demos folder. Let's get started
Project creation
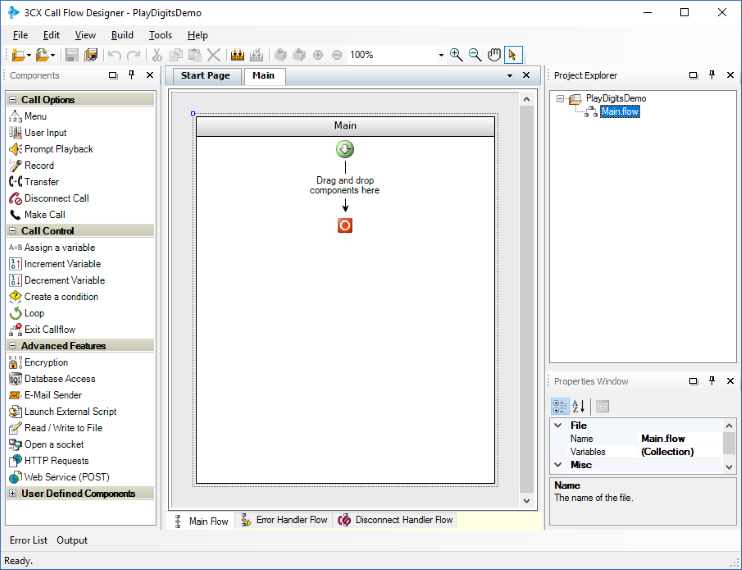
To create a CFD project, go to File → New → Project , specify the project location folder and its name, for example, “PlayDigitsDemo” .
Create custom component
The created component will receive a sequence of numbers from the user and play them in sequence.
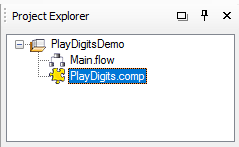
To create a component in the Project Explorer window, right-click on the project name, select New Component and name it PlayDigits .
Then click on the PlayDigits.comp component and in the Properties Window, click the button next to the Variables collection. Add two variables - Digits and Index . Variable Digits - takes the numbers that the component then loses. The Index variable is internal, it allows the component to go from digit to digit.

To add variables, click the Add button to add a variable and change its name (Name property) to Digits . The variable Digits must have the following properties: Accessibility: ReadWrite, Initial Value:, Scope: Public. Click the Add button again, add a new variable and change its name to Index . The Index variable must have the following properties: Accessibility: ReadWrite, Initial Value: 0, Scope: Private
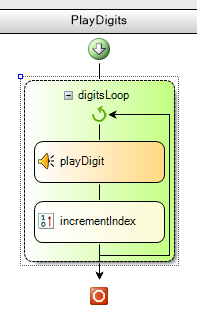
Now let's take a look at the component architecture. We will use the Loop component to iterate through the sequence of numbers (cycle). In the Loop component, add the Prompt Playback component to play the next digit in the sequence. In the same Loop component, add the Increment Variable component, which will increase the value of the Index variable. This design will allow you to consistently reproduce all the numbers entered by the user.
Create loop
- Drag the Loop component into the main window of the development environment.
- In the Properties window, change the component name to digitsLoop
Select the digitsLoop component and in its Condition property specify the lineLESS_THAN(callflow$.Index,LEN(callflow$.Digits)).
This expression repeats the cycle until the Index variable (callflow $ .Index) is less than the number of digits entered by the user LEN (callflow $ .Digits).
Replaying messages
- First of all, we need sound files corresponding to each digit. Prepare and copy the files 0.wav , 1.wav , etc. Up to 9 in the Audio folder of your project.
- Drag the Prompt Playback component to the main application field on the Loop component.
- Change the component name to playDigit .
- Select this component and in the properties window, click the button next to the Prompts collection to open the Prompt Collection Editor sound message editor.
- Click the Add button and change the type to Dynamic Audio File Prompt
In the Audio File Expression field, enter the stringCONCATENATE(MID(callflow$.Digits,callflow$.Index,1),".wav").
The expression uses the digit of the current iteration and combines it with the file extension (string) .wav . Thus, the corresponding number is reproduced to the subscriber.
Variable number increment component
- Drag the Increment Variable component onto the Loop component, below the playDigit component
Change component name to incrementIndex
For the VariableName property, specify an expressioncallflow$.Index
The execution cycle will be as follows:
Our component is ready. Now we will call it from the main application.
Calling a component to play numbers
After the custom component is ready, enable it in our application:
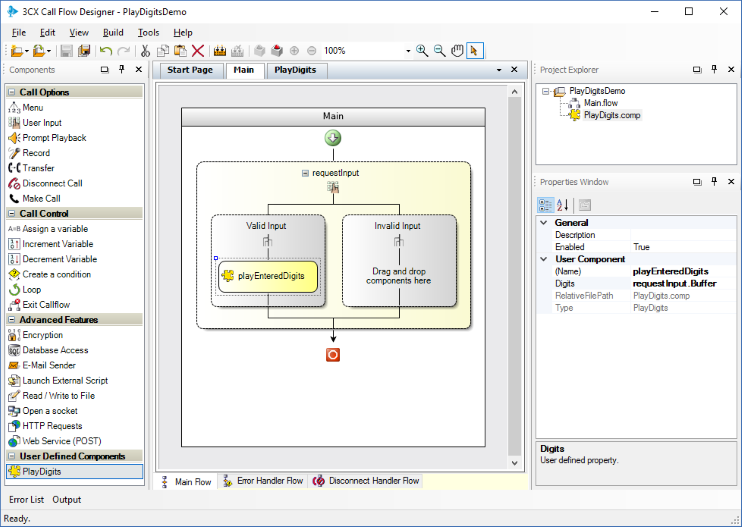
- In the Project Explorer window , click Main.flow to open the main application.
- Add a User Input component that will request input from the user. Rename it to requestInput and add a pre-prepared message to the user about the need to enter.
- In the Valid Input branch of the User Defined Components window, add the created custom PlayDigits component .
Rename it to playEnteredDigits
Select it and in the Digits property specify the following expressionrequestInput.Buffer
The requested digits will be first buffered and then played to the user. The finished application will look something like this:
Compiling and installing the application on the 3CX server
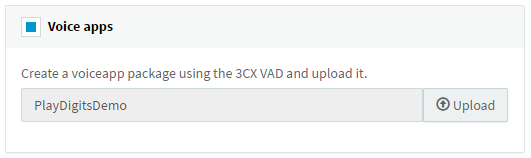
Voice application is ready! Now it should be compiled and uploaded to the 3CX server. For this:
- Go to Build> Build All , and the CFD will create the PlayDigitsDemo.tcxvoiceapp file.
- Go to the 3CX management interface, in the Call Queues section. Create a new Call Queue, specify the name and extension number of the Queue, and then set the Voice Applications option and download the compiled file.
- Save your changes to the Call Queue. Voice application is ready to use.
Conclusion
Our application solves a specific problem, but it is important to note the ability to encapsulate certain logic of operation into a separate user component. This is a very powerful mechanism, offering a number of advantages:
- Accelerate application development by reusing existing components.
- Simplify the structure of the main application and prevent the application architecture from expanding to a size that is already difficult to manage.
- Voice application is clear and easily changeable.
By the same principle, we can create custom components that lose time and dates, validate user input, and so on.
Source: https://habr.com/ru/post/337654/
All Articles