We write GraphQL API server on Yii2 with a client on Polymer + Apollo. Part 2. Client
Part 1. Server
Part 2. Client
Part 3. Mutations
Part 4. Validation. findings
To implement the UI, consider an example of writing a web client for our GraphQL server. And if we decided not to follow the good old traditions, we will not do this in the UI, of course, and we will write it on custom web components using the excellent Polymer library .
Why the Apollo library was chosen to connect to the GraphQL server is difficult to say, since I did not see any analogues for working with GraphQL. Initially, the library, as well as all its documentation is sharpened under React, and all information about integration with Polymer is limited only to a reference to the component in the Integrations section. Thus, if you work with React, you and cards in hand. All examples, tweaks and hooks for him.
Actually, the code
The finished client project can be viewed and downloaded here .
Step 1. Install Polymer
This step does not carry the target load, but, again, is necessary to start working with GraphQL. Thus, if you are with web components on "you", then you can safely skip this step.
As in the case of the server, first we will raise the environment. How to do this you can find in the official documentation . I will only clarify that of all the proposed options, we will need to create an empty Polymer project (option "2) polymer-2-application"), the remaining options can be left as default:
$> polymer init ? Which starter template would you like to use? ? Which starter template would you like to use? polymer-init-polymer-2-applicat info: Running template polymer-2-application... ? Application name (graphql-client-demo) ? Application name graphql-client-demo ? Main element name (graphql-client-demo-app) ? Main element name graphql-client-demo-app ? Brief description of the application GraphQL Demo Client ? Brief description of the application GraphQL Demo Client create bower.json create index.html create manifest.json create polymer.json create README.md create src\graphql-client-demo-app\graphql-client-demo-app.html create test\graphql-client-demo-app\graphql-client-demo-app_test.html Project generated! Installing dependencies... And immediately run:
$> polymer serve info: Files in this directory are available under the following URLs applications: http://127.0.0.1:8081 reusable components: http://127.0.0.1:8081/components/graphql-client-demo/ ... and leave it running, because All changes are picked up on the fly (for me, as a backend-boxer, it was not completely obvious from the beginning).
Step 2. Installing the module for working with GraphQL
Module for working with the Apollo library with good documentation .
$> npm install --save polymer-apollo apollo-client Step 3. Install and configure webpack
Unfortunately, the reality is that working with this module occurs through a webpack. On the one hand, this is not so bad, due to the fact that webpack packs all our scripts so that everything works faster and more efficiently. But on the other hand, to complete the work with the webpack, you must use npm instead of the Polymer CLI. Because of this, unexpected situations can arise in working with Polymer. This is due to the fact that it is impossible to configure some functions past the polymer.json configuration file. But here, most likely, the problem is in the curved hands of the backend-box, so do not minus much, but rather share your configuration ways in the comments.
Note. Although there is a webcam loader for the polymer from the developer of the polymer-apollo expansion itself, but, to tell the truth, I did not feel any special benefit from this loader.
$ npm install -g webpack Then add 2 files to the project root:
webpack.config.js - packer infusions;
entry.js - a list of all js-files for packaging (will be filled in the course of application development).
webpack.config.js:
module.exports = { entry: "./entry.js", output: { path: __dirname, filename: "bundle.js" } }; After that, only the packaged file will need to be included in the index.html:
<script src="bundle.js"></script> In order to choose the correct sequence for connecting all the scripts and components, I had to spend a certain amount of time, so I advise you not to waste your own and look at the <head> section of the index in the repository to the article .
Step 4. Creating the structure
A certain structure on the frontend side, it seems to me, cannot be for the reason that it, as a rule, is sharpened for a specific project. But we still need two elements:
This is the src / models directory, which will store all (just all-all) GraphQL queries and nothing but them, and will continue to connect as needed to the places of use. AND...
- src / client.js is the place to connect to the GraphQL server, which we will immediately deal with.
Step 4.1 src / client.js
import ApolloClient, { createNetworkInterface, addTypename } from 'apollo-client'; // GraphQL export const apolloClient = new ApolloClient({ networkInterface: createNetworkInterface({ // URL uri: 'http://graphql.server.demo/api/graphql', transportBatching: true, }) }); ... and don't forget to add it to entry.js:
import "src/client.js" Step 4.2 Model user.js
These files have nothing to do with the concept of the model as such. These are only libraries of string constants with queries, grouped by specific functionality. Not fundamentally tied to the essence. Possible breakdown by specific pages or functional elements. All at the discretion of the developer.
src / models / user.js:
// import gql from 'graphql-tag'; // , , // // (.. : query getUserInfo { ... }) // export const getUserInfoQuery = gql` query getUserInfo { user(id: 1) { firstname lastname createDate(format: "d M, H:i") addresses { city { name } } } addresses { user { firstname } } } `; Step 4.3 Component
For convenience, we will move js from our polymer-created component to a separate file, and make changes to it so that it cooperates with the Apollo library.
src / graphql-client-demo-app / graphql-client-demo-app.js:
import { PolymerApolloMixin } from 'polymer-apollo'; import { apolloClient } from '../client'; // // ( ) import { getUserInfoQuery } from '../models/user'; class GraphqlClientDemoApp extends PolymerApolloMixin({ apolloClient }, Polymer.Element) { static get is() { return 'graphql-client-demo-app'; } static get properties() { return { appName: { type: String, value: 'GraphQL Client Demo' }, // !!! // , // property // // // .. // : // query { user { ... } } user: { type: Object, value: {} } }; } // get apollo() { return { getUserInfo: { // , // // , // // // , // // query: getUserInfoQuery } }; } } window.customElements.define(GraphqlClientDemoApp.is, GraphqlClientDemoApp); ... and again, do not forget to add it to entry.js:
import "src/client.js" Well, actually left to look at all that comes from the server.
src / graphql-client-demo-app / graphql-client-demo-app.html:
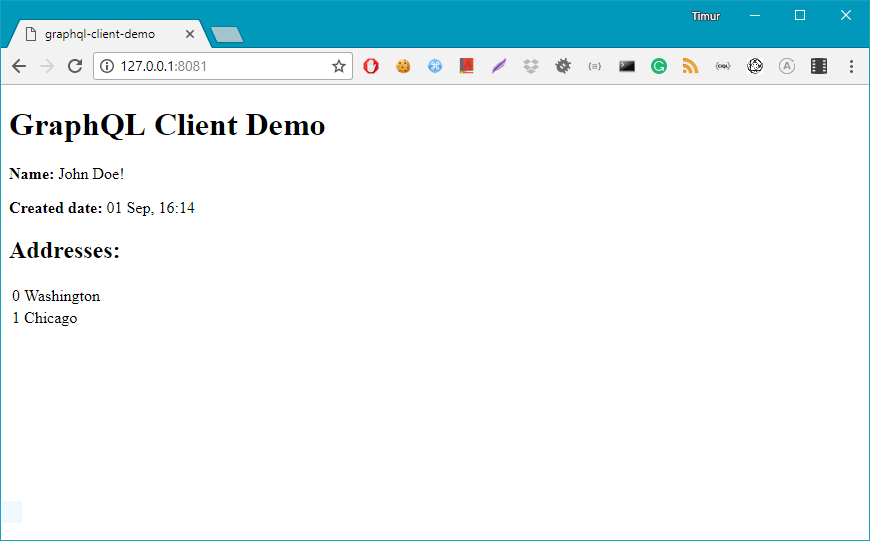
<dom-module id="graphql-client-demo-app"> <template> <style> </style> <!-- property --> <h1>[[appName]]</h1> <!-- --> <p><b>Name:</b> [[user.firstname]] [[user.lastname]]!</p> <p><b>Created date:</b> [[user.createDate]]</p> <h2>Addresses:</h2> <table> <!-- --> <template is="dom-repeat" items="{{user.addresses}}"> <!-- , , --> <tr> <td>{{index}}</td> <td>{{item.city.name}}</td> </tr> </template> </table> </template> </dom-module> By the way, during the development of the template, my environment window looks like this:

On the left side of the screen, I completely see the structure of the request (which is identical to the structure of the response), and I describe it in the pattern I need. Conveniently.
Step 5. Build, test and debug
To begin, do not forget to collect webpack:
$> webpack During development, you unfortunately will have to do this after each update of js-scripts. This can be avoided if you follow the tutorial written by polymer-apollo itself and use npm start, but I repeat that if you work past the polymer CLI, you may have problems with some components of Polymer and with deploem (specifically, I ran into the problem of incorrect work iron-pages and lazy-import, which I will not describe here because, unfortunately, have not yet fully decided).
Open Chrome, go to the address of our already raised client (the address can be seen immediately after executing $ polymer serve , usually it is http://127.0.0.1:8081/ ) and rejoice in the results returned from our GraphQL server:
And again, I can't get enough of a tool for debugging. We put the extension for Chrome Apollo Client Developer Tools , open the console, go to the Apollo tab, recline on the back of the chair and start to enjoy:
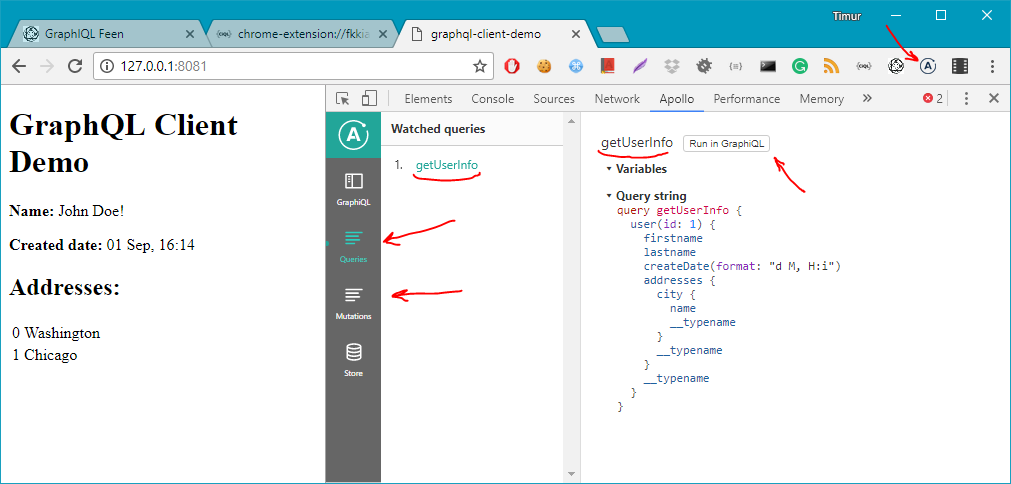
Remember, we set our alias request? So, this list will display requests for exactly these aliases (otherwise just a number). Requests and mutations are displayed in separate lists. It should be noted that this tool is not a complete replacement for the Network tab, since it shows only requests, but the answers are not. True, any request with one click on the button near the request alias (or mutations) can be immediately loaded into the GraphiQL extension built into the same extension.
In general, such a laconic inspector, so if you still want to look at the headers and statuses, welcome to the good old Network tab.
In the next (their) part (s), we finally consider the mutations , consider one of the server validation methods, and of course draw conclusions.
')
Source: https://habr.com/ru/post/337044/
All Articles