Vertex Wireless VW210: a rare router and its inner world
Lyrical digression: everything described in this article was made solely for educational purposes, the goal of material gain was not pursued, not a single cat in the process (hopefully) was damaged. Everything that is described here you repeat at your own peril and risk.

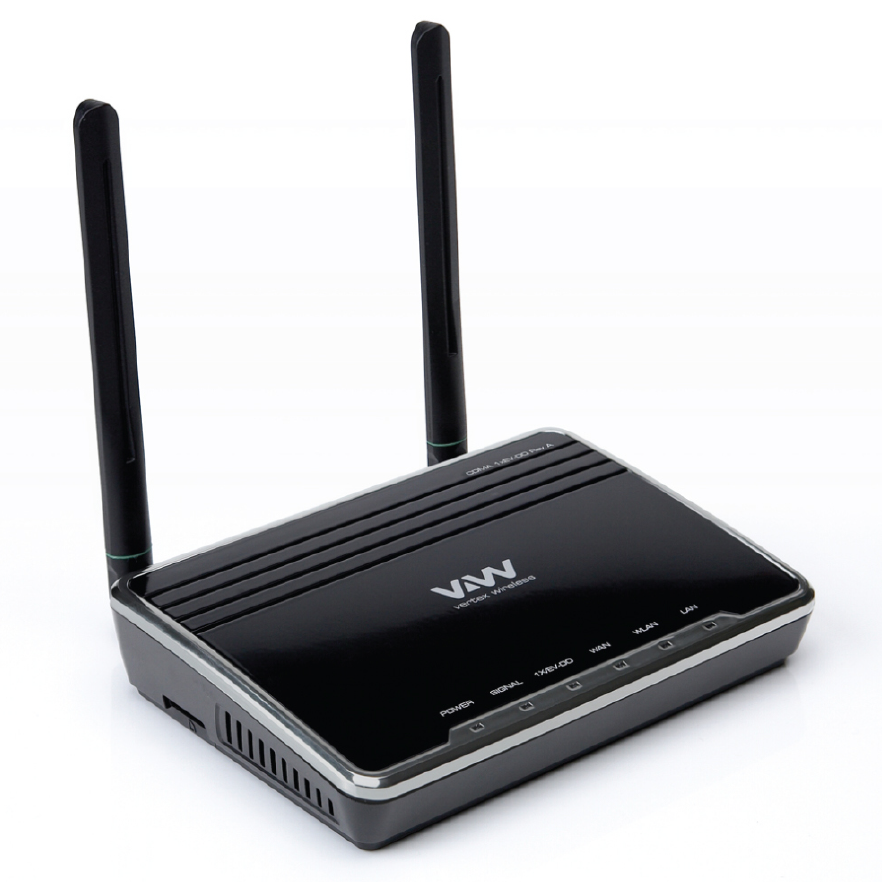
KDPV smoker (for those who have expensive traffic)
For several years in a deaf village, this elusive Joe of the networking industry has been working tirelessly. The choice fell on him, thanks to the support of the only working solution for the area, namely CDMA 450 from the local operator Sotel (ala SkyLink). Unlike other routers / modems for this standard of the time, he was the only one who allowed to achieve a stable connection with the help of
KDPV for readers who do not limit themselves to anything, although there is so much attention here if you are already here.
All subsequent images are clickable (except for the fairytale character)
Motivation
Together with the site and the manufacturer, they left this mortal world and any hopes of receiving firmware files, let alone opening its source codes, despite the requirements of the GPL. The idea to get a more complete access to the system than the web interface allows, appeared in my head for a long time and didn’t give rest to playful hands. And, thanks to the question on the toaster from uv. Nomad1 and contrary to his advice to throw out this misunderstanding of the network industry, was immediately enforced. In fact, thanks to this habraiser both for the first and for the second, because it was a direct challenge, after which I shouted "Dementia and courage!" I went to an unequal battle with the Korean technological machine of the sample of 2009.
Soft
First of all, I began to study the web interface, or rather its inner world. Thanks to a hole in the used version of the GoAhead embedded web server, it was possible to download the source code of the pages by adding the "/" link to the main link. For example, the link http://192.168.200.1/html/log.asp opened the result of the script log.asp, and http://192.168.200.1/html/log.asp/ - the original file of the script log.asp. With a small script on the bash, everything that was at least somehow mentioned in the scripts was pulled out, but after analyzing the mined, it became clear that this information was clearly not enough for hacking.
')
Due to another vulnerability in the same GoAhead, it was possible to execute code when the buffer overflowed, but for this it was necessary to get information about the address, where to transfer control, and in the absence of access to the system, the call stack could not be received when it was dropped.
In addition to the 2 vulnerabilities in the web server, vulnerabilities were found in the implementation of the uPnP server, which led to buffer overflow and code execution, but their operation also required access to the router system.
Iron
Saying goodbye to the hopes of a software hack, I turned to the study of the iron part.
The iron part of the router is a sandwich of two boards: a modem and interfaces (on the top of the photo) and a processor unit (on the bottom of the photo):

On the reverse side of the processor, there is a mini-PCI connector in which the Wi-Fi board is at peace:

The initial examination of the patient showed that the main components of this device are:
- Qualcomm MSM6801A - modem processor
- Micrel KSZ8692PB - system on a chip (SoC) with a network, PCI and other payload

Since we have identified
UART
After studying the extracted documentation, it became clear that our new friend has UART-interfaces in the amount of 4 pieces, as well as JTAG. One of the UARTs is most likely used as a debug console. Having started the terminal,
$ minicom -D /dev/ttyUSB0 -b 115200 I started poking a needle connected to the TTL-USB converter at the debug points on the board, periodically sending a router to reload. And at the next point, the cherished letters ran into the console ... and on the next letter of answers. It turned out to be a UART for communicating SoC with a modem. Theoretically, the exchange log with the modem is also of some interest, especially given the lack of intelligible documentation on the creation of Qualcomm in free access, but we still have a slightly different goal.
The points of the UART of the debugging console turned out to be on the back of the board and closed with the second “sandwich” board, so it took a little longer to detect them.

Solder to the cherished contacts:

Boot log
  U-Boot 1.1.4 (November 6, 2008)

 DRAM: 64 MB
 Flash: 4 MB
 In: serial
 Out: serial
 Err: serial

 ## Booting image at 1c040000 ...
    Image Name: Kernel-Ramdisk-Image
    Image Type: ARM Linux Multi-File Image (uncompressed)
    Data Size: 3338960 Bytes = 3.2 MB
    Load Address: 00008000
    Entry Point: 00008000
    Contents:
    Image 0: 1609588 Bytes = 1.5 MB
    Image 1: 1729360 Bytes = 1.6 MB
    Verifying Checksum ... OK
 Ok
    Relocate RAMDISK from 0x1c1c8fc0 to 0xc00000 by 0x1a6350 bytes

 Starting kernel ...

 Uncompressing Linux ................................................ .................................................. ........ done, booting the kernel.
 Linux version 2.6.23.17-Pegasus (gcc version 4.2.1)
 CPU: ARM922T [41029220] revision 0 (ARMv4T), cr = c0007177
 Machine: Micrel Pegasus
 Memory policy: ECC disabled, Data cache writeback
 Pegasus ID = 8692 SubID = 00 Revision = 02
 Clocks: System 166 MHz, CPU 166 MHz, DDR 166 MHz, PCI 33 MHz, IPsec 50 MHz
 CPU0: D VIVT write-back cache
 CPU0: I cache: 8192 bytes, associativity 64, 32 byte lines, 4 sets
 CPU0: D cache: 8192 bytes, associativity 64, 32 byte lines, 4 sets
 Built 1 zonelists in Zone order.  Total pages: 16256
 Kernel command line: console = ttyAM0,115200
 PID hash table entries: 256 (order: 8, 1024 bytes)
 console [ttyAM0] enabled
 Dentry cache hash table entries: 8192 (order: 3, 32768 bytes)
 Inode-cache hash table entries: 4096 (order: 2, 16384 bytes)
 Memory: 64MB = 64MB total
 Memory: 59756KB available (3028K code, 259K data, 128K init)
 Mount-cache hash table entries: 512
 CPU: Testing write buffer coherency: ok
 NET: Registered protocol family 16
 PCI: bus0: Fast back to back transfers disabled
 usbcore: registered new interface driver usbfs
 usbcore: registered new interface driver hub
 usbcore: registered new device driver usb
 NET: Registered protocol family 2
 Time: pegasus clocksource has been installed.
 IP route cache hash table entries: 1024 (order: 0, 4096 bytes)
 TCP Established hash table entries: 2048 (order: 2, 16384 bytes)
 TCP bind hash table entries: 2048 (order: 1, 8192 bytes)
 TCP: Hash tables configured (established 2048 bind 2048)
 TCP reno registered
 Freeing initrd memory: 1688K
 reset button handler is loaded
 NetWinder Floating Point Emulator V0.97 (double precision)
 NTFS driver 2.1.28 [Flags: R / O].
 JFFS2 version 2.2.  (NAND)    2001-2006 Red Hat, Inc.
 io scheduler noop registered
 io scheduler deadline registered (default)
 LED device driver is installed
 Serial: Micrel Pegasus UART driver version: 2.6.1.0
 ttyAM0 at MMIO 0x1fffe000 (irq = 45) is a Pegasus
 ttyAM1 at MMIO 0x1fffe080 (irq = 49) is a Pegasus
 ttyAM2 at MMIO 0x1fffe100 (irq = 52) is a Pegasus
 ttyAM3 at MMIO 0x1fffe180 (irq = 55) is a Pegasus
 RAMDISK driver initialized: 16 RAM disks of 16384K size 1024 blocksize
 PPP generic driver version 2.4.2
 PPP Deflate Compression module registered
 PPP BSD Compression module registered
 IMQ starting with 2 devices ...
 IMQ driver loaded successfully.
         Hooking IMQ after NAT on PREROUTING.
         Hooking IMQ before NAT on POSTROUTING.
 30 = ffff ffff
 Micrel Pegasus 1.0.0 (Oct 7, 2008)
 physmap platform flash device: 00400000 at 1c000000
 physmap-flash.0: Found 1 x16 devices at 0x0 in 16-bit bank
  Amd / Fujitsu Extended Query Table at 0x0040
 physmap-flash.0: CFI does not contain boot bank location.  Assuming top.
 number of CFI chips: 1
 cfi_cmdset_0002: Disabling erase-suspend-program due to code brokenness.
 cmdlinepart partition parsing not available
 RedBoot partition parsing not available
 Using physmap partition information
 Creating 4 MTD partitions on "physmap-flash.0":
 0x00000000-0x00030000: "Boot Loader"
 0x00030000-0x00040000: "Loader Config"
 0x00040000-0x003e0000: "Linux RootFS"
 0x003e0000-0x00400000: "System Config"
 pegasus-ehci pegasus-ehci: Pegasus-EHCI
 pegasus-ehci pegasus-ehci: new USB bus registered, assigned bus number 1
 pegasus-ehci pegasus-ehci: irq 8, io mem 0x1fffc000
 pegasus-ehci pegasus-ehci: USB 0.0 started, EHCI 1.00, driver 10 Dec 2004
 usb usb1: Product: Pegasus-EHCI
 usb usb1: Manufacturer: Linux 2.6.23.17-Pegasus ehci_hcd
 usb usb1: SerialNumber: KS8692
 usb usb1: configuration # 1 chosen from 1 choice
 hub 1-0: 1.0: USB hub found
 hub 1-0: 1.0: 2 ports detected
 pegasus-ohci pegasus-ohci: new USB bus registered, assigned bus number 2
 pegasus-ohci pegasus-ohci: irq 9, io mem 0x1fffd000
 usb usb2: Product: Pegasus-OHCI
 usb usb2: Manufacturer: Linux 2.6.23.17-Pegasus ohci_hcd
 usb usb2: SerialNumber: ks8692
 usb usb2: configuration # 1 chosen from 1 choice
 hub 2-0: 1.0: USB hub found
 hub 2-0: 1.0: 2 ports detected
 usbcore: registered new interface driver cdc_acm
 cdc_acm: v0.26: usb adapters for usb modems and ISDN adapters
 usbcore: registered new interface driver usbserial
 drivers / usb / serial / usb-serial.c: USB Serial support registered for generic
 usbcore: registered new interface driver usbserial_generic
 drivers / usb / serial / usb-serial.c: USB Serial Driver core
 Using Pegasus for AES algorithm.
 Using Pegasus for DES algorithm.
 u32 classifier
     Performance counters on
 nf_conntrack version 0.5.0 (1024 buckets, 4096 max)
 IPv4 over IPv4 tunneling driver
 GRE over IPv4 tunneling driver
 ip_tables: (C) 2000-2006 Netfilter Core Team
 TCP cubic registered
 NET: Registered protocol family 1
 NET: Registered protocol family 17
 NET: Registered protocol family 15
 Bridge firewalling registered
 RAMDISK: Compressed image found at block 0
 VFS: Mounted root (ext2 filesystem).
 Freeing init memory: 128K
 Setting hostname ...
 Mounting root fs rw ...
 Mounting other filesystems ...
 checksum f0d68bc4, tmp_checksum f0d68bc4
 flash: Read from flash memory ...
 sysconf read 0x40070000
 Checksum is f0d68bc4
 flash: wrote to flash memory ...
 br0: Dropping NETIF_F_UFO since no NETIF_F_HW_CSUM feature.
 device eth1 entered promiscuous mode
 time: 9628 ms
 usb 2-1: new full speed usb device using pegasus-ohci and address 2
 usb 2-1: device descriptor read / 64, error -62
 usb 2-1: Product: Qualcomm CDMA Technologies MSM
 usb 2-1: Manufacturer: Qualcomm, Incorporated
 usb 2-1: configuration # 1 chosen from 1 choice
 cdc_acm 2-1: 1.0: ttyACM0: USB ACM device
 br0: port 1 (eth1) entering learning state
 udhcpd (v0.9.9) started
 Unable to open /etc/config/udhcpd.leases for reading
 Unable to open /etc/config/udhcpd.assigned for reading
 br0: topology change detected, propagating
 br0: port 1 (eth1) entering forwarding state
 => ATcommand Start 3

 >>> Send: AT $ ROUTERBOOTDONE
 >>> Read: AT $ ROUTERBOOTDONE = OK
 command count 0

 >>> Send: AT $ TIME
 >>> Read: AT $ TIME = 19800106000024

 >>> Send: AT $ PINSTAT

 >>> Send: AT $ TIME
 Sun Jan 6 00:00:24 UTC 1980
 command count 0
 >>> Read: AT $ DRC = 0
 cdmainfo.r_drc Null Rate
 >>> Read: AT $ RF = 007d, 007d
 cdmainfo.r_rf = Rx1 007d
 cdmainfo.r_rf = Rx2 007d
 >>> Read: AT $ CALLSTAT = 0.0
 cdmainfo.r_callstat = 1x Offline
 cdmainfo.r_callstat = EVDO Inactive
 >>> Read: AT $ PINSTAT = NOCARD
 pinstat 3
 command count 0
 >>> Read: AT $ TIME = 19800106000024
 command count 0
 >>> Read: AT $ EVDOINFO = 0,0,0,0,0, -31,0,0,0
 >>> Read: AT $ CDMAINFO = 0,0,0,0,0,0,0,0, -31,0,0,9,9
 rmmod: nf_nat_dnsproxy: Unknown error -1074267480
 create_sysconf_linux_module

 >>> Send: AT $ DRC = OK

 >>> Send: AT $ RF = OK

 >>> Send: AT $ CALLSTAT = OK

 >>> Send: AT $ EVDOINFO = OK
 Sysinit done

 >>> Send: AT $ CDMAINFO = OK
 login: >>> Read: AT $ BOOTDONE

 >>> Send: AT $ BOOTDONE = OK
 >>> Read: AT $ RUIMREADDONE = NOCARD
 pinstat 3

 >>> Send: AT $ RUIMREADDONE = OK
And here we are in the console, but after the download the system asks for authorization and standard attendance passwords everyone there flatly refuses to accept, and the u-boot loader turned out to be assembled without being able to stop the download and manage it. The path of the serial console was closed for me and I went further ... well, this is not counting foolish attempts to select a password as a script for minicom, which were doomed to receive the result a little later than that super computer says its "42".
JTAG
My happiness is that all the contacts of the JTAG-interface of the chip turned out to be extreme and were available for “pinging” using a needle:

JTAG contacts on the board:

However, the adapter assembled on the knee from the DB25-papa for LPT-port, resistances and snot showed that the JTAG is either disconnected or someone has curved arms. For the second option, a factory-made JTAG adapter was ordered on the notorious trading platform of the Middle Kingdom, but this is a long time. And in the first case, you should try to enter the SoC into some kind of test mode with the help of needles, wires and test points that go to the TESTEN and TESTEN1 legs.
Insight
But at that moment an old hack emerged in my memory, used to force every piece of hardware to be flushed: drive the piece of iron into the “broken firmware” mode, shorting the address legs on the flash drive with the firmware. On our board, the firmware is in the microchip (Samsung K8P3215UQB www.bdtic.com/DataSheet/SAMSUNG/K8P3215UQB.pdf ) under the screen next to the process.

The first legs of this microcircuit are the address lines and, by shorting them, we can break the firmware reading:

Since we would like to get into the menu of the u-boot, we will be naughty right after it is loaded at the moment of reading the rest of the firmware. We turn on the router and after a significant blinking of the LEDs and the text output to the console:
  U-Boot 1.1.4 (November 6, 2008)

 DRAM: 64 MB
 Flash: 4 MB
 In: serial
 Out: serial
 Err: serial
Start gently short 1-2-3-4 feet with a screwdriver to achieve the coveted one:
  Bad header checksum
 ks8692pb>
Well, we have achieved the location of the intractable loader.
Loader
Let's see what this veteran can do:
ks8692pb> help
? - alias for 'help'
autoscr - run script from memory
base - print or set address offset
bdinfo - print Board Info structure
boot - boot default, ie, run 'bootcmd'
bootd - boot default, ie, run 'bootcmd'
bootm - boot application image from memory
bootp - boot image via network using BootP / TFTP protocol
cmp - memory compare
coninfo - print console devices and information
cp - memory copy
cp - memory copy
crc32 - checksum calculation
dhcp - invoke DHCP client IP / boot params
echo - echo args to console
erase - erase FLASH memory
fatinfo - print information about filesystem
fatload - load binary file from a dos filesystem
fatls - list files in a directory (default /)
flinfo - print FLASH memory information
go - start application at address 'addr'
help - print online help
icrc32 - checksum calculation
iloop - infinite loop on address range
imd - i2c memory display
iminfo - print header information for application image
imls - list all images found in flash
imm - i2c memory modify (auto-incrementing)
imw - memory write (fill)
inm - memory modify (constant address)
iprobe - probe to discover valid I2C chip addresses
isf - i2s transmit waveform data file from memory address
isr - i2s receive waveform data to the memory address
isw - i2s transmit waveform data from memory address
itest - return true / false on integer compare
loadb - load binary file over serial line (kermit mode)
loads - load S-Record file over serial line
loady - load binary file over serial line (ymodem mode)
loop - infinite loop on address range
md - memory display
mdior register - read mdio register
mdiow register data - write mdio register
mii - MII utility commands
mm - memory modify (auto-incrementing)
mmcinit - init mmc card
mnand - copy to nand boot
mr - memory read and compare
mtest - simple RAM test
mw - memory write (fill)
nettest - network port load test
nfs - boot image via network using NFS protocol
nm - memory modify (constant address)
pci - list and access PCI Configuration Space
ping - send ICMP ECHO_REQUEST to network host
printenv- print environment variables
protect - enable or disable FLASH write protection
rarpboot- boot image via network using RARP / TFTP protocol
reset - Perform RESET of the CPU
run - run commands in an environment variable
saveenv - save environment variables to persistent storage
setenv - set environment variables
sleep - delay execution for some time
sspi - SPI utility commands
tftpboot- boot image via network using TFTP protocol
usb - USB sub-system
usbboot - boot from USB device
version - print monitor version
wait - wait for memory
It looks promising, but it turns out that some of the commands do not work, despite the mention in the help. First of all I would like to know how the addressing of the flash drive works:
ks8692pb> flinfo
  Bank # 1: CFI conformant FLASH (16 x 16) Size: 4 MB in 78 Sectors
  Erase timeout 8192 ms, write timeout 1 ms, buffer write timeout 1 ms, buffer size 1
   Sector Start Addresses:
     1C000000 (RO) 1C002000 (RO) 1C004000 (RO) 1C006000 (RO) 1C008000 (RO)
     1C00A000 (RO) 1C00C000 (RO) 1C00E000 (RO) 1C010000 (RO) 1C020000 (RO)
     1C030000 (RO) 1C040000 1C050000 1C060000 1C070000
     1C080000 1C090000 1C0A0000 1C0B0000 1C0C0000
     1C0D0000 1C0E0000 1C0F0000 1C100000 1C110000
     1C120000 1C130000 1C140000 1C150000 1C160000
     1C170000 1C180000 1C190000 1C1A0000 1C1B0000
     1C1C0000 1C1D0000 1C1E0000 1C1F0000 1C200000
     1C210000 1C220000 1C230000 1C240000 1C250000
     1C260000 1C270000 1C280000 1C290000 1C2A0000
     1C2B0000 1C2C0000 1C2D0000 1C2E0000 1C2F0000
     1C300000 1C310000 1C320000 1C330000 1C340000
     1C350000 1C360000 1C370000 1C380000 1C390000
     1C3A0000 1C3B0000 1C3C0000 1C3D0000 1C3E0000
     1C3F0000 1C3F2000 1C3F4000 1C3F6000 1C3F8000
     1C3FA000 1C3FC000 1C3FE000
The areas marked "(RO)" are the bootloader itself. Touching him is not pulling at all, so we run past him and stop his eyes on the other bands.
Long and painful attempts to dump the contents of the flash drive in a normal form ended EXTREMELY with a flush overwritten after the restart. It turned out that under some unknown conditions, after downloading the file via tftp, the loader sent the processor to a rezet, after which the flash drive automatically started erasing the range where the kernel image and ramdisk lie, and the loaded one begins to be written in their place. In my case, it was a hastily assembled image of OpenWRT from Micrel for this platform, which has the same attitude to combat firmware as a plumber to a choreographer. I tried to load it into memory, but the above feature of the bootloader led to the recording of this nonsense in the flash. It was saved by the fact that in the first place the loader did not get stuck, and in the second I had the same combat piece of iron next to me. Subsequently, the dump from the battle was set up on a padded test specimen, but then it was not at all ridiculous and the bricks fell to the floor in a continuous stream, while I tried to pull myself together.
Since the bootloader didn’t go anywhere, and at the firmware site didn’t understand what, interrupted halfway through the recording, the procedure was a bit easier ’: now you didn’t have to caress the stick of the flash drive with a screwdriver to go to the“ Bad Header Checksum ”.
On the barely breathing semi-corpus, the only way to dump the flash drive was found - this is the command md (memory display), which displays the specified section of memory directly to the console in the form of hexadecimal text:
ks8692pb> md 0x1c040000
  1c040000: 56190527 8e2b9359 cd32444b d0f23200 '..VY. +. KD2..2 ..
 1c040010: 00800000 00800000 6a1878c2 00040205 ......... xj ...
 1c040020: 6e72654b 522d6c65 69646d61 492d6b73 Kernel-Ramdisk-I
 1c040030: 6567616d 00000000 00000000 00000000 mage ............
 1c040040: 748f1800 50631a00 00000000 e1a00000 ... t..cP ........
 1c040050: e1a00000 e1a00000 e1a00000 e1a00000 ................
 1c040060: e1a00000 e1a00000 e1a00000 ea000002 ................
 1c040070: 016f2818 00000000 00188f74 e1a07001. (O ..... t .... p ..
 1c040080: e1a08002 e10f2000 e3120003 1a000001 ..... ..........
 1c040090: e3a00017 ef123456 e10f2000 e38220c0 .... V4 ... ... ..
 1c0400a0: e121f002 00000000 00000000 e28f00d0 ..! .............
 1c0400b0: e890307e e0500001 0a00000a e0855000 ~ 0 .... P ...... P ..
 1c0400c0: e0866000 e08cc000 e0822000 e0833000 .` ....... ... 0 ..
 1c0400d0: e08dd000 e5961000 e0811000 e4861004 ................
 1c0400e0: e156000c 3afffffa e3a00000 e4820004 ..V ....: ........
 1c0400f0: e4820004 e4820004 e4820004 e1520003 .............. R.

"It will be enough!"
It turns out besides the starting address you need to specify the second parameter - the size.
Dump
In order that everything acquired by overwork will not disappear together with the minicom console, we start recording the output to the file: press "Ctrl + al" and confirm the file name, for example, the standard "minicom.cap".
We need a dump of the area from 0x1c040000 to 0x1c3fffff (see flinfo output). A block of size 0x3c0000 is obtained, but the size of the md command (memory display) is not taken in bytes, but in 32-bit (4-byte) words, so the value we need is obtained by dividing 0x3c0000 by 4 and equal to 0xf0000. Here is the result:
ks8692pb> md 1c040000 f0000
We are leaving to drink tea / coffee / boredom, since the procedure for outputting 3932160 bytes in a hexadecimal text form to a serial console is sadness. After completion of the drainage procedure, close minicom (Ctrl + ax).
Copy minidump exhaust to a file with a more meaningful name.
$ cp ~/minicom.cap ./dump.hex We'll have to look into it and remove the extra lines that were entered / displayed in the minicom. In my case, this is one line at the beginning:
ks8692pb> md 1c040000 f0000
and one at the end of the file:
ks8692pb>
Convert from text to binary data:
$ xxd -r -s-0x1c040000 dump.hex > dump.raw.bin The offset to -0x1c040000 requires that data from the 0x00000000-0x1c03ffff range, which xxd would otherwise find missing, and politely write to the file, is not recorded in the final file.
It turned out that the order of the bytes in the resulting binary is not the same, and I had to find a solution to deploy every four bytes (32-bit word). On the Internet, a solution was found quickly:
cat dump.raw.bin | perl -e 'while (sysread(STDIN,$d,4)){print pack("N",unpack("V",$d));}' > dump.bin Autopsy
Let's see what we have inside the dump:
$ binwalk dump.bin
  DECIMAL HEXADECIMAL DESCRIPTION
 -------------------------------------------------- ------------------------------
 0 0x0 uImage header, header size: 64 bytes, header CRC: 0x59932B8E, created: 2010-01-06 06:50:53, image size: 3338960 bytes, Data Address: 0x8000, Entry Point: 0x8000, data CRC: 0xC278186A, OS: Linux, CPU: ARM, image type: Multi-File Image, compression type: none, image name: "Kernel-Ramdisk-Image"
 14476 0x388C gzip compressed data, maximum compression, from Unix, last modified: 2010-01-05 04:49:24
 1609664 0x188FC0 gzip compressed data has original file name: "ramdisk.img", from Unix, last modified: 2010-01-06 06:50:44
It is interesting that, in spite of the marking on the “2009-10-15” board, the factory firmware is labeled January 2010. Apparently something “went wrong” and finished the party finished on the move. Well, that software, not iron ... mounted installation.
Divide the acquired into separate parts:
headline
$ dd if=dump.bin of=uImageHeader ibs=1 count=14476 core (size 1595188 = 1609664-14476)
$ dd if=dump.bin of=zImage ibs=1 skip=14476 count=1595188 ramdisk image:
$ dd if=dump.bin of=initrd.gz ibs=1 skip=1609664 & gunzip initrd.gz Subsequently, after editing a ramdisk, it will be possible to put everything back together into one command:
$ cat uImageHeader > out.bin $ cat zImage >> out.bin $ gzip initrd & cat initrd.gz >> out.bin Now you need to find out what file system is used:
$ sudo blkid -o value -s TYPE ./initrd ext2 And mount it somewhere for cruel experiments:
$ mkdir rootfs $ sudo mount -o loop -t ext2 ./initrd ./rootfs/ After a brief study of the FS, we find:
$ sudo cat rootfs/etc/inittab ::sysinit:/etc/rc ::respawn:/bin/lgc_login The first thing that comes to mind is “what is it that has been done?”:
$ sudo strings rootfs / bin / lgc_login
  /lib/ld-uClibc.so.0
 liblgc.so
 _DYNAMIC
 __dso_handle
 _init
 _fini
 _GLOBAL_OFFSET_TABLE_
 printf
 fgets
 strlen
 libc.so.0
 stdout
 getpass
 fflush
 abort
 stdin
 signal
 execlp
 __uClibc_main
 strcmp
 exit
 __data_start
 _edata
 __bss_start
 __bss_start__
 _end
 __bss_end__
 __end__
 login:
 password:
 admin
 .admin.
 GCC: (GNU) 3.3.2 20031005 (Debian prerelease)
 GCC: (GNU) 2.95.4 20010319 (prerelease)
 GCC: (GNU) 2.95.4 20010319 (prerelease)
 GCC: (GNU) 2.95.4 20010319 (prerelease)
 GCC: (GNU) 3.3.2 20031005 (Debian prerelease)
 .shstrtab
 .interp
 .note.ABI-tag
 .hash
 .dynsym
 .dynstr
 .rel.dyn
 .rel.plt
 .init
 .text
 .fini
 .rodata
 .data
 .dynamic
 .ctors
 .dtors
 .got
 .sbss
 .bss
 .comment
Well, here it’s enough to have eyes to see the login / password pair “admin / .admin.” Tightly wired in the code. I will not torture - the authorization in the serial console with this data was successful.
After a more detailed study of the file system, it turned out that it was possible to run the command without any authorization at all, for example telnetd:
$ wget --post-data "cmd_key=%24telnetd%3b" "http://192.168.200.1/goform/ping_showpopup" It will start, start accepting connections ... but, unfortunately, will not be able to authorize us. But that's another story.
Thank uv. Nomad1 for kicking under my lazy ass, kind people who provided a half-dead sample for inhuman experiments, my wife and daughters for patience, and my five-year-old son for helping to reboot the router and run commands on the computer when my dad ran out of limbs.
Source: https://habr.com/ru/post/336942/
All Articles