Collecting Windows Server 2016 Boot Event Data

In Windows Server 2016, there is a not-so-well-known feature called “Collection of data on settings and boot events.” It allows you to remotely collect information about events that occurred during the boot process. This feature is especially useful when searching for "floating" problems during the OS boot.
In the article I will tell you how you can conveniently collect this missing information.
The following are the types of events that you can find out about using the “Collection of settings and boot events” function:
- Loading kernel modules and drivers.
- Enumerate devices and initialize their drivers.
- Verification and installation of file systems.
- Run executable files.
- Start and completion of system updates.
After collecting all the necessary information about the events on the collection server, you can use the well-known tools - Event Viewer, Wevutil or PowerShell to analyze them.
Next, we look at how to configure the server and remote sites for data collection.
Supported OS
The role of the collector can only be performed by Windows Server 2016 - it can be either a server with desktop capabilities or Server Core.
Below is a table from the TechNet Internet resource, which shows the supported virtualized OS types for collectors and target computers:
| Virtualization host | Virtual Collector | Target virtual machine |
| Windows 8.1 | Yes | Yes |
| Windows 10 | Yes | Yes |
| Windows Server 2016 | Yes | Yes |
| Windows Server 2012 R2 | Yes | not |
On the servers from which you want to collect data, you must have either Windows Server 2016 or Windows 10 installed. In addition, a computer with a Nano Server can act as a target node. You can also collect data from the windows of Windows Server 2016, even if they work as a virtual machine on computers running Windows Server 2012 R2.
Collector Node Configuration
To receive and display ETL events from target computers, you must configure the collector node. First, you need to connect the event collection service using one of the following methods.
With DISM:
dism /online /enable-feature /featurename:SetupAndBootEventCollection With the PowerShell command:
Get-WindowFeature -Name *boot* Install-Windows -Name Setup-and-Boot-Event-Collection You can also install this component using the Server Manager GUI:
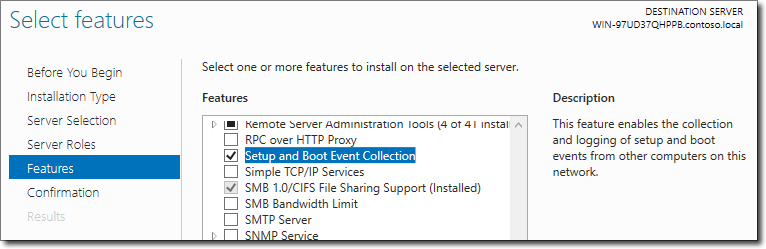
Installing the service using Server Manager.
After installing the event collection service, you will have access to a new service - the Boot Event Collector, running under the Network Service account.
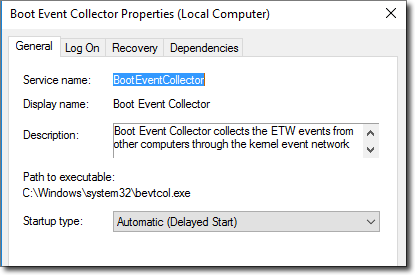
Properties Boot Event Collector.
There is also the command-line tool bevtcol.exe , which can be run with some useful options. It will help test your settings before installing a full service.

Parameters bevtcol.exe.
For example, you can run bevtcol.exe - config NewConfig.xml - checkOnly only to verify the configuration file is correct. And then exit without starting the process itself.
Then you need to check if the default configuration files were created on the collector node - this will help you create your first configuration file for the collector computer.
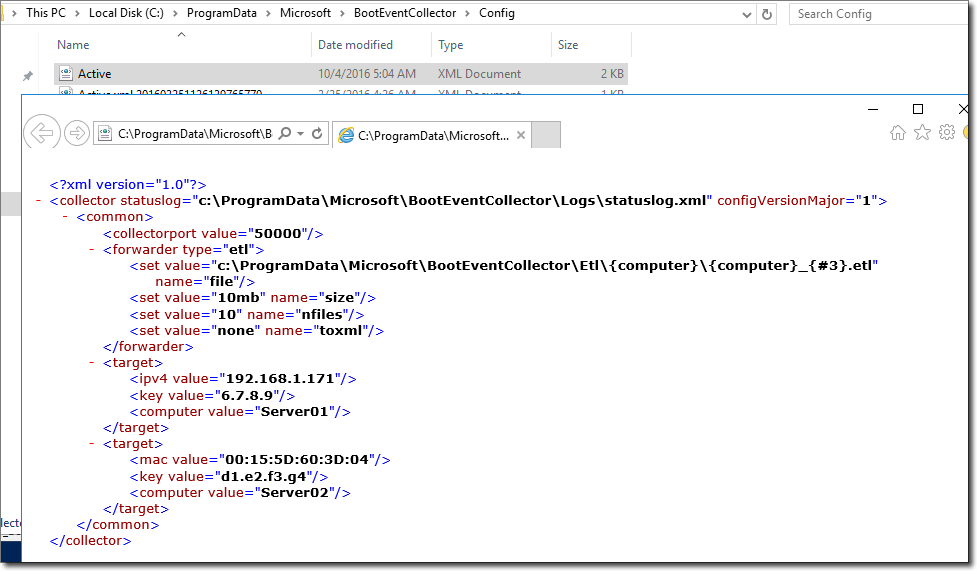
In the folder C: \ ProgramData \ Microsoft \ BootEventCollector \ Config , you will see three XML configuration files created immediately after installing the service.

XML configuration files.
Active.xm contains the same configuration as the Empty.xml. Each new configuration should be saved in this file:
- Empty.xml - contains the minimum necessary configuration items, with default values;
- Example.xml - contains useful configuration examples.

* XML file with an example * configuration.
If you look at the structure of the folder C: \ ProgramData \ Microsoft \ BootEventCollector , you can see that different folders are created for different purposes:
- ETL is the directory for storing the collected ETL files;
- Logs, as the name implies, store log files for the collection service.
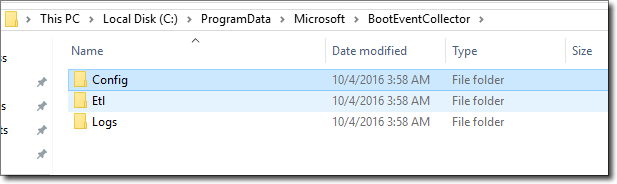
ETL and log file folders.
Now we can create our first configuration file. Create a new XML file in the% SystemDrive% \ ProgramData \ Microsoft \ BootEventCollector \ Config directory and copy the contents of the configuration specified below into the .xml file.
<collector configVersionMajor="1" statuslog="c:\ProgramData\Microsoft\BootEventCollector\Logs\statuslog.xml"> <common> <collectorport value="50000"/> <forwarder type="etl"> <set name="file" value="c:\ProgramData\Microsoft\BootEventCollector\Etl\{computer}\{computer}_{#3}.etl"/> <set name="size" value="10mb"/> <set name="nfiles" value="10"/> <set name="toxml" value="none"/> </forwarder> <target> <ipv4 value="192.168.1.171"/> <key value="6.7.8.9"/> <computer value="Server01"/> </target> <target> <mac value="00:15:5D:60:3D:04"/> <key value="1.2.3.4"/> <computer value="Server02"/> </target> </common> </collector> There are several important points in the configuration file.
First, the Collector - in this node we specified the version of the configuration file and the name of the log file.
Secondly, collectorport - indicates the port number for collecting inbound events. We also need to configure the same port number on target computers.
Thirdly, forwarder - here we indicate the characteristics of the ETL files. These characteristics may be as follows:
1. File defines a file name pattern. {# 3} is a three-digit file index on access, such as 001, 002, etc. {Computer} is used to denote a computer name. Thus, in our example, the files will be collected in the Etl \ COMPUTERNAME \ folder named COMPUTERNAME_00x.
2. Size determines the maximum size of the ETL file.
')
3. Nfiles determines the number of generated ETL files in circulation. Each new file is created as soon as the size of the previous one reaches the limit specified by the Size parameter.
4. ToXML is an optional parameter that determines the payload from which ETW events are converted to XML during transfer. None is the default value. It always sends events in binary format as they are received. If you set the value to “ALL”, the payload will be continuously converted to XML.
This parameter is actually a kind of protection, since ETW events were designed to be interpreted by the computers on which they were generated.
But as soon as you want to move events to another computer, there may be some inconsistency. Converting to XML format makes events available to a wider range of target nodes. The only drawback is that converting to XML also loads the collector node.
Fourth, target - here you can specify the settings of the target node. For example, an IP address, MAC address, or GUID to configure computers to accept connections. You can also specify anyAllowed to accept all connections.
You can specify multiple target computers by adding additional target nodes:
- in the case described above, two target computers are indicated: one with an IP address and one with a MAC address;
- Key is the encryption keys that we are going to get later when setting up target computers;
- Computer value is the name of the target computer that should be entered in the ETW records when they are converted to XML.
After you finish the configuration file, save it and configure the target node.
Target computer setup
To configure target computers to send ETW events, you must activate event transfer. You can activate it locally using the bcdedit command or remotely using the PowerShell Remote and Enable-SbecBcd commands .
In my lab, I have access to my target computers, so I will use bcdedit:
bcdedit /event yes bcdedit /eventsettings net hostip:192.168.1.172 port:50000 key:6.7.8.9 Where:
- HostIP is the name of the collector computer that we configured earlier;
- Port is the port number we specified in the configuration file;
- Key is the encryption key that we need to specify in the configuration file.

Activation of event transfer through the bcdedit command.
I set up encryption keys. You can check the configuration with the following bcdedit command:
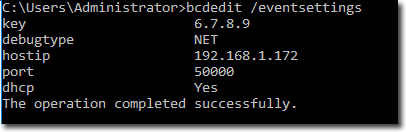
Check BCD event configuration.
Now I can go back to my server and apply the new configuration file that I created earlier with the specified keys. Set-SbecActiveConfig cmdlet will help us with this:
$result = (Get-Content .\myconfig.xml | Set-SbecActiveConfig); $result 
Apply the configuration file on the collector computer.
(Get-SbecActiveConfig).content 
Getting the accepted configuration.
Finally, the last step is to configure target computers to send ETW events.
On the server, run the following command:
Enable-SbecAutoLogger -ComputerName <targetcomputer> -Credential (Get-Credential) 
Configure the target computer to send ETW events.
On the server, the active.xml configuration file was updated with my settings.
Updated active.xml file.
A new log status was also created:

Updated log file.
In addition, a new ETL file is created that can already collect configuration information and boot events from the target computer (Server01). After restarting one of your servers, the information will appear in it:
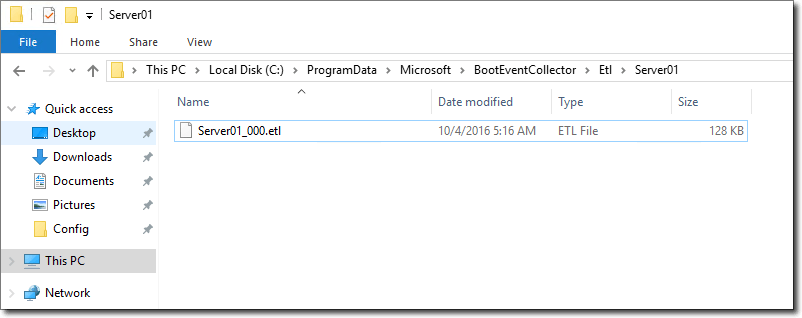
Collected ETL files.
Now you can open the collected ETL files in the Windows Event Viewer:

Events collected after the first reboot of the target computer.
Remember to reboot the target server to apply the settings and receive the first set of events.
Source: https://habr.com/ru/post/336604/
All Articles