Weather and routes in MajorDoMo
This is the second article in which I will try to tell you how to adjust the weather and routes in the MajorDoMo smart home system and make separate scenes for them. And also set up the output of weather data on the main stage.
Table of contents
Introduction
In the first article we covered in detail how to install and configure the main scene in MajorDoMo. Now, using the knowledge gained, set up two more scenes. First we need to download our scene templates for weather and routes . Downloaded? Great, let's install and configure them.
Weather setting
As in the previous article, we launch MajorDoMo by clicking on the link we need (if this is the computer you are sitting at, then 127.0.0.1 , if not, then the IP of the device where MajorDoMo is installed). Go to Control Panel -> Scenes and click on Add New Scene . We call it weather and click Add (you can not put the background image ), let's make the background change automatically, depending on the season. Next, go to the Elements tab and then select the downloaded and unzipped file for the weather and click Import . Like last time, we need our scene to be animated, for this we need to change the indexes that I have, to the ones that you have. Briefly recall.
')
In the Elements panel there is an element general_CSS (only CSS) , we go into it and in the code we find .element_ * , where * is the id of the element (for each such element there is a comment indicating which element it belongs to). Focusing on the comments again go to the Elements tab, click on the one we need and look in the address bar of the element id and in general_CSS (only CSS) change what is there, what we have just learned.
Let's now make it so that the background changes depending on the time of year. Go to the Internet and download four pictures of the time of year with the extension you need (in my case 1024x600). Put the downloaded images in the folder \ htdocs \ cms \ scenes \ backgrounds.
After you need to add a new script, Control Panel → Scripts click Add New Script , call it getSceneImage and click Add .
Now we insert into the Code field:
Scenario
If you called the scene somehow differently, then in the first line change the word weather to the one you wrote in yourself. In the 2-5 lines instead of my picture names write your own.
if($params['scene'] == "weather") { $winter = array("cms/scenes/backgrounds/winter.jpg"); $spring = array("cms/scenes/backgrounds/spring.jpg"); $summer = array("cms/scenes/backgrounds/summer.jpg"); $autumn = array("cms/scenes/backgrounds/autumn.jpg"); $seasons = array(0 => $winter, 1 => $spring, 2 => $summer, 3 => $autumn); $season = $seasons[floor(date('n') / 3) % 4]; $img = $season[rand(0, count($season) - 1)]; if (file_exists($img)) { header("Content-type: image/jpg"); readfile($img); } } else { $images = array("cms/scenes/backgrounds/weather_1067x640.jpg", "cms/scenes/backgrounds/city_1067x640.jpg", "cms/scenes/backgrounds/plants_1067x640.jpg"); $img = $images[rand(0, 2)]; if (file_exists($img)) { header("Content-type: image/jpg"); readfile($img); } } If you called the scene somehow differently, then in the first line change the word weather to the one you wrote in yourself. In the 2-5 lines instead of my picture names write your own.
The script is ready. Now back to our scene Control Panel -> Scenes find the created scene and click on the pencil in front of the scene, then the familiar editing window will appear. In the Background image field we write the following code (if you called the scene not weather, then write your name):
/objects/?script=getSceneImage&scene=weather This, of course, can be customized in the fon element, but in this way you can change the picture from the weather conditions (rain, snow, thunderstorm) or you can take several pictures at one time of year.
Where to get weather data?
To display the weather, we need to take it from somewhere. There are various services for this (weather Yandex, OpenWeatherMap, etc.). I stopped at the OpenWeatherMap, and we will customize it. The MajorDoMo system has a ready-made module for OpenWeatherMap. Go to the Control Panel -> Market Add-ons in the Information tab, find the Open Weather module (by nick7zmail) and click Add . After adding in the Applications section we find and click on the Weather from the OpenWeatherMap . On the Settings tab, select the desired city, put a tick Use cached icons , set up for how many days you need a forecast and a period of updates. To fill in the API Key field. Go to the site OpenWeatherMap register and get the API key. How to get it, I will not describe here, on the Internet there is information about this.
The weather pictures that are on the site are not very beautiful, you can replace them with your own, for example these . Unzip them with a replacement in the \ htdocs \ cached \ openweather \ image folder.
Weather chart
To plot the actual temperature, we need to save history. To save history, go to Control Panel -> Objects and find openweather Weather Open Weather Map . Opposite him click on the pencil and go to the Properties tab and create a new property called temperature in the Store history (days) field : set as many days as you need. Everything, history for temperature is saved, if you need to save history for something else, then you just need to look at the name of the property for the parameter you need.
Several screenshots for pinning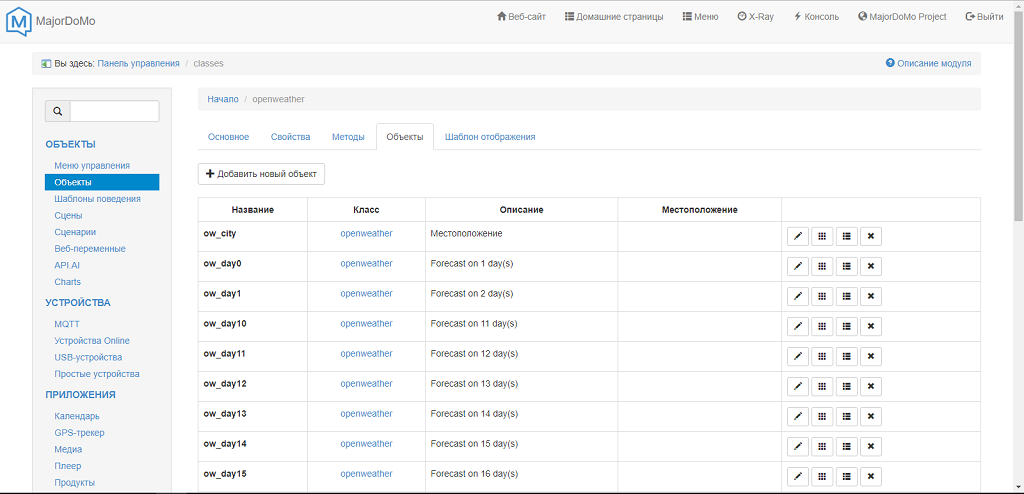
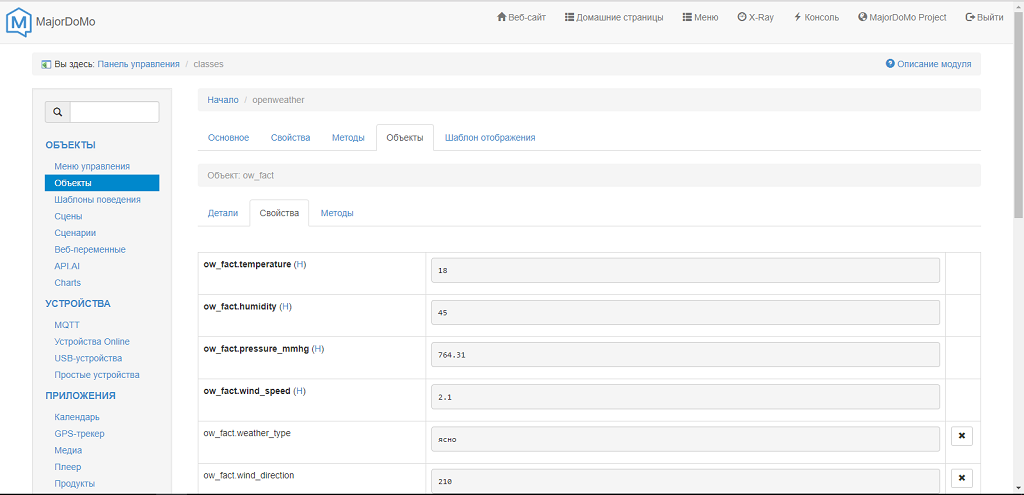
It can be seen that the properties that you have created are highlighted in bold and that H stands near this property, this indicates that the history for this property is saved.
It can be seen that the properties that you have created are highlighted in bold and that H stands near this property, this indicates that the history for this property is saved.
Go to our scene, open the element cont1 → chart and replace the code that is there on our
<div align="center"> <img src="/pChart/?p=ow_fact.temperature&title=.&type=1d&unit=°C&type=1d&width=450&height=250&gcolor=red>ype=curve&px=10" style="-moz-border-radius: 10px 0px 0px 10px; -webkit-border-radius: 10px; border-radius: 10px; opacity:0.8;"> Now for the remaining elements in cont1 -> chart we need to slightly change the code that is there. Choose, for example, panel-now. In the code we find% ow_fact.image%,% ow_fact.weather_type%, etc. we need to change everything. They need to be taken from the properties of the object (on the screenshots above they are visible). For panel-now, this is the actual temperature, respectively, we go into the property of the object we need, copy and replace it in panel-now. Do not forget and change the link to the picture.
What we should have in the element panel-now
<div align="center"> <div class="panel-now"> <div class="mainInfo"> <img src="/cached/openweather/image/%ow_fact.image%.png" alt="%ow_fact.weather_type%" title="%ow_fact.weather_type%" /> <div class="temp"><span class="value">%ow_fact.temperature%<span class="degree">°C</span></span></div></div> <div class="row"> <div class="info"><i class="fa fa-paper-plane-o"></i><span class="value">%ow_fact.wind_speed% /</span></div> <div class="info"><i class="fa fa-arrows"></i><span class="value">%ow_fact.wind_direction%</span></div> <div class="info"><i class="fa fa-tint"></i><span class="value">%ow_fact.humidity% %</span></div> <div class="info"><i class="fa fa-sort-amount-asc"></i><span class="value">%ow_fact.pressure_mmhg% ..</span></div></div></div> I think the principle is clear, the same thing, but for other properties we do it with the other elements.
If you want a compass to spin around your city name, then you need to change something in the panel-location element. You can replace my code and put your city.
<div class="panel-location"> <div class="icon"><i class="fa fa-compass fa-spin" aria-hidden="true"></i></div> <div class="title"> <span></span></div></div> If you play around with it a bit, you end up with something like this.
Weather scene
Weather on the main stage
So that on the main stage in the window where the weather is located, your actual temperature is displayed, it is enough to do a few simple actions. Go to the settings of the main scene and find the element panel-weather. And we edit that code, as we did above.
Hidden text
<div class="panel-weather"> <div class="location"></div> <img src="/cached/openweather/image/%ow_fact.image%.png" alt="%ow_fact.weather_type%" title="%ow_fact.weather_type%" /> <div class="temp-weather">%ow_fact.temperature%<span class="degree">°C</span></div> <div class="text-weather">%ow_fact.weather_type% <span style="font-size: 8px"></span>/div></div> Routes
There is also a good module for routes in MajorDoMo. Go to the Marketplace add-ons and in the Information tab we find the GPS tracker module (by SergeJey). Add it and see the GPS tracker appeared in the Applications section. Find the Devices tab and click Add New Record . You have one default user admin in the Settings -> Users section. You can of course go there and change at your discretion (for example, change the name). We write some name, select a user (the list will contain the name specified in Users ), and in order to fill in the Device field, you need to install a program on your phone, I have Big Brothr GPS (although I have not used others). In the program settings, we find the URL and enter the following line 192.168.20.161/gps.php (you have your address, of course); You can put all the checkboxes so that the phone sends data to this address that you indicated in the URL. We are now interested in the checkmark Send device id . If GPS is enabled on the phone and you did everything correctly, a line will appear in the GPS tracker in the Event Log tab. From it, we learn the ID that we need to enter.
Hidden text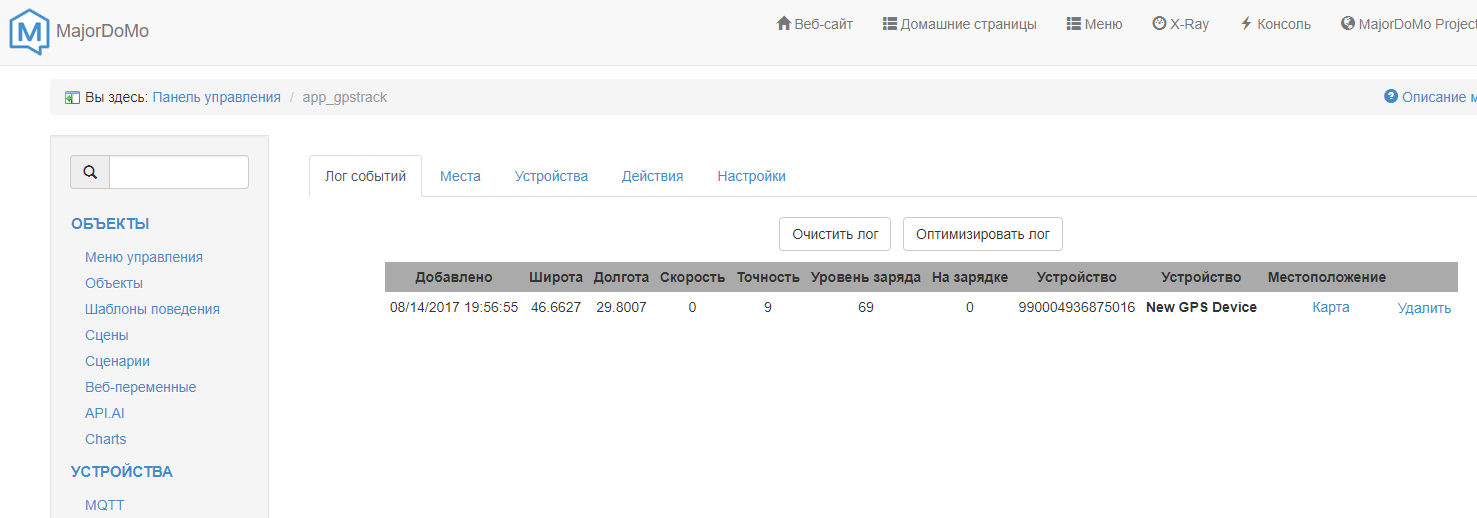
On the Settings tab, you need to put Yandex in the Map Service section : because Google requires an API key.
We still have the Places tab. We can add some place to the map and draw a circle of the radius you set around this place. If you enter / exit the radius of this circle, you can configure it to perform some action. But we will not dwell on this in this article in detail, and even then the article has already dragged on. So, we add a new place, find out the coordinates of latitude and longitude from Yandex or Google maps and enter them, the radius of action is at your discretion, in the Virtual user field : set 0. Ready, if you send your coordinates using the phone, then everything should work and show your route.
Do not forget to first open the 1883 port, so that your device on which MajorDoMo is installed was visible from the outside.
Setting the scene for GPS
We act according to the old scheme. Create a new scene, put your picture in the Background image field (which you saved in the \ htdocs \ cms \ scenes \ backgrounds folder with the necessary extension). We edit the id of the elements, as we did earlier, so that your elements are animated.
To your new and customized scenes displayed on the main stage. That is, when you click on the buttons on the main stage (weather and routes), your scenes will open. You need to go to the settings of the main scene and for the function_1 and function_2 elements in the lines of the code put the path to your new scenes.
Hidden text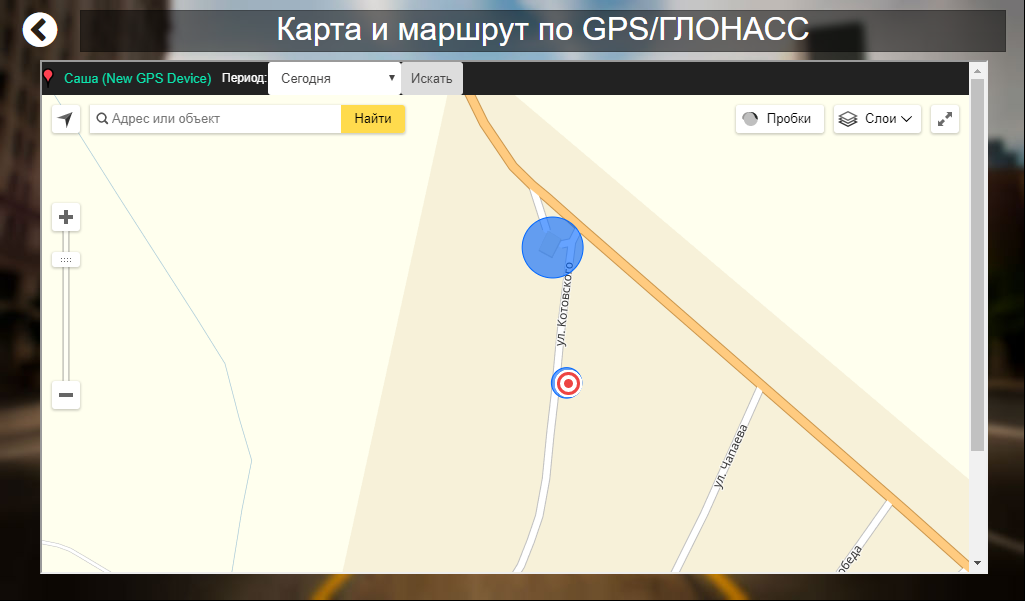
Conclusion
In this article, we learned how to set up and adjust two scenes, one for the weather, the second for the routes. We also track our phone and show our route. Now on the main stage we show our actual temperature. On the weather scene, a forecast is shown and a temperature graph is plotted. I would like to specifically thank the user Vovix for making such wonderful scenes. As well as the developer MajorDoMo - Sergey . I hope this article will be useful to someone.
Source: https://habr.com/ru/post/336386/
All Articles