Using the terminal when developing for Android

Being a fan of the terminal, I have long wanted to write about this topic. In addition, knowledge of how to use the terminal, significantly speeds up the work.
My goal in this article is to share with you how I use the terminal when developing for Android.
iTerm2
Since we are going to spend a lot of time on the command line, let's set up a better terminal than a standard one. I bring to your attention iTerm2 .
ITerm2 is a modern terminal with features that you have long wanted to see. For example, dividing the panel, custom color schemes, history, control of hot keys, as well as many other convenient settings that you will find useful.
oh-my-zsh
When you launch a terminal, it launches a shell called bash . Bash is by far the most popular shell and comes with almost every UNIX-based operating system. However, there are Bash alternatives that make using the terminal faster and more convenient for developers.
By default, oh-my-zsh comes with a plugin that provides many useful features.
Autocomplete
Zsh-autosuggestions are quick / unobtrusive sentences for insertion into zsh . It offers commands as you type based on command history:
Reverse smart search
You can hit Control + R to perform reverse smart search in command history. Start typing the command, and the shell will auto-populate with the commands previously entered.
Then you can either press Enter to execute the suggested command, or use the left / right arrows to edit the command, or continue pressing Control + R to switch between other possible commands.
Dryrun
You came across a cool github library, but what do you need to do to test it on your phone?
- Click Download zip
- Extract the zip file
- Open Android Studio
- Import downloaded project
- Sync gradle
- Run the project
- Select device
- To try
- Delete the project folder and zip file when you no longer need it.
Or...
You can use dryrun :
dryrun REMOTE_GIT_URL 
Build a project faster / without network
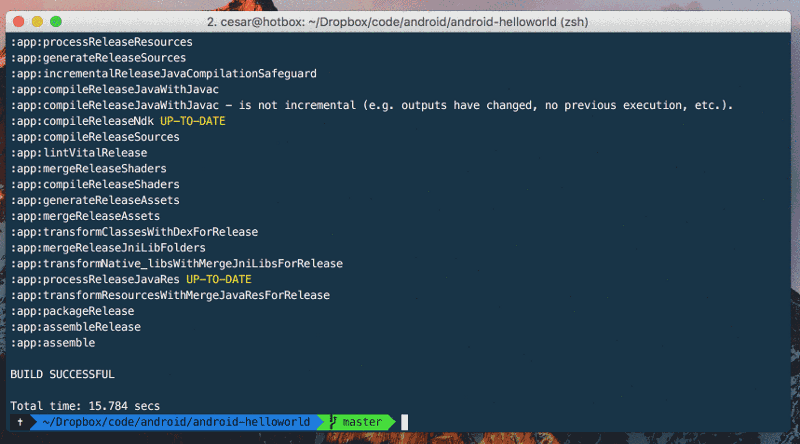
The --offline flag tells gradle to always use cache dependency modules, regardless of whether they should be checked. When working offline, gradle never tries to access the network to perform dependency resolution. If the required modules are not in the dependency cache, the build will fail.
Build at full speed:
./gradlew assembleDevelopDebug --offline Run your unit tests at full speed:
./gradlew test --offline Alternatively, in Android Studio, you can make gradle build completely offline by activating this option:
Settings -> Build, Execution, Deployment -> Build tools -> Gradle

alfi
As an Android developer, you are probably using Android Studio with Gradle. One of the great advantages is dependency management, which automatically downloads artifacts from the repository and makes them available to your application. Basically, you simply add one line to the build.gradle file, and your library is included. Pretty easy, right?
But do you know this line exactly ?
There is an ALFI for this:
- Enter: alfi NAME_OF_THE_LIBRARY
- Copy the library you want
- Paste into build.gradle
No user interface interaction is required and up to 20 results at once!
alfi picasso 
Understanding gradle tasks
If you run the ./gradlew tasks , you will get a list of available gradle functions. What is not listed is the short version of the commands, so here’s a short list of assumptions you can make,
- iDD == installDevelopmentDebug
- aDD == assembleDevelopmentDebug
- cC == connectedCheck
- etc.
You can start doing this as follows:
./gradlew :App:iDD So much more compact.
Android Rocket Launcher
This is a gradle plugin that adds tasks to your Android modules to install and run all the options, so there is no need to run ./gradlew installDebug and go to the phone, find the application among the 50 applications that you installed, and run the right one.

All you need to do is add 2 lines to build.gradle
Tip: do not forget that even when you start the application from the terminal, you can always activate the debugging process without having to restart the application.
Outputting unit tests to the console
A small trick that allows you to see the results of testing devices Android.
android { ... testOptions.unitTests.all { testLogging { events 'passed', 'skipped', 'failed', 'standardOut', 'standardError' outputs.upToDateWhen { false } showStandardStreams = true } } } Now, when you run your tests, they output something like this:

Convenient logcats
During application development, you often want to show only log messages coming from your application. Unfortunately, since the process ID changes every time you deploy an application on your phone, sorting messages becomes a problem.
This small tool solves this problem by filtering by application package. Put the desired package as the only argument and get the desired result.
pidcat github.cesarferreira.helloworld 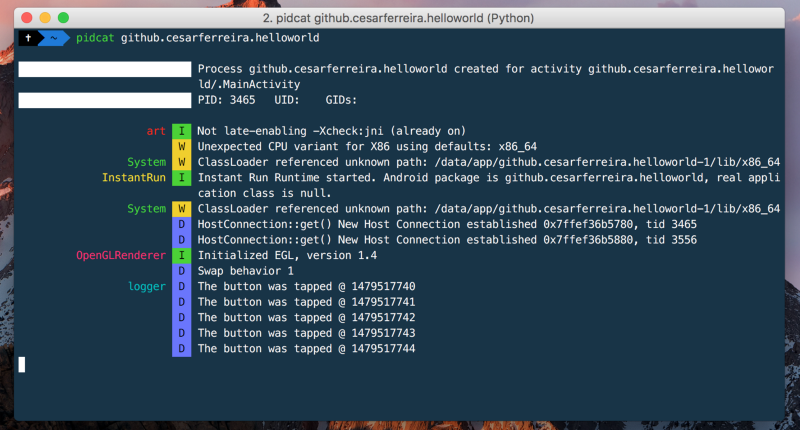
Total
- Install iterm2 , a more functional terminal than the standard
- Use the oh-my-zsh shell to auto-complete
- Don't forget about compact commands ./gradlew iDD
- Run commands faster using the --offline flag
- Do not open the application on the phone manually after installation, use this plugin to automate the process
- Attach the debugging process without restarting the application
- Enjoy more convenient logcat output with pidcat .
')
Source: https://habr.com/ru/post/336348/
All Articles