How I created a monitoring system for computers at work and moved the service to Amazon AWS
Hello, dear% user%. Today I will talk about how I wrote a simple system that allows you to get computer configuration and information about who logged in to computers at work, and how I transferred it to Amazon AWS, making a service for general use. This article can also be considered as partly a detailed guide on how to raise your web server, mail, sending letters and properly configure it on Amazon AWS. And yes, this article can be categorized - I am promoting. To whom it became interesting welcome under kat. Carefully there will be a lot of screenshots.
Prehistory
Once we received a call from a warehouse manager in the helpdesk. I answered his call. He asked me about whether it was possible to find a computer by serial number. He could not find who uses this computer, to which I replied it is of course impossible. This conversation brought me to the idea, but what if we created a system in which the entire configuration of the computer would be displayed, including its serial number and who logged in on it. Write a client application in C #, send everything to a web server with a simple interface to control all this.
Server part
I asked system administrators to allocate a separate server for Windows Server 2012 R2. Installed on it XAMPP. Added Apache and Mysql to services so that if the server is restarted, the site will not run. Created the opermon database, added tables.
The web interface is written using a self-written mvc engine. Project structure:
- Configs - the configuration file for communication with the database is stored here
- Controllers - classes are stored here
- Locale - localization
- Views - the pages themselves, with styles, pictures and javascript
')
In the root folder, create the index.php file and write the code:
<?php session_start(); spl_autoload_register(function ($class){ include './app/controllers/' . $class . '.php'; }); $api = new Api($_GET); $controller = new Controller($_GET, $_POST); ?> In the Controllers folder there are many classes describing the behavior of the system. One of the important classes is the class Controller.php. This class is a controller that accepts GET and POST requests in __construct ($ get, $ post) from index.php. After receiving a specific request, it shows a specific page.
The Api class is used to receive ajax requests and process them. The system management console is loaded only once. All subsequent actions are carried out using javascript and ajax requests.
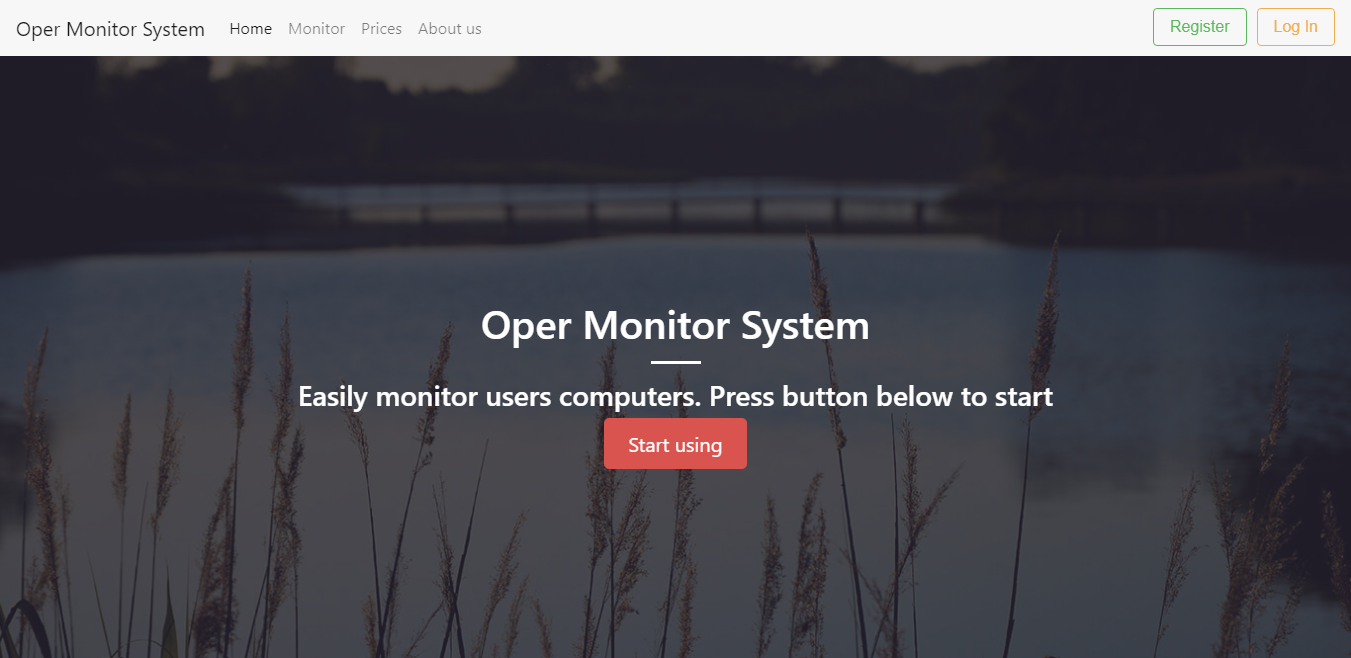
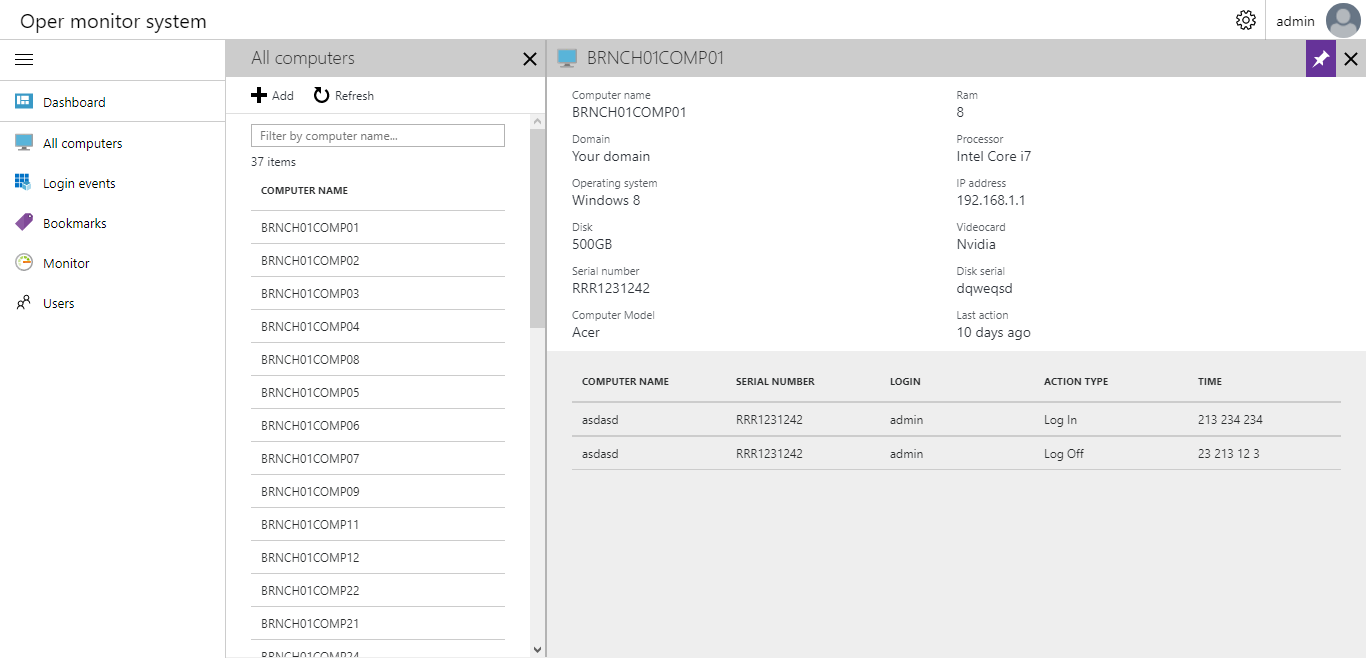
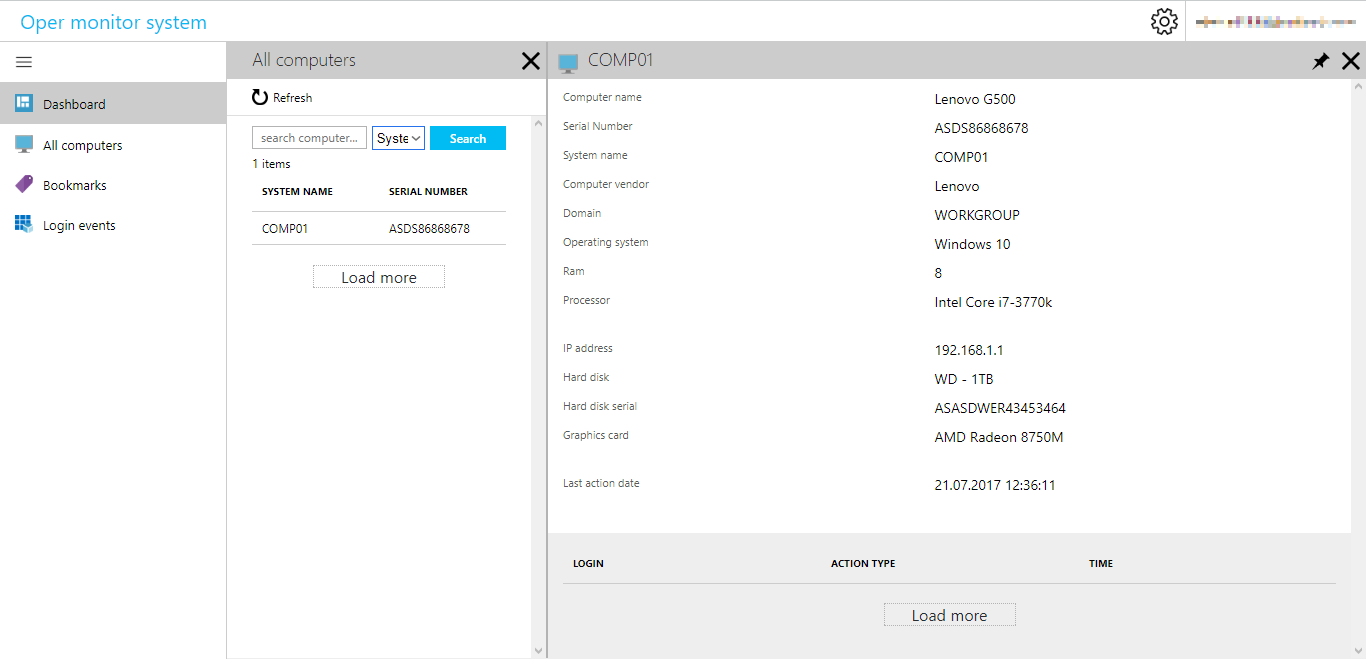
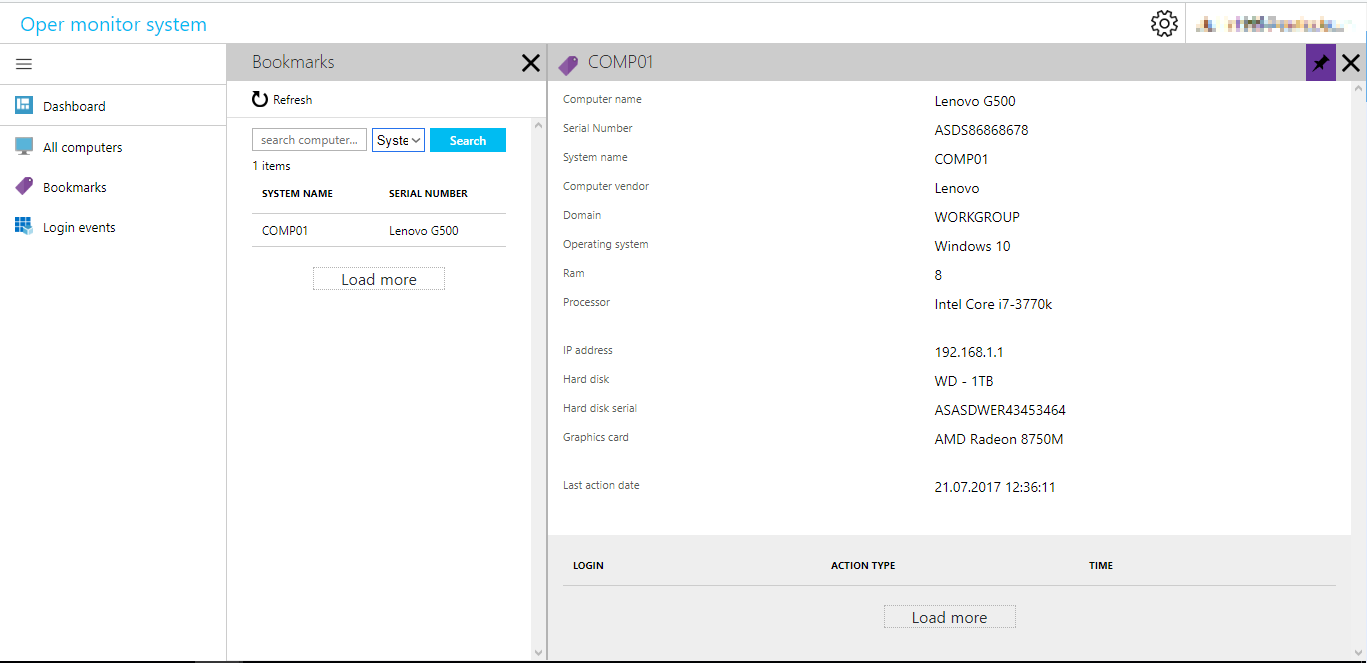
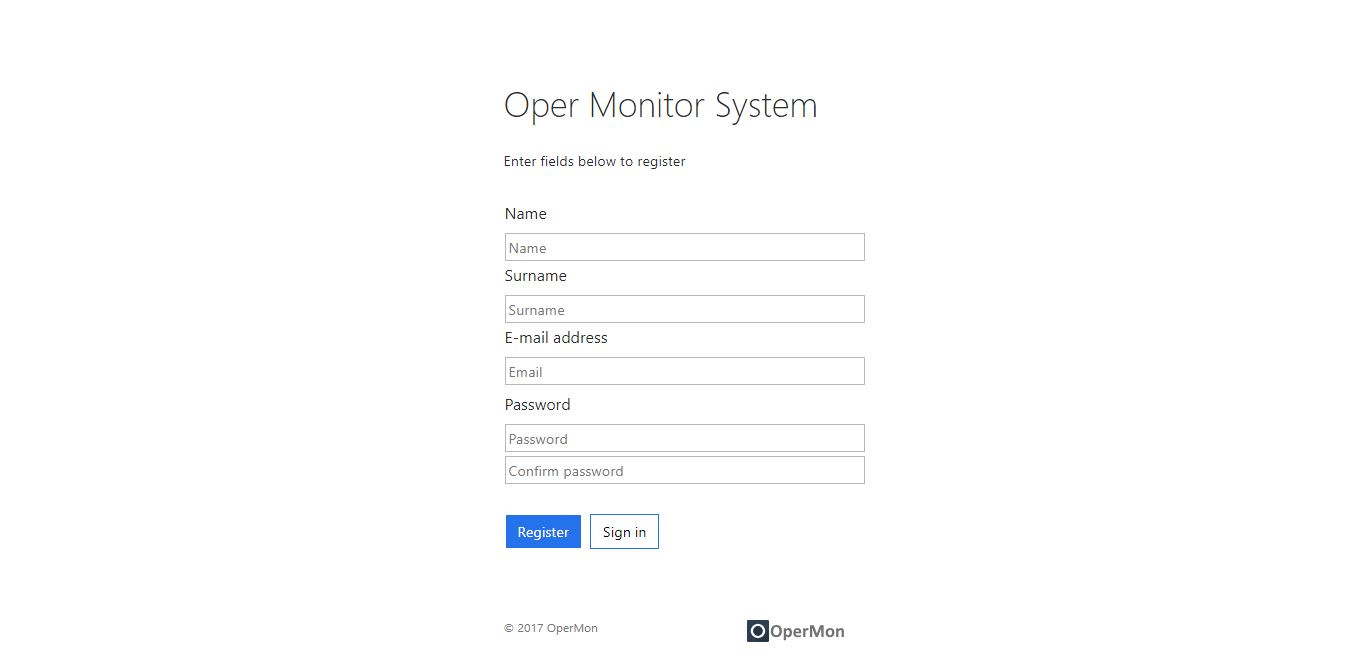
The system design was inspired by Microsoft Azure. I'll give the screenshots of the final result below:
Screenshots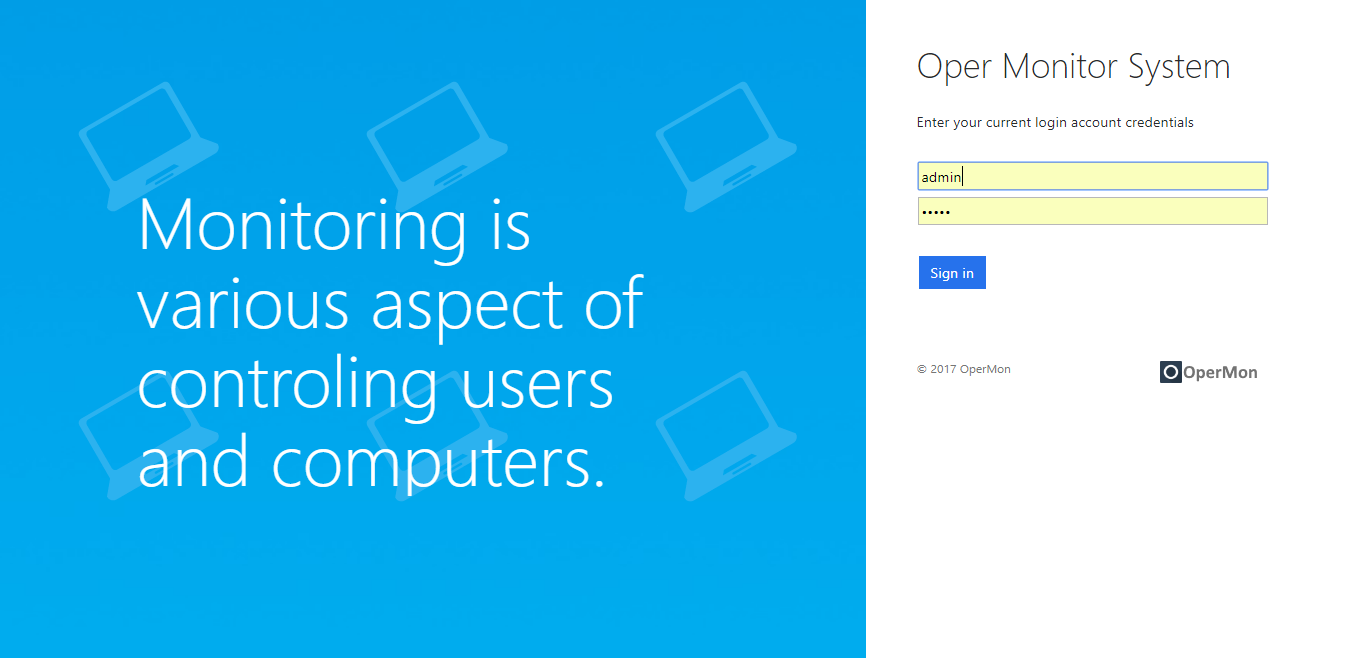
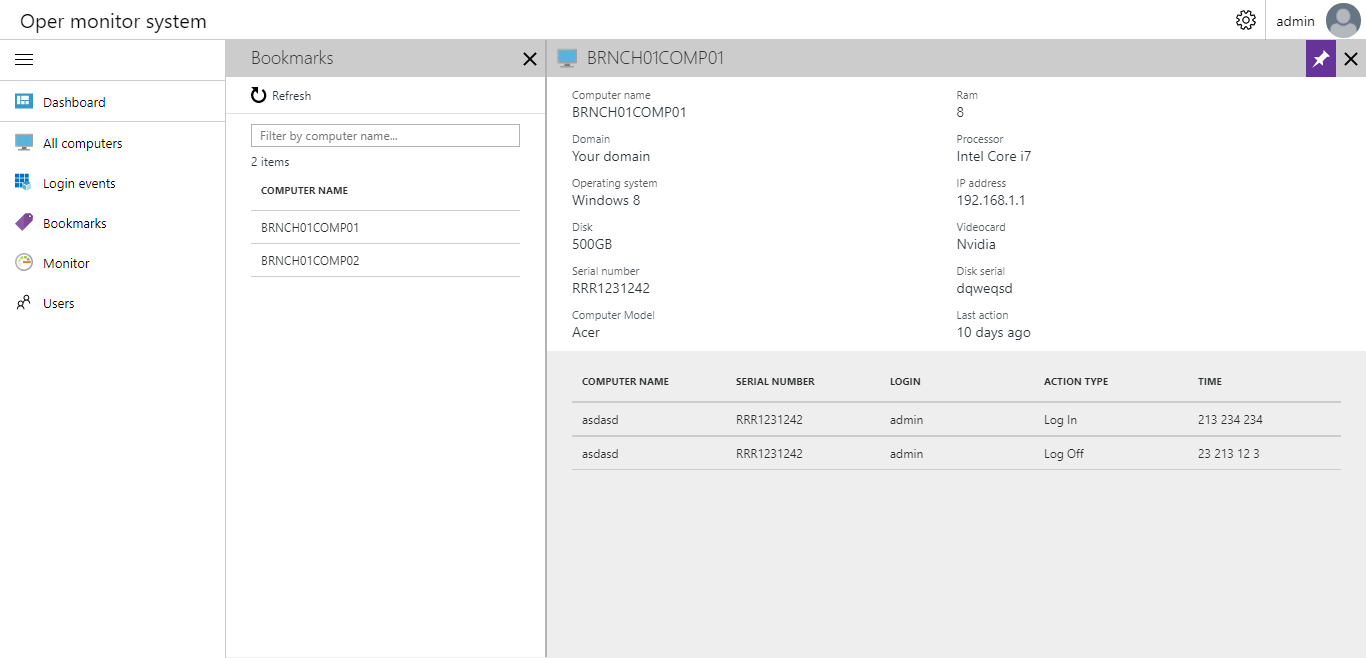
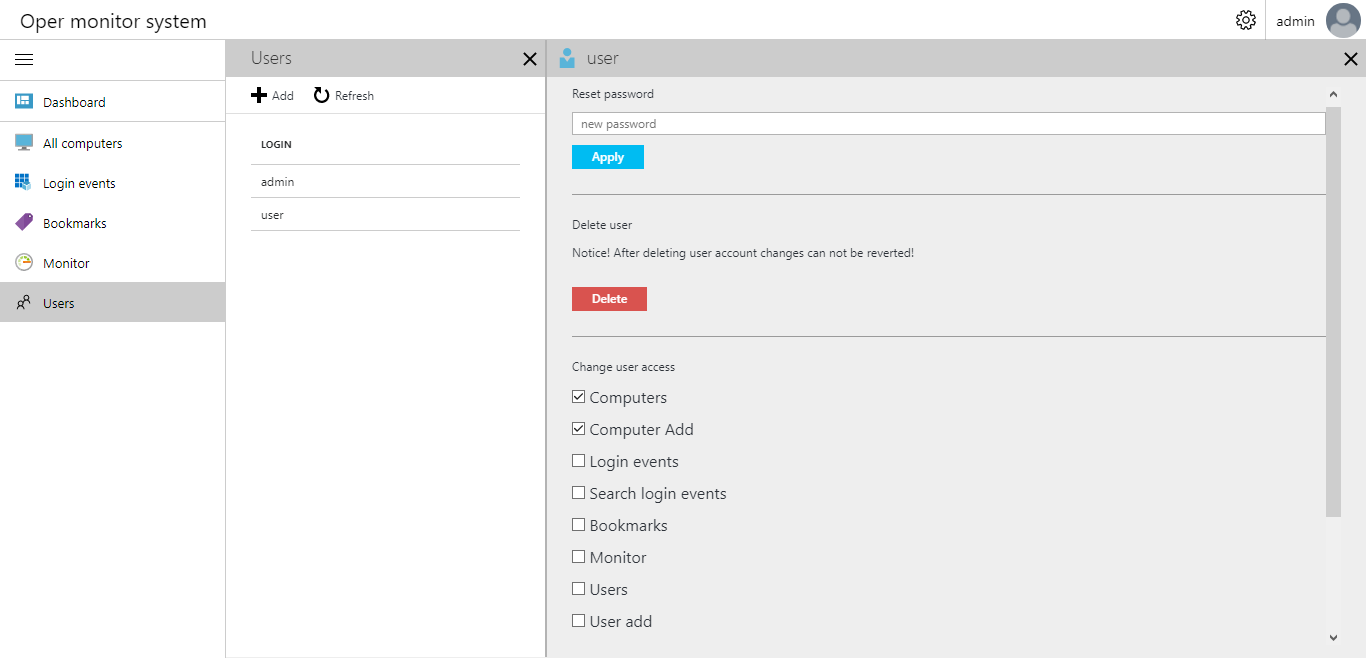
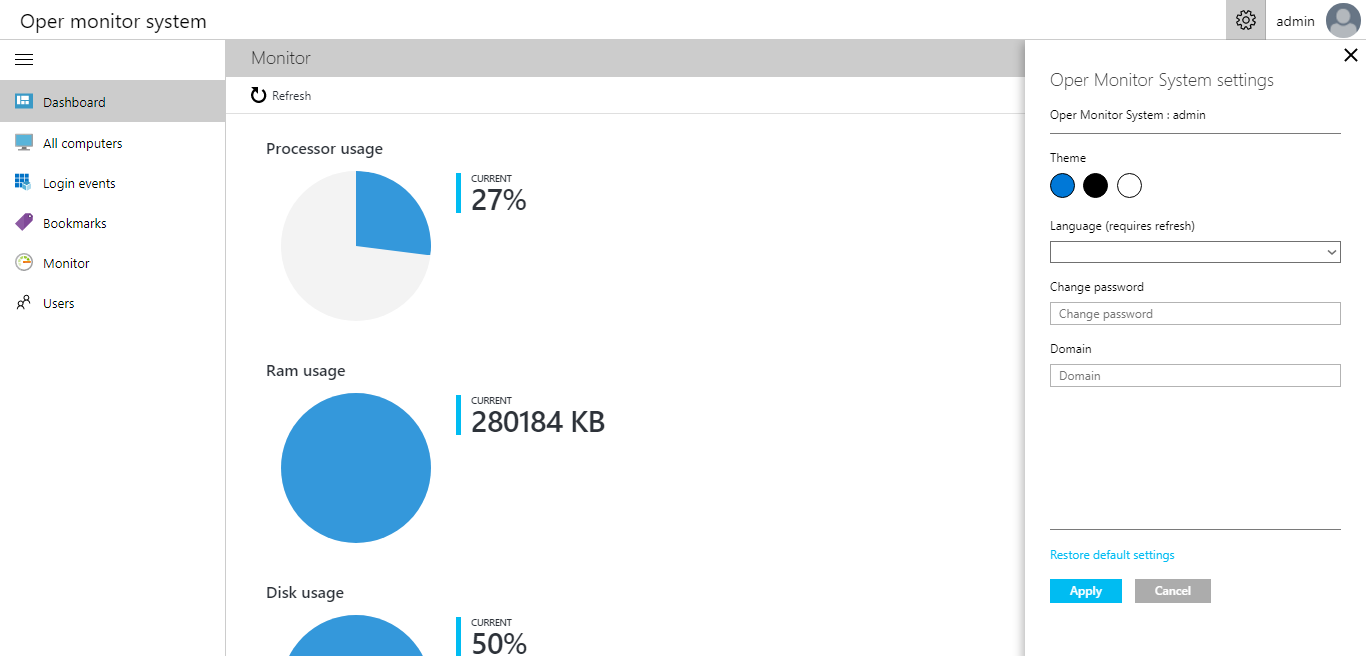
It should be noted that before making a commercial version on Amazon AWS, I completely rewrote the system by making it safer, focused on general use, and simply removed some of the functions due to uselessness, but the essence remained the same.
Client part
The client part of this system is a simple service application written in c #. When loading, the service opens the configuration file located at% windows_path% \ OperMonitorSystem.xml. The structure of this xml file:
<OperMonitorSystem> <Server>http://servername/</Server> </OperMonitorSystem> In order for the service to catch user session events, you should add to the service initialization:
this.CanHandleSessionChangeEvent = true; You should add a function that catches session changes:
protected override void OnSessionChange(SessionChangeDescription changeDescription) { switch (changeDescription.Reason) { case SessionChangeReason.SessionLogon: // break; case SessionChangeReason.SessionLogoff: // break; case SessionChangeReason.SessionLock: // break; case SessionChangeReason.SessionUnlock: // case SessionChangeReason.RemoteConnect: // case SessionChangeReason.RemoteDisconnect: // } base.OnSessionChange(changeDescription); } Using the WebClient class, a POST request is sent to the server. WMI requests are used to get the computer configuration.
The client part can be installed manually on each computer (if there are not a lot of them) or deployed by Group Policy.
The idea of creating a service arose after I wrote this article , or rather, after these comments:

During the rewriting of the system, it was necessary to enter some unique code for each user - hashid. This is a kind of sequence of random numbers and letters written through a dash, which is created once during the registration of the user. Hashid is very similar in appearance to the serial key of Windows operating systems. After paying for the required subscription, each installer drops the installer, in which his unique hashid is registered. That is why hashid data is entered in the database and this will ensure that an unauthorized user cannot see another user's computers.
I decided to put the system on Amazon AWS. Amazon AWS gives a year of free use of all the features of the system, of course not without limitations. Register on Amazon AWS. During registration, a call will be sent to your mobile phone to confirm your account. During the call, you will need to dial the numbers on the phone. Unfortunately, registration in this way did not work for me. I dialed the required numbers, but the answering machine required everything to dial the numbers and nothing happened. Then I turned to the support service, described my situation to them. They ordered a personal identity check on a call from a support worker. Soon a support worker called me to make sure that it was me and confirmed my account. It should be noted that Amazon support is very polite and loyal to users. Moving on to the fun part — setting up Amazon AWS. All that is written below I managed through a long search for trial and error. Using this guide, you can completely adjust everything and raise without resorting to searching or something else.
Set up Amazon AWS
Route 53
First we need to buy a domain name. I chose opermon.com. Why opermon:
- Oper - from the word operator
- Mon - from the word monitor
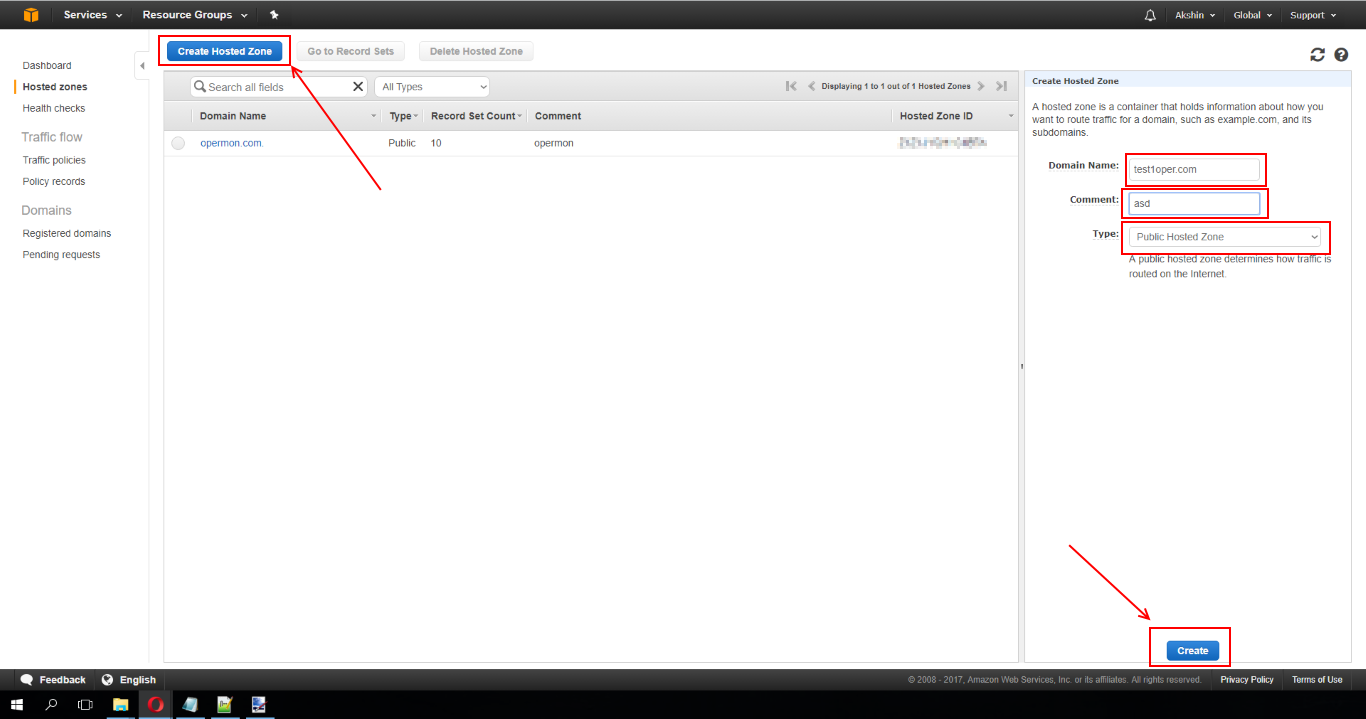
- Go to Route 53
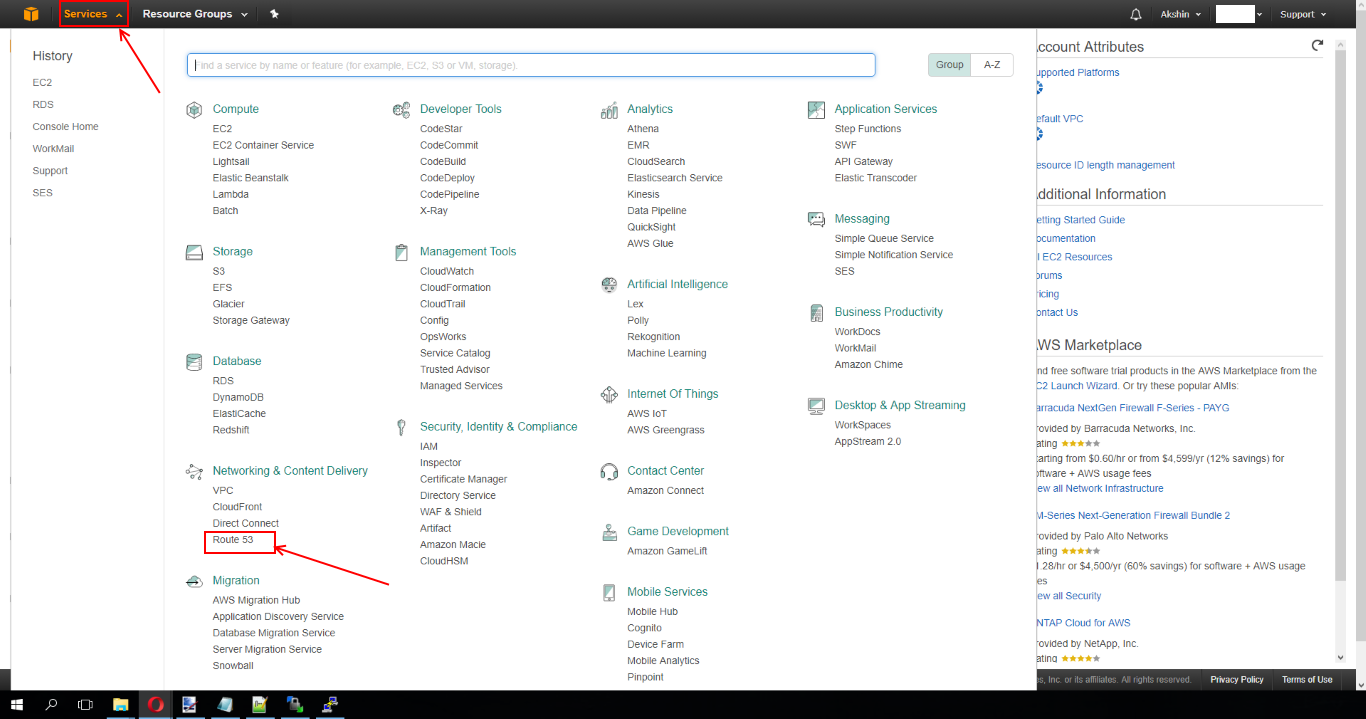
- Click on the “Create Hosted Zone” button. On the right side of the menu, enter the address, comment and select the “Public Hosted Zone”. Public Hosted Zone - means that the name you write will be available to the whole world. It should be noted that renting a domain name at Amazon AWS costs different prices. In my case, it cost 12 US dollars. Paid once a year. Within 24 hours the domain name will be ready for use.
Amazon EC2
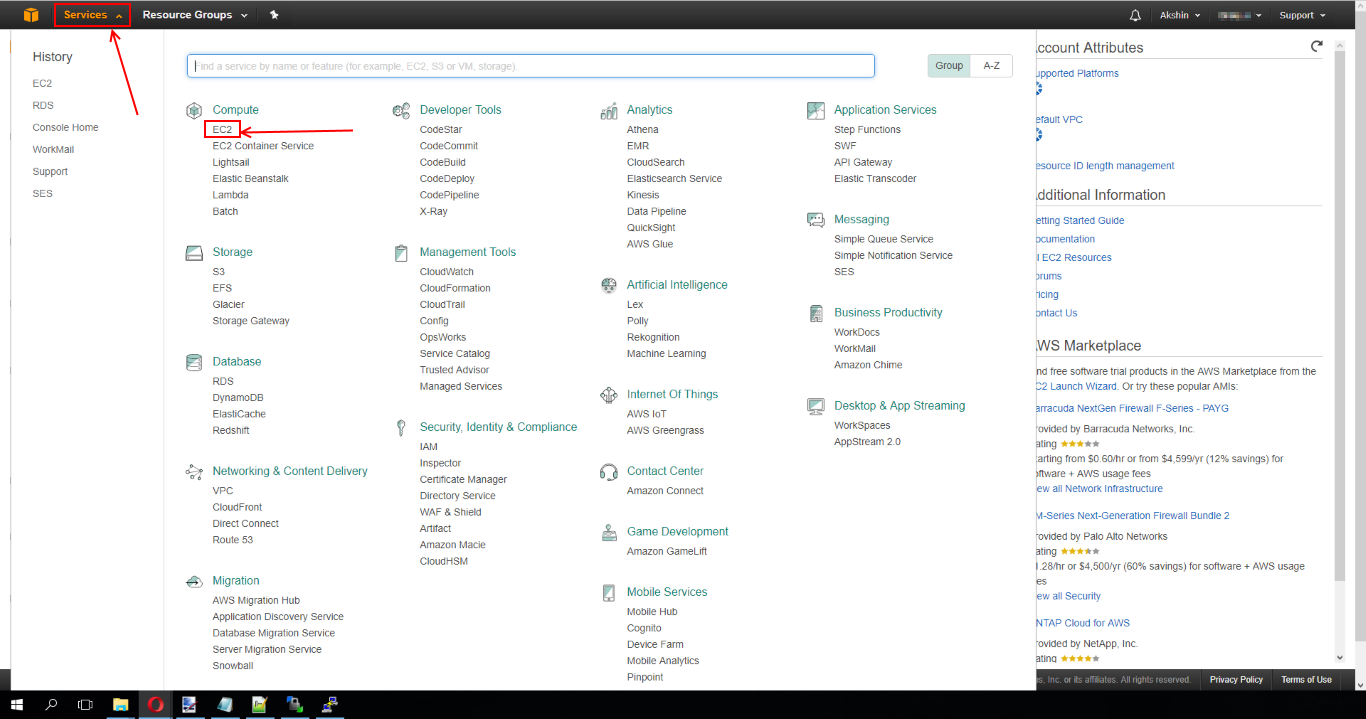
- Go to EC2
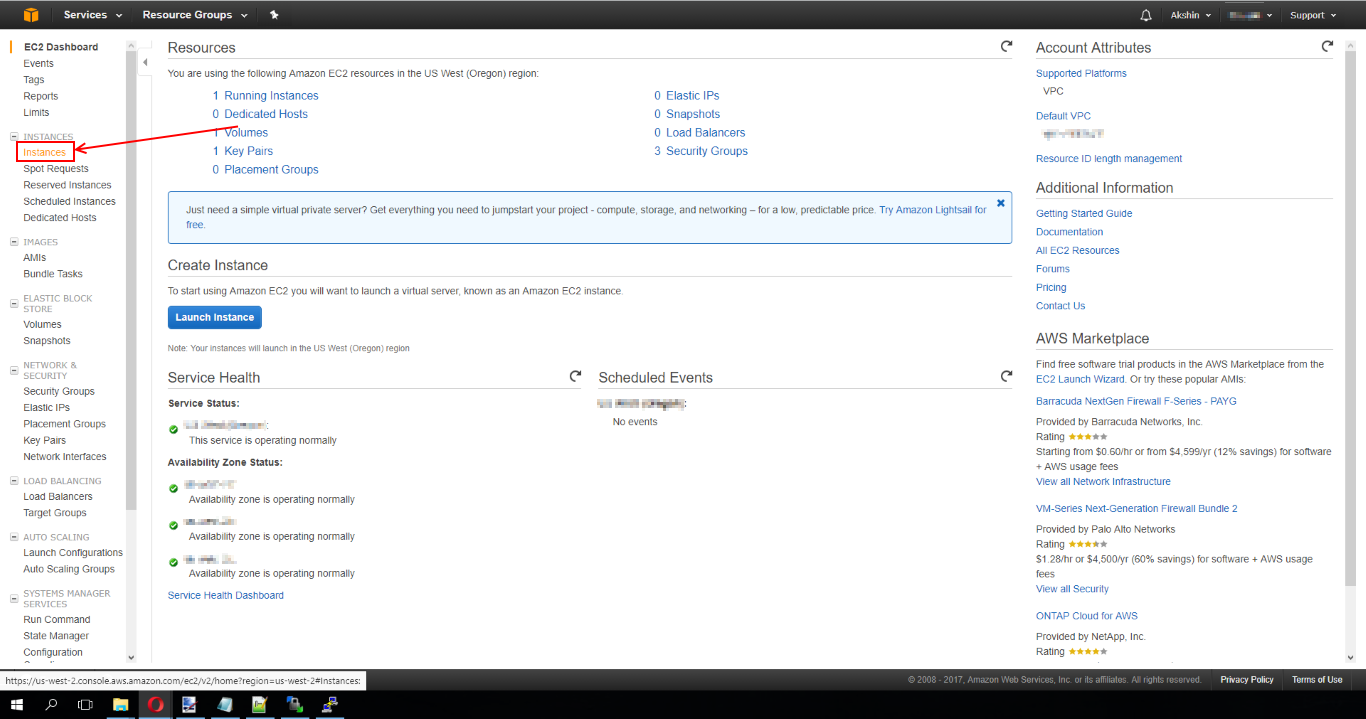
- Select the item on the right "Instances"
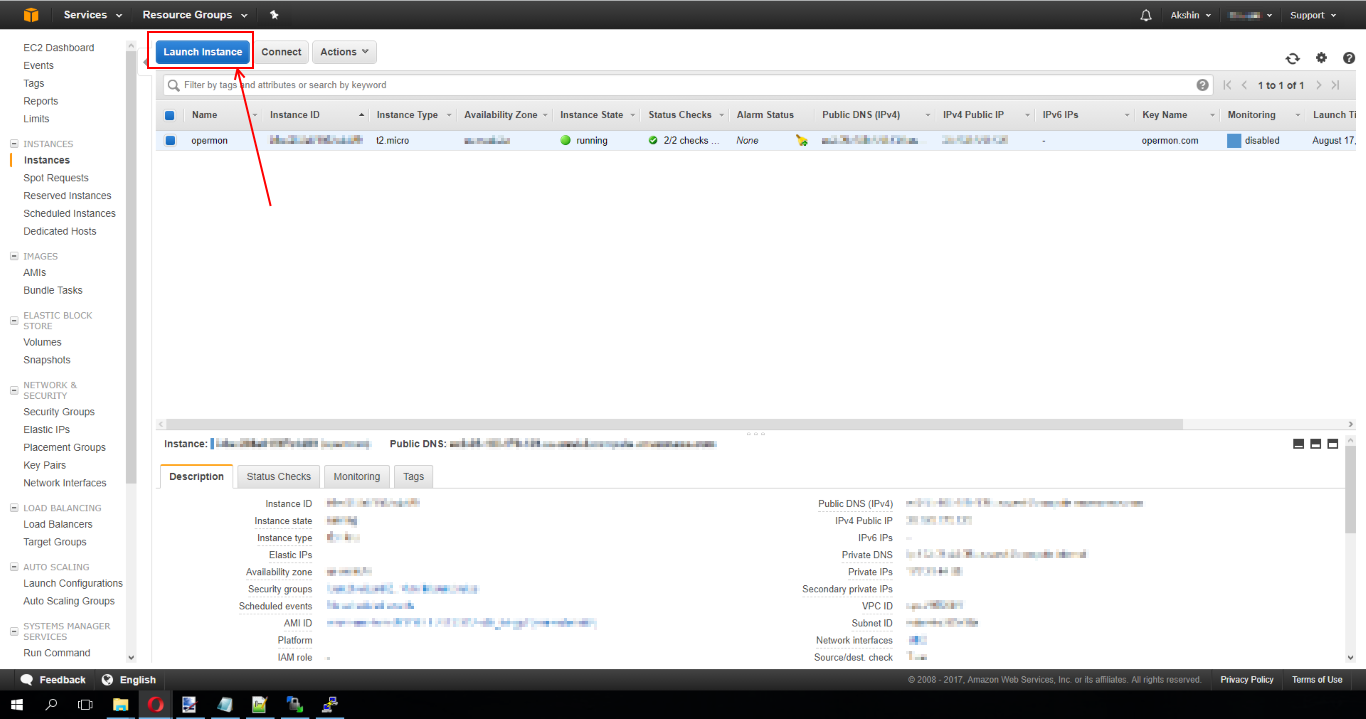
- Click “Launch Instance”
- Put a tick "Free tier only" and select "Select" as shown in the screenshot.
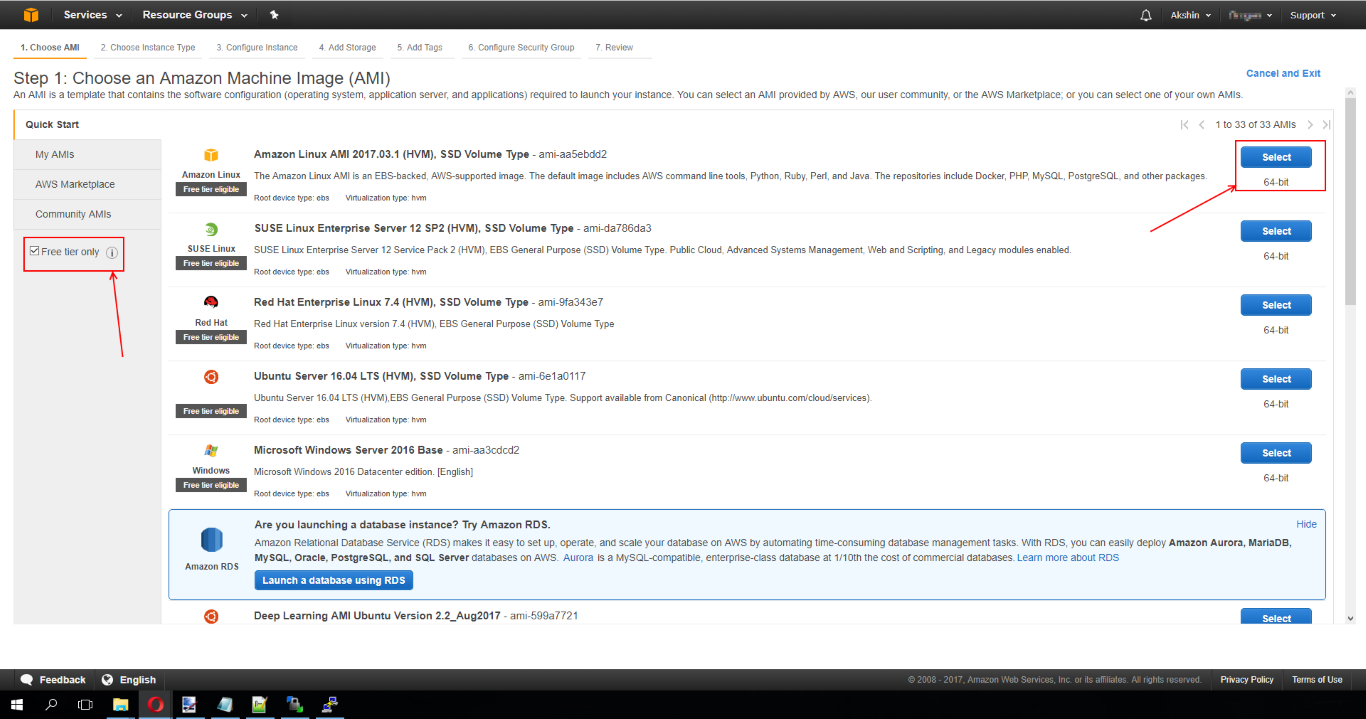
- Click "Next: Configure Instance Details"
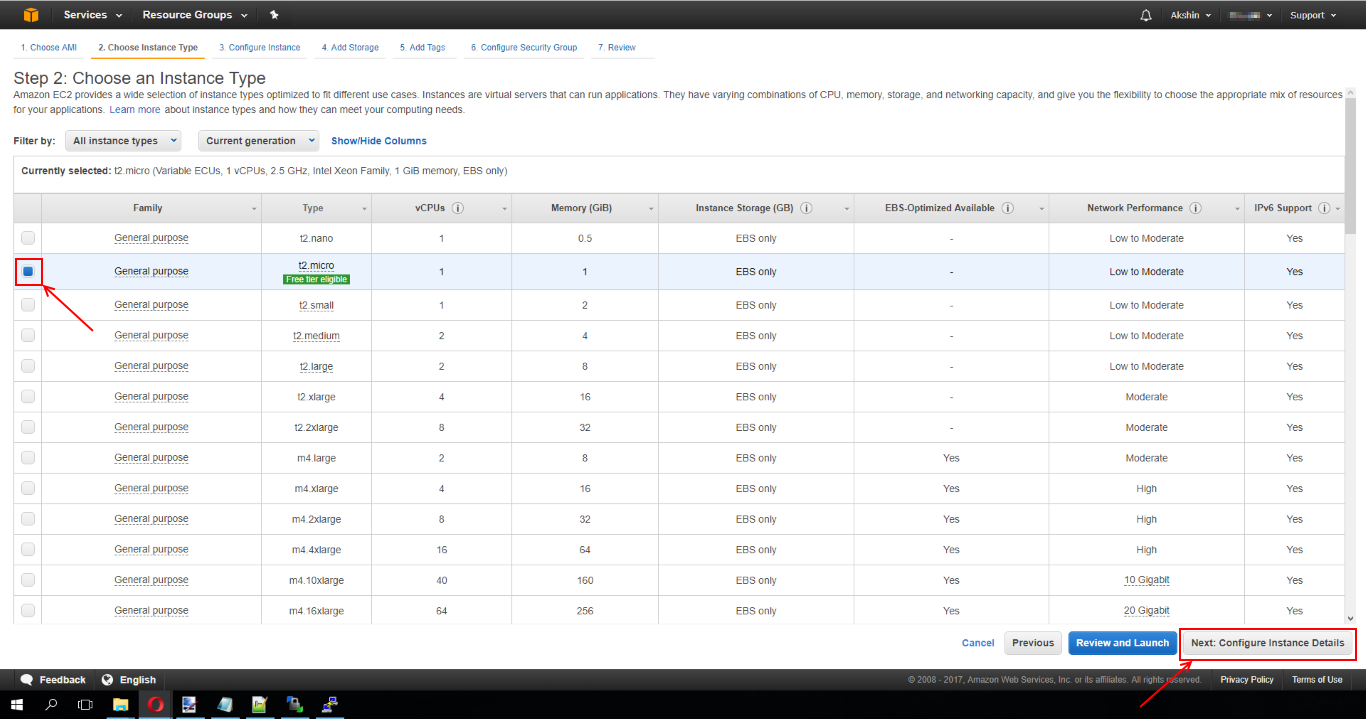
- Click "Next: Add storage"

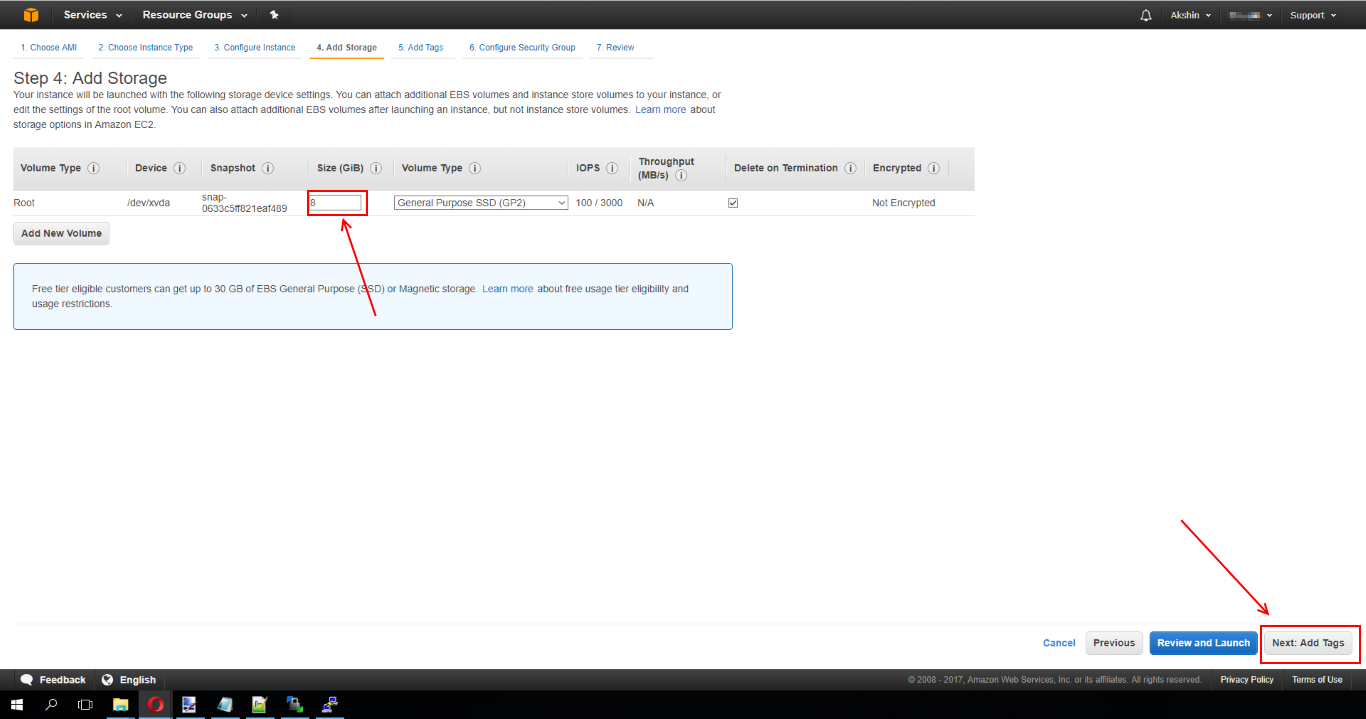
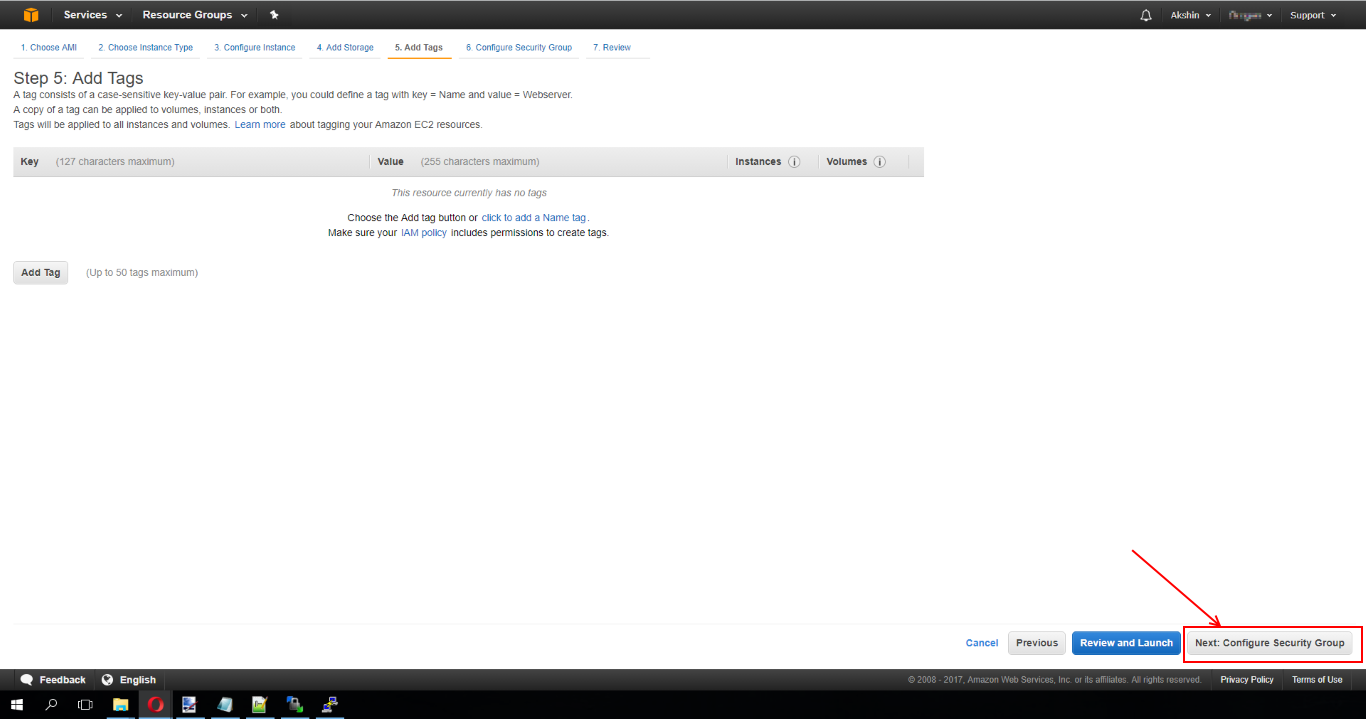
- Specify the size of the disk. In my case, 8 gigabytes is enough. Click "Next: Add tags"
- Click "Next: Configure Security Group"
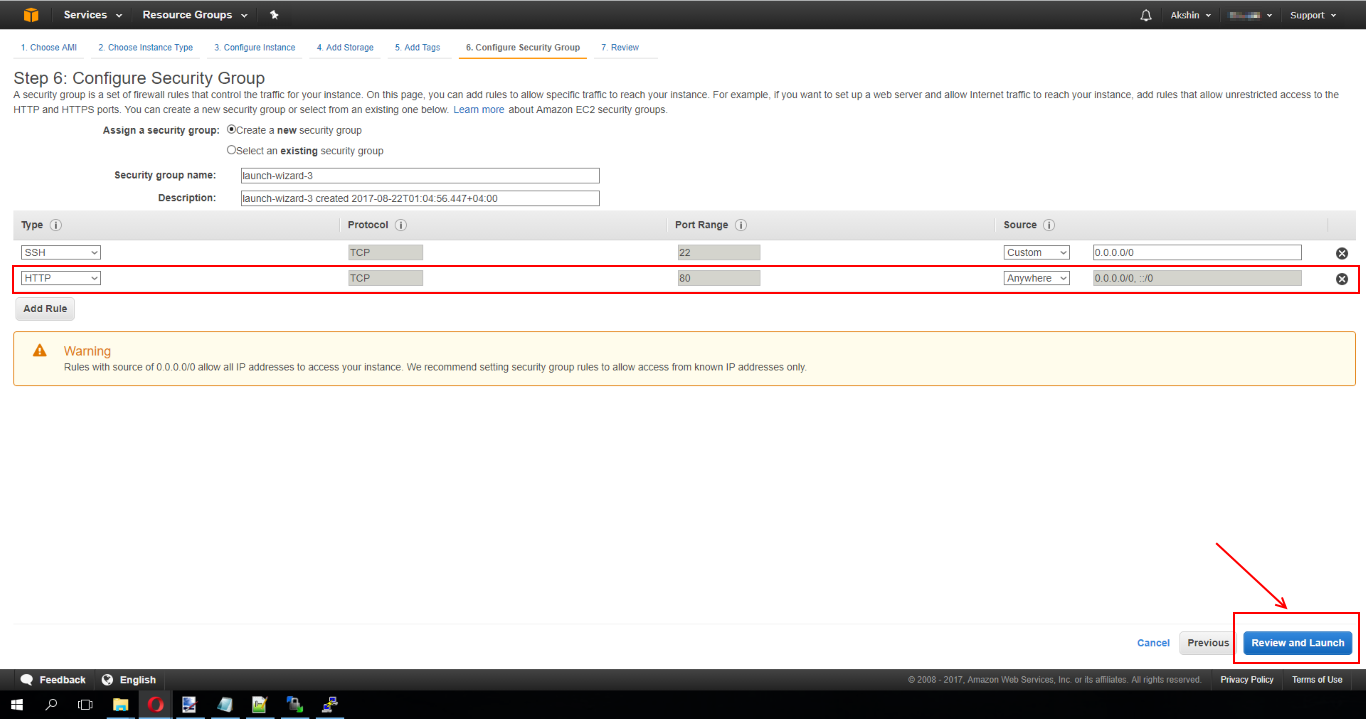
- Click "Add new rule". Choose from the list of HTTP, Source, select Anywhere. This procedure is necessary so that when we install apache on our server, we would have access to our web site from the outside. Click "Review and Launch".
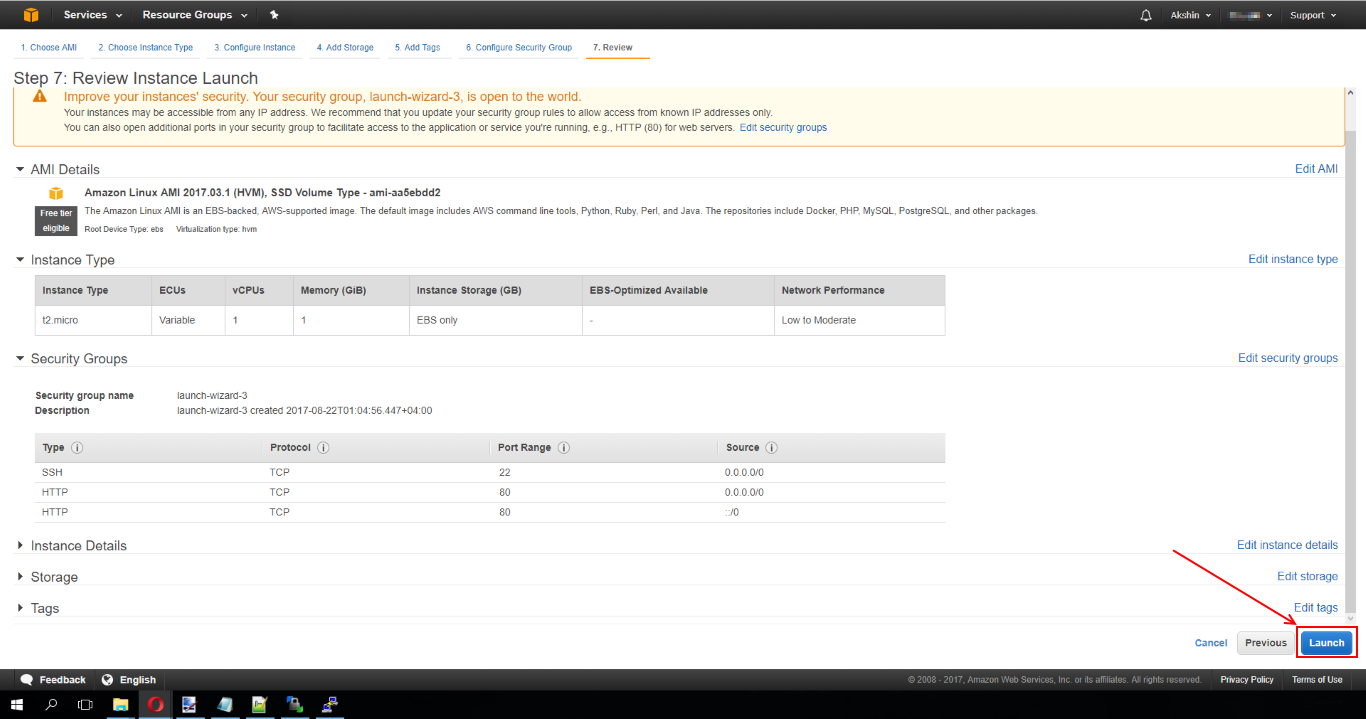
- Click on the "Launch" button.
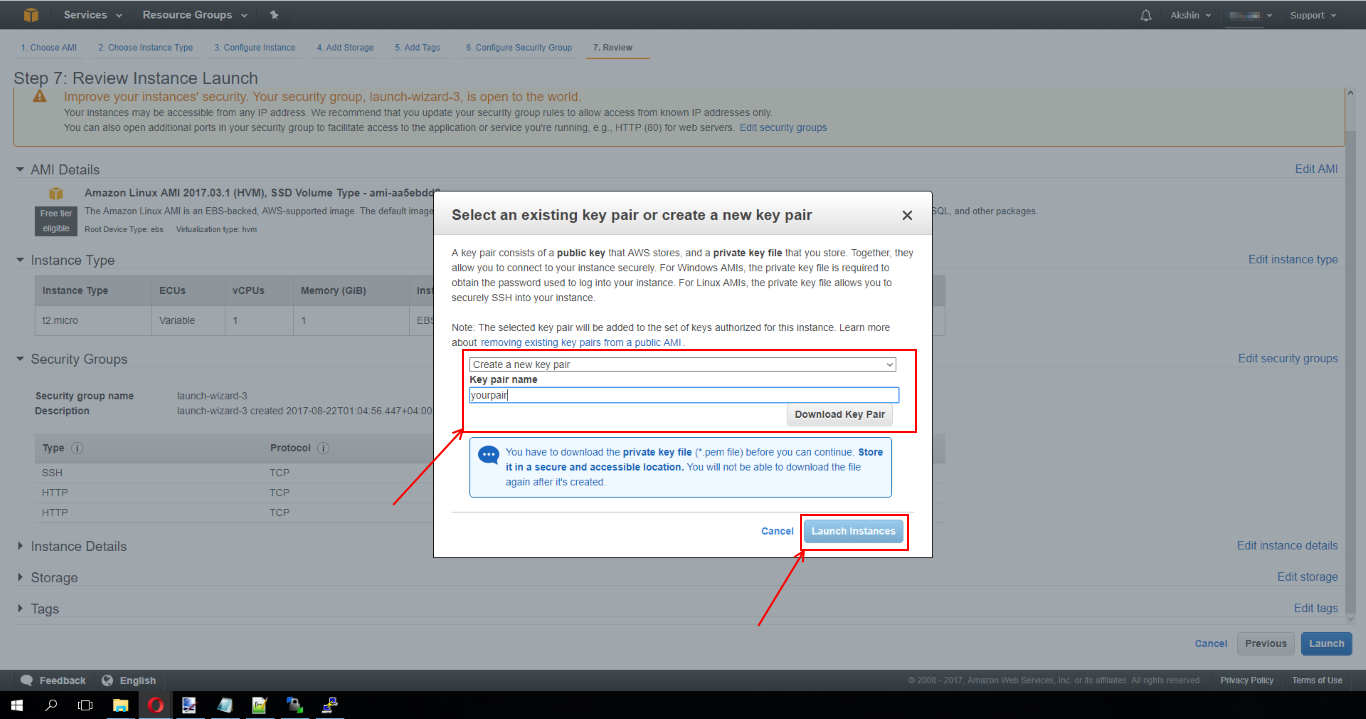
- In this window, select from the drop-down list “Create a new key pair”, enter the name and click on the button “Download Key Pair”. After that, the "Launch Instances" button will become active. The downloaded .pem file must be copied to different storage locations. In no case can you lose this file. Using this pem file we will connect to our instance via WinSCP and Putty (the article will describe how to configure them).
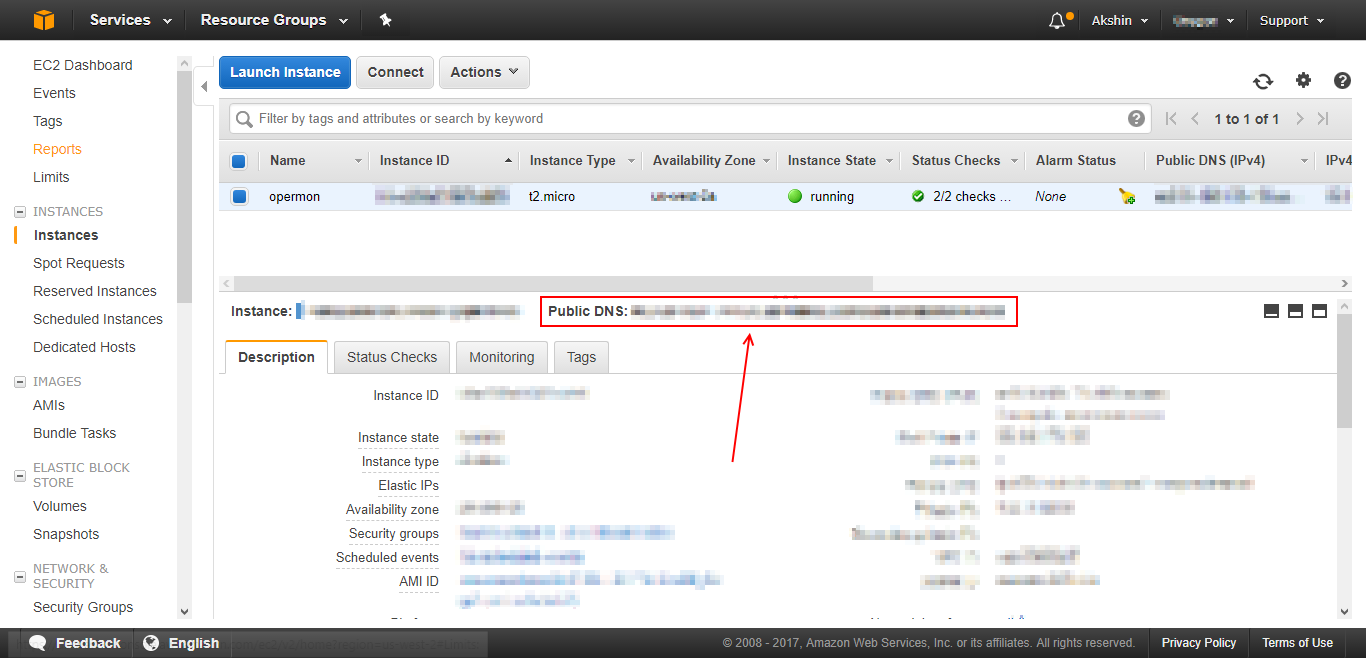
- After 5 minutes, our server will rise and we will be able to connect to it. Standard account "ec2-user". We will configure it so that when typing the address in the browser, the web site of the elevated one will be opened (further we will describe how to configure it) on our server. Go to the “Instances” section, select the virtual machine we just created and look at the “Public DNS” and Public IPv4 address. I look like this:
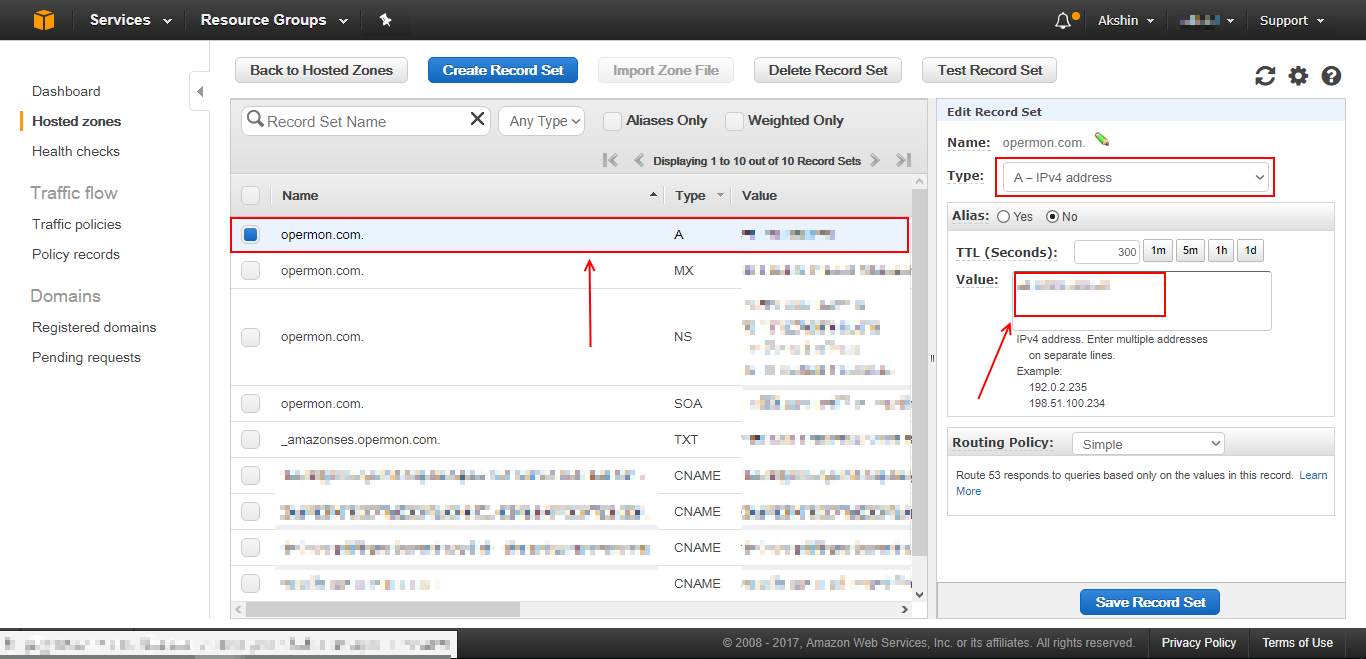
We copy this data to ourselves. Now we need him - Go to Route 53. Select the domain we purchased. Select the first A record. In the right menu we add the Public IPv4 address of our instance.
- Click "Create record set". In the right-hand side menu that opens, select "Cname - canonical name" from the list. In the field "Name" enter "www". In the field “Value” enter the “Public DNS” address of our instance and click “Create”
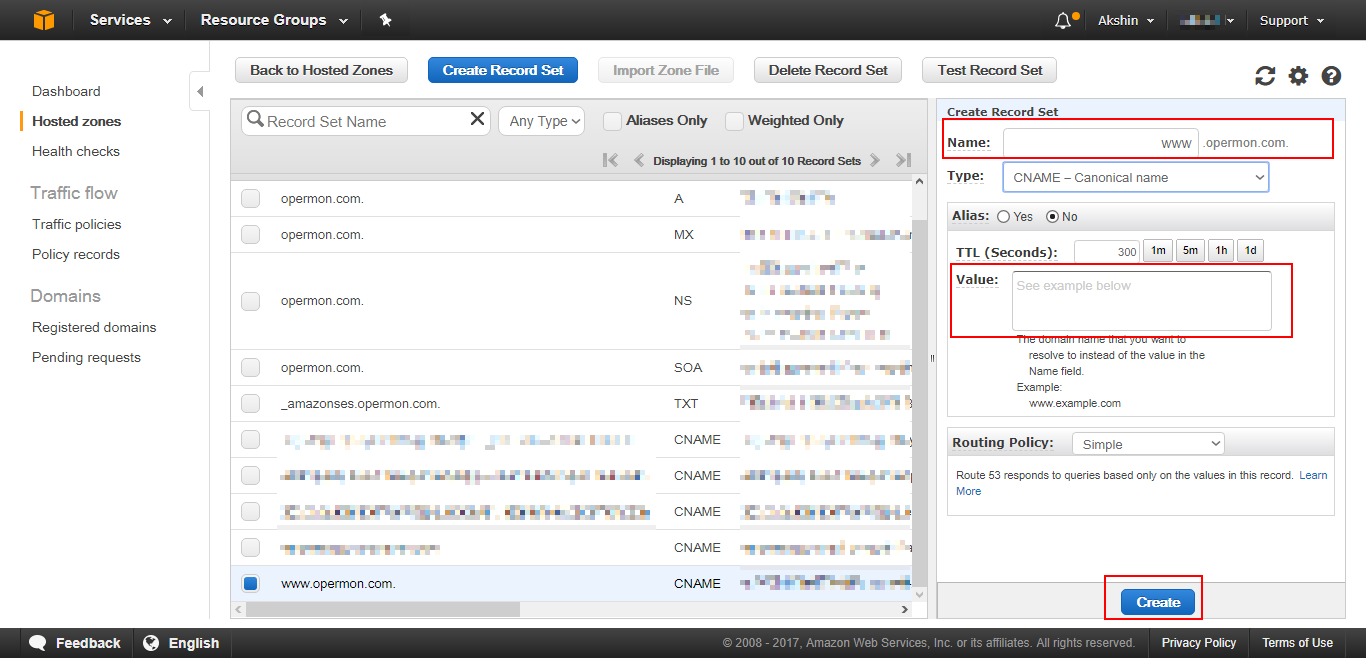
Changes will take effect within 24 hours.
Configure the Putty and WinSCP application
Let's start with Putty. Download Putty to your computer and install it.
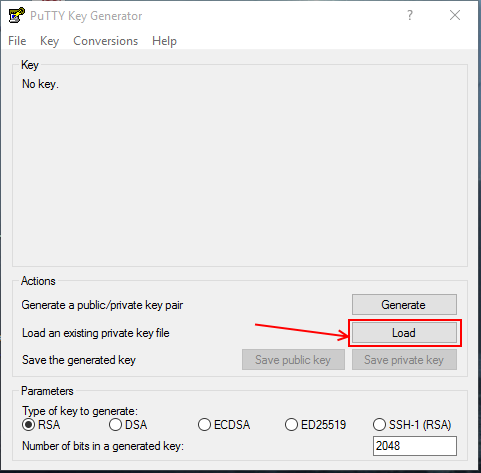
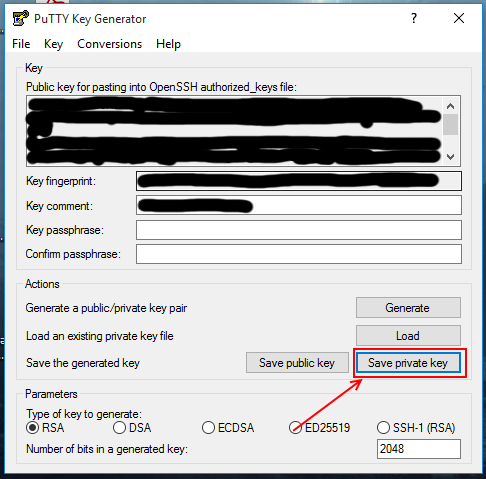
- Open Puttygen first (the application is located in the Start menu, in the Putty folder). Click "Load" and select the .pem file we downloaded when we raised the EC2 instance:

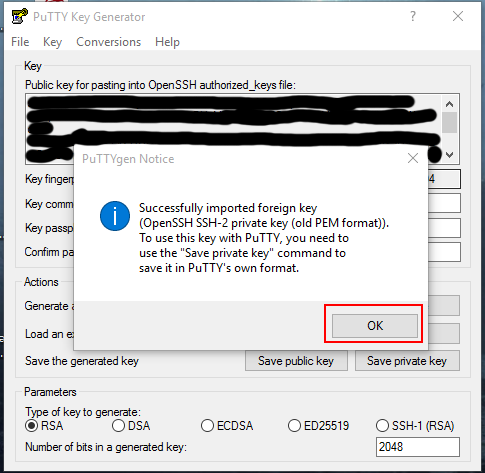
- Click on the button “Save private key” and save the file
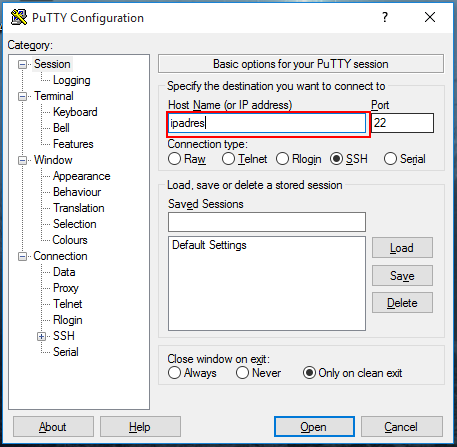
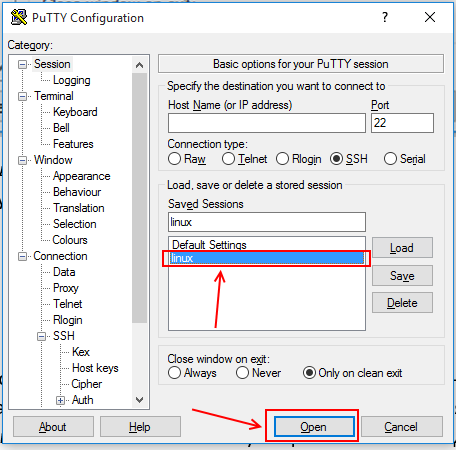
- Open Putty. In the "Host name" write "Ip" address or "Public dns" instance address
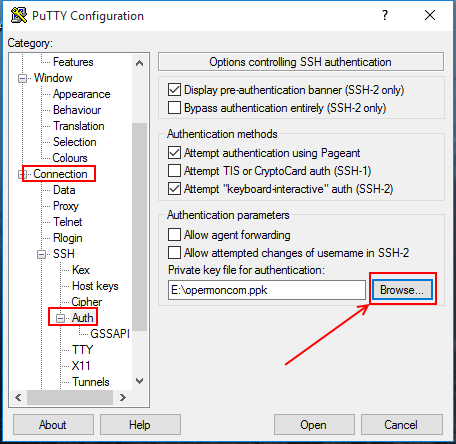
- In the menu on the left, select the Connection-> SSH-> Auth section and select the .ppk file that we just created in Puttygen.
- On the left in the menu, go to the Session section, enter the text “linux” in the “Saved sessions” field and click on the “Save” button. In the list of sessions we will see how linux was added.
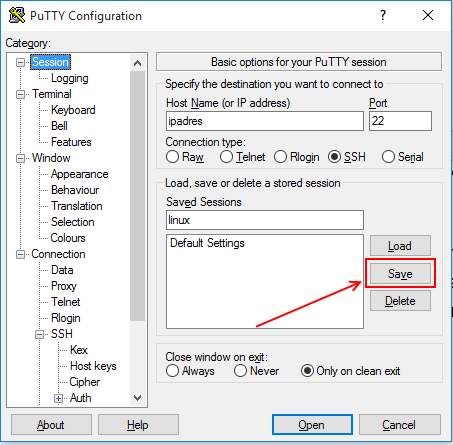
- Thus, the next time we need to connect to the server, we just need to select the configuration we just saved and click on the Open button.
Let's go to WinSCP. Download WinSCP to your computer and install it.
- In the "Host Name" write the "Ip" address or "Public dns" instance address. The username is “ec2-user”. Password left blank. Click on the "More" button
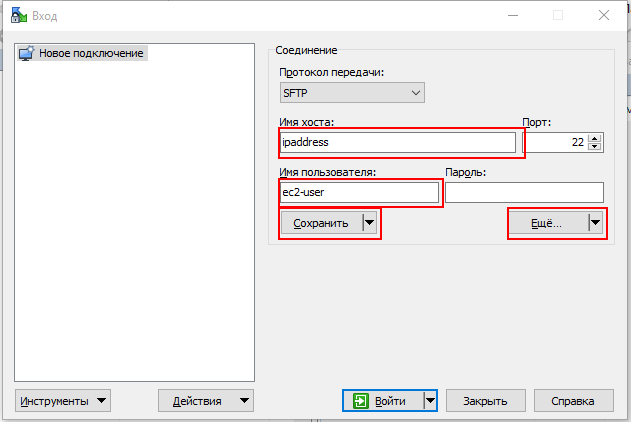
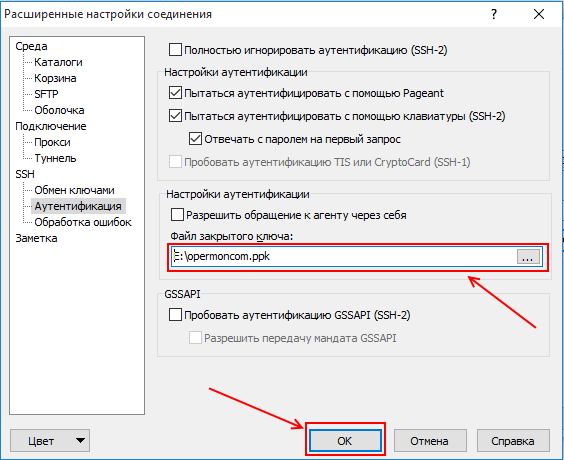
- In the Authentication menu, select the .ppk file and click "OK"
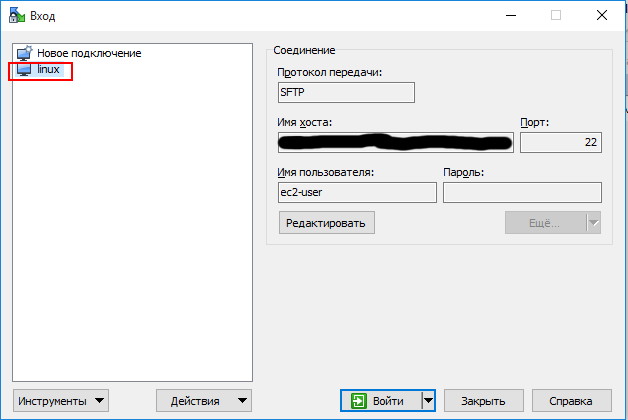
- We click on the "Save" button so that the next time we do not configure the connection. We will see how a connection was added to the menu on the left.
Amazon RDS
Create a relational mysql database.
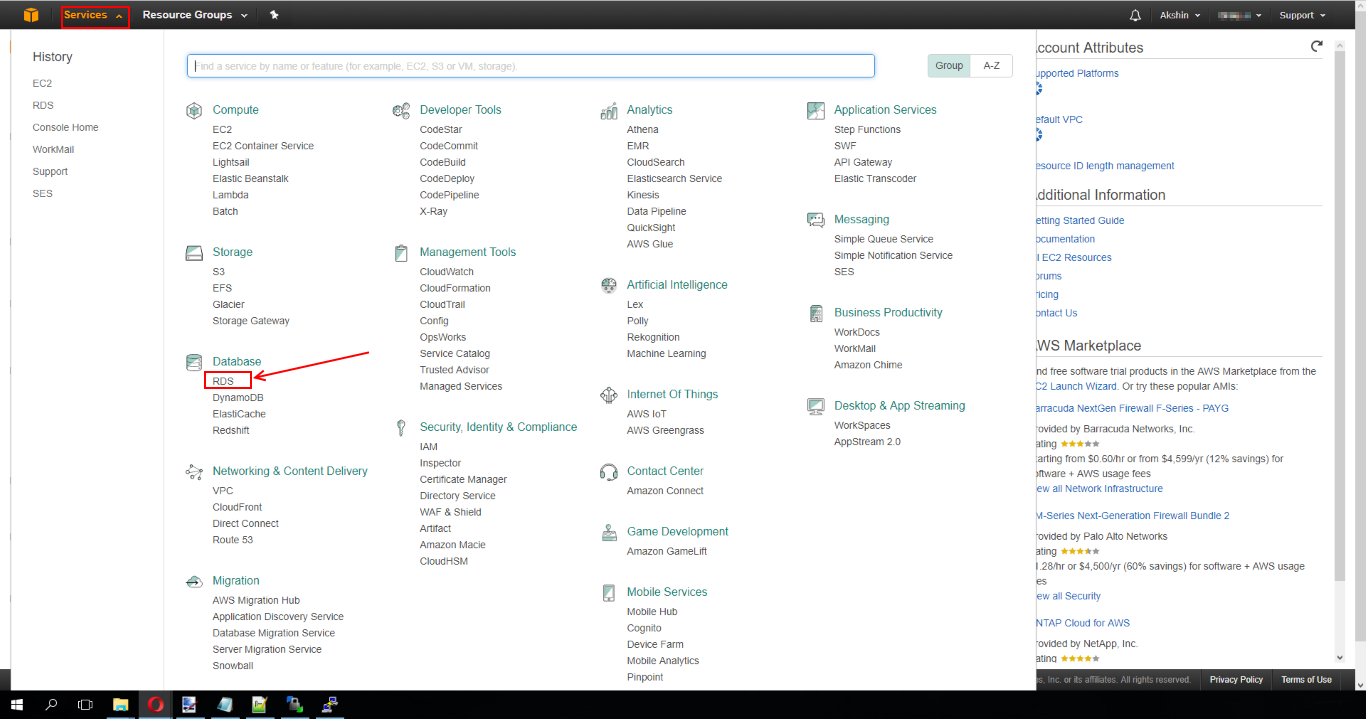
- Open Amazon RDS
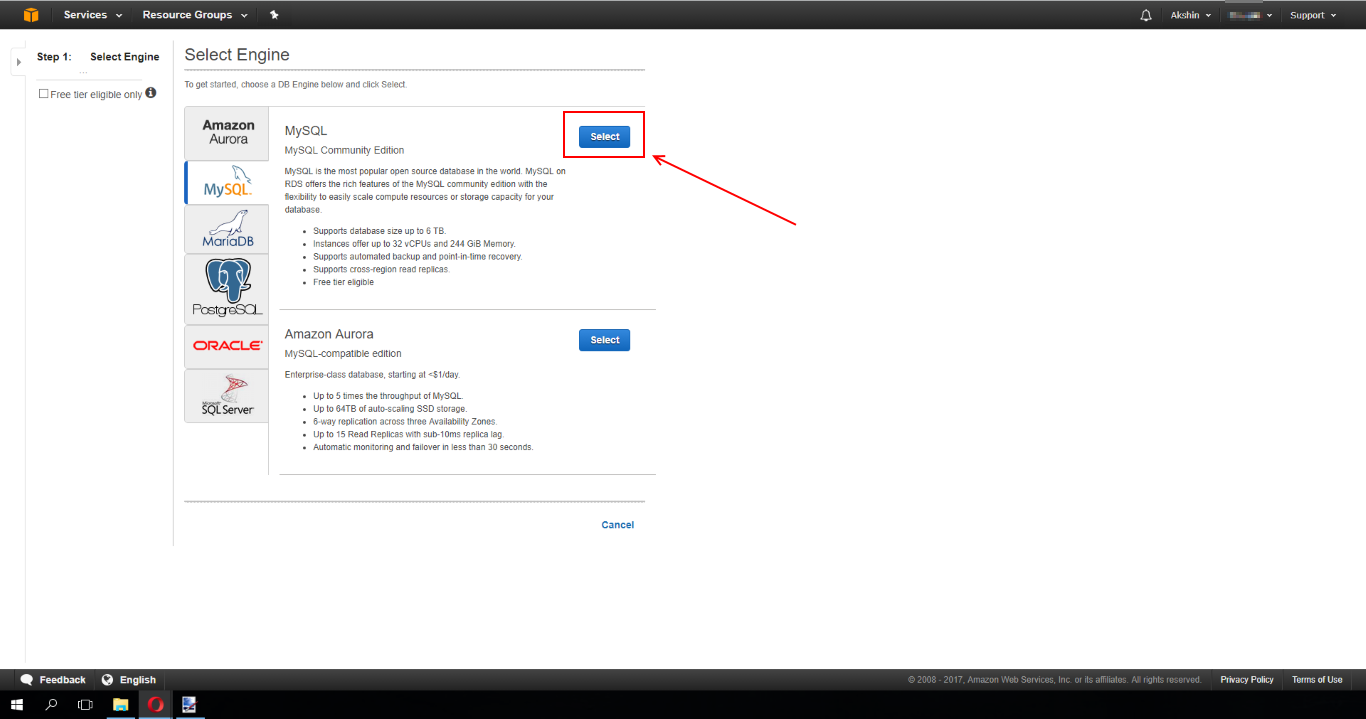
- Click on the button "Select"
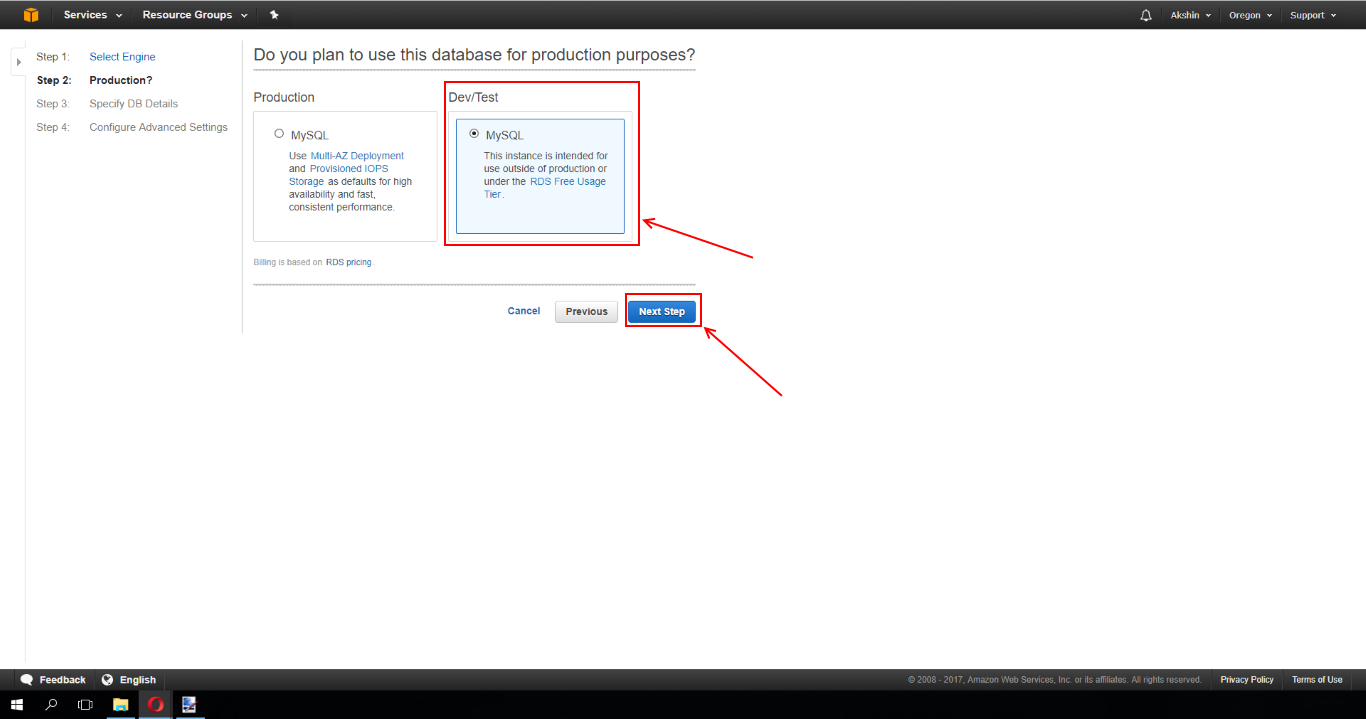
- Select Dev / Test, and click "Next Step"
- Enter the database ID (I have opermon), username and password. Click "Next step"

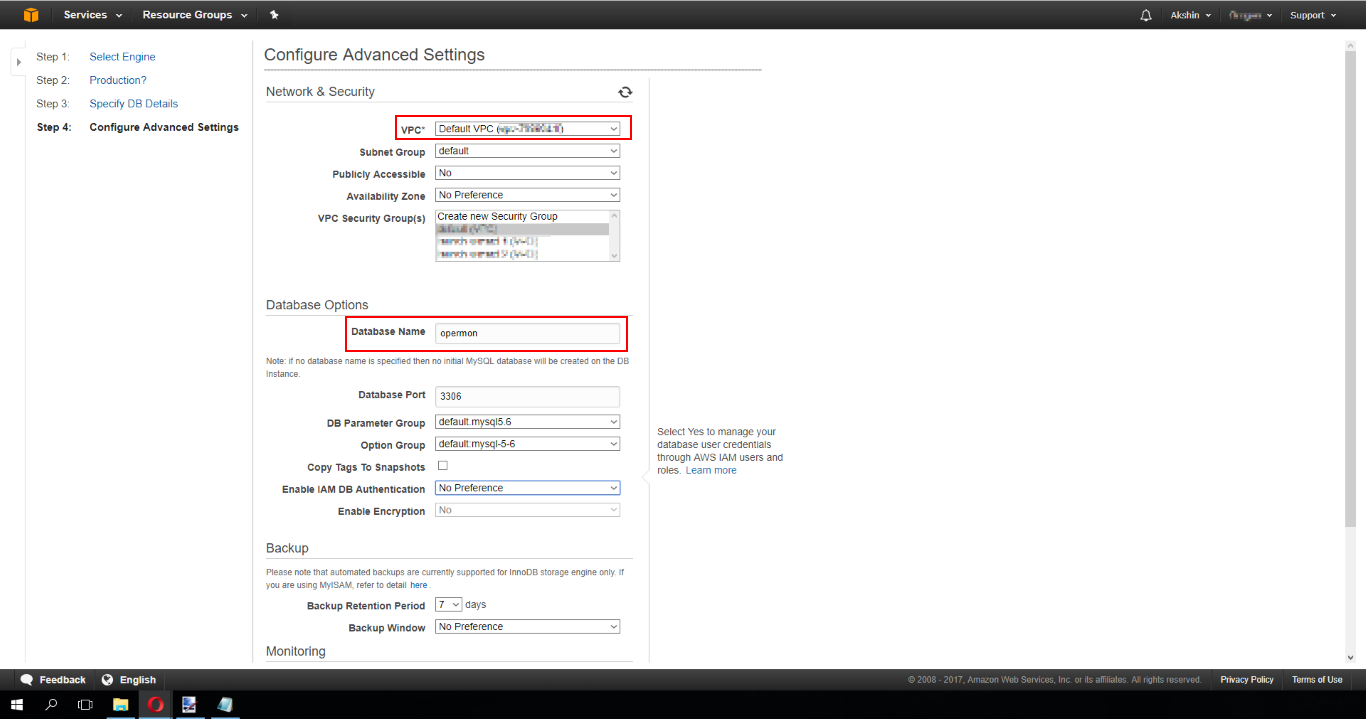
- Select the VPC that was created when creating the EC2 instance, set the name of our database and click “Launch DB instance”
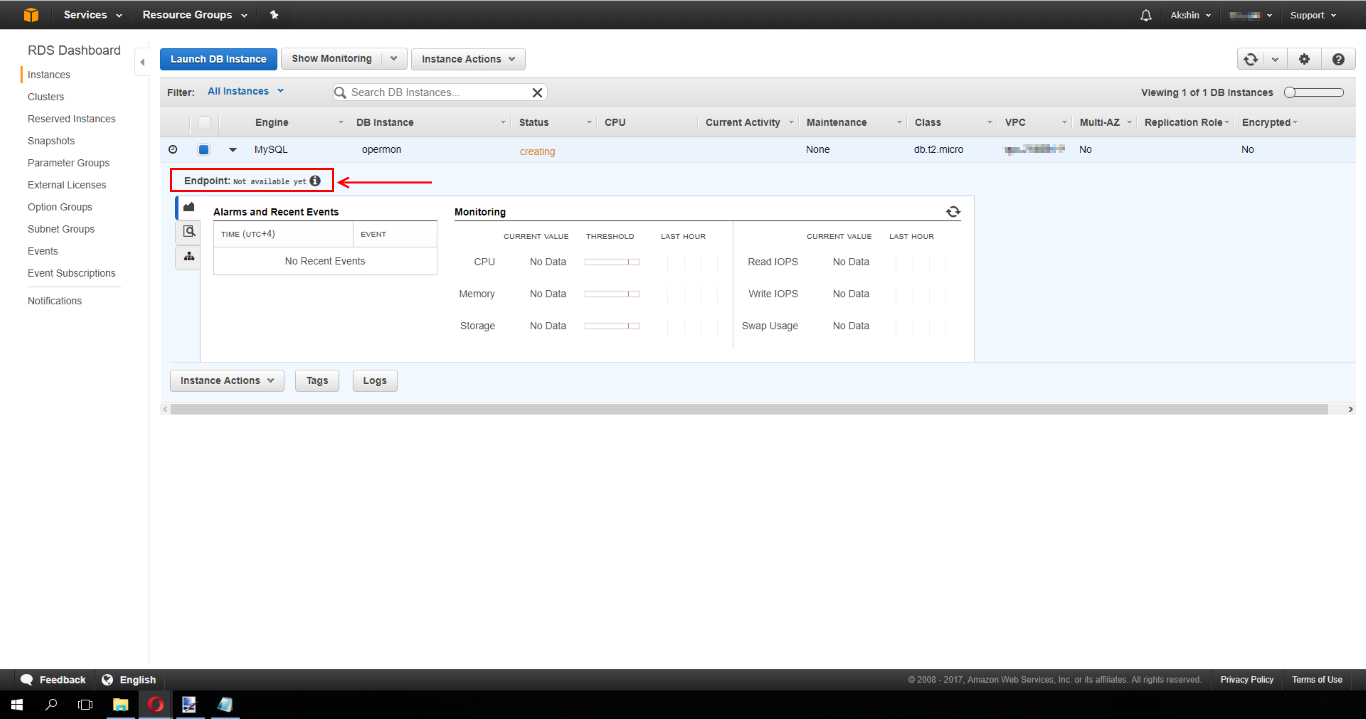
- Go to the management console RDS section "Instances". After 5 minutes, our database will become available and the address of our database will be written at the Endpoint site. We need it.
We set up our instance
Open Putty and connect to our instance.
- Install apache
sudo yum install -y httpd24 php56 php56-mysqlnd - After installation, run it.
sudo service httpd start - We give access to the www folder
sudo groupadd www sudo usermod -a -G www ec2-user - Exit the Putty program and reconnect to our instance and set the commands.
sudo chmod 2775 /var/www find /var/www -type d -exec sudo chmod 2775 {} + find /var/www -type f -exec sudo chmod 0664 {} +
Now in WinSCP we can go to the / var / www / directory and upload our web site, engine, html there - whatever.
Install phpmyadmin
Open Putty and connect to our instance.
- Install phpmyadmin
sudo yum-config-manager --enable epel sudo yum install -y phpMyAdmin - We find our external ip using extraneous services and write a command
sudo sed -i -e 's/127.0.0.1/__/g' /etc/httpd/conf.d/phpMyAdmin.conf
If your ip has changed, then we write the commandsudo tail -n 1 /var/log/httpd/access_log | awk '{ print $1 }' ____ sudo sed -i -e 's/__/_/g' /etc/httpd/conf.d/phpMyAdmin.conf - Restart apache server for changes to take effect.
sudo service httpd restart - Now you need to configure phpmyadmin so that it connects to our database.
sudo chmod -R 777 /etc/phpMyAdmin - Open WinSCP, go to the address / etc / phpmyadmin, copy the file config.inc.php and open it in any text editor. We find the lines shown below and change them to our own:
$cfg['Servers'][$i]['host'] = 'Endpoint '; $cfg['Servers'][$i]['port'] = '3306'; $cfg['Servers'][$i]['user'] = ' '; $cfg['Servers'][$i]['password'] = ''; - Save the file and overwrite it on the server. There will be an error stating that the file has been overwritten, but the attributes have not been changed. Click "skip" and enter the command in Putty:
sudo chmod -R 755 /etc/phpMyAdmin
If this command is not done, then phpmyadmin will refuse to open, referring to the fact that the permissions on the files have been changed and do not comply with the security policy.
Set up WorkMail
What is WorkMail?
Amazon WorkMail is a robust managed business email and calendaring service that supports existing email clients for desktops and mobile email clients. Amazon WorkMail gives users the ability to easily access their email, contacts, and calendars using a convenient email client, including Microsoft Outlook, email applications for iOS and Android, any IMAP-enabled email clients, as well as directly through a web browser.
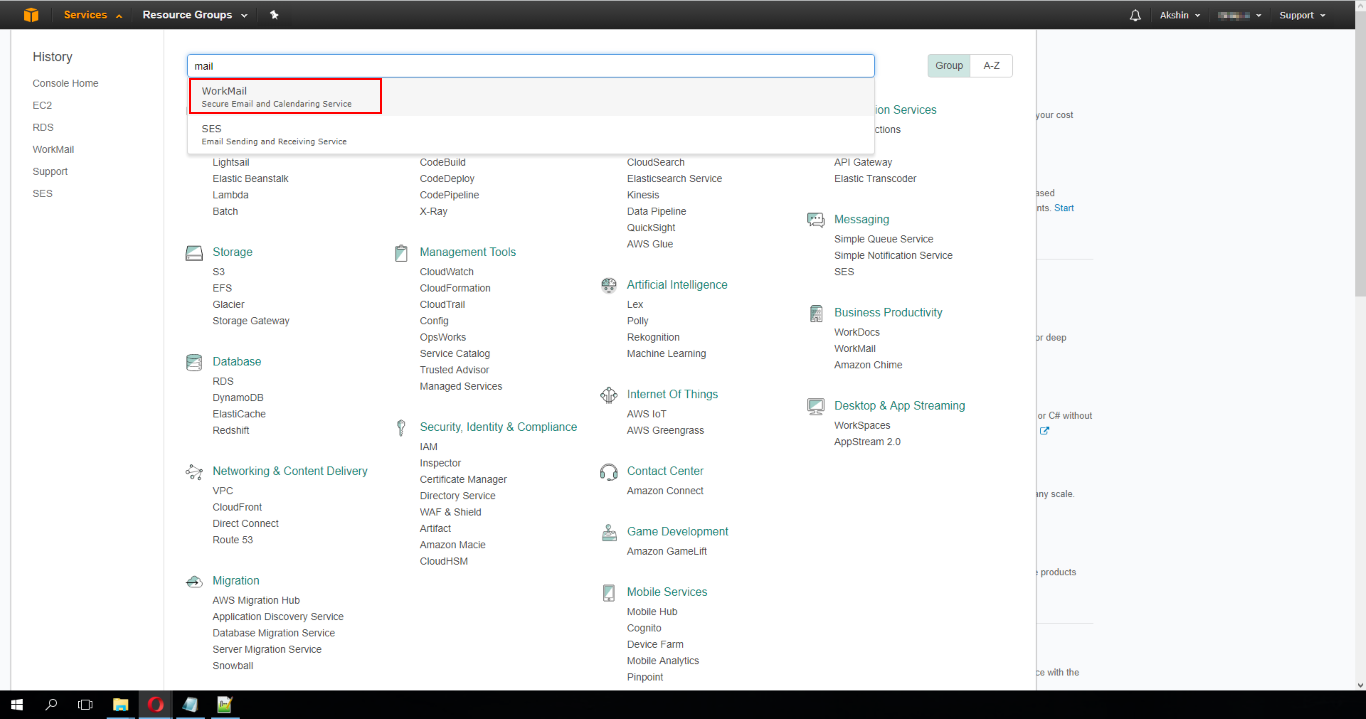
- Do a search on the Amazon AWS console and find WorkMail
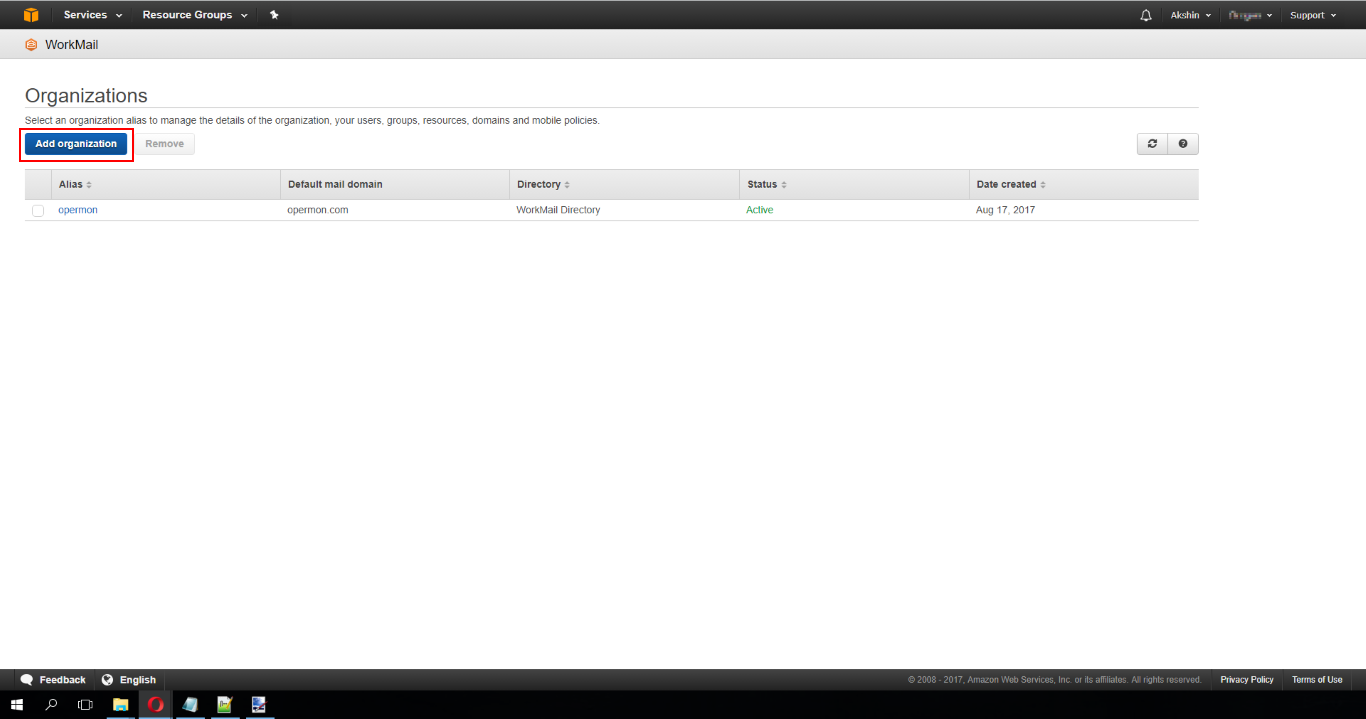
- Choose Add Organization
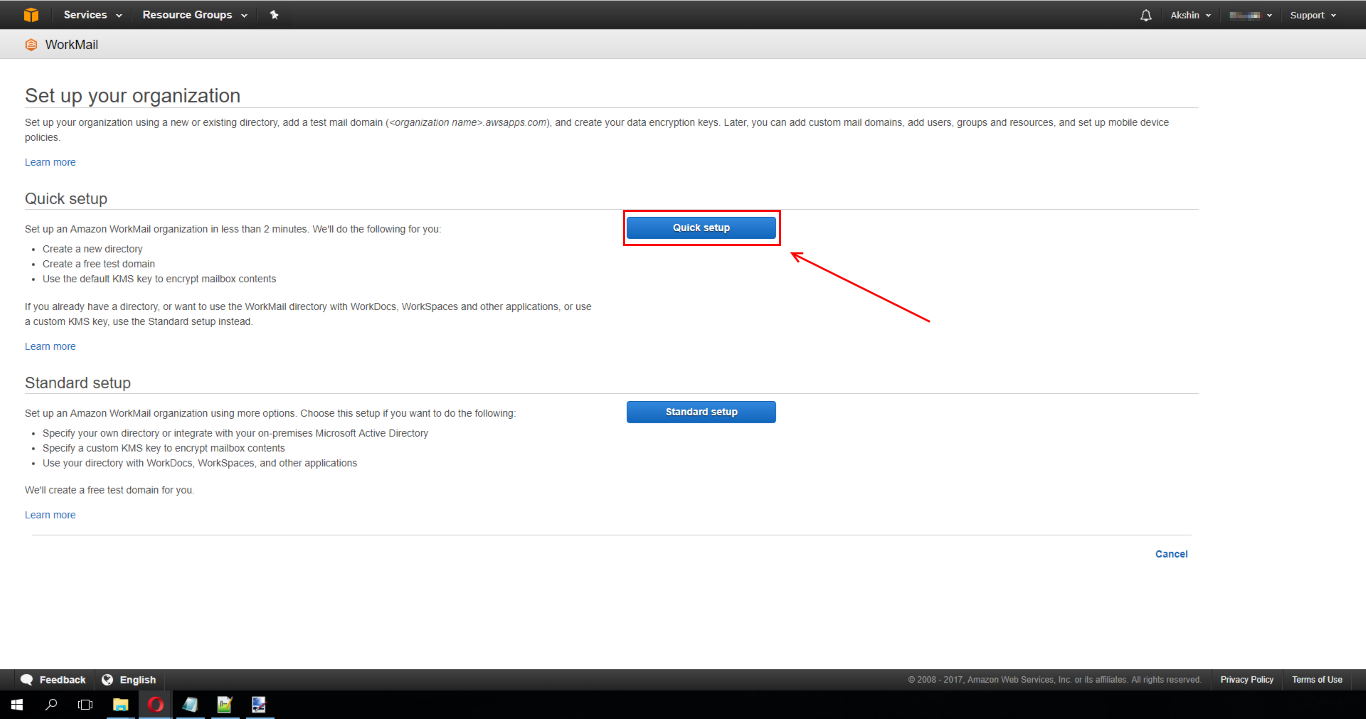
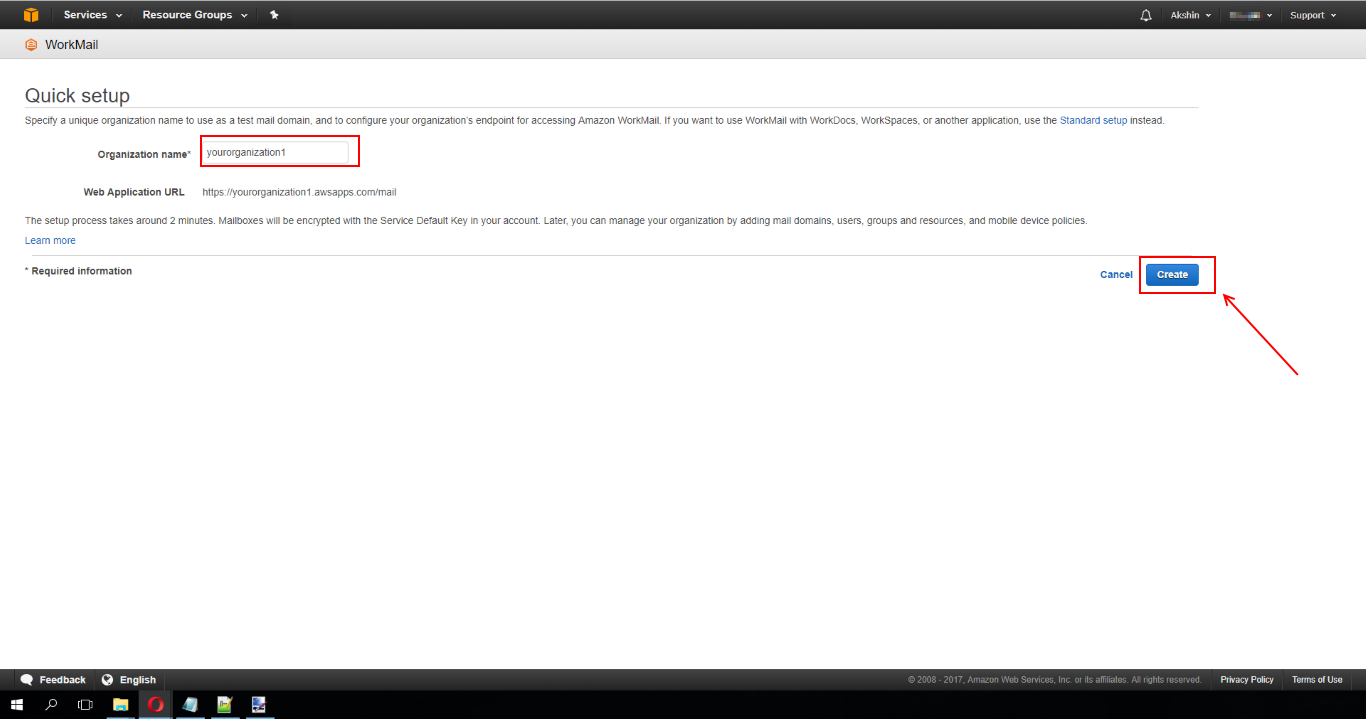
- Click "Quick setup"
- Enter the name of the organization and click on "Create". In my case, the organization has already been created, so I will click on the “opermon” in the list in the second screenshot.
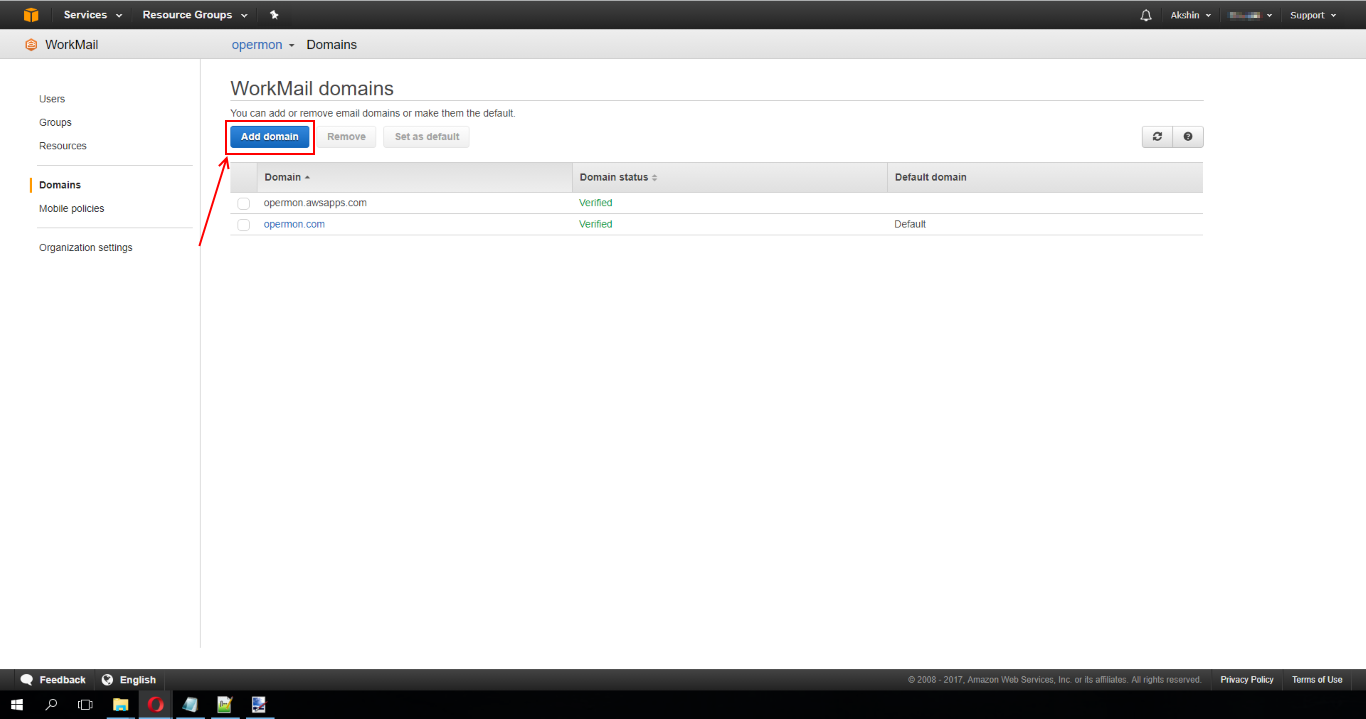
- Go to the section "Domains" and click "Add domain"
- Enter the domain name and click "Add domain"
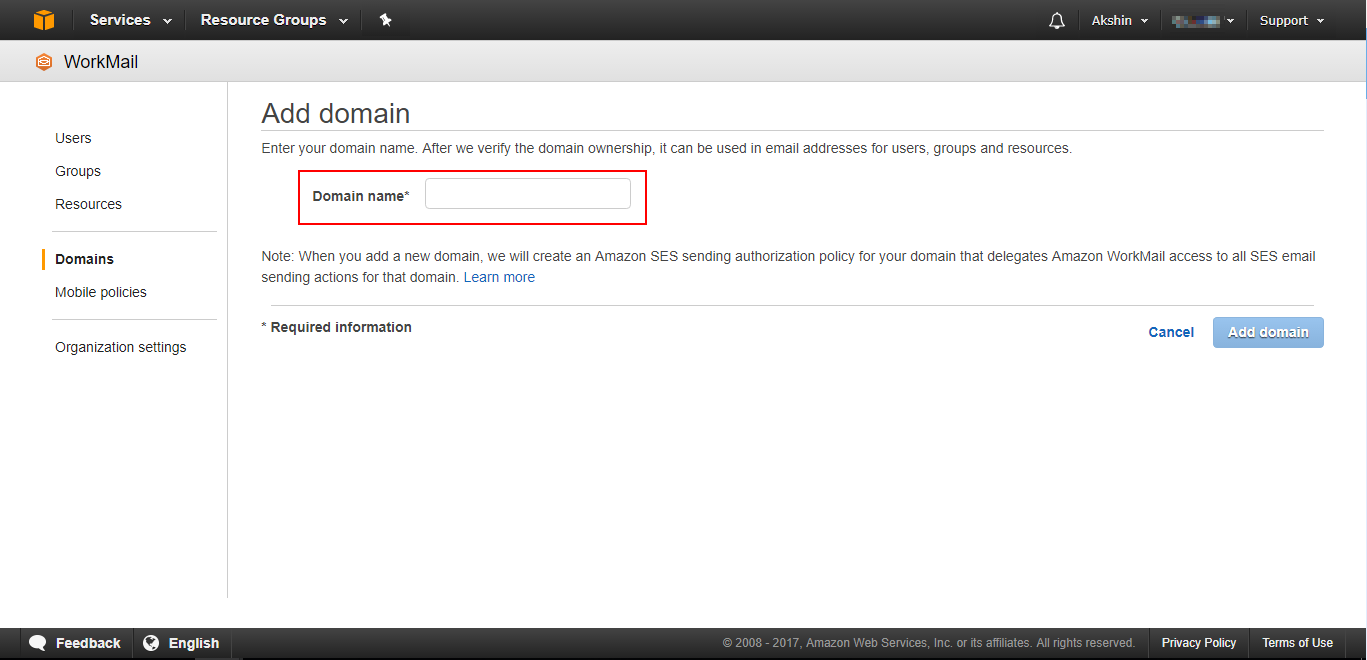
- A page will open in which all the entries you need to enter in Route 53, in the settings of our domain name. Write the settings I think you can do yourself.
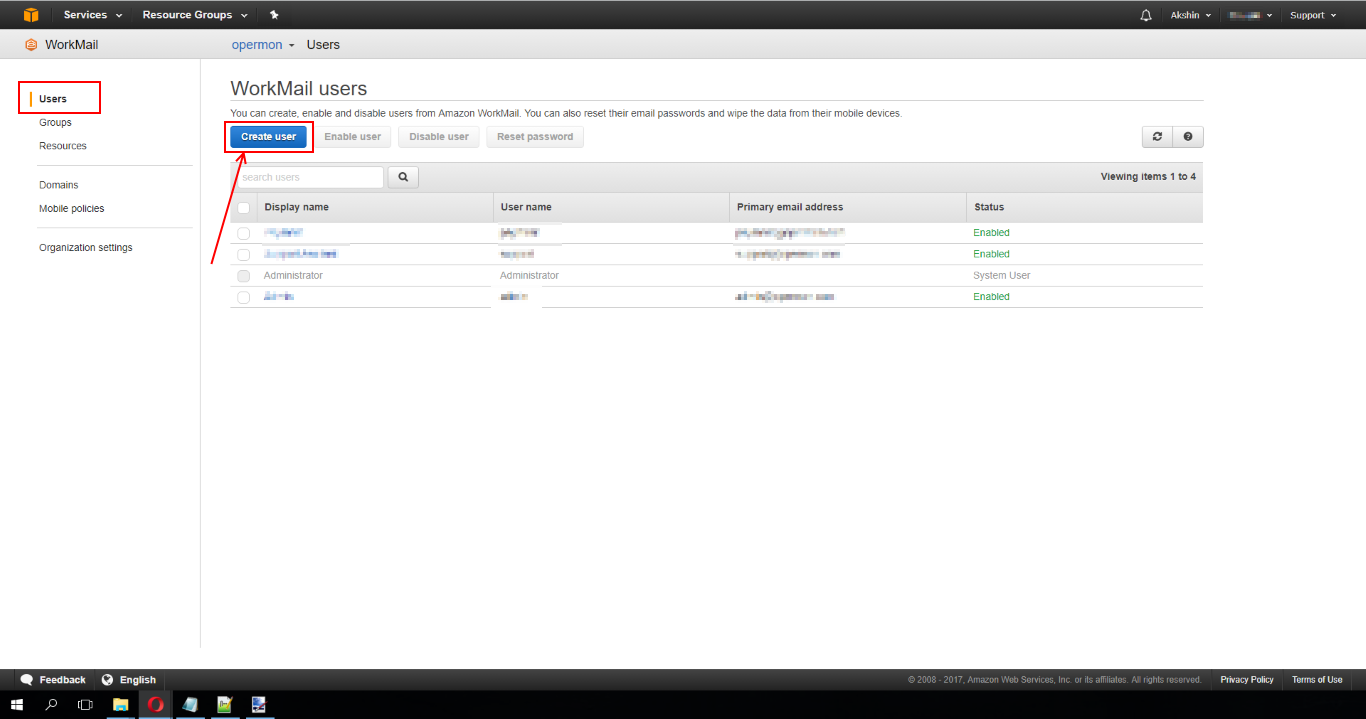
Then come back here - Go to the section "Users" click "Create user"
- Enter the first name, last name, the displayed name and click "Next step"

- Set an email address, choose your domain.com from the list, set a password and click "Add user"
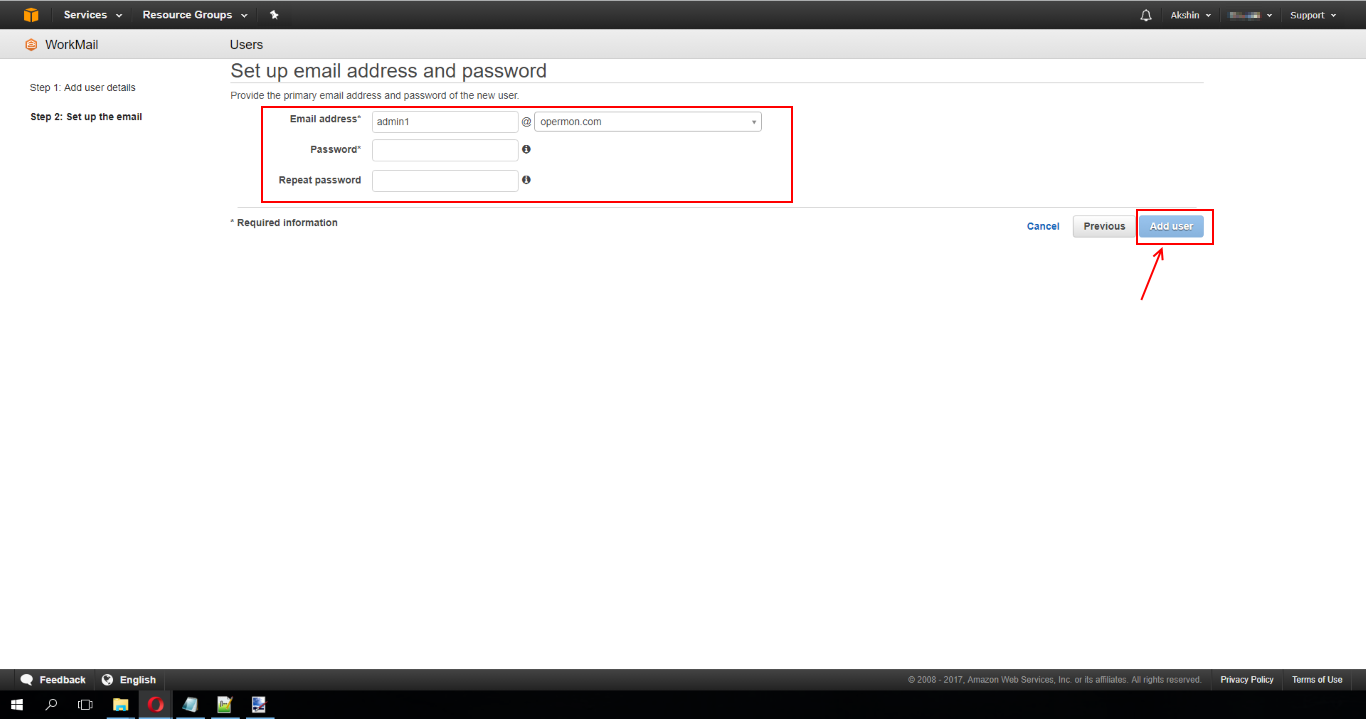
Now we can go to the mail by going to your_domain.awsapps.com / mail .
Configure Amazon SES
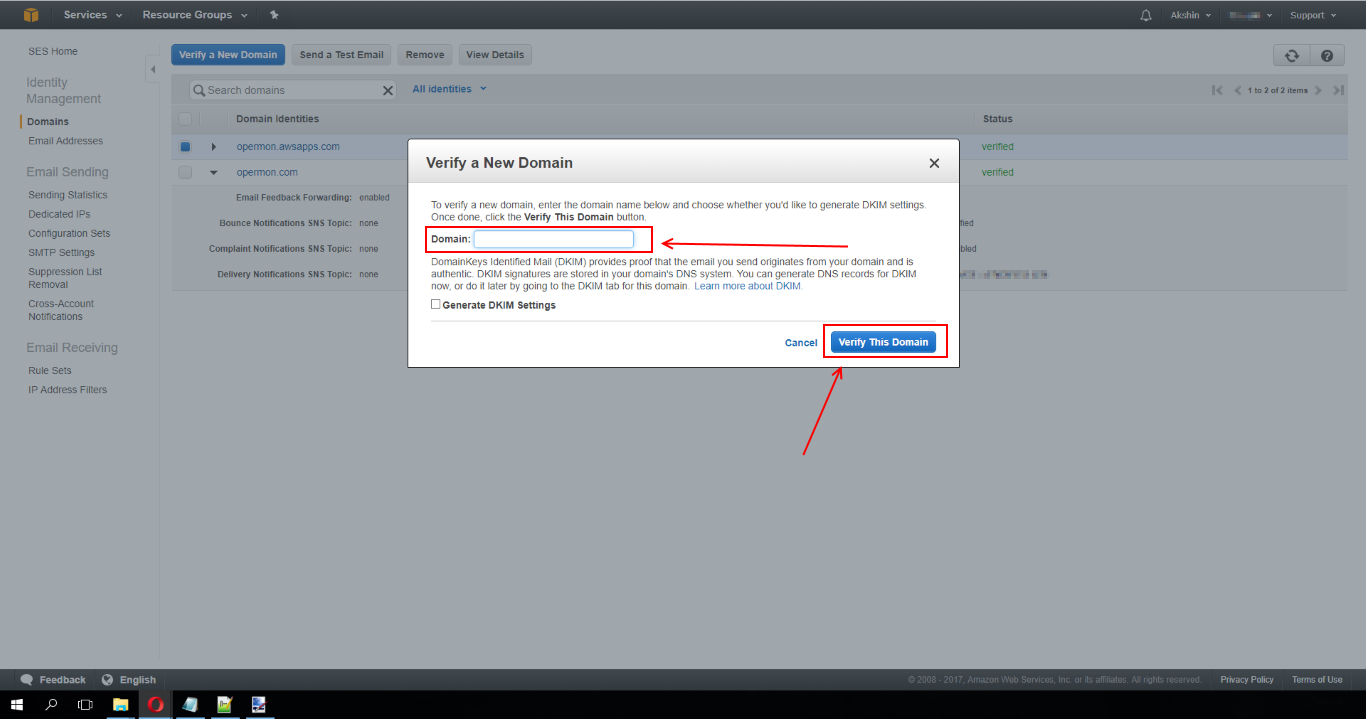
- Open Amazon SES, go to the “Domains” section and click on “Verify a new domain”. In the window that opens, enter the address (in my case it is opermon.com) and click on "Verify this domain"
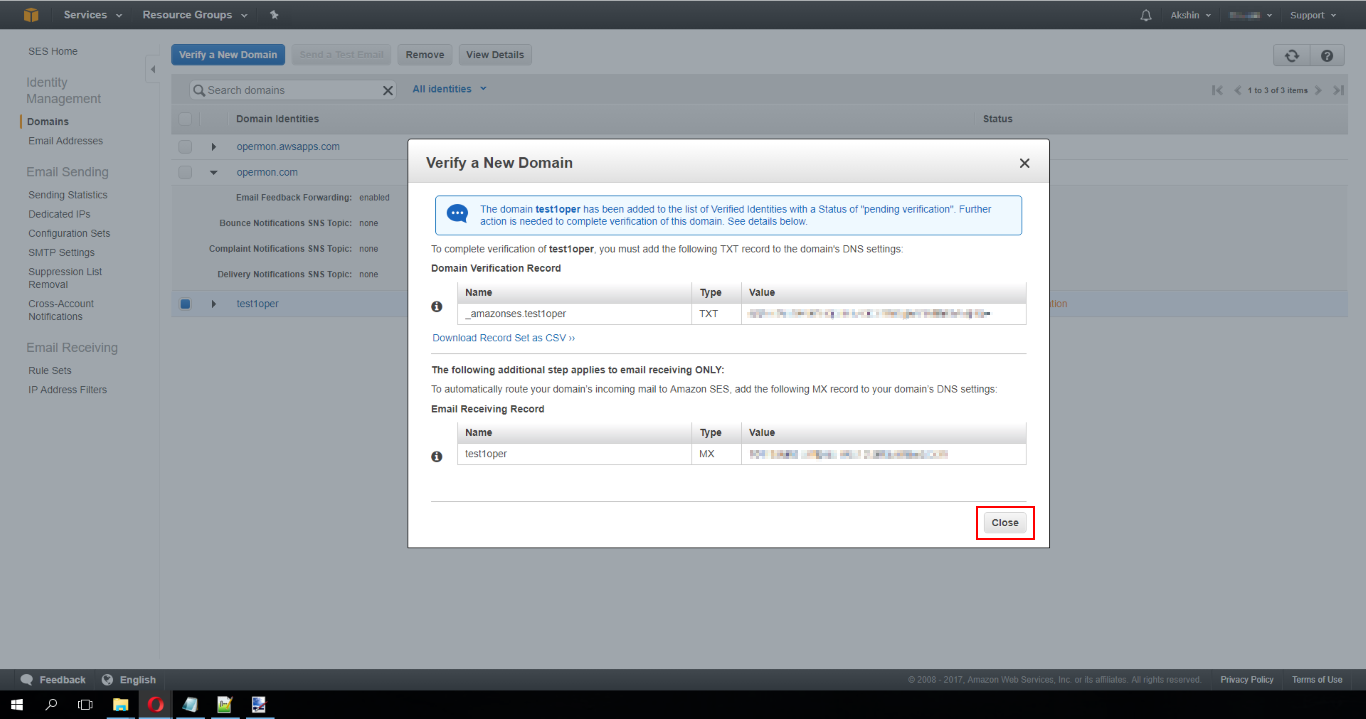
- This window will open. The data recorded in this window will need to be entered again in Route 53.
- Go to the Email addresses section and click "Verify a New Email Address", enter the email address previously created in WorkMail and click on "Verify This Email Address". After some time, a letter with a confirmation link will be sent to our address. Open the mail and click on the confirmation link. This procedure is necessary so that in the service letters sent by our web site, the system and others, we could use the sender's address created earlier in WorkMail.

- Go to the section "Create my SMTP credentials". The SMTP server address should be written somewhere.
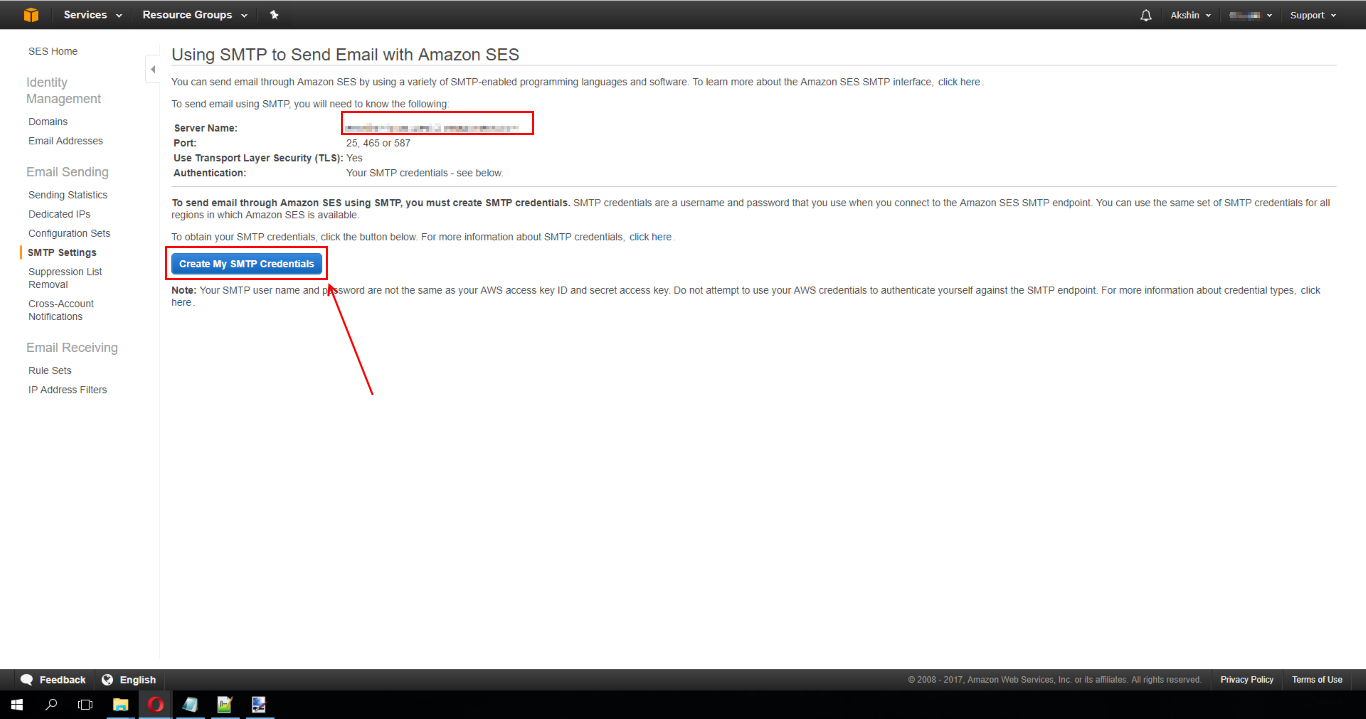
- Click "Create"
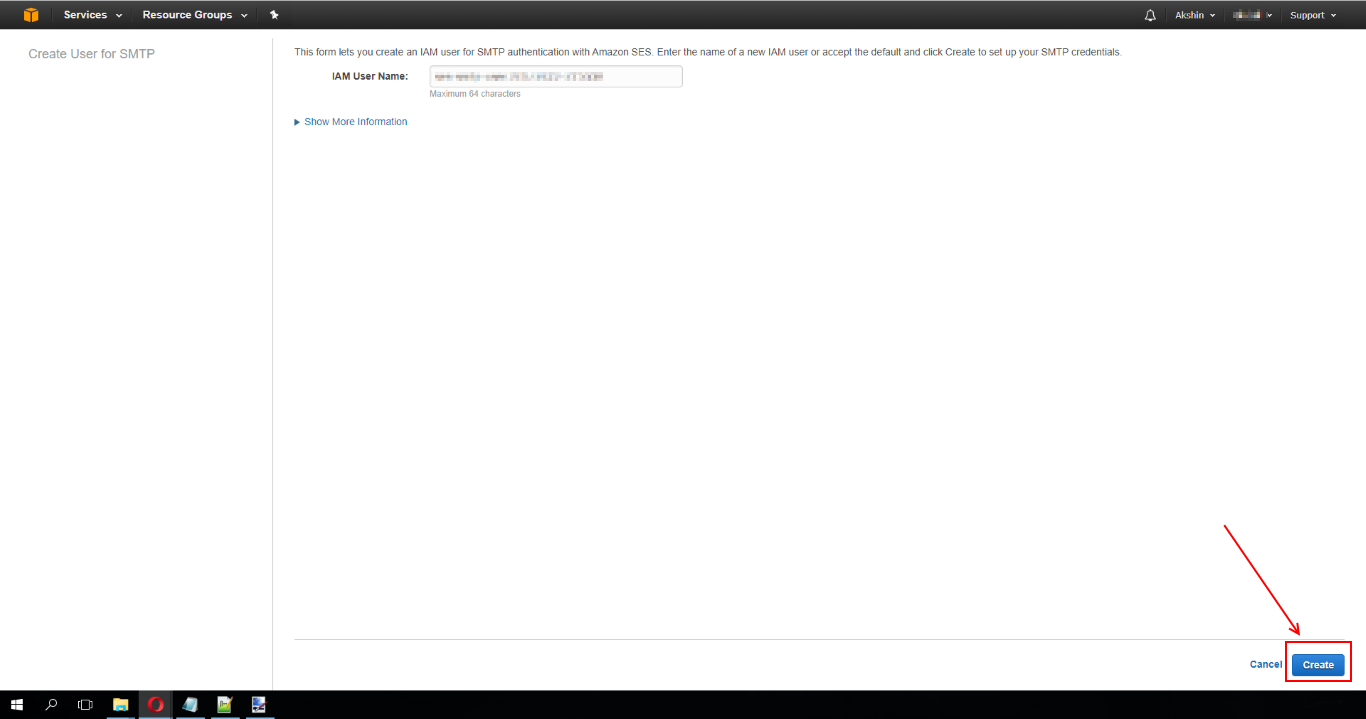
- The account has been created, we copy the login and password and store it somewhere. We will need them too.

Set up a script to send letters
In its samopinny engine there is a class Mail. It looks like this:
<?php require_once('app/class/mail/PHPMailerAutoload.php'); class OpermonMail { public static function SendMail($subject = 'none', $email, $name, $surname, $text_body = '', $text_altbody = '') { $config = parse_ini_file('app/config/mail.ini'); $mail = new PHPMailer; $mail->isSMTP(); $mail->Host = $config['MAIL_HOST']; $mail->SMTPAuth = true; $mail->Username = $config['MAIL_USERNAME']; $mail->Password = $config['MAIL_PASSWORD']; $mail->SMTPSecure = 'ssl'; $mail->Port = 465; $mail->setFrom($config['MAIL_SETFROMEMAIL'], $config['MAIL_SETFROMNAME']); $mail->addAddress($email, $name.' '.$surname); $mail->isHTML(true); $mail->Subject = $subject; $mail->Body = $text_body; $mail->AltBody = $text_altbody; if(!$mail->send()) { return $mail->ErrorInfo; } else { return true; } } } ?> As you can see from the code, PHPMailer is used. You can find it on github.
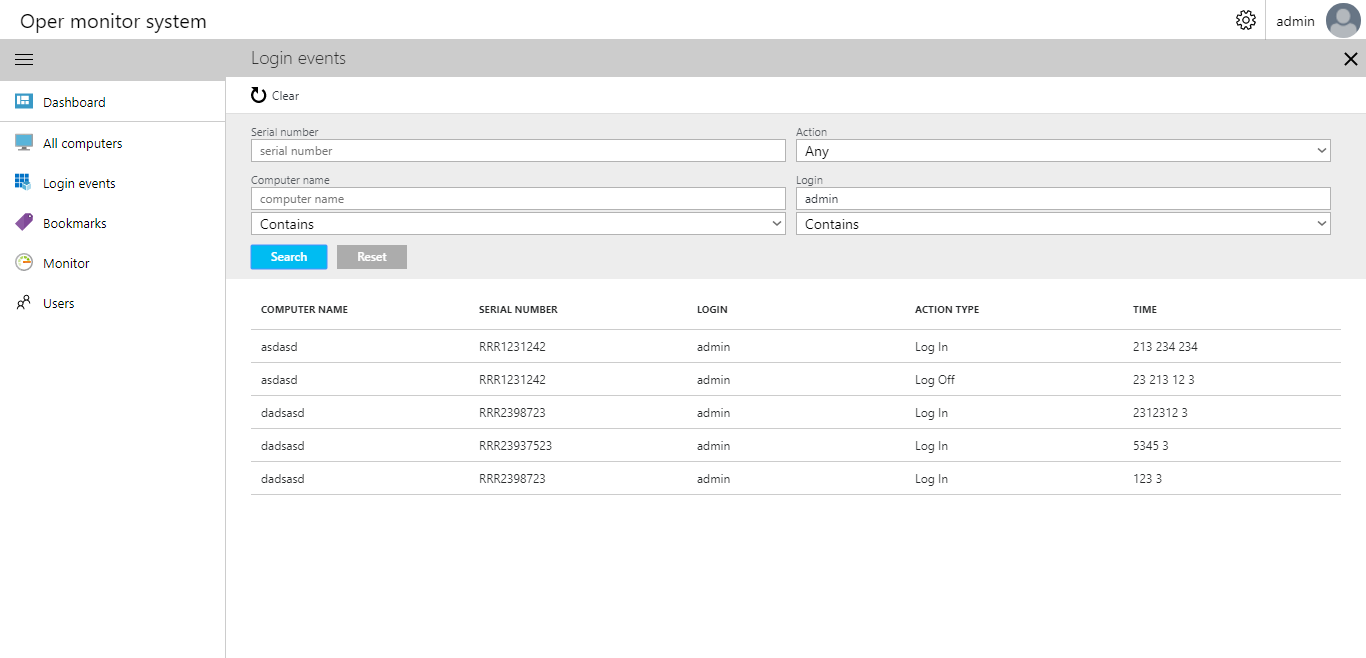
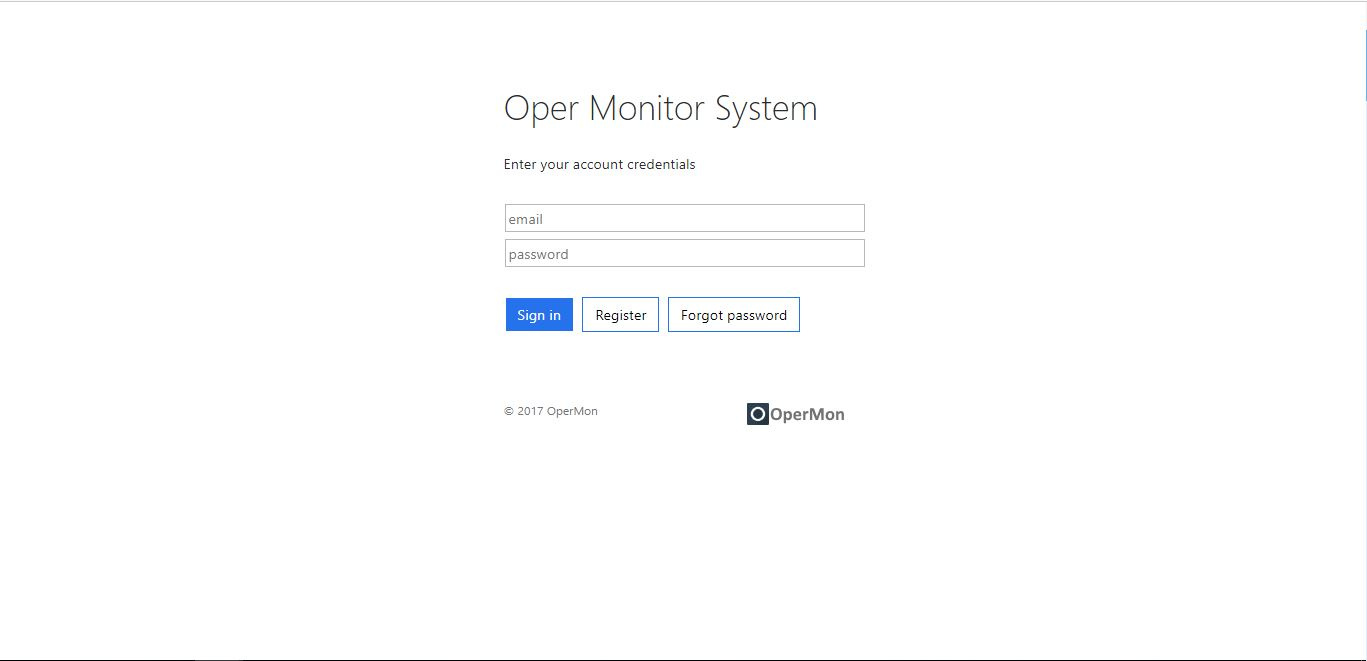
And so finally after all this, the system has earned. When registering, a confirmation code is sent to users (not for nothing, we used Amazon SES and WorkMail), the website itself opens (Amazon EC2 with apache installed on it) and you can see records in the database (phpmyadmin). I attach screenshots of the finished system:
The result is why we fought so much
Unfortunately, I don’t know how to do an installer collection in the system itself. Plus, in the country in which I live, the business type of PayPal account is not supported, so I could not write the payment function directly in the system. These aspects I have to do manually.
Thank you all for your attention!
Source: https://habr.com/ru/post/336276/
All Articles