Python-selvpcclient library

For convenient interaction with our Virtual Private Cloud service, we have developed the selvpcclient library . It is written in Python and covers the entire API, so you can manage projects, quotas, resources from your programming code or console.
Preparation for work
- Load the library from pypi with the command:
pip install python-selvpcclient - Get the Token API for working with the cloud (for example, a key like the following "xxxxvGBYVXcQ3q86zQCGxgvk_42069")
- Get the actual URL of the API URL , for example, api.selectel.ru/vpc/resell/v2
Note: when working with the API library, the URL and version of the API are indicated separately!
Library use
After successful installation of the library, it must be imported and initialized:
')
from selvpcclient.client import Client, setup_http_client SEL_TOKEN=YOUR_API_TOKEN_HERE SEL_URL="https://api.selectel.ru/vpc/resell" SEL_API_VERSION=2 http_client = setup_http_client(api_url=SEL_URL, api_version=SEL_API_VERSION, api_token=SEL_TOKEN) selvpc = Client(client=http_client) The selvpc object has the following fields:
- projects - for project management;
- quotas - for managing project quotas;
- limits — for information on domain restrictions;
- users - to manage users;
- licenses - to manage licenses;
- roles - for interaction by user roles;
- floatingips - to manage floating addresses;
- subnets - for managing subnets;
- vrrp - for managing VRRP subnets;
- capabilities — to obtain supporting information (information on available regions, zones, and so on);
- tokens - to get a token that allows you to interact with the OpenStack API directly.
Fields have the following methods:
- list - to get a list of objects (except for tokens);
- show - to display detailed information about the object (except for tokens);
- create - to create an object (only projects / users);
- add - to add a resource to the project (except tokens);
- update - to update the object (only projects / users);
- delete - to delete an object (except tokens).
Create a project and set quotas
When creating a project, set the base quotas and add a license for Windows Server 2012:
project = selvpc.projects.create("Bonnie") Note: Also from library version 1.1 you can get a “bare” json response from the API, for this you need to pass the return_raw key:project_json = selvpc.projects.create("Clyde", return_raw=True)
project_json will contain the value:{ "name": "Clyde", "id": "f3504dc929ee40e5a296143218bf435d", "url": "https://xxxx.selvpc.ru", "enabled": True }
The result of this operation will be an object of the class “Project”, which has helper methods (delete, update, and so on).
Now set quotas for the created project:
"quotas": { "compute_cores": [ { "region": "ru-1", "zone": "ru-1a", "value": 10 } ], "compute_ram": [ { "region": "ru-1", "zone": "ru-1a", "value": 1024 } ] } } # via object project.update_quotas(quotas) # via quotas manager quotas = client.quotas.update(project.id, quotas=quotas) Add a license:
"licenses": [{ "region": "ru-1", "quantity": 1, "type": "license_windows_2012_standard" }] } # via object project.add_license(license) # via licenses manager licenses = selvpc.licenses.add(project.id, licenses=licenses) CLI
A console application selvpc is provided with the library. It is based on the python-cliff framework for creating console applications.
Learn more about python-cliff here .
Preparation for work
For a console application to work with the cloud, an API URL and a token are required.
A console application can receive them in one of two ways: from the corresponding SEL_URL and SEL_TOKEN environment variables or from the arguments passed during the call (--url URL, --token TOKEN).
Note: by default, the library is already configured to work with version 2 of the API, SEL_API_VERSION / --api-version can be omitted.
Note: if information is passed through arguments and is present in environment variables, then arguments will be given priority.
export SEL_TOKEN="xxxxvGBYVXcQ3q86zQCGxgvk_42069" export SEL_URL="https://api.selectel.ru/vpc/resell" export SEL_API_VERSION=2 selvpc --url "https://api.selectel.ru/vpc/resell" --token "xxxxvGBYVXcQ3q86zQCGxgvk_42069" project list Teams
The commands are standard for OpenStack console clients:
- To create an object - * create (for example, project create);
- To update the object - * update (for example, user update);
- For a list of objects - * list (for example, license list);
- To delete an object - * delete (for example, subnet delete).
Where * is the key name of the object: "project, user, role, floatingip, subnet, vrrp, license".
For example, create a project using the project create command:
selvpc project create -n awesome Get a list of projects:
selvpc project list +----------------------------------+----------+-------------------------+---------+ | id | name | url | enabled | +----------------------------------+----------+-------------------------+---------+ | f3504dc929ee40e5a296143218bf435d | awesome | https://xxxxx.selvpc.ru | True | +----------------------------------+----------+-------------------------+---------+ You can always get a list of available commands by typing in the console:
selvpc help Commands: ... capabilities show traffic Show available traffic values complete print bash completion command floatingip add Create new floatingip IP address floatingip delete Delete floatingip IP floatingip list List floatingip IP ... Creating a virtual machine based on Ubuntu 16 x64
Consider a detailed example of how to create a virtual machine using console clients.
The general sequence of actions will be something like this:
- We create the project, the user and we add a role.
- We allocate resources.
- Preparing the environment.
- Create a virtual machine.
Create a project
Create a project:
selvpc project create -n "another-project" +---------+----------------------------------+ | Field | Value | +---------+----------------------------------+ | id | 96063b0c4a71443c8a842c647bdab316 | | name | "another-project" | | url | https://xxxxx.selvpc.ru | | enabled | True | +---------+----------------------------------+ Since we do not yet have users, create them:
selvpc user create --name "T-Rex" --password "c1017e8c8fd14b7e8057618a882240df" +---------+----------------------------------+ | Field | Value | +---------+----------------------------------+ | id | 052027b58a3f49e390c3849d6697e2f3 | | name | "T-Rex" | | enabled | True | +---------+----------------------------------+ Add the user “T-Rex” (052027b58a3f49e390c3849d6697e2f3) to the project “another-project” (96063b0c4a71443c8a842c647bdab316):
selvpc role add -p 96063b0c4a71443c8a842c647bdab316 -u 052027b58a3f49e390c3849d6697e2f3 +------------+----------------------------------+ | Field | Value | +------------+----------------------------------+ | project_id | 96063b0c4a71443c8a842c647bdab316 | | user_id | 052027b58a3f49e390c3849d6697e2f3 | +------------+----------------------------------+ We allocate resources
For our new machine, we will allocate 1 core, 512 MB of memory and 5 GB of disk.
Currently available resources can be obtained using the following command:
selvpc capabilities show resources +-------------------------------+-------------+----------+------------+ | name | quota_scope | quotable | unbillable | +-------------------------------+-------------+----------+------------+ | compute_cores | zone | True | True | | compute_ram | zone | True | True | | volume_gigabytes_fast | zone | True | False | +-------------------------------+-------------+----------+------------+ Quotas for a project can be set with the “selvpc quota set” command (the description of the arguments can be obtained from help: “selvpc _help_ quota set”):
selvpc quota set 96063b0c4a71443c8a842c647bdab316 --region ru-1 --zone ru-1a --value 1 --resource compute_cores selvpc quota set 96063b0c4a71443c8a842c647bdab316 --region ru-1 --zone ru-1a --value 512 --resource compute_ram selvpc quota set 96063b0c4a71443c8a842c647bdab316 --region ru-1 --zone ru-1a --value 5 --resource volume_gigabytes_fast +----------------------------+--------+-------+-------+ | resource | region | zone | value | +----------------------------+--------+-------+-------+ | compute_cores | ru-1 | ru-1a | 1 | | compute_ram | ru-1 | ru-1a | 512 | | volume_gigabytes_fast | ru-1 | ru-1a | 5 | +----------------------------+--------+-------+-------+ In order to interact with the cloud through the OpenStek clients, you need to log in.
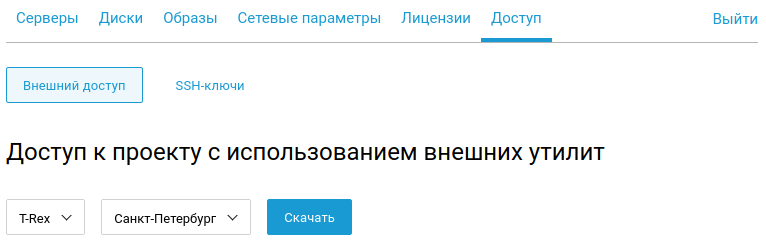
For the convenience of our users, we provide the RC file (it is a script with which console clients can be authorized in the Identity API v3).
To get the script, you must perform the following steps:
- Go to the project management panel .
- Open the project in which you will work.
- Click the Access tab.
- Select a user.
- Choose region.
- Click the Download button.
Example content of RC.sh :
export OS_AUTH_URL="https://api.selvpc.ru/identity/v3" export OS_IDENTITY_API_VERSION="3" export OS_VOLUME_API_VERSION="2" export OS_PROJECT_DOMAIN_NAME='xxxx' export OS_PROJECT_ID='96063b0c4a71443c8a842c647bdab316' export OS_TENANT_ID='96063b0c4a71443c8a842c647bdab316' export OS_REGION_NAME='ru-1' export OS_USER_DOMAIN_NAME='xxxx' export OS_USERNAME='T-Rex' export OS_PASSWORD='c1017e8c8fd14b7e8057618a882240df' Note: In the original script, the variable “OS_PASSWORD” will not contain the password, as it is explicitly initialized for demonstration. Never shine your passwords - it is not safe!After downloading the script, it is necessary to execute it with the source command:
source RC.sh Preparing the environment
In this example, we will use the image of Ubuntu 16.04 LTS 64-bit .
Get a list of available images:
openstack image list +--------------------------------------+---------------------------------+--------+ | ID | Name | Status | +--------------------------------------+---------------------------------+--------+ | 9feac917-f155-4013-b2fa-f5c8b72fd33c | Ubuntu 16.04 LTS 64-bit | active | +--------------------------------------+---------------------------------+--------+ Create a disk based on the image:
openstack volume create ubuntu-volume --image "9feac917-f155-4013-b2fa-f5c8b72fd33c" --size 5 +---------------------+--------------------------------------+ | Field | Value | +---------------------+--------------------------------------+ | id | f79c0d35-f54c-4b6a-82ad-1764e425eec8 | +---------------------+--------------------------------------+ To create a car, flavor is also needed - a configuration for creating a car.
Create a new private configuration:
openstack flavor create --private --ram 512 --vcpus 1 my-flavor +----------------------------+--------------------------------------+ | Field | Value | +----------------------------+--------------------------------------+ | id | 006f7e84-f957-4764-a3a7-db8575c54ba7 | | name | my-flavor | | os-flavor-access:is_public | False | | ram | 512 | | vcpus | 1 | +----------------------------+--------------------------------------+ Create a virtual machine
And finally, we create a virtual machine with a loud name "server-1":
openstack server create --wait --volume "f79c0d35-f54c-4b6a-82ad-1764e425eec8" --flavor "006f7e84-f957-4764-a3a7-db8575c54ba7" "server-1" Note: if you have multiple subnets in your project, then when creating a virtual machine, you must specify which subnet to use.
openstack subnet list +--------------------------------------+----------------+ | Network | Subnet | +--------------------------------------+----------------+ | a220c08e-a63f-48b8-aca5-563136ee9131 | 192.168.0.0/24 | | afc24500-65f0-4d28-ada0-773d92820850 | 192.168.0.0/24 | +--------------------------------------+----------------+ openstack server create --wait --volume "f79c0d35-f54c-4b6a-82ad-1764e425eec8" --flavor "006f7e84-f957-4764-a3a7-db8575c54ba7" --network a220c08e-a63f-48b8-aca5-563136ee9131 "server-1" Conclusion
If you encounter a problem while using the library or want to change something, feel free to open the issue .
Note: the current version of the library at the time of this writing is 1.0.
useful links
Python-selvpcclient library on github
API VPC Documentation
Cloud key
Source: https://habr.com/ru/post/336066/
All Articles