Introduction to the development of smart contracts Ethereum

Recently, an all-time high hyip has risen around the blockchain, cryptocurrency, smart contracts and related technologies. It seems that even the most lazy and passive man in the street blows about it from every swamp. A huge number of startups and companies with history and experience in IT, services, retail and the real sector of the economy are thinking about introducing the blockchain into their activities, and more than 100,000 companies have already done so .
The Initial Coin Offering mechanism not only contributed to a new wave of interest in crowdfunding, increasing the amount of investment attracted with its help, but also spurred interest in cryptocurrency and blockchain technology. Today, new vacancies in this area, as well as requests for assistance in conducting an ICO in general and developing smart contracts in particular, are increasingly coming across.
Unfortunately, today there is a strong shortage of specialists in this field, although in reality the process of developing smart contracts is much simpler than it might seem at first glance. The shortage of specialists directly arises from the fact that the blockchain technology reached the mass user not so long ago - in the form of bitcoin cryptocurrencies, and smart contracts in the blockchain came much later. So personally, I was not surprised by the fact that there are still very few materials on the development of smart contracts.
On the other hand, as a technical director of a company in which we are engaged in building a blockchain-based digital jurisdiction and simplifying the process of creating smart contracts for ordinary users who do not have programming skills, I feel the need for technicians who have an understanding of technology, and even better - Experience with her.
')
In this article I want to show that the threshold for entering the development of smart contracts is actually quite low, and try to bring new developers to the sphere. Of course, not everything in life is as simple as in educational materials, and in the development of smart contracts there is a huge amount of subtleties. Nevertheless, this is true for any other technology, including JavaScript familiar to many, and with this, as a rule, practical experience helps us to cope, which cannot be obtained without starting to program, design, experiment, test and do everything that developers do. usually do.
In this tutorial, we will install all the necessary tools for starting development, frameworks, write our first ERC20 token in Solidity , compile it, publish it in a local blockchain, write a couple of tests and run them out. We will use framework truffle , which will help us with managing migrations, compiling, managing dependencies, and testing. In addition, we will use the OpenZeppelin framework, which contains a set of contracts and libraries written in the Solidity language and have already proven their usefulness and security over time.
First, let's install the framework truffle. To do this, simply go to the framework documentation and find installation instructions for your operating system. After installation, create a folder for your project. In my case, this folder will be called “jcr-token”. After that, open the created project folder in the terminal and initialize the project using the command
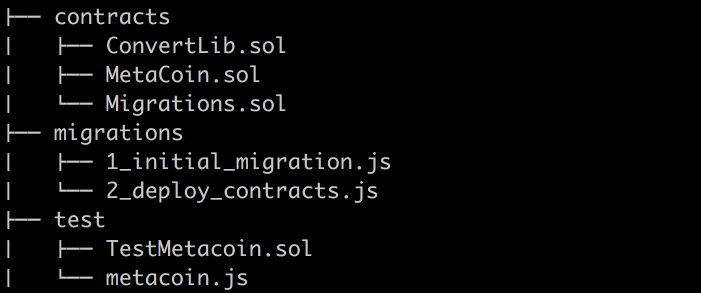
truffle init .Now open the project in your favorite text editor (I use Atom). Let's look at the structure of the project. Initially, you can see three folders in the root directory:
- contracts , designed to store the source code of our smart contracts;
- migrations , containing migration files that serve to publish contracts on the blockchain;
- test , containing tests of our contracts. It is important to note that tests can be written both in Solidity and in JavaScript. If now something seems incomprehensible to you, do not worry, then we will talk about each of the parts in more detail and learn how to create contracts, migrations and tests.
As you can see, truffle has already created a couple of simple smart contracts for us. We use them to test our installation.
In order to interact with contracts and create tests for them, we must first publish them in the blockchain. In our case, I propose to use for this purpose a lightweight ethereum client called testrpc. It just emulates the usual behavior of the ethereum network client, but it is much faster and uses less resources, which makes it a good development tool. After installation, you can start your own development blockchain simply by typing the
testrpc command in a terminal.After a successful launch, you will see the host and port of your blockchain. Open the file `truffle.js` in the root directory of the project. This file contains the configuration of your project. Make sure that the host and port in the configuration match the host and port running testrpc.
Now let's try to compile smart contracts by typing
truffle compile . This step will generate files in the build directory. If you run compile for the first time, the directory will be created automatically. In this folder will be located build-artifacts. We will talk about them later.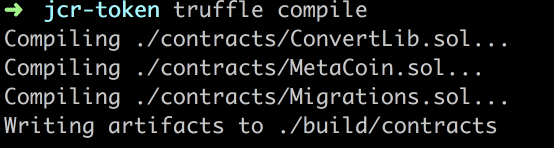
To test contracts, type
truffle test . If you are familiar with unit tests in JavaScript or any other language, then you already know how to test smart contracts. Please pay special attention to the tests, because the price of a mistake in the blockchain is very high! You do not even need to pre-compile contracts before running tests, since the `test` command does this for you automatically.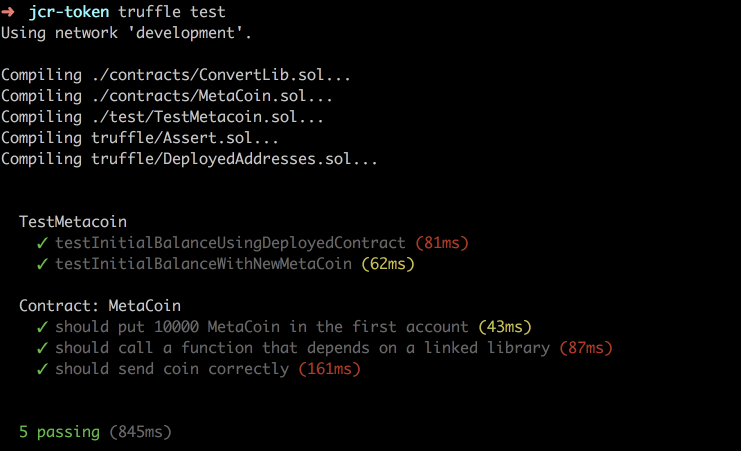
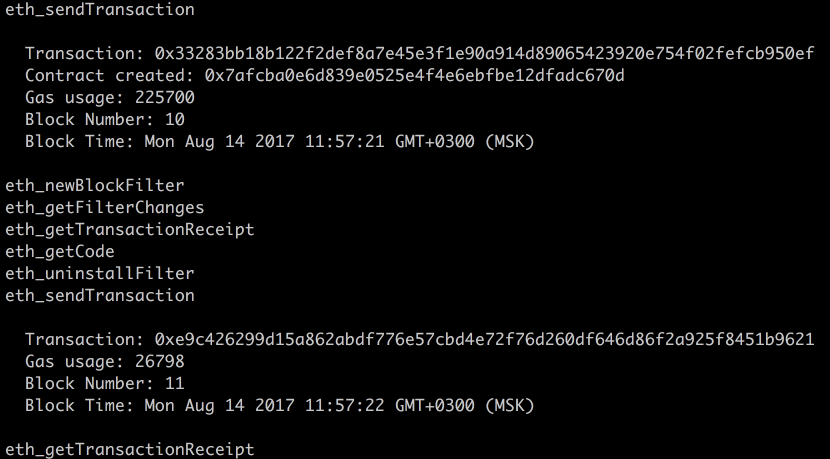
And finally, in order to run the migrations that will publish our contracts on the testrpc blockchain, type
truffle migrate .
Soon after this, you will see the output of the command in the terminal and the output of the event in the testrpc client. Congratulations! We just published our first smart contract in the blockchain network emulator.
To create more advanced contracts, we will use the OpenZeppelin framework, which includes several very useful libraries, interfaces, and ready-made contracts. It is worth noting that the Solidity language supports inheritance and we can easily extend the functionality of existing contracts. This opens up great opportunities for thinking through your architecture.
You can install OpenZeppelin in the same way as any other JavaScript library using your favorite dependency manager, for example, npm or yarn. You can find more information on the OpenZeppelin project page on github, or on their website.
So we set everything you need to start developing your own smart contracts. And it was not so difficult, right?
We now turn to the text editor and see the project files. You may notice that truffle has already created some basic contracts during initialization. Let's delete all of these files, except for the migration files. We will remove the extra contract, library, tests, and also remove some code from the migrations.
Create a new solidity-file with the code of our custom smart contract. I will create a token called JCR for Jincor’s ICO, which means I’ll call the file JCR.sol.
Solidity is a fairly young and dynamic programming language. This imposes certain inconveniences, one of which is frequent changes, some of which can break backward compatibility, which in turn can cause problems with contracts already published. In order to prevent this, we need to specify the version of the compiler language Solidity. Personally, I will use `^ 0.4.11`.
Note that here `^` means that we are also satisfied with newer minor versions and bugfixes, and not strictly specified version 0.4.11. You can define much more flexible versioning templates just as you do in npm.
As I have already said, we are going to use some contracts from the OpenZeppelin library in order not to reinvent the wheel, but simply to take advantage of working, safe practices, containing best community practices and regularly passing security audits.
In order to import a contract, you need to use the keyword `import` and then in quotes indicate the path to the imported file, as, for example, I did:` import "zeppelin-solidity / contracts / token / MintableToken.sol"; `.
I strongly recommend that you familiarize yourself with the OpenZeppelin documentation from cover to cover and look at the implementation of their smart contracts in order to have a clear idea of how they work. In addition, in the process of studying you will see code design examples and will be able to find inspiration for writing new contracts. You can find the sources in the node_modules directory.
Let's look at the Mintable token, which I am going to use today. Now we will not dive into the details very deeply, because you can familiarize yourself with the source codes and documentation without my help. We will simply discuss the most important thing.
We see that "Mintable token is Ownable, Standard token". The “is” keyword is about the same as “extends” in Java or PHP. The Mintable token contract adds 2 events, one public property, 2 modifiers and 2 functions. All this together constitutes a functional for the emission of tokens. Standard Token adds tokens transfer functionality on behalf of another user with previously obtained permission. Basic token is simply an implementation of the ERC20Basic interface that defines the transfer of tokens and a balance check. The Ownable contract adds the onlyOwner modifier, which is usually used to restrict the calling of functions by third parties.
Now back to the source code of our contract and slightly change them. After we have imported all the necessary contracts, we call our own JCR contract. Please give the contract files and names the same names.
In the contract, we define the publicly available name, symbol and number of decimal places (equal to 18, as in Ethereum).
contract JCR is MintableToken { string public name = "Jincor Token"; string public symbol = "JCR"; uint public decimals = 18; } Then we write the constructor code. A constructor is simply a function that is called exactly the same as a contract, and is called when instantiating a contract object, or, in other words, when creating a new instance. This is a pretty good place for an initialization code. Personally, I want to make a contract that can issue the specified number of tokens and transfer all tokens to the balance of the creator of the contract. To do this, I simply add the amount argument to the constructor, designate the contract creator as its owner, and issue the specified number of tokens to the owner’s wallet.
function JCR(uint256 _amount) { owner = msg.sender; mint(owner, _amount); } JCR.sol summary file (also available on github)
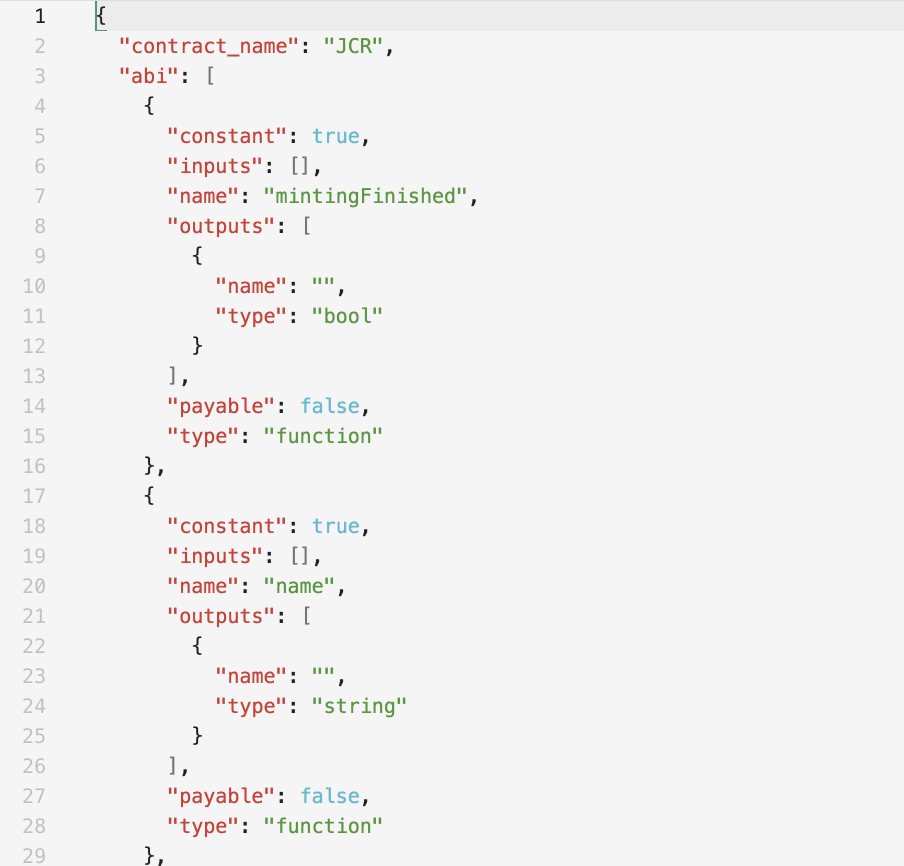
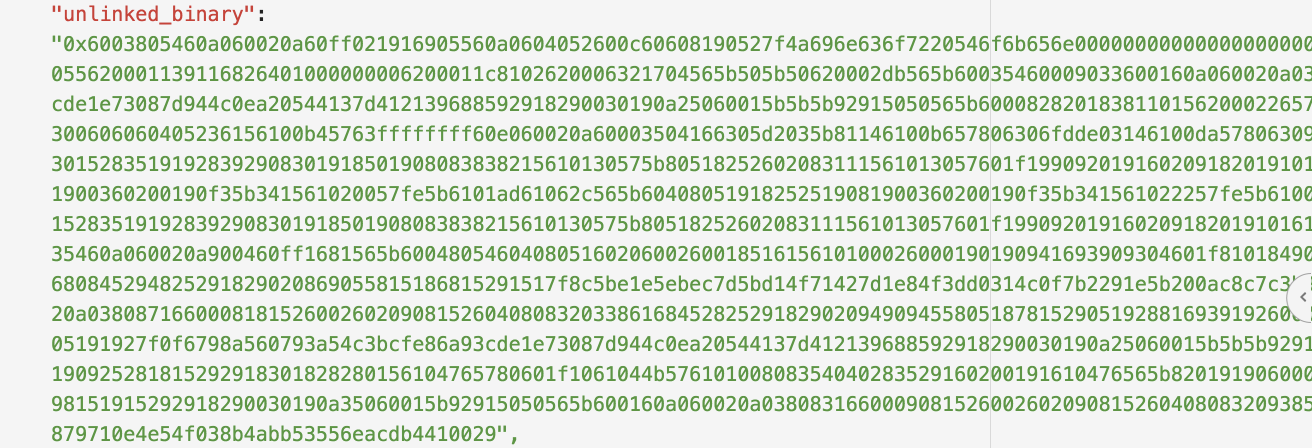
pragma solidity ^0.4.11; import "zeppelin-solidity/contracts/token/MintableToken.sol"; contract JCR is MintableToken { string public name = "Jincor Token"; string public symbol = "JCR"; uint public decimals = 18; function JCR(uint256 _amount) { owner = msg.sender; mint(owner, _amount); } } Now let's try to compile what we got. You can do this by typing `truffle compile`. Let's look at the build folder and see what we got at the output. The first thing that catches your eye is that we received the artifacts of all used contracts from the ERC20, to Mintable and JCR. Artifacts are saved in JSON files. These JSON files contain the contract name, Application Binary Interface (abi), the binary code that will be subsequently run on the Ethereum Virtual Machine and some additional information.
We can use artifacts to publish our smart contracts on the blockchain. However, it is better from the very beginning to accustom yourself to the good and immediately automate this routine process by adding migration. Remember that we still have to transfer to the designer the number of tokens produced? Migrations are a good place for such manipulations. Let's open the 2_deploy_contracts.js file and add some code. I'm going to release 1.4 million tokens.
We can publish contracts in the migration script using the method deployer.deploy, in which we pass the build artifact as the first argument, followed by the arguments that are later passed to the contract constructor in the same order. In our case, we have only one argument - 1,400,000. Truffle will take care of the rest. To make the deployment process easier and more pleasant, you can unlock your account (allow it to perform actions on its behalf). To do this, at the start of testrpc add the argument `-u 0`
var JCR = artifacts.require("./JCR.sol"); module.exports = function(deployer) { const tokenAmount = 1400000; deployer.deploy(JCR, tokenAmount); }; Let's start our new migration and see if it works. Fine! Now we need to make sure that our token works as we expect from it. To do this, we will write a couple of tests in JavaScript. Type `truffle create test` and the name of the test contract to generate a JavaScript file with the test. I note that tests can be written on Solidity, but we'll talk about this later.
I hope that you already have some experience writing tests in other programming languages, such as PHP. If you have already encountered the Mocha and Chai frameworks, then everything will seem familiar to you, since the truffle uses them. More information can be found in the official documentation.
Finally, let's try to make sure that the owner received the correct number of tokens when creating the contract and the token transfer function behaves as expected.
var JCR = artifacts.require("./JCR.sol"); contract('JCR', function(accounts) { it("Create 1 400 000 tokens at the owner account", function(done) { JCR.deployed().then(function(instance) { return instance.balanceOf.call(accounts[0]); }).then(function(balance) { assert.equal(web3.toWei(balance.valueOf(), 'ether'), web3.toWei(1400000, 'ether'), "1400000 wasn't in the first account"); }); done(); }); it('Should transfer tokens correctly', function(done){ var token; var amount = 10; var account_one = accounts[0]; var account_two = accounts[1]; var acc_one_before; var acc_one_after; var acc_two_before; var acc_two_after; JCR.deployed().then(function(instance){ token = instance; return token.balanceOf.call(account_one); }).then(function(balanceOne) { acc_one_before = balanceOne.toNumber(); return token.balanceOf.call(account_two); }).then(function(balanceTwo) { acc_two_before = balanceTwo.toNumber(); return token.transfer(account_two, amount, {from: account_one}); }).then(function() { return token.balanceOf.call(account_one); }).then(function(balanceOne){ acc_one_after = balanceOne.toNumber(); return token.balanceOf.call(account_two); }).then(function(balanceTwo){ acc_two_after = balanceTwo.toNumber(); assert.equal(acc_one_after, acc_one_before - amount, "Token transfer works wrong!"); assert.equal(acc_two_after, acc_two_before + amount, "Token transfer works wrong!"); }); done(); }); }); That's all for today. In the next lesson we will try to test our contract in a more realistic environment, and also write an ICO contract for the sale of our token.
By the way! Youtube has a video version of this article in 2 parts:
1. Preparation for development
2. We write token contract
Code available on github
Source: https://habr.com/ru/post/335710/
All Articles