Virtual network environment for testing network protocols. Use QEMU + YOCTO + TAP

The idea of creating a network test environment arose when the need came to launch and debug devices with IPsec and GRE protocols. The developers faced strong problems with similar problems. The problem was with the unit test run. They prepared a virtual network based on UML (user mode linux). This document outlines what it is and how it works. I will bring the virtual network under UML at the earliest opportunity, and at the first stage the test environment was raised on QEMU and on distributions prepared under YOCTO. So this article describes: how to create your linux distribution, pick up and configure several QEMU instances, set up a virtual network and, as an example, put a GRE tunnel. It turns out a very useful thing for debugging and testing routers. So I invite all interested below.
Ubuntu distribution was used as Host.
Linux 4.10.0-28-generic #32~16.04.2-Ubuntu SMP Thu Jul 20 10:19:48 UTC 2017 x86_64 x86_64 x86_64 GNU/Linux Cooking distribution linux
So first we will prepare the distribution of linux for virtual machines. For this we use the assembly system YOCTO. Distribution is easy, and it also allows you to configure / compile the kernel and install additional packages. Another plus is the cross-platform distribution of linux. Having trained on virtual builds we can transfer distribution to embedded systems. Distribution preparation can take about an hour or two. Finished assembly can be found here .
')
Required Tools
$sudo apt-get install chrpath gawk texinfo python Maybe something else is needed.
a) Install yocto
$mk yocto $cd yocto $git clone -b pyro git://git.yoctoproject.org/poky.git $git clone -b pyro git://git.openembedded.org/meta-openembedded $source ./poky/oe-init-build-env b) Editing configuration files
The working directory will be "yocto / build"
Let's fix the installation.
In the file conf / bblayers.conf correct
BBLAYERS ?= " \
/home/user/yocto/poky/meta \
/home/user/yocto/poky/meta-poky \
/home/user/yocto/poky/meta-yocto-bsp \
/home/user/yocto/meta-openembedded/meta-oe \
/home/user/yocto/meta-openembedded/meta-networking \
/home/user/yocto/meta-openembedded/meta-webserver \
/home/user/yocto/meta-openembedded/meta-python \
/home/user/yocto/meta-openembedded/meta-multimedia \
"
Install some useful packages. In the /conf/local.conf file
# We default to enabling the debugging tweaks.
EXTRA_IMAGE_FEATURES ?= "debug-tweaks"

CORE_IMAGE_EXTRA_INSTALL = " \
kernel-modules \
lrzsz \
setserial \
strongswan \
opkg \
nbench-byte \
lmbench \
alsa-utils \
i2c-tools \
devmem2 \
dosfstools \
libdrm-tests \
netkit-ftp \
iproute2 \
iptables \
bridge-utils \
socat \
wget \
curl \
vlan \
dhcp-server \
dhcp-client \
ntp \
libstdc++ \
nginx \
ppp \
proftpd \
boost \
openssl \
openssh \
fcgi \
mc \
ethtool \
minicom \
procps \
tcpdump \
file"
Additionally, you need to correct the sshd configuration file "yocto / poky / meta / recipes-connectivity / openssh / openssh / sshd_config".
# override default of no subsystems
#Subsystem sftp /usr/libexec/sftp-server
Subsystem sftp internal-sftp
This amendment is necessary in order not to install an additional sftp server. It is used when mounting the file system via ssh.
c) Running the assembly
$bitbake core-image-minimal You must wait.
If the assembly ended in success, then at the output we get:
rootfs - /yocto/build/tmp/deploy/images/qemux86/core-image-minimal-qemux86-20170803162854.rootfs.ext4

kernel - /yocto/build/tmp/deploy/images/qemux86/bzImage—4.10.17+git0+e92bd55409_6648a34e00-r0-qemux86-20170801184648.bin
The build system determines what has changed and appends files with a time stamp in the file name. Links to the latest versions.
«bzImage»
«core-image-minimal-qemux86.ext4»
d) Check the assembly
Install qemu for the host platform. In this case, x86 is 64 bits.
$sudo apt-get install qemu-system-x86 $qemu-system-x86_64 --version QEMU emulator version 2.0.0 (Debian 2.0.0+dfsg-2ubuntu1.34), Copyright (c) 2003-2008 Fabrice Bellard Run qemu.
$cd ~/yocto/build/tmp/deploy/images/qemux86 $qemu-system-x86_64 -hda ./core-image-minimal-qemux86.ext4 -kernel ./bzImage -append "console=ttyS0 root=/dev/hda initrd=/initrd" -nographic 
If we see the following picture, the virtual machine got up.
Virtual Network Configuration
Scripts and installations are here https://github.com/framer/test-net .
a) Creating a network diagram
For clarity, we will create a virtual network diagram.

H1, H2, R1, R2 - Virtual Machines.
BR0, BR1, BR2, BR3 - Virtual Switches.
Each virtual machine has a management interface (eth0) connected to the switch BR0. We are also creating a network 192.168.40.0/24. These interfaces and network will be used for installations and control.
b) Installing virtual switches
First, we will install virtual switches to which the TAP interfaces of virtual machines will be connected. Install multiple virtual switches for different network segments. You can install as follows:
$cd ./src $sudo ./setup_bridge.sh 4 $ip link 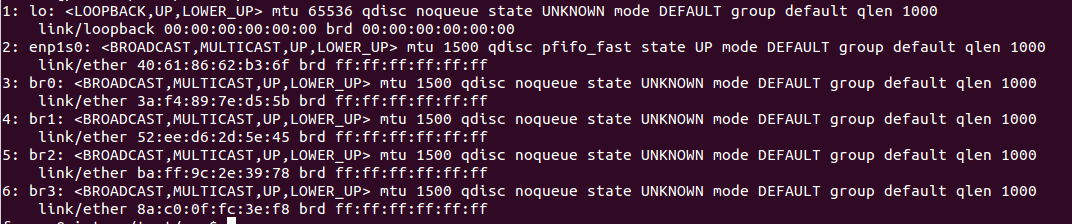
For the BR0 switch, we assign the control address and enable packet transfer between the interfaces.
$ip addr add 192.168.40.1/24 dev br0 $sysctl -w net.ipv4.ip_forward=1 c) Settings file "conf.json"
The installation file is prepared according to the scheme. If something needs to be changed or supplemented, then this file should be edited. This file installs interfaces and management addresses. Setting the addresses of the tested network will be after the launch of virtual machines.
d) Creating instances of virtual machines
First, we copy the previously created kernel and system root file into the “src” directory.
File names are as follows:
bzImage - core
rootfs is the root file system.
If someone does not have its distribution, then ready-made assembly can be taken here .
To create instances, use the “create_network.py” script.
$./create_network.py The script creates instances of virtual machines. Since there is no control network configuration yet, there is no access to the virtual machine through the network. The script starts the virtual machines in the mode of intercepting I / O streams and makes the installation of the control network.
After running the script directories are created for each virtual machine.
$ls .. -Al 
e) Starting the environment
To run the environment, do this:
$sudo ./run_network.py 
Run under sudo, as the machines create tap interfaces. Machines work in the background. A standard console is written to the file “output.log”.
Access to the machines via ssh. There is one problem. If we re-create the environment, the keys will be re-generated for ssh when the machine starts. The host will determine that under those same addresses the machine is running with other keys and will start swearing. In this case, you need to clean the file ".ssh / known_hosts".
Once the machines are up, you can mount the root file system.
$./mount_fs.py The mounted system files are located in the H1 / tmp, H2 / tmp, R1 / tmp, R2 / tmp directories.
e) Network settings
After starting the environment, the virtual machines have only the management network installed. You can set the remaining network parameters according to the scheme, for all machines at once, by running the script:
$cd ../scripts $./static.sh static.sh is an example of a network with static routing.
Theoretically, the network is configured.
Network diagnostics. Network diagnostics can be performed on each virtual switch.
Connect to H1 via ssh.
On H1, run ping on H2.
root@H1:~# ping 192.168.51.10 On the host run diagnostics
$ sudo tcpdump -i br2 
f) Network shutdown
To stop and unmount the system file, run.
$sudo ./stop_network.py GRE configuration
a) correct the network diagram

b) Starting the environment and setting the environment
$sudo run_network.py Wait and mount the system file.
$mount_fs.py Set environment settings
$cd ../scripts $./gre.sh c) Network diagnostics
Connect to H1 via ssh.
On H1, run ping on H2.
root@H1:~# ping 192.168.51.10 On the host run
$ sudo tcpdump -i br2 
Conclusion
Why all this?
First of all. Anyone who is working on creating routers is wondering. “And how will it work in real conditions?” And then this system comes to the rescue. Having additional network cards on the host, you can connect a real card to the virtual switchboard and replace the virtual machine with a real device. Automation of the creation of the environment allows you to prepare different scenarios of work and check the functionality of a real device.
Secondly. Probably for students.
Source: https://habr.com/ru/post/335038/
All Articles