OAuth Authorization for Xamarin Applications
All articles from the column can be found and read on the link #xamarincolumn , or at the end of the material under the cut.

')

It is assumed that you are already familiar with the way OAuth works, and if not, we recommend this good article on Habré . In short, when authoring OAuth, the user is redirected from one web page to another (usually 2-3 steps) until it reaches the final URL. This final transition will be captured in the application (if you write the logic yourself) at the WebView level, and the necessary data (token and the term of its validity) will be listed directly in the URL.
A small list of popular services that provide the ability to authorize users by OAuth: Classmates, Mail.ru, Dropbox, Foursquare, GitHub, Instagram, LinkedIn, Microsoft, Slack, SoundCloud, Visual Studio Online, Trello.
Xamarin.Auth
In order to work with OAuth in Xamarin, we will focus on the simple and convenient Xamarin.Auth library, which has been developing for more than a year and has all the necessary mechanisms for us:
- Browser display with authorization pages
- Redirect flow control and authorization process
- Getting the right data
- Providing mechanisms for additional requests to the service, for example, to obtain information about the user
Xamarin.Auth also supports the ability to store user credentials in a secure repository. In general, a mature and high-quality component with the necessary functionality.
We recommend installing Xamarin.Auth from Nuget, since the version in Xamarin Components is outdated and not updated for a long time.

Let me remind you that we already told you about authorization using the SDK from Facebook and VKontakte. In our example, we brought all the authorization logic into platform projects, leaving only interfaces in PCL. For OAuth, we will go the same way, despite PCL support in Xamarin.Auth itself.
In addition to Xamarin.Auth, we can also recommend the Xamarin.Forms.OAuth library from Bruno Bernardo. Even if you use classic Xamarin, you can find many ready-made configurations for various services in the source codes of this project.
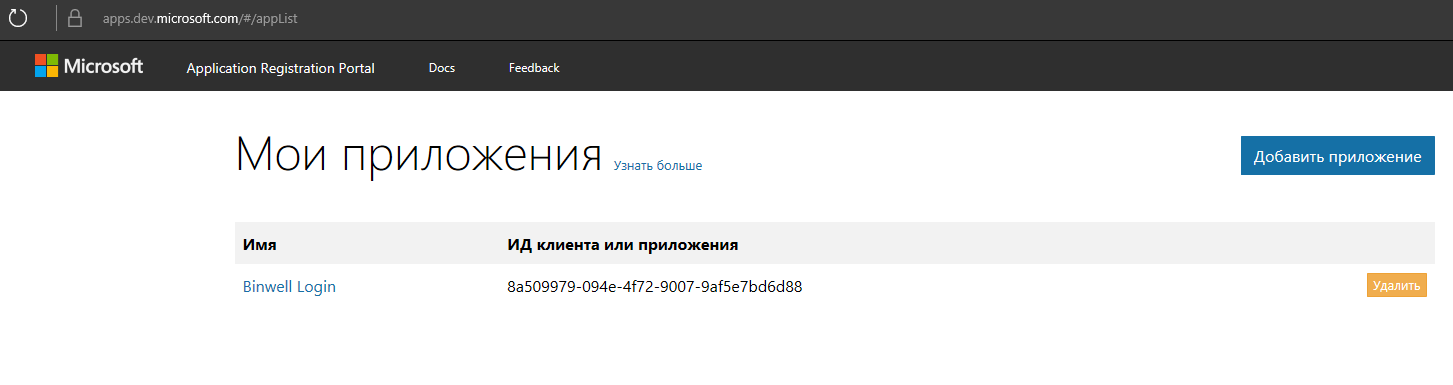
We, as an example of the work of OAuth, will connect authorization with the help of Microsoft. First of all, we will create an application on the site https://apps.dev.microsoft.com and get a Client ID (client or application ID).
We connect authorization in PCL
At the PCL level, everything is as usual - we make the IOAuthService interface simple for the platform service, we don’t add any new dependencies to the project.
public interface IOAuthService { Task<LoginResult> Login(); void Logout(); } And, of course, it will be necessary to add a call to the DependencyService.Get<IOAuthService>().Login() and DependencyService.Get<IOAuthService>().Logout() methods within our authorization page.
There is also no problem to add support for several OAuth services. To do this, you can add the providerName argument (type string , int or enum ) to the Login() and Logout() methods, and select the service provider, depending on its value.
Implementation of the platform part
As noted earlier, you need to add the Xamarin.Auth libraries from Nuget to each platform project, in our case iOS and Android. Then we write our implementation of IOAuthService for each platform and register it as a Dependency .
Now we just need to create an instance of the OAuth2Authenticator class with the necessary parameters:
var auth = new OAuth2Authenticator ( clientId: "_CLIENT_ID", scope: "wl.basic, wl.emails, wl.photos", authorizeUrl: new Uri("https://login.live.com/oauth20_authorize.srf"), redirectUrl: new Uri("https://login.live.com/oauth20_desktop.srf"), clientSecret: null, accessTokenUrl: new Uri("https://login.live.com/oauth20_token.srf") ) { AllowCancel = true }; Now let's hang up the authorization completion handler:
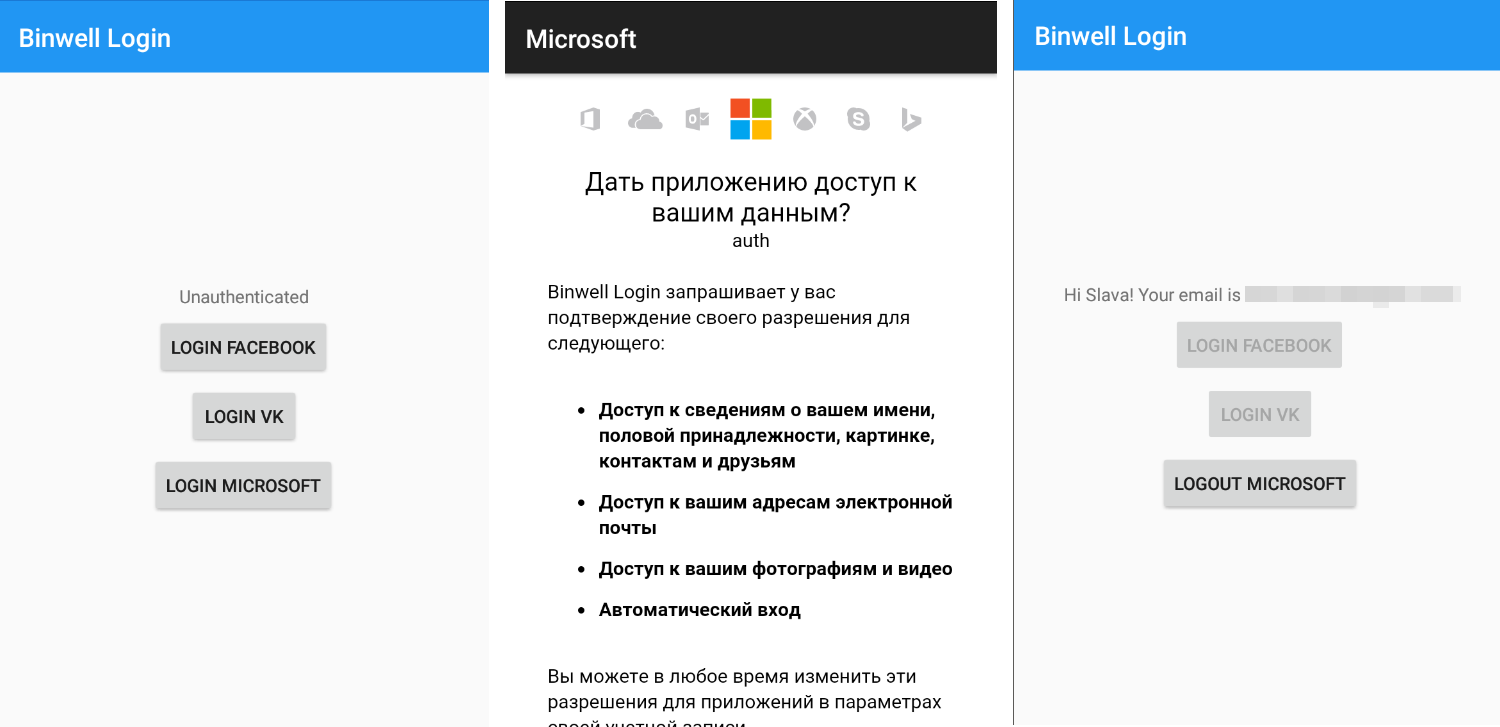
auth.Completed += AuthOnCompleted; Everything, you can show a modal window with a built-in web browser for authorization, obtained through the auth.GetUI() method. On iOS, this can be done like this:
UIApplication.SharedApplication.KeyWindow.RootViewController.PresentViewController(auth.GetUI(), true, null); On Android, when using Xamarin.Forms, the code may turn out to be as follows:
Forms.Context.StartActivity(auth.GetUI(Forms.Context)); After successful authorization, our AuthOnCompleted() method will be AuthOnCompleted() , and for iOS it will be necessary to hide the modal window with the browser (it will disappear on Android itself):
UIApplication.SharedApplication.KeyWindow.RootViewController.DismissViewController(true, null); Now you can get the necessary data ( access_token and its lifetime in seconds - expires_in )
var token = authCompletedArgs.Account.Properties["access_token"]; var expireIn = Convert.ToInt32(authCompletedArgs.Account.Properties["expires_in"]); var expireAt = DateTimeOffset.Now.AddSeconds(expireIn); And we have the last step - to get extended information from the user profile, including email and a link to the avatar. To do this, Xamarin.Auth has a special class OAuth2Request with which it is convenient to make such requests.
var request = new OAuth2Request("GET", new Uri("https://apis.live.net/v5.0/me"), null, account); var response = await request.GetResponseAsync(); Now we get JSON with user data, and we can save and display them in the application.
if (response.StatusCode == HttpStatusCode.OK) { var userJson = response.GetResponseText(); var jobject = JObject.Parse(userJson); result.LoginState = LoginState.Success; result.Email = jobject["emails"]?["preferred"].ToString(); result.FirstName = jobject["first_name"]?.ToString(); result.LastName = jobject["last_name"]?.ToString(); result.ImageUrl = jobject["picture"]?["data"]?["url"]?.ToString(); var userId = jobject["id"]?.ToString(); result.UserId = userId; result.ImageUrl = $"https://apis.live.net/v5.0/{userId}/picture"; } As you can see, there is nothing complicated. The question is to correctly register the URL for the authorization process. Well, remember that the expires_in field contains the time in seconds (this raises frequent questions).
In real projects, we also recommend assigning an error handler to the auth.Error event auth.Error that not a single problem remains without a solution.
Conclusion
Today we have completed the consideration of all popular ways to authorize users and obtain basic information about them through external services. The described mechanisms are suitable for both Xamarin.Forms and the classic Xamarin iOS / Android. Full source code of the project with all the examples can be found in our repository:
https://bitbucket.org/binwell/login
Ask your questions in the comments to the article and stay in touch!
about the author
 Vyacheslav Chernikov - head of development at Binwell , Microsoft MVP and Xamarin Certified Developer. In the past, he was one of the Nokia Champion and Qt Certified Specialists, currently he is the Xamarin and Azure platform specialist. He came to the sphere of mobile in 2005, since 2008 he has been developing mobile applications: he started with Symbian, Maemo, Meego, Windows Mobile, then switched to iOS, Android and Windows Phone. Articles Vyacheslav you can also read the blog on Medium .
Other articles by the author:
- 7 best device farm for mobile app testing
- Automate non-automated, or about Xamarin in real projects
- OAuth Authorization for Xamarin Applications
- Deploy mobile software with Microsoft devops pipeline
- DevOps in the service of man
- Convenient REST for Xamarin Applications
- Quickly create MVP (minimum viable product) based on Microsoft Azure and Xamarin.Forms
- Preparing Xamarin.Forms: Setting Up the Environment and First Steps
- Increase work efficiency in Xamarin.Forms
- Working with screen states in Xamarin.Forms
- Connecting Facebook SDK for Xamarin.Forms
- We connect VKontakte SDK for Xamarin.Forms
Source: https://habr.com/ru/post/332970/
All Articles