Marketer Notes: How to install Ubuntu on RPI and connect to Azure IoT Hub
What does the marketer do when he is asked to tell how to use the technology, but he cannot find instructions? Usually starts to pull all the surrounding techies, search the Internet or silently wait for a miracle, or cry. But, this story is about another marketer. He just took and wrote the instructions himself. I invite under the cut to evaluate the works and share your opinion.

I give the word to Andrew .
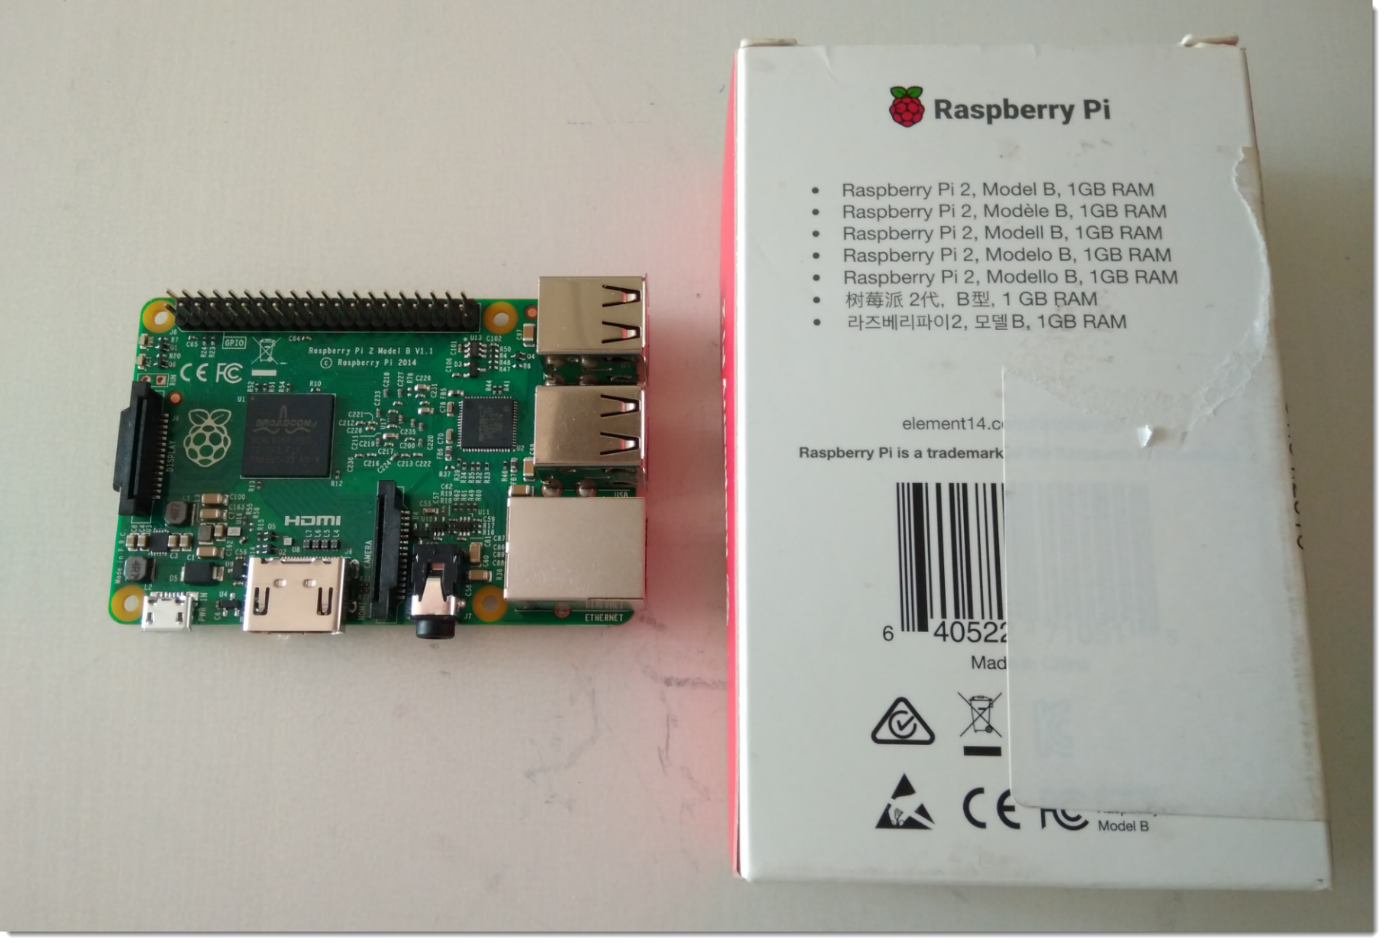
Let's agree that below we will talk about the Raspberry Pi 2 Model B. It was during the work with him that all the screenshots were taken.
')
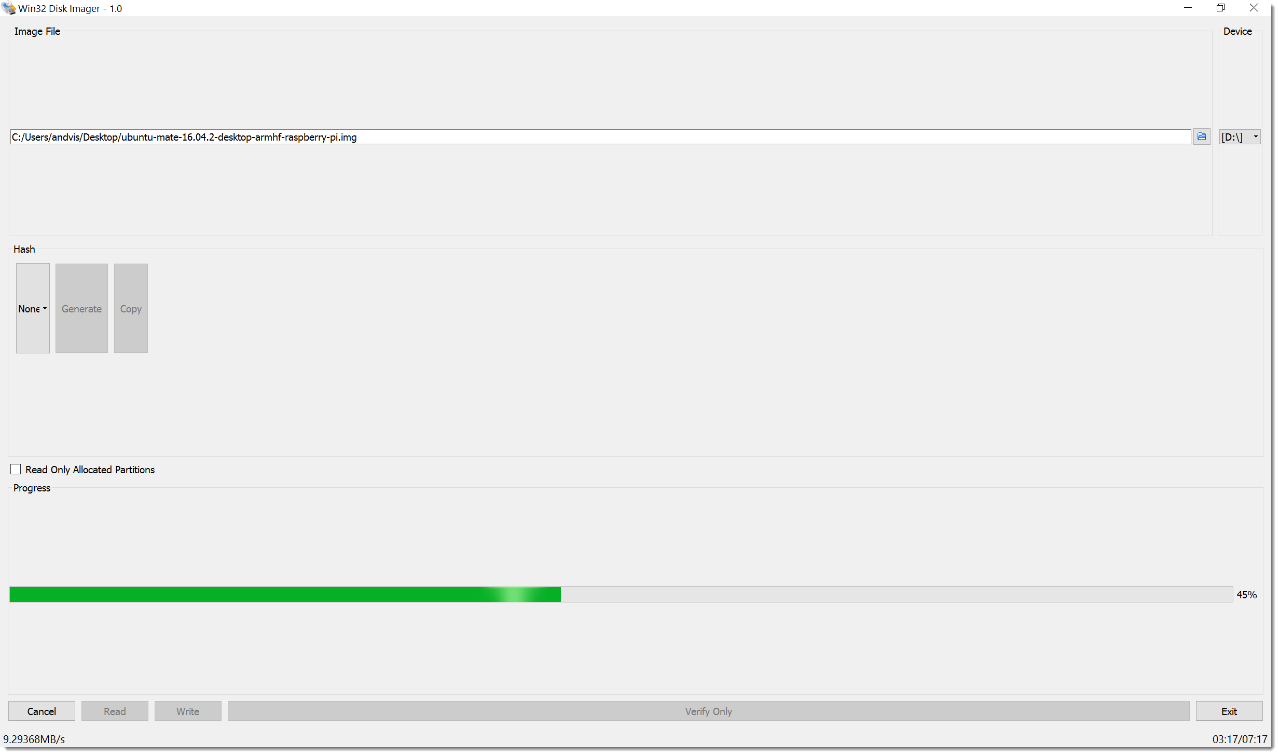
The Ubuntu Mate distribution can be downloaded, for example, here .
Having an img file - we create a bootable SDCard - for this I used Win32 Disk Imager, which I installed on my Windows 10.
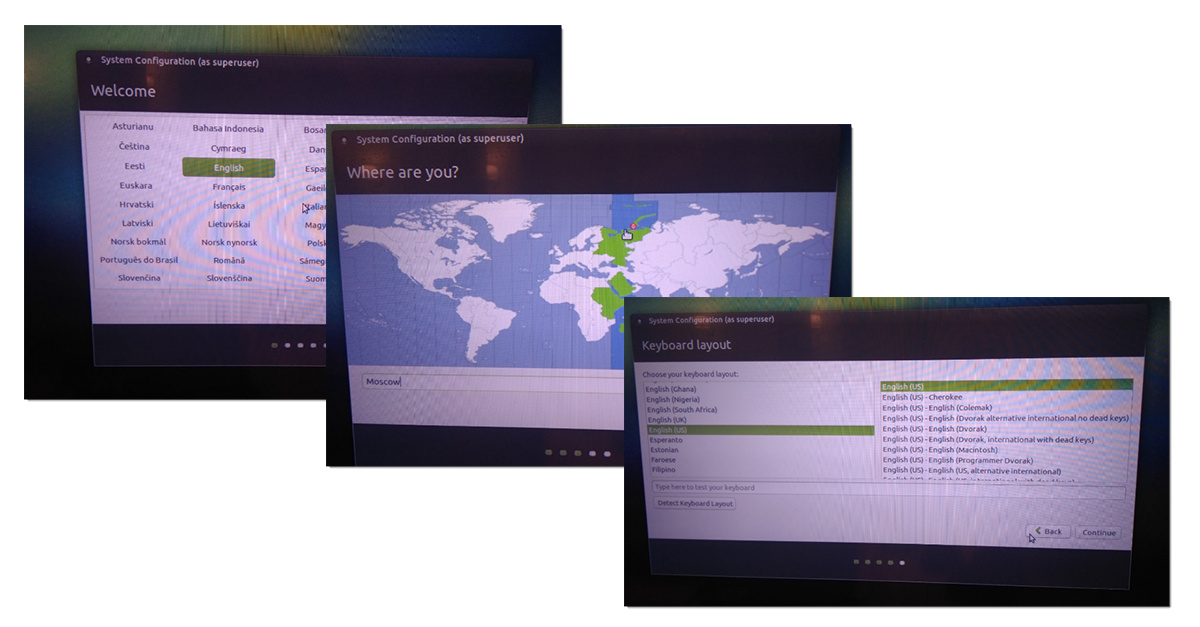
The resulting boot card is inserted into the Raspberry Pi, we connect the keyboard, mouse and display. After successful loading see the window below.
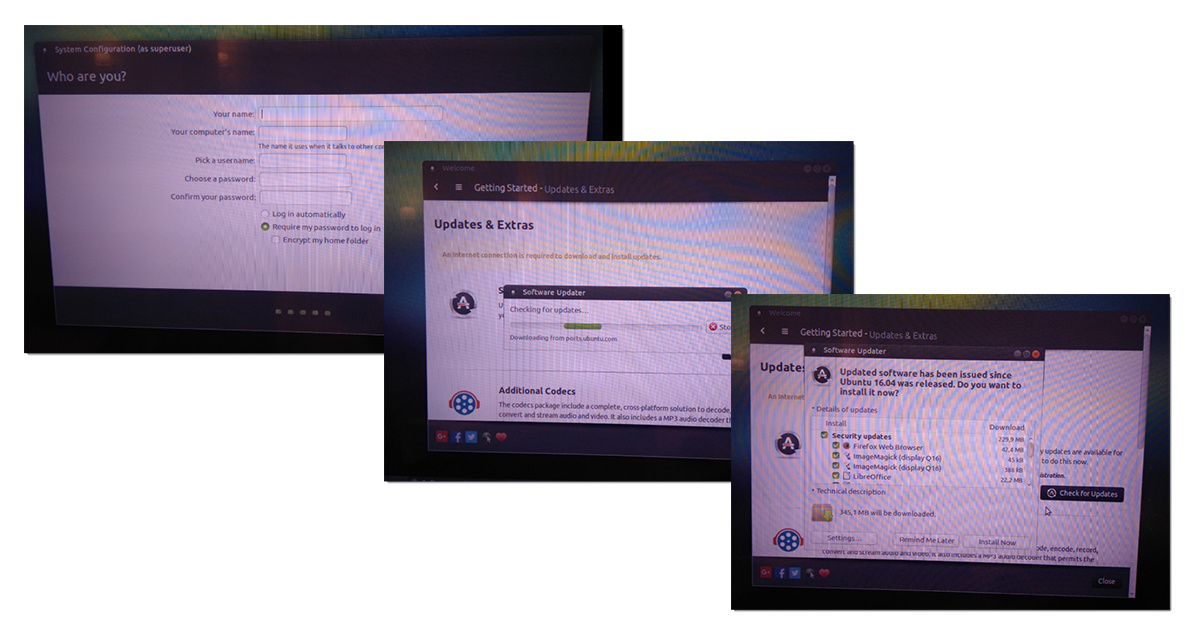
After installation, we execute several commands.
Important update and upgrade commands - to upgrade the system.

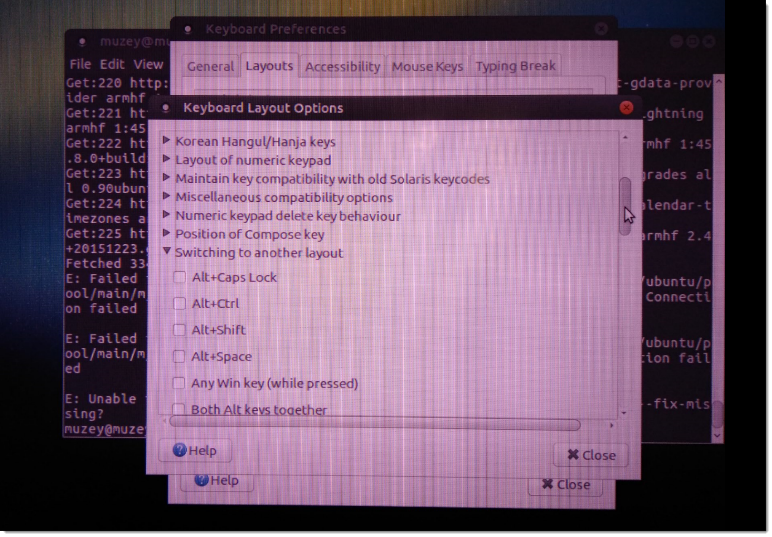
Next, add the Russian language for the keyboard.
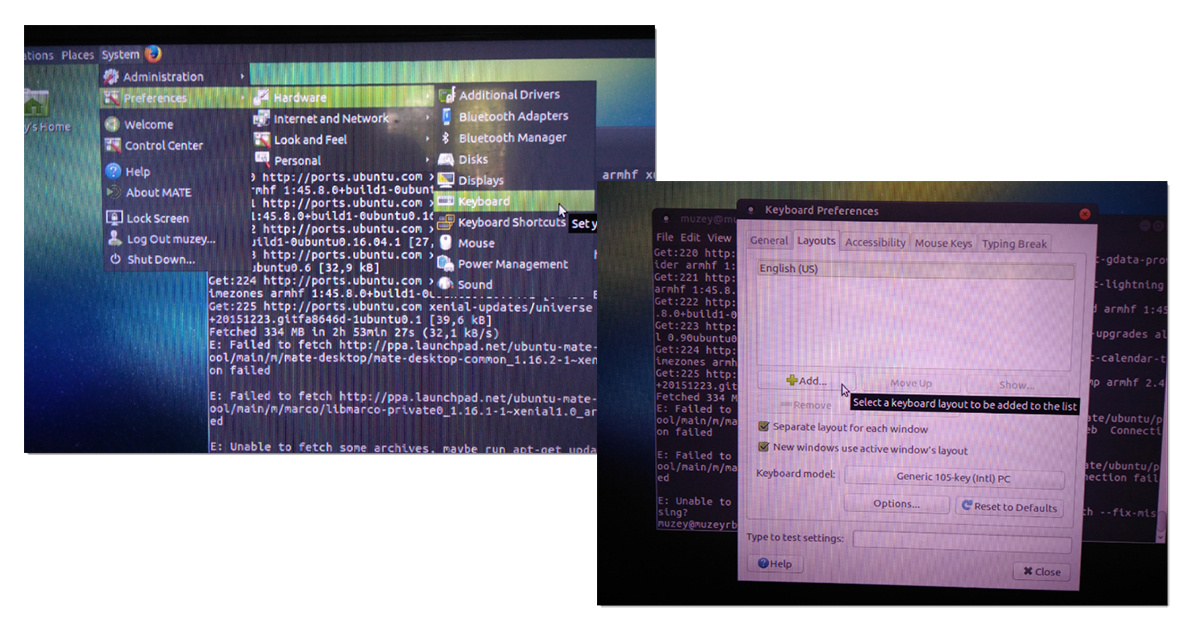
This is how you can change the switch key combination (I spent a couple of minutes until I found this item).
I read on one of the forums that I2C should be enabled: with the
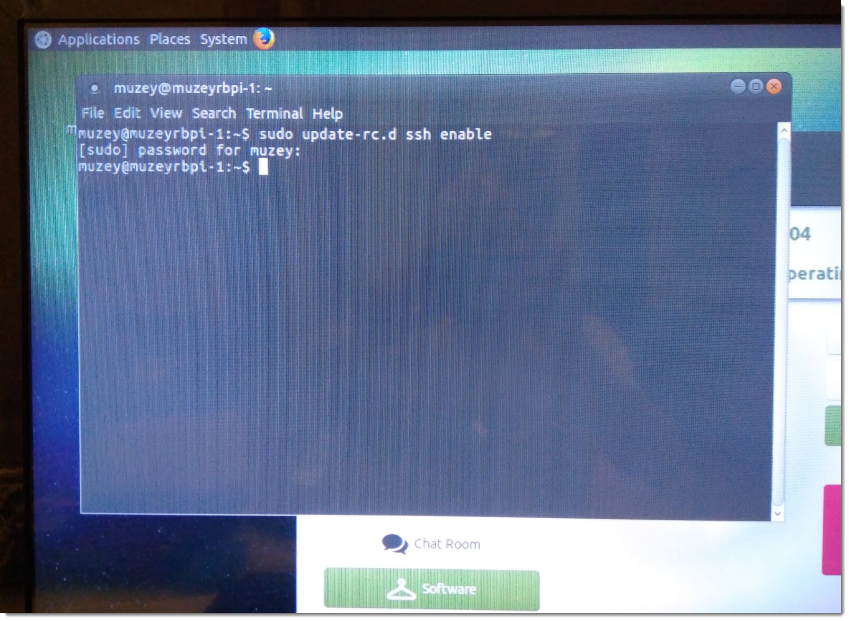
Here by the way, and the SSH settings can be changed.


There are no sensors at hand yet - I try to do at least something ... I read this article .
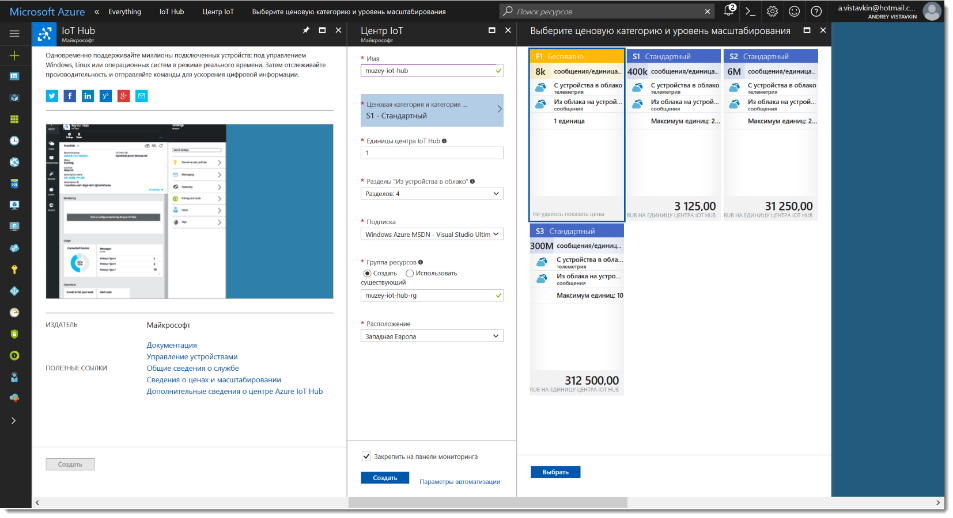
Let's start with the fact that we need an Azure subscription! You can get a trial version here .
Our next steps.
Step 1 .
Step 2 .

Step 3 .
Step 4 .
So back to the device! The
Install Node.js. To do this, we drive the command:
Now the
Just in case.
Now you need NPM - install with the command:
Next, run:

Now you need to install the latest version of IoT Hub transport package:

And one more command:

Now you need to install IoT Explorer:
The next step is to run the following command:
Next, connect the device:
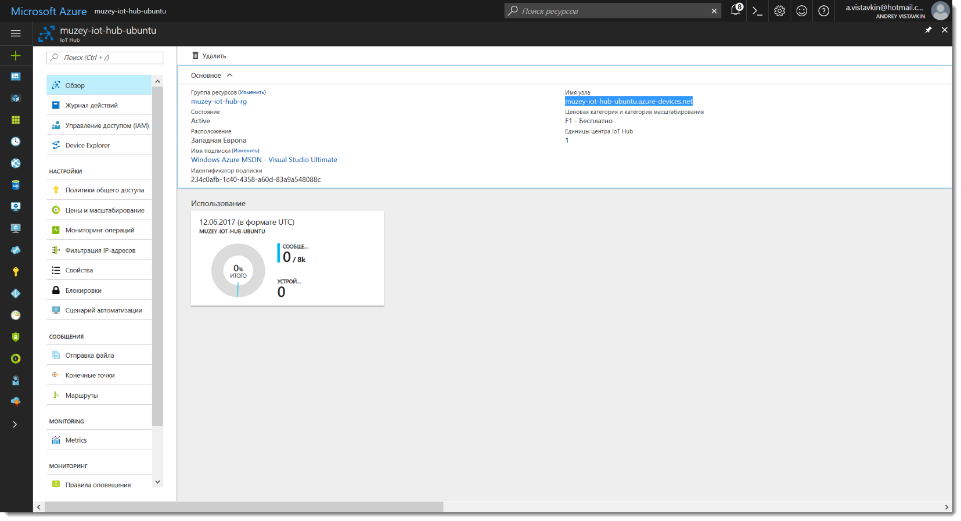
The portal Azure device can be seen.

Copy the JS script from the page to the device:
By itself, the script does not start - you need:
The script is launched by the
We try again - this time in Device Explorer (more about it and the download link in the article .
Hit Enter ... :)

Congratulations - the first posts from our RPI reached Azure IoT Hub
I sincerely hope to improve this manual and make it even more useful! For example, passing this way here (with or without a BME280 sensor).
In order for you to try this exercise yourself, Andrei and I decided to play two pieces of Raspberry Pi 3. They will receive the first 2 people who answer correctly in messages from the Microsoft Developer community to the question: “On the basis of which microcontroller was the earliest version developed Raspberry Pi? ” General rules .
I give the word to Andrew .
Disclaimer :
Colleagues, I do not pretend to the truth - just sharing my experience. Maybe he will save someone a little time and effort. And yes, at the time of writing this article, I saw the Linux command line for the first time in my life.
Let's agree that below we will talk about the Raspberry Pi 2 Model B. It was during the work with him that all the screenshots were taken.
')
The Ubuntu Mate distribution can be downloaded, for example, here .
Having an img file - we create a bootable SDCard - for this I used Win32 Disk Imager, which I installed on my Windows 10.
The resulting boot card is inserted into the Raspberry Pi, we connect the keyboard, mouse and display. After successful loading see the window below.
After installation, we execute several commands.
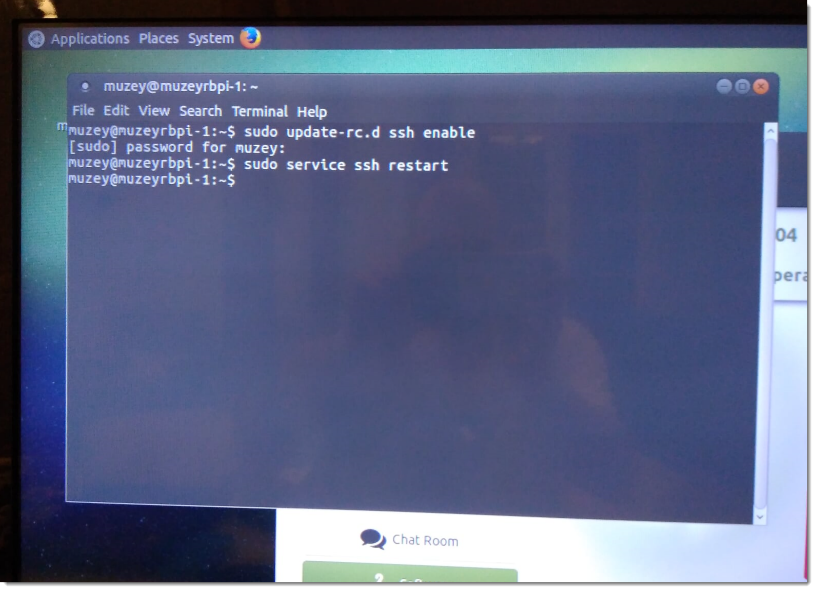
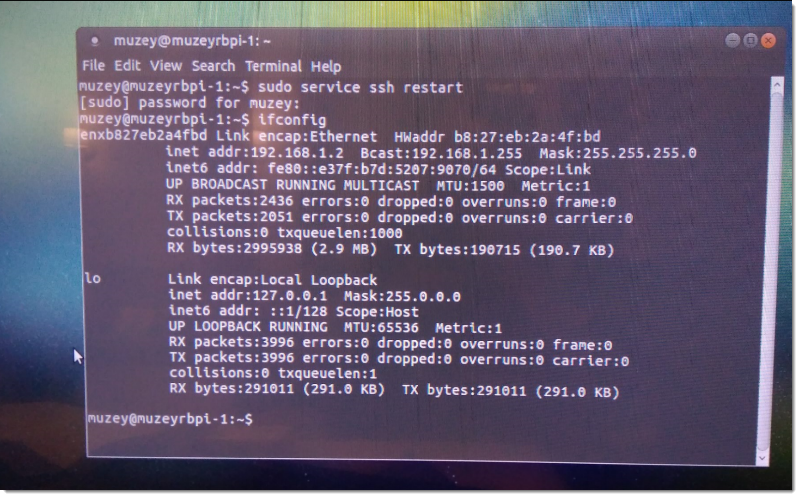
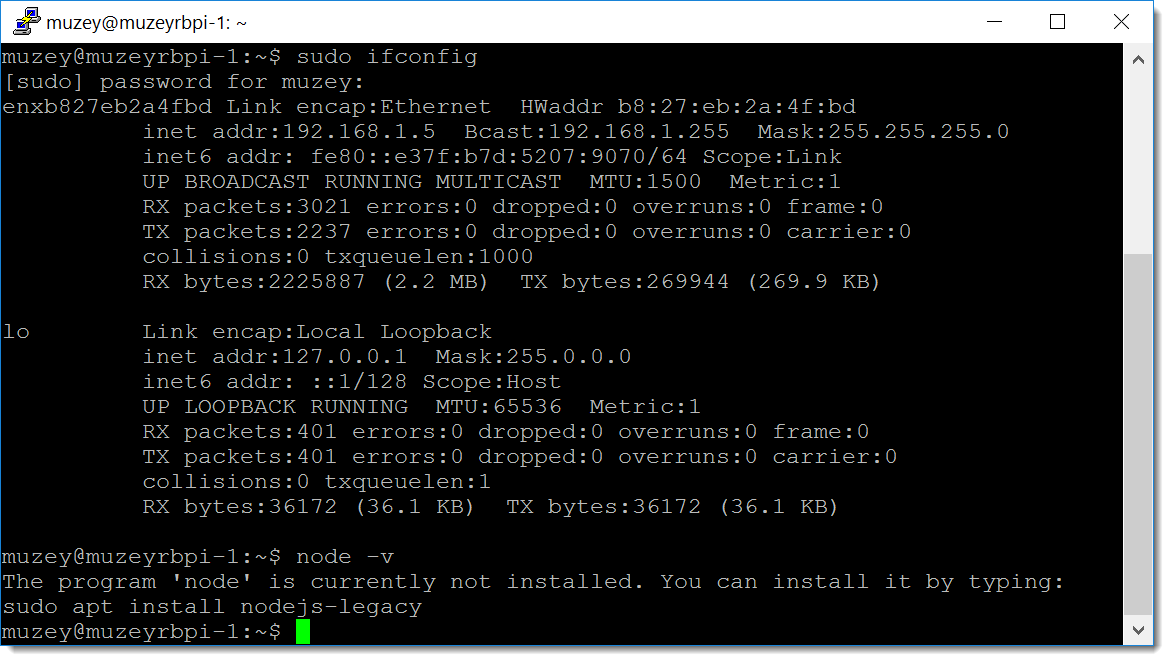
sudo update-rc.d ssh enablesudo service ssh restartsudo ifconfig - shows us the network settings of the deviceImportant update and upgrade commands - to upgrade the system.
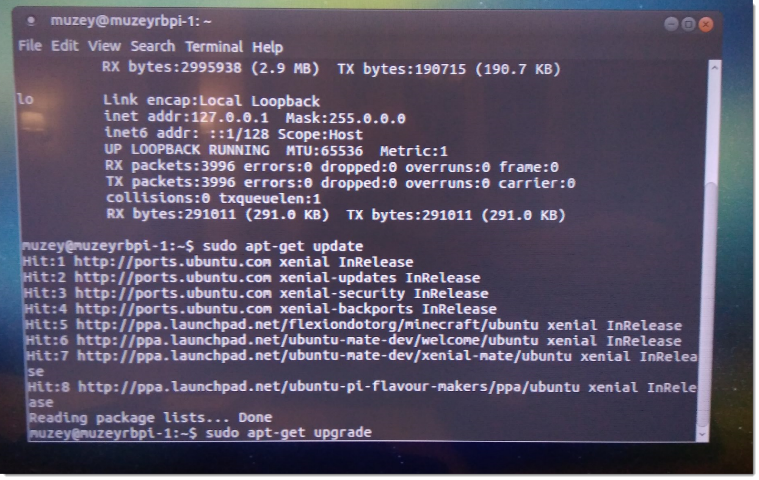
sudo apt-get updatesudo apt-get upgradeNext, add the Russian language for the keyboard.
This is how you can change the switch key combination (I spent a couple of minutes until I found this item).
I read on one of the forums that I2C should be enabled: with the
sudo raspi-config command.Here by the way, and the SSH settings can be changed.
There are no sensors at hand yet - I try to do at least something ... I read this article .
Let's start with the fact that we need an Azure subscription! You can get a trial version here .
Our next steps.
Step 1 .
Step 2 .
Step 3 .
Step 4 .
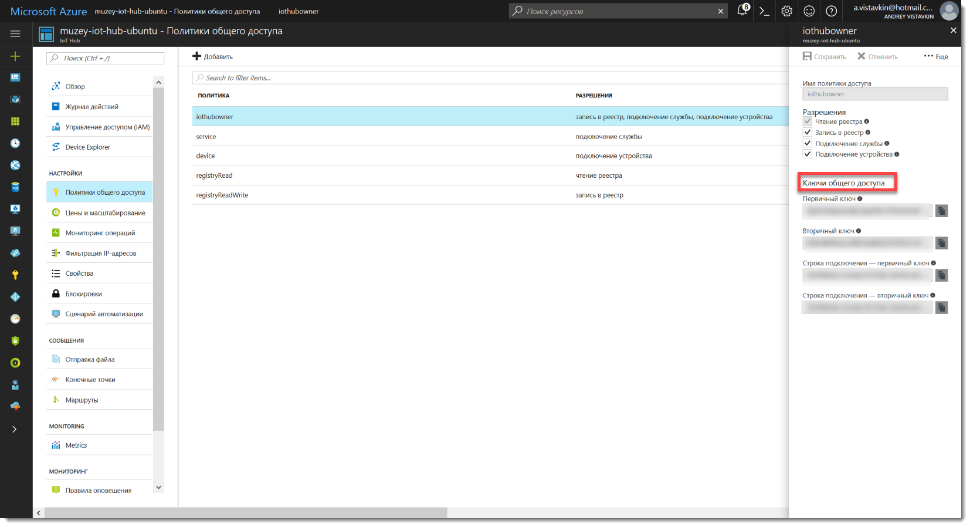
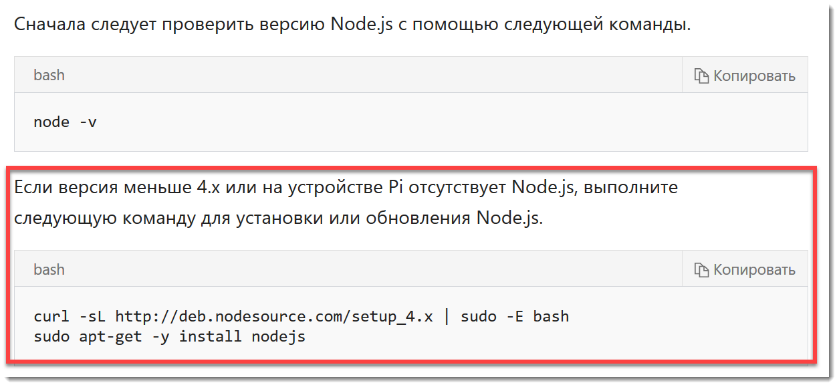
So back to the device! The
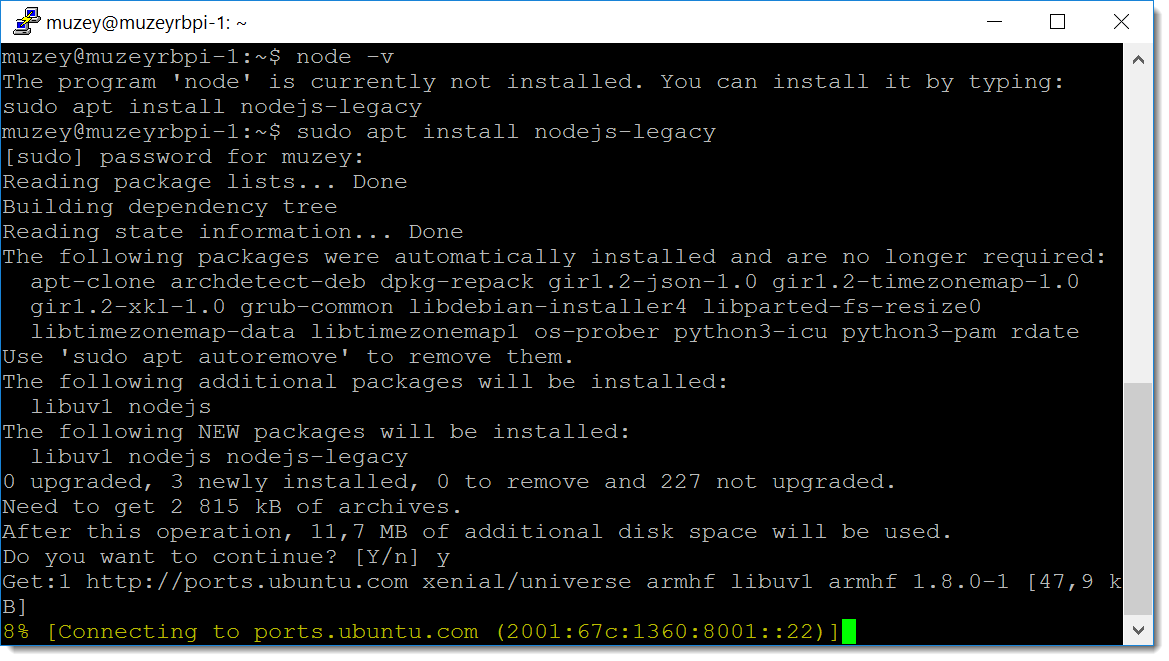
node -v command returns an error on my RPI.Install Node.js. To do this, we drive the command:
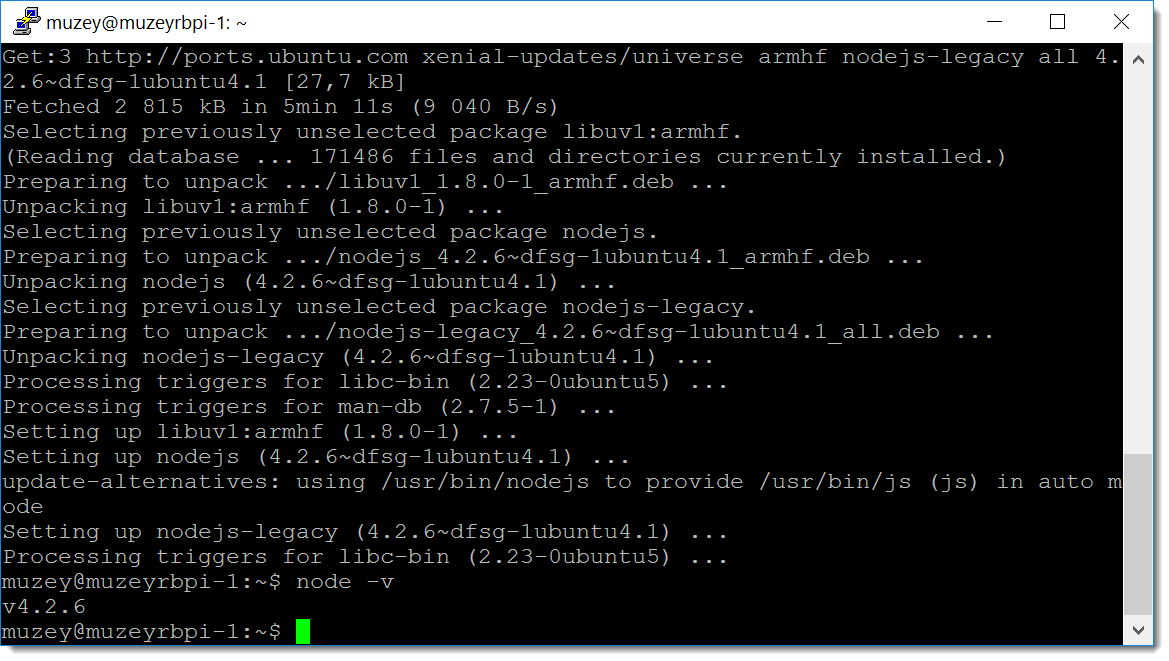
sudo apt install nodejs-legacy .Now the
node -v command returns the current version.Just in case.
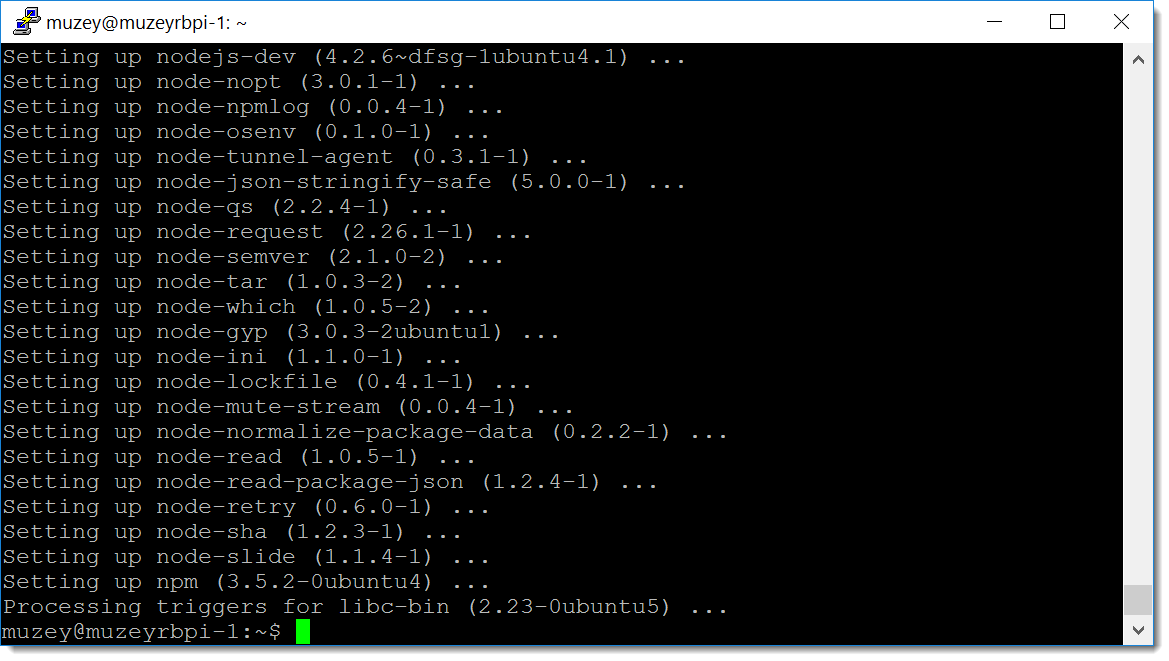
Now you need NPM - install with the command:
sudo apt-get install npm . The team is not fast, but it worked!Next, run:
sudo npm install -g npm@2.x .Now you need to install the latest version of IoT Hub transport package:
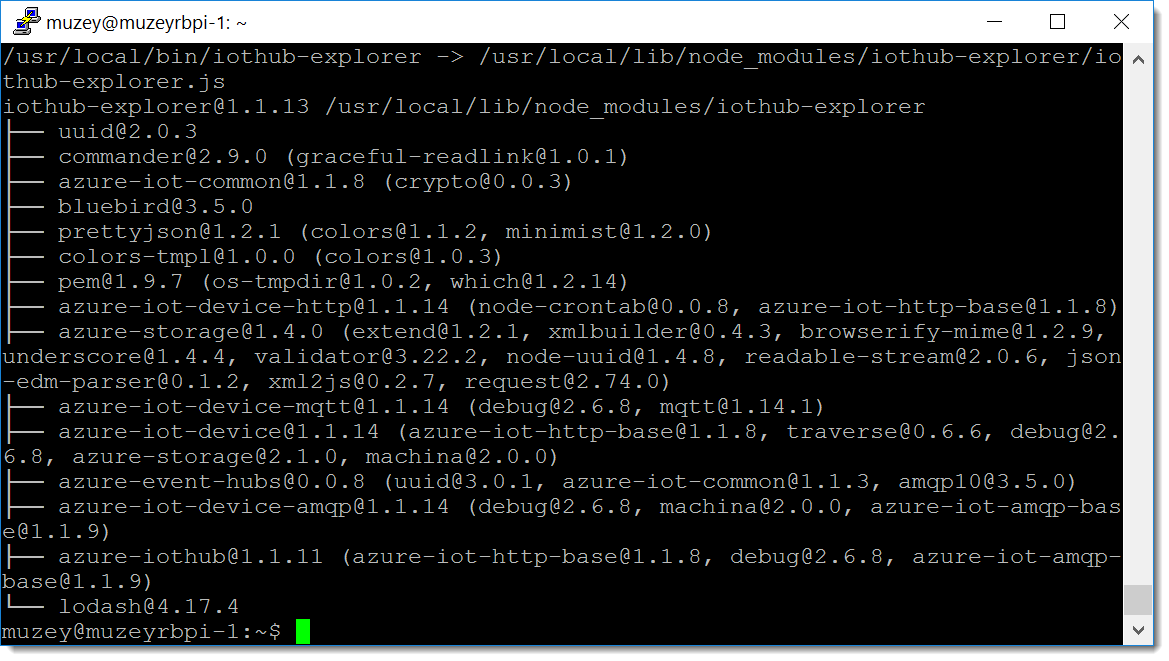
sudo npm install -g azure-iot-device@latest .And one more command:
sudo npm install -g azure-iot-device-http@latest .Now you need to install IoT Explorer:
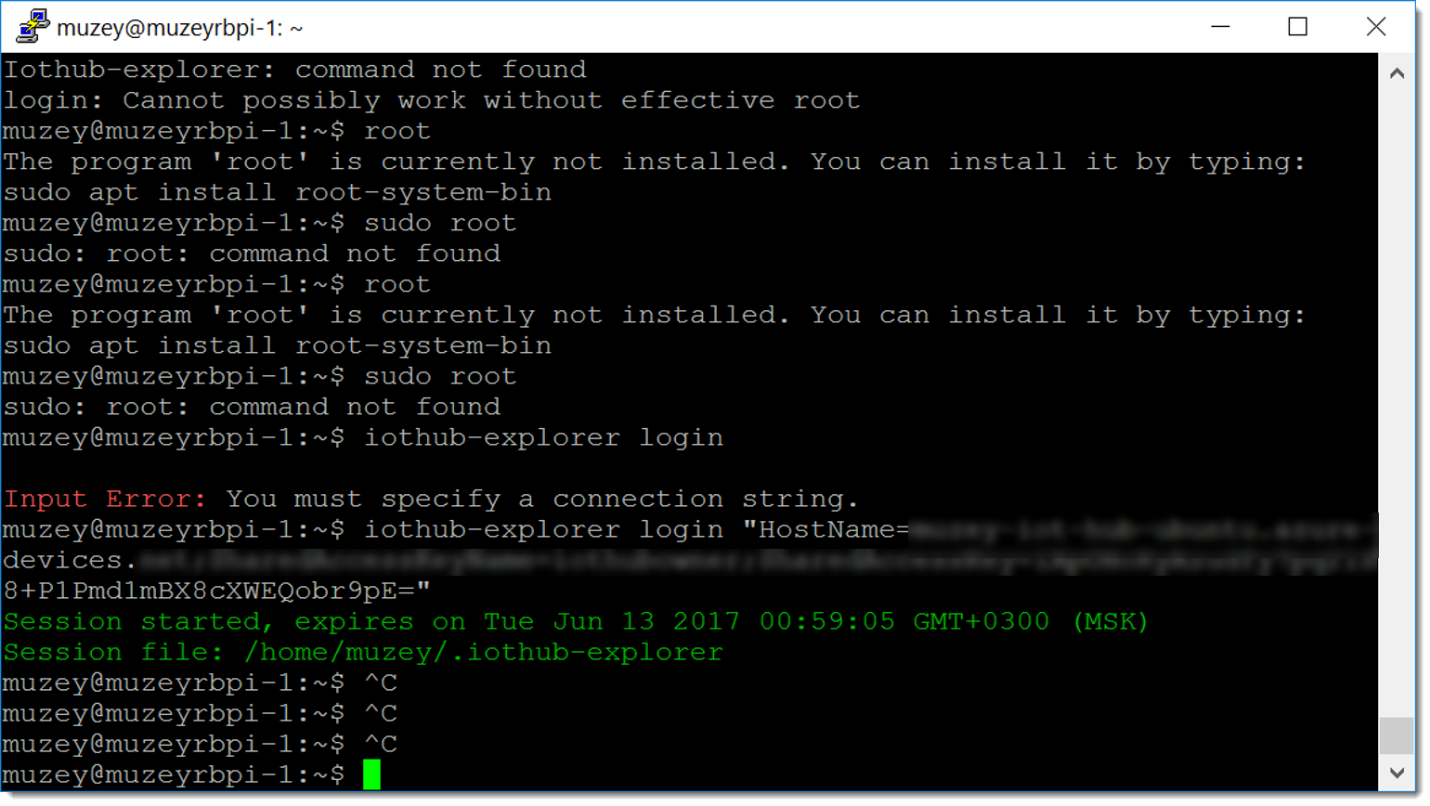
sudo npm install -g iothub-explorer@latest .The next step is to run the following command:
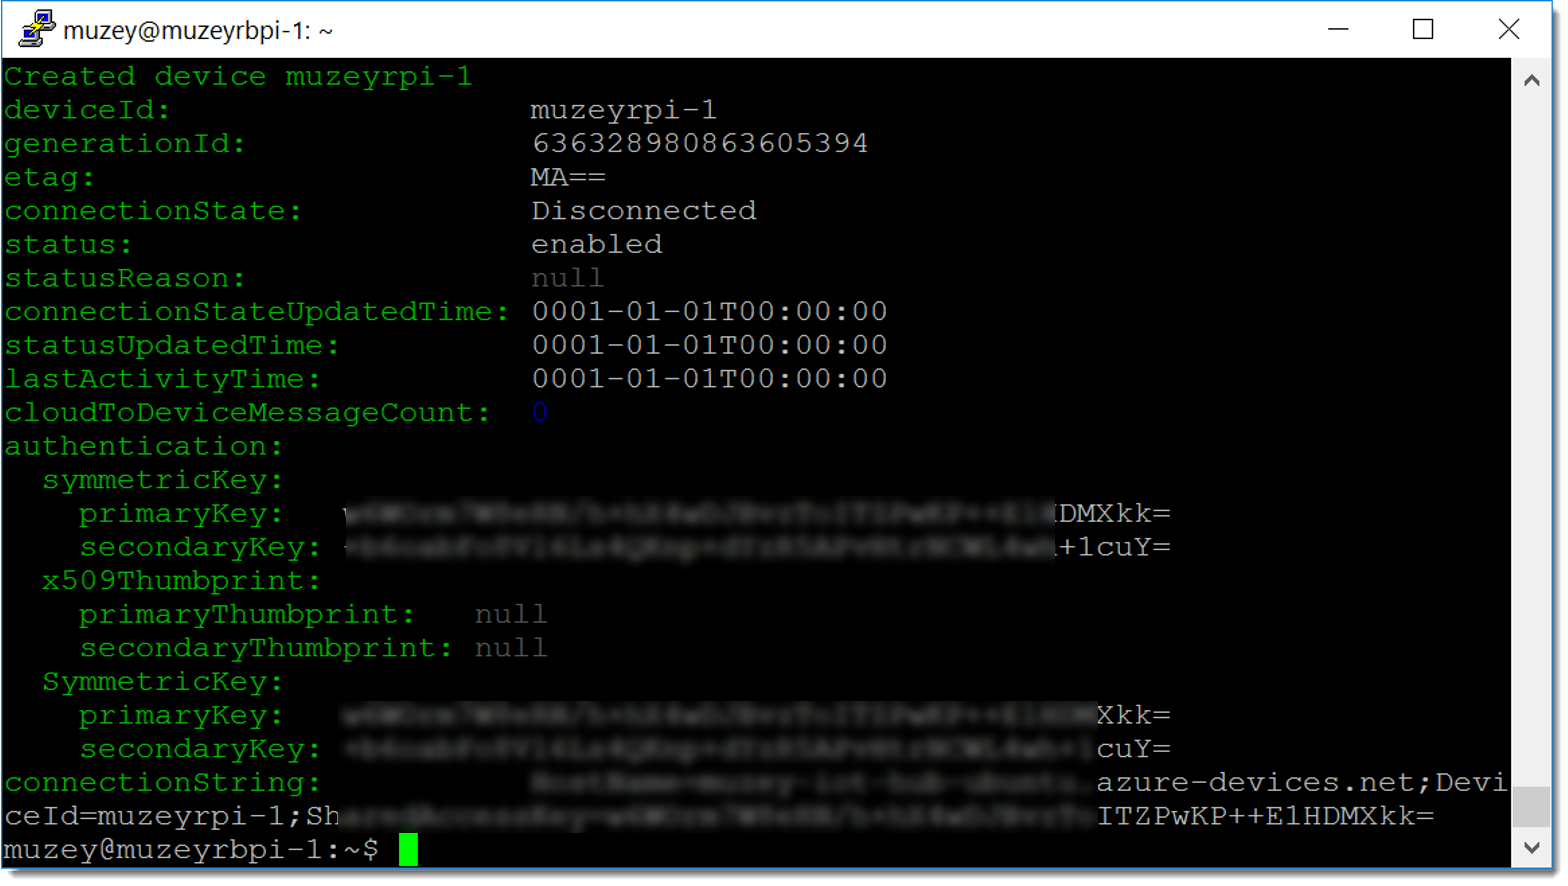
iothub-explorer login " " .Next, connect the device:
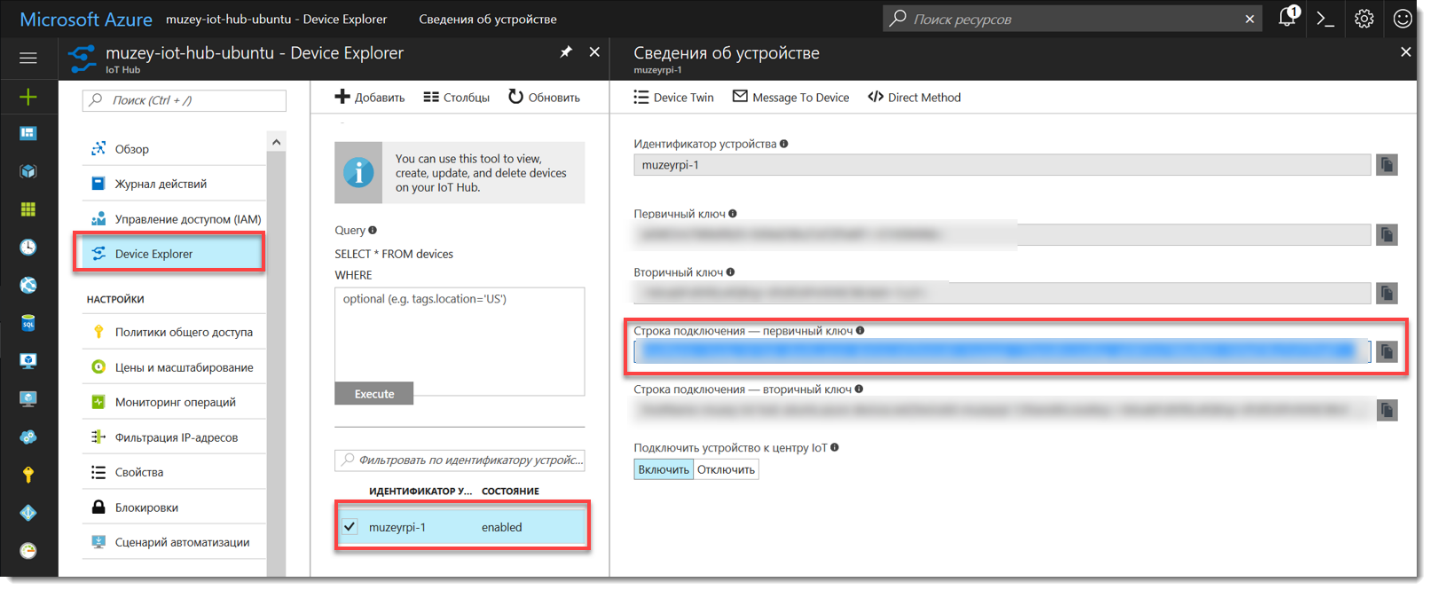
iothub-explorer create muzeyrpi-1 --connection-string . Successfully!The portal Azure device can be seen.
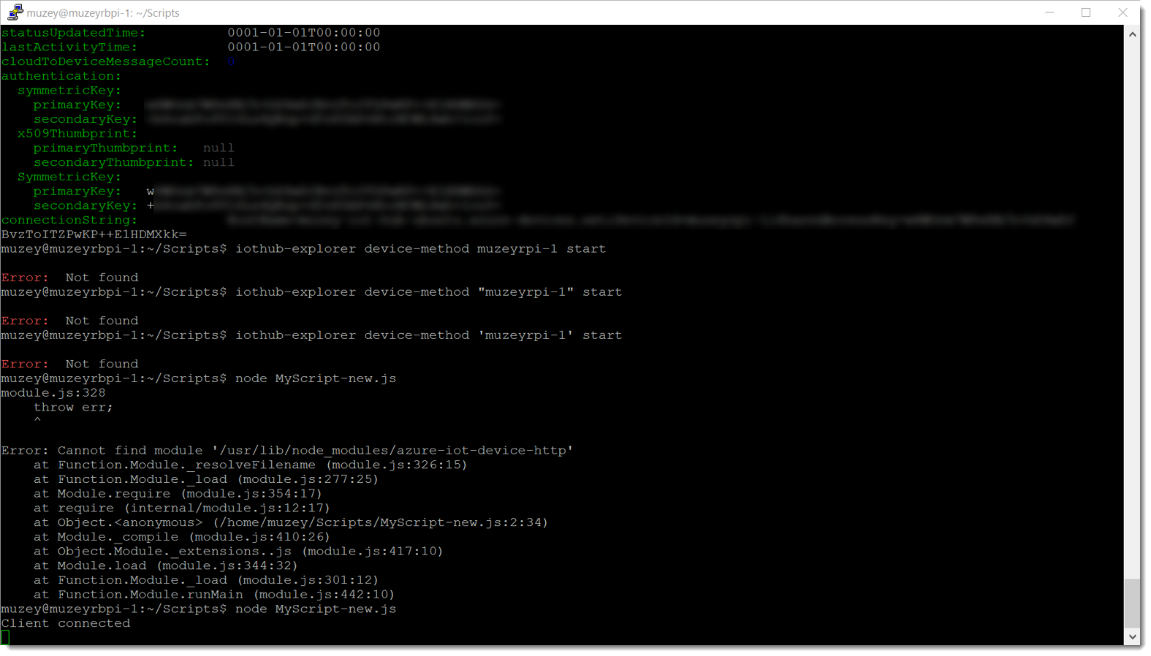
Copy the JS script from the page to the device:
var connectionString = '<your device connection string>'; var clientFromConnectionString = require('/usr/lib/node_modules/azure-iot-device-http').clientFromConnectionString; var client = clientFromConnectionString(connectionString); var Message = require('/usr/lib/node_modules/azure-iot-device').Message; var msg = new Message('some data from my device'); var connectCallback = function (err) { if (err) { console.error('Could not connect: ' + err); } else { console.log('Client connected'); var message = new Message('some data from my device'); client.sendEvent(message, function (err) { if (err) console.log(err.toString()); }); client.on('message', function (msg) { console.log(msg); client.complete(msg, function () { console.log('completed'); }); }); } }; client.open(connectCallback); By itself, the script does not start - you need:
- In the paths inside the file, you must change
/usr/libto/usr/local/lib. - Add connection string. And the connection string to the device.
The script is launched by the
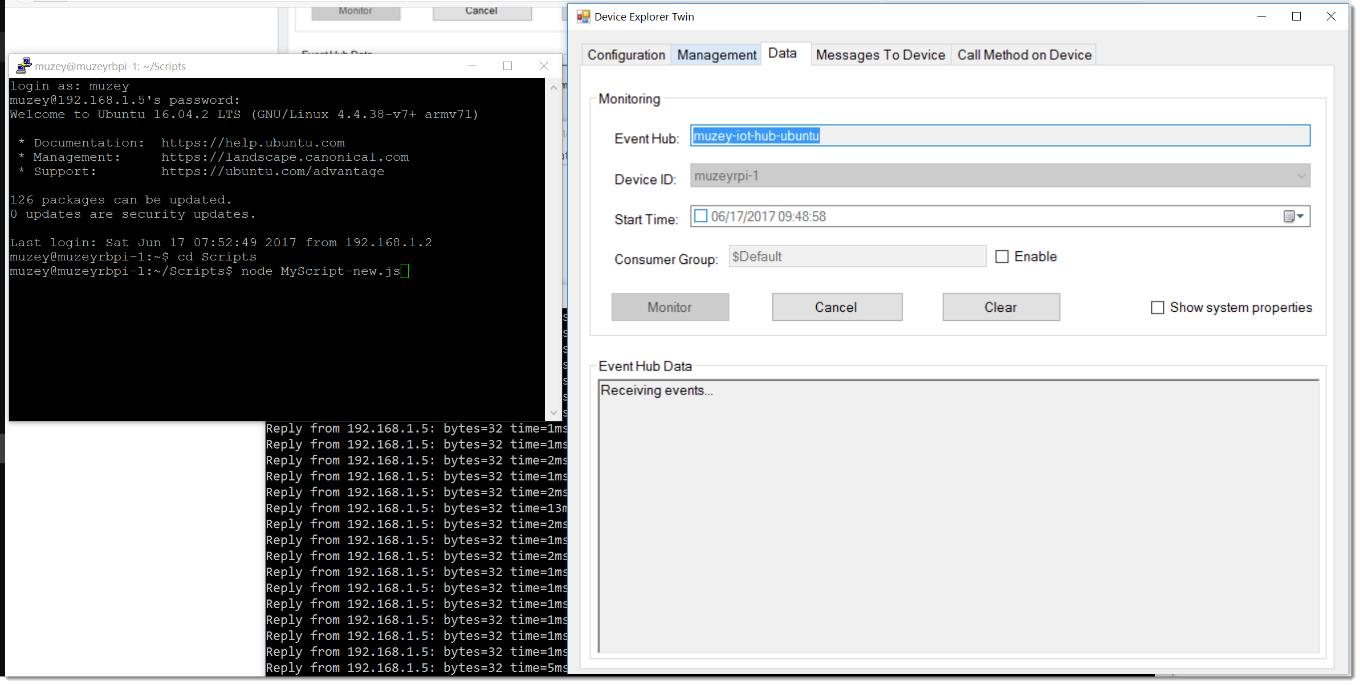
node MyScript.js from the folder where the script is located.We try again - this time in Device Explorer (more about it and the download link in the article .
Hit Enter ... :)
Congratulations - the first posts from our RPI reached Azure IoT Hub
I sincerely hope to improve this manual and make it even more useful! For example, passing this way here (with or without a BME280 sensor).
For those who read
In order for you to try this exercise yourself, Andrei and I decided to play two pieces of Raspberry Pi 3. They will receive the first 2 people who answer correctly in messages from the Microsoft Developer community to the question: “On the basis of which microcontroller was the earliest version developed Raspberry Pi? ” General rules .
Source: https://habr.com/ru/post/332940/
All Articles